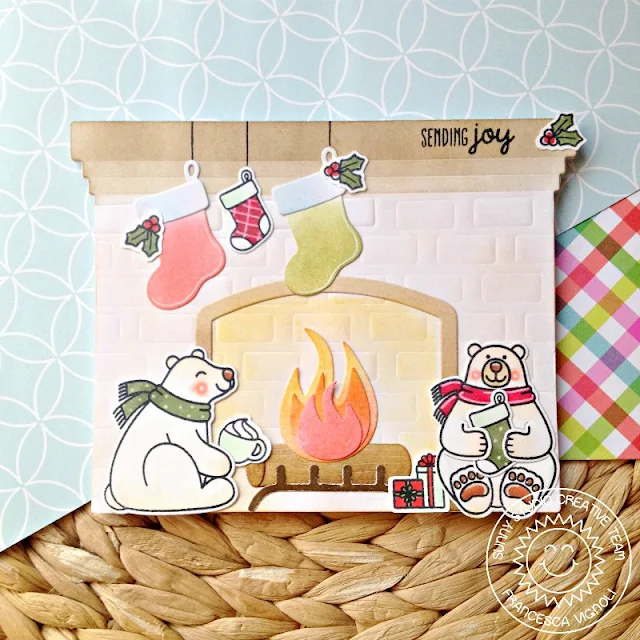
The fireplace is cute and the set is full of little details to rock it out. You can have fun building the fire and the stockings, and you only have to change color combos to have a completely new scene! I die cut all my pieces out of some white cardstock and then colored them by sponging on Distress inks.
Then I didn't separate those 4 little rectangles that are the fireplace bricks and instead I embossed them to give my fireplace extra interest. You can actually use any dies to create an emboss effect. You only have to set up your die cutting machine to the emboss mode and create this sandwich: clear plate, embossing mat, cardstock, die, clear plate. Then you run it all through and the magic happens!
Then I sponged some more distress ink onto the embossed bricks to give even more dimension. I stamped lots of images from the Playful Polar Bears stamp set and I also added the gifts from the Gleeful Reindeer stamp set and hollies from the Blissful Baking set. I colored them with Copic markers and then die cut them with their coordinating dies.
I stamped my sentiment from the Gleeful Reindeer stamp set and drew some lines for my stockings to hang on with a fine tip black marker. I put lots and lots of Wink Of Stella onto my scene to create sparkly details and let everything dry.
I stamped my sentiment from the Gleeful Reindeer stamp set and drew some lines for my stockings to hang on with a fine tip black marker. I put lots and lots of Wink Of Stella onto my scene to create sparkly details and let everything dry.
And here we come to the funny and time consuming part - creating the notepad! First of all, I used copy papers and I die cut lots and lots of fireplaces with the die. Since copy paper is so thin you can cut more layers at once. I die cut something like 30 layers because I wanted my notepad to be light and manageable (like you can carry it around in your purse and don't feel it at all!).
Then I stuck all my layers one on top of another, and added my decorated piece on top. I put some liquid glue at the top, and secured all my die cuts with big paper clips to press them together until they dried. I did it before going to bed so they had all the night to dry completely.
Hope you like my project and thank you so so much for stopping by!
Sunny Studio Supplies Used:
 Blissful Baking Dies Shop at: Sunny Studio |
 Blissful Baking Stamps Shop at: Sunny Studio |
 Gleeful Reindeer Dies Shop at: Sunny Studio |
 Gleeful Reindeer Stamps Shop at: Sunny Studio |
 Fireplace Shaped Dies Shop at: Sunny Studio |
 Playful Polar Bears Stamps Shop at: Sunny Studio |
 Playful Polar Bears Dies Shop at: Sunny Studio |


No comments:
Post a Comment