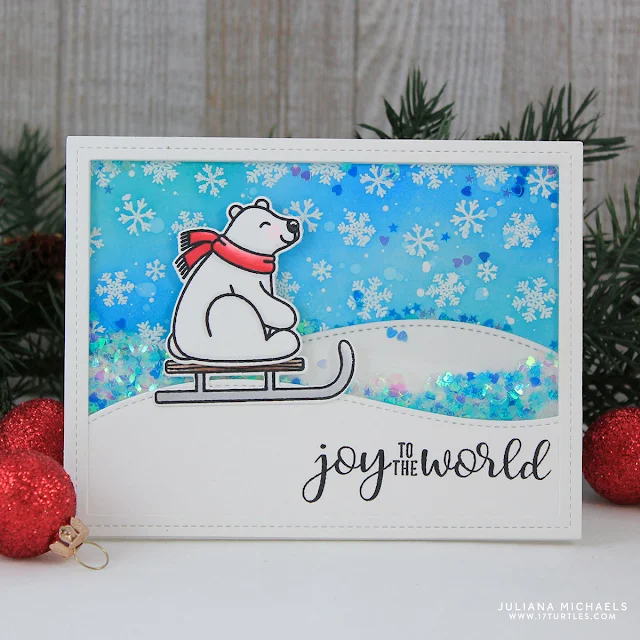
We're so excited to welcome Juliana Michaels back to the blog today as our special guest. She is sharing a tutorial that shows how she created this adorable shaker card, and I'm sure you're all going to love it!
Happy Saturday
and hello Sunny Studio Fans! It's Juliana
with you today and I'm so happy to be guesting again here on the Sunny Studio
blog. Today I'm sharing a Playful Polar Bear Christmas shaker card I created using some
new stamps and dies from the Winter Release.
To create the
snowy background for this card, begin with the Snow Flurries stamp. With the
help of a stamp positioning tool, such as the MISTI, stamp the image with
Versamark Embossing Ink 3 times across a piece of 4.25 x 5.5 inch white
cardstock. Slide the cardstock over 1.75
inches each time until the image is stamped across the paper. Sprinkle it with
white embossing powder and heat set it using a heat gun.
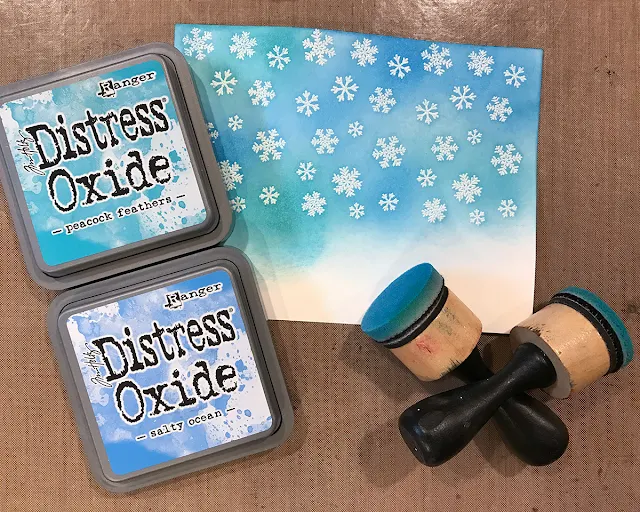
Next, use an ink
blending tool to apply Distress Oxide Ink in Salty Ocean and Peacock Feathers
over the stamped and heat embossed snowflakes. This will help the snowflakes show up and pop against the blue
background.
Die cut 5 frames
from white cardstock and glue them together to create the shaker box frame. Cut
a piece of transparency to the same size and glue it on top of the box.
To add a snowy
hill for the polar bear to sled on, die cut one from white cardstock and adhere
it on the bottom of the stamped snowflakes background.
Die cut another frame from white cardstock. Then die cut another snowy hill,
stamp the sentiment on it from the Festive Greetings stamp set and trim it to
fit behind the die cut frame. Adhere
these together and then adhere them on top of the shaker box.
Next, die cut
and trim 5 more snowy hills to match the one you stamped the sentiment on,
adhere them together inside the shaker box frame. By adding these inside the
shaker box, it will keep the sequins from falling behind the hill in front. I
chose to put the sentiment on the outside because with it being placed at the
bottom, the sequins would have covered it up and made it difficult to read. You
are now ready to fill the shaker box with your favorite sequins and beads.
After you do this, adhere the snowflake background to the back side of the
shaker box.
For the final touch stamp, color and die cut the polar bear and sled images
from the Playful Polar Bears stamp and coordinating dies. Attach them to the hill on the
front of the card and your shaker card is complete!
I hope you
enjoyed learning how to create this polar bear Christmas shaker card and are
inspired to start your Christmas card crafting using the new Sunny Studio
Stamps Winter Release. For more inspiration using the Playful Polar Bears stamp set, head on over to my blog HERE to see another polar bear Christmas card that I
created.
- Juliana
Sunny Studio Supplies Used:
 Festive Greetings Stamps Shop at: Sunny Studio |
 Playful Polar Bears Stamps Shop at: Sunny Studio |
 Playful Polar Bears Dies Shop at: Sunny Studio |
 Snow Flurries Stamps Shop at: Sunny Studio |


Fun and fabulous!
ReplyDeleteThat's a great shaker card !! I. Love this set so much. Thanks for sharing this tutorial.
ReplyDelete