Tuesday, August 7, 2018

Home Sweet Gnome Sliding Interactive Card with Juliana

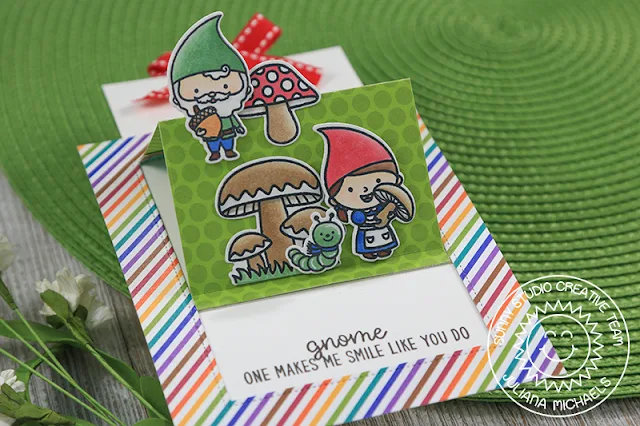
Hello friends! It's Juliana Michaels with you to share a card I created using my new favorite interactive die ever! I've definitely fallen in love with the new Sliding Window die. I combined it with the Home Sweet Gnome stamp set to create a cute little scene and I can't wait to share it with you today.

Sunny Studio Stamps: Home Sweet Gnome Sliding Window Interactive Card by Juliana Michaels

Sunny Studio Stamps: Home Sweet Gnome Sliding Window Interactive Card by Juliana Michaels

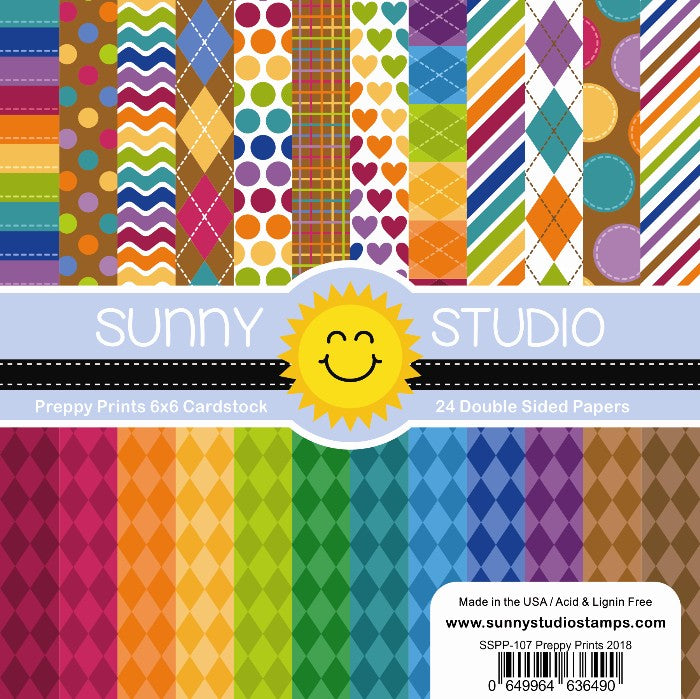
To get started, I cut a piece of patterned paper from the Preppy Prints 6x6 paper pad using the Sliding Window die. I used Therm O Web Purple Tape to help hold the dies in place as I ran it through my die cutting machine. I then trimmed off the flap leaving about a 1/4” at the top.

Sunny Studio Stamps: Home Sweet Gnome Sliding Window Interactive Card by Juliana Michaels

Next, I die cut a piece of green dot patterned paper from the Dots & Stripes Jewel Tones 6x6 paper pad using the Sliding Window die, but I did not bother with the half circle die. I then trimmed off the frame part of the window and adhered it to the little bit of flap I left on the striped paper. 

Sunny Studio Stamps: Home Sweet Gnome Sliding Window Interactive Card by Juliana Michaels

This allows you to use two different patterns of paper for your design and adds a nice bit of contrast and color depending on the color combination you use. Because I had already used a lot of color on the front of the card, I decided to use white cardstock for the inside.

Sunny Studio Stamps: Home Sweet Gnome Sliding Window Interactive Card by Juliana Michaels

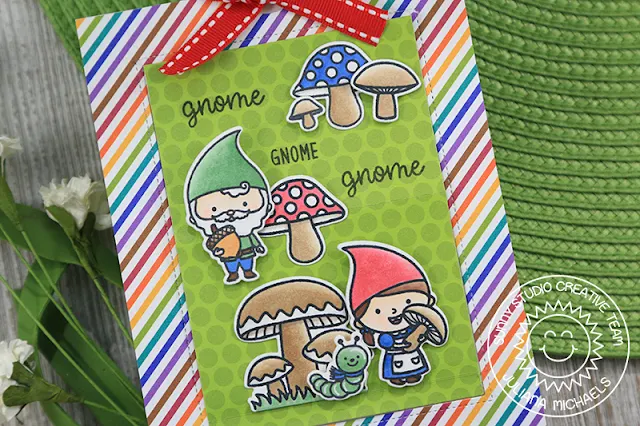
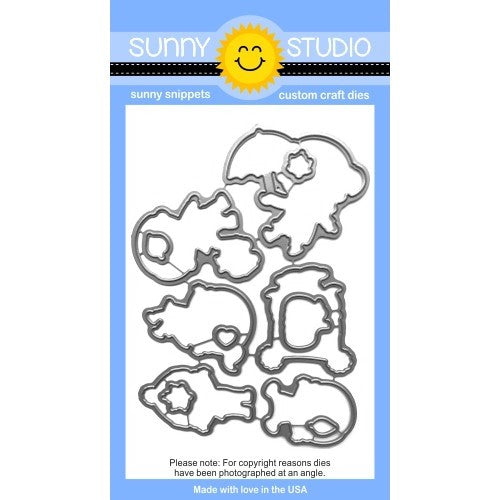
After the window part was complete, I stamped and colored several of the images from the Home Sweet Gnome stamp set using Chameleon Pens. I then die cut them using the coordinating dies. Next, I went about creating a little scene on the front of the window and adhered the images with double sided foam tap for a bit of dimension. I then stamped the sentiments on the front of the card and on the inside of the card using black ink. To complete the card, I added a red ribbon bow to give the recipient something to pull on as they open the card.


Sunny Studio Stamps: Home Sweet Gnome Sliding Window Interactive Card by Juliana Michaels

So have you made a card yet using the Sliding Window die? There's one thing I “gnome”...I'll be using it again real soon! Thanks so much for stopping by today and I hope you enjoyed this Sliding Window die card little card featuring the Home Sweet Gnome stamp set! 


Sunny Studio Supplies Used:

Dots & Stripes Jewel Tones 6x6 Paper
Shop at:
Sunny Studio
Preppy Prints 6x6 Paper
Shop at:
Sunny Studio
Home Sweet Gnome Stamps
Shop at:
Sunny Studio
Home Sweet Gnome Dies
Shop at:
Sunny Studio
Sliding Window Dies
Sliding Window Dies
Shop at:
Sunny Studio

Monday, August 6, 2018

Fall Kiddos Hooray For Fall Card with Eloise

Hi everyone, Eloise here and today I have a card to share with you all using the Fall Kiddos stamp set. This set is so super cute, probably one of my favourite from the newest release and I love mixing this set with these other fall themed sets for scenes, they all work together so well. Today's card is a simple 'Hooray' card so I matched some images with the sentiment for a cute card. 

Sunny Studio Stamps: Fall Kiddos Happy Harvest Woodland Borders Hooray For Fall Card by Eloise Blue

To start off I stamped out my images from Fall Kiddos onto some white cardstock and coloured them all in with various Copic Markers. Once they were all coloured I cut them out using the coordinating dies. While I had my die cutting machine out I used the Woodland Borders Dies and cut one out of watercolour cardstock. I used Shabby Shutters and Mowed Lawn on the grassy piece and Salty Ocean and Broken China on the sky. I then adhered them together. 

(Copic Markers Used: E000, E00, E21 / R17, R29, R89 / B21, B24, B26 / YG61, YG63, YG67 / Y35, YR15, YR18 / Y11, Y15, Y38 / E42, E44, E47 / YR21, YR24, YR27 / W2, W4, W7)

Sunny Studio Stamps: Fall Kiddos Happy Harvest Woodland Borders Hooray For Fall Card by Eloise Blue

Now that all my elements were ready, it's time to adhere them together. I added adhesive onto the backs of my images and adhered them down into place. I had some left over pumpkins from Happy Harvest that I used on a previous card so I added those into the scene as well. Since I wanted it to seem like the leaves were moving with the wind, I clear heat embossed some of the wind lines included in the set on the left hand side of the panel. Once my images were in place, I stamped the 'Hooray For Fall' sentiment on the right hand side with black ink. I popped up the entire panel on foam tape and adhered it onto a card base. 

Thanks for stopping by today and I'll catch you all next time. 

Sunny Studio Supplies Used:

Fall Kiddos Stamps
Fall Kiddos Stamps
Shop at:
Sunny Studio
Fall Kiddos Dies
Fall Kiddos Dies
Shop at:
Sunny Studio
Happy Harvest Stamps
Shop at:
Sunny Studio
Happy Harvest Dies
Happy Harvest Dies
Shop at:
Sunny Studio
Woodland Borders Dies
Shop at:
Sunny Studio

Saturday, August 4, 2018

Guest Designer Spotlight: Fall Kiddos Cards with Anita Madden

Hello! Anita Madden here, and I'm excited to be guest designing for Sunny Studio Stamps today. I used the Fall Kiddos stamps and dies from their latest release.

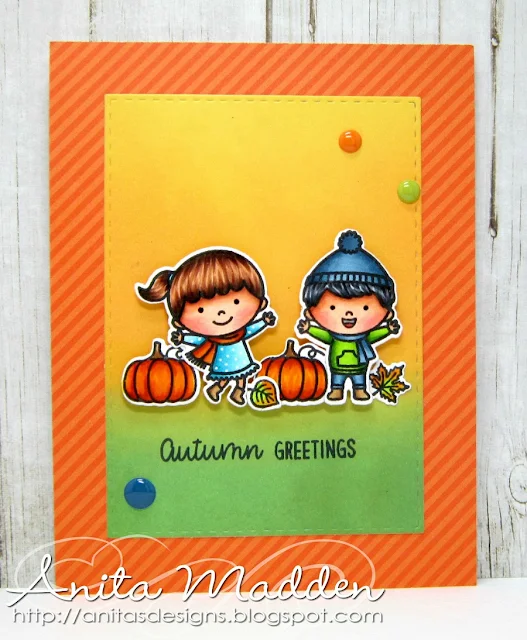
Sunny Studio Stamps: Fall Kiddos Orange Background Fall Themed Cards by Anita Madden

I colored all the images with Copics and then die cut them using the coordinating dies. The diagonal-striped brown paper is from the Dots & Stripes Jewel Tones 6x6 paper pack – I love the colors and patterns in this collection! I die cut a piece of Bristol cardstock and applied Distress Oxide inks in spiced marmalade and Fossilized Amber. I adhered the images and the sentiment tag with foam tape.

Sunny Studio Stamps: Fall Kiddos Orange Background Fall Themed Cards by Anita Madden

I used a piece of diagonal striped paper from the Dots & Stripes Jewel Tones Paper pack on this card also. I die cut a rectangle of Bristol card and sponged various distress oxide inks and distress inks to create a background with fall colors. I colored all the images with Copics and then die cut them using the coordinating dies. I added white polka dots to the girl’s dress with a white gel pen. I adhered the images with foam tape and added a few enamel dots to finish my card.

I hope I’ve inspired you to get your fingers inky today! Thanks to Mendi for having me as her guest!

Sunny Studio Supplies Used:

Fall Kiddos Stamps
Fall Kiddos Stamps
Shop at:
Sunny Studio
Fall Kiddos Dies
Fall Kiddos Dies
Shop at:
Sunny Studio

Friday, August 3, 2018

Happy Harvest Fall Themed Warm Wishes Card with Lexa

Hello everyone! Lexa here today with a warm hue greeting card showcasing the fall release Happy Harvest Stamps and the coordinating dies. It's August already. Does time really fly by or is it just me? Some of you may feel the weather starts to change. I bet it's really beautiful in the fall.

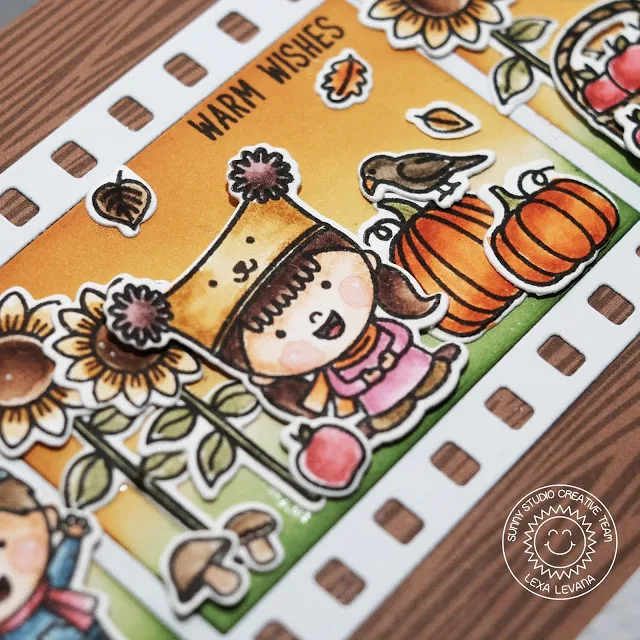
Sunny Studio Stamps: Happy Harvest Fall Kiddos Fall Flicks Filmstrip Fall Themed Warm Wishes Card by Lexa Levana

First I stamped all of the images with Versafine black ink on watercolor paper and used Distress Markers to color all of the images. After I finished with the coloring, I used both coordinating dies to die cut all of the images. The crisp white borders around them is so satisfying. The Happy Harvest really goes well with the Fall Kiddos Stamps, and they compliment each other to create a super adorable scene. I used Fall Flicks Filmstrip Dies to frame all the scenes together. I love how festive and fun it looks. 

Sunny Studio Stamps: Happy Harvest Fall Kiddos Fall Flicks Filmstrip Fall Themed Warm Wishes Card by Lexa Levana

For the background of the scene I blend some Distress Inks in Mowed Lawn, Wild Honey and Spiced Marmalade. The brown woodgrain patterned paper from Amazing Argyle Paper pad looks great with everything I've finished. Don't you think so? Here's a closer look to show you all the layers and details on my card.

That's all for today, I hope you enjoy today's post and have an amazing day!

Sunny Studio Supplies Used:

Amazing Argyle 6x6 Paper
Shop at:
Sunny Studio
Fall Flicks Filmstrip Dies
Shop at:
Sunny Studio
Fall Kiddos Stamps
Fall Kiddos Stamps
Shop at:
Sunny Studio
Fall Kiddos Dies
Fall Kiddos Dies
Shop at:
Sunny Studio
Happy Harvest Stamps
Shop at:
Sunny Studio
Happy Harvest Dies
Happy Harvest Dies
Shop at:
Sunny Studio

Thursday, August 2, 2018

Beautiful Autumn Heat Embossed Fall Themed Card with Vanessa

Hello dear Sunny Studio friends! Vanessa here today with a card using the Beautiful Autumn set. You might think it is a small set, but it is packed with wonderful fall images offering so many possibilities!

Sunny Studio Stamps: Beautiful Autumn Heat Embossed Fall Themed Card by Vanessa Menhorn

For my card, I first trimmed a piece of watercolor paper slightly smaller than my card base. Now I stamped and heat-embossed the leaves with white embossing powder and applied watercolors. After it was dried, I stamped the sentiment and the dots and adhered the panel to the card.

Sunny Studio Stamps: Beautiful Autumn Heat Embossed Fall Themed Card by Vanessa Menhorn

Then I heat-embossed the acorns, colored them with watercolors, fussy-cut them and adhered them to the card, popping up two for more dimension. Finally, I added gold sequins.

What do you think? This small set is worth its money, don't you agree? Thank you for stopping by today!

Sunny Studio Supplies Used:

Beautiful Autumn Stamps
Shop at:
Sunny Studio
Beautiful Autumn Dies
Shop at:
Sunny Studio

Wednesday, August 1, 2018

Nutty For You Fall Themed Shaker Card with Franci

Hi there, Franci here with you today to showcase the new Nutty For You set! I'm so super happy about this set because I asked Mendi to create this product (I'm in love with acorn images!) and it turned out exactly how I imagined it! For today, I stretched it out a little bit to create a mini shaker card. 

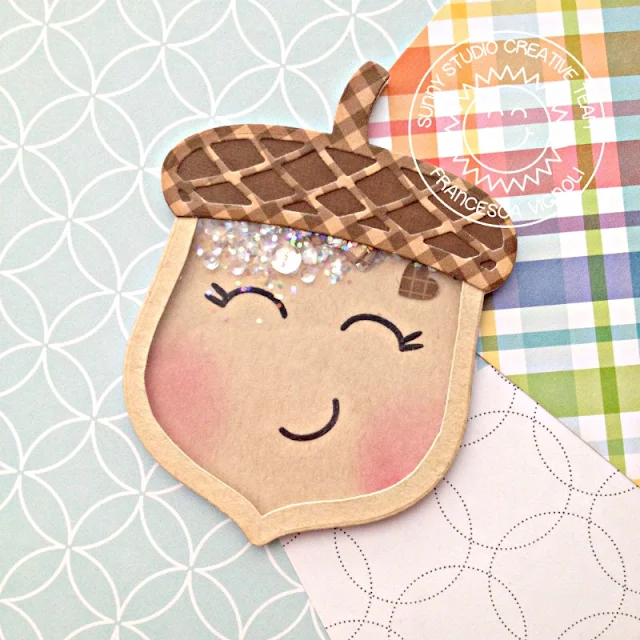
Sunny Studio Stamps: Nutty For You Fall Themed Shaker Card by Franci Vignoli

First, I die cut all the images out of kraft and brown cardstock and also used a patterned paper from the Gingham Jewel Tones paper pack. All the new papers are amazing, and the colors are so rich and saturated! I also die cut lots of those little extra images out of black cardstock to create the eyes/eylashes and the smile.

I die cut an additional acorn out of kraft cardstock, drew a little frame with a pencil and cut it out. On my main kraft piece, I glued down the eyes, added the eyelashes to make it extra cute and pretty, the smile and I also sponged some Picked Raspberry Distress ink for the cheeks.

Sunny Studio Stamps: Nutty For You Fall Themed Shaker Card by Franci Vignoli

I die cut another acorn out of acetate, giving me all of the pieces to create a little shaker! I assembled my card and filled the inside with lots of glitters, some sparkling clear sequins and also little hearts that I cut out of the brown pattern paper used before with a little die that was free with purchase at the shop some times ago. I sealed everything with foam adhesive and mounted my card onto a little coordinated card base.

It's so much fun and it brings all the magic of fall. Hope you like it and thank you so much for stopping by today. Have a lovely week. 

Sunny Studio Supplies Used:

Gingham Jewel Tones 6x6 Paper
Shop at:
Sunny Studio
Nutty For You Dies
Nutty For You Dies
Shop at:
Sunny Studio

Tuesday, July 31, 2018

Fruit Cocktail Apple Of My Eye Card with Juliana

Hello friends! It's Juliana Michaels with you and today I'm sharing a sweet little card using the Fruit Cocktail stamp set. If you love the Sunny Studio layering stamp sets, then this set is a must have for your collection!

Sunny Studio Stamps: Fruit Cocktail Fancy Frames Circles Dies Apple Of My Eye Card by Juliana Michaels

To get started, I stamped the multiple layers of the apple with 3 shades of red ink and added the stem using brown ink. I then stamped the leaf with 2 shades of green ink. I used the coordinating dies to cut out the images.

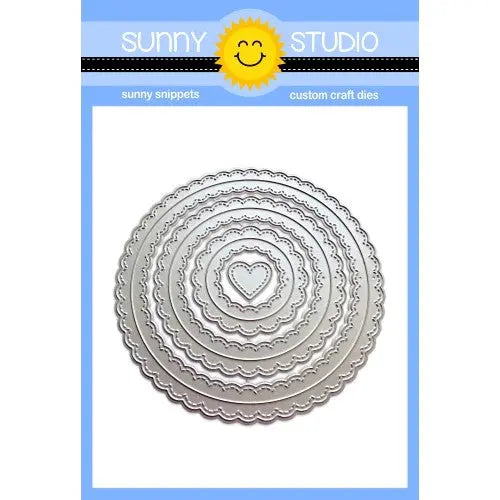
Next, I die cut a piece of white cardstock using the middle scalloped edged circle from the Fancy Frames Circle dies. I used a simple circle die to cut a circle to back the opening of the frame. Using a stamp positioning tool, I stamped the sentiment with black ink. I then adhered the apple to the center with double sided foam adhesive.

Sunny Studio Stamps: Fruit Cocktail Fancy Frames Circles Dies Apple Of My Eye Card by Juliana Michaels

For the background, I embossed a piece of kraft cardstock with a wood grain embossing folder and trimmed it to 3.75 x 5 inches. I cut a piece of red gingham from the Classic Gingham 6x6 paper pad to 4 x 5.25 inches and layered it behind the kraft paper. I then finished it off by placing a piece of brown gingham cut to 4.25 x 5.5 inches from the Gingham Jewel Tones 6x6 paper pad.


The final accent to the card was to wrap a piece of black and white gingham ribbon around the card front. I then adhered the focal piece and the card was complete.

Thanks so much for stopping by today and I hope you enjoyed this sweet little card featuring the Fruit Cocktail stamp set!

Sunny Studio Supplies Used:

Fancy Frames-Circle Dies
Shop at:
Sunny Studio
Classic Gingham 6x6 Paper
Shop at:
Sunny Studio
Gingham Jewel Tones 6x6 Paper
Shop at:
Sunny Studio
Fruit Cocktail Stamps
Shop at:
Sunny Studio
Fruit Cocktail Dies
Fruit Cocktail Dies
Shop at:
Sunny Studio