Friday, June 23, 2023

Everything's Rosy Card with Tina

Hello crafty friends, it’s Tina and today we are talking about lots of layering! First up I am creating gorgeous flowers with the layering stamp and die set Everything’s Rosy! The detail in these stamps is just amazing and you end up with such great realistic roses.

Sunny Studio Stamps: Everything's Rosy Thank You Card by Tina Henkens (featuring Frilly Frame Dies, Big Bold Greetings, Spring Greenery Dies, Scalloped Circle Mat Dies)

As always with layering stamps I used a trick I learned from Jennifer McGuire using the dies and a stamping tool. You start by die cutting the basic shapes, in this case the two roses and the clustered leaves. I cut each shape several times. You put the negative pieces of cardstock inside the stamping tool, so you can just pop in the basic shapes.

Next, I removed all the stamps from the plastic sheet they come on. You place the first drawing (the 1a image) onto the cut basic shape for perfect placement. I secure the plastic in place with some low tack tape. Next, I place the coordinating stamp onto the drawing and line it up with the lines of the image. Then you just pick up the stamp with the door of your stamping tool and remove the plastic, you’ll get perfect stamping each time! Repeat the same process for each layer. I always stamp more images than I need, giving myself some room to play with the design.

Sunny Studio Stamps: Everything's Rosy Thank You Card by Tina Henkens (featuring Frilly Frame Dies, Big Bold Greetings, Spring Greenery Dies, Scalloped Circle Mat Dies)

I created a white A2 card base and covered it with a pretty teal paper from the Sweater Weather paper pad. This ties in nicely with the teal inks I used on the leaves. I cut a white panel with the Frilly Frames Stripes Die and layered it on top of the teal one. Next, I added a white circle using the largest of the Scalloped Circle Mats 3.

Now it was time to lay down my roses and leaves, so I could see how much room I had left for a sentiment. I fiddled a bit with the placement and once I was happy, I could adhere the arrangement with liquid glue and dimensional foam tapes. As a little bonus, I added some white and teal leaves cut with the Spring Greenery dies.

I stamped the beautiful scripty ‘Thank You’ from the Big Bold Greetings in Versafine Onyx Black ink and cut it with the matching die. A few Chrystal Clear Jewels were scattered around the sentiment.

I hope you will create beautiful bouquets with these gorgeous, layered roses! Thank you for joining me and happy crafting!

Sunny Studio Supplies Used:

Everything's Rosy Stamps
Shop at:
Sunny Studio
Everything's Rosy Dies
Shop at:
Sunny Studio
Frilly Frames Stripes Die
Shop at:
Sunny Studio
Scalloped Circle Mat 3 Dies
Shop at:
Sunny Studio
Sweater Weather Paper
Shop at:
Sunny Studio
Spring Greenery Dies
Shop at:
Sunny Studio
Big Bold Greetings Stamps
Shop at:
Sunny Studio
Big Bold Greetings Dies
Shop at:
Sunny Studio

Thursday, June 22, 2023

Critter Campout Card with Marine

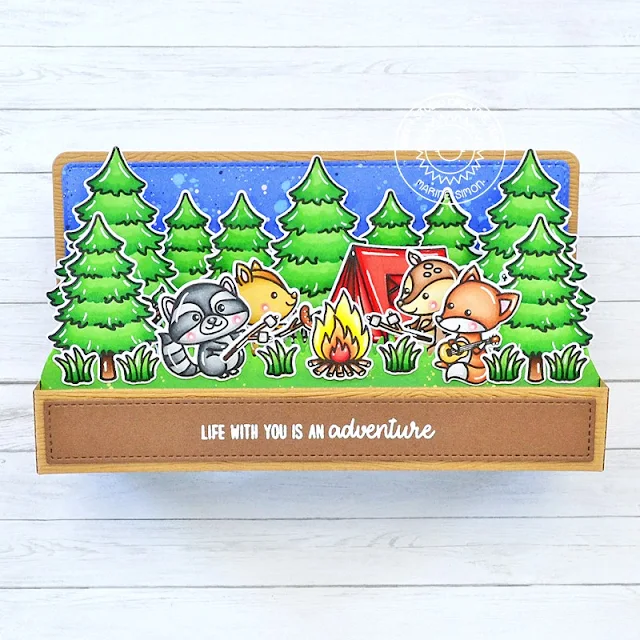
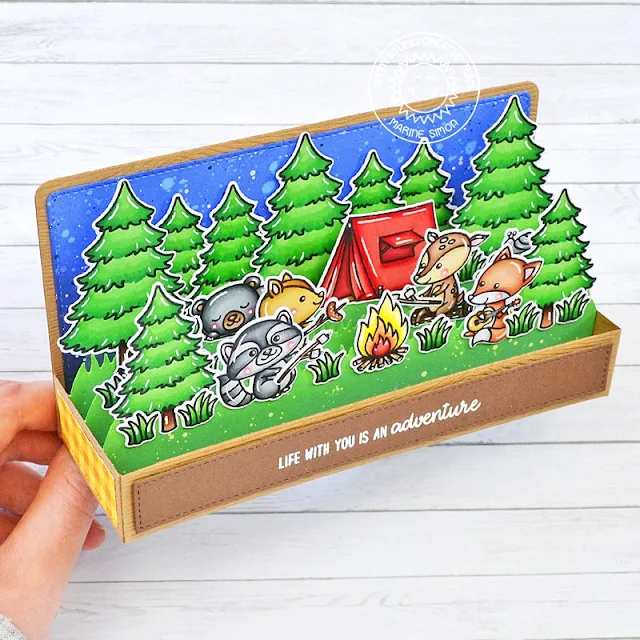
Hello crafty friends! Marine here, so happy to be back with a new 3D card showcasing the little guys from Critter Campout. It was my first time coloring them, and I had a lot of fun creating this camping in the woods scenery for them.

Sunny Studio Stamps: Critter Campout Card by Marine Simon (featuring Picket Fence Dies, Seasonal Trees)

I started off with the coloring. I stamped all my images on Transotype perfect coloring paper using an alcohol marker friendly black ink, as always I used the coordinating dies to cut them all, and then colored everything using my Graph'it brush markers and Spectrum Noir Illustrator markers. And in addition to the little campers from Critter Campout, I picked the pine trees from Seasonal Trees, the tree trunk from Happy Harvest, and the grass sprigs from Bunnyville.

Sunny Studio Stamps: Critter Campout Card by Marine Simon (featuring Picket Fence Dies, Seasonal Trees)

Once everything was colored, I cut all the 3D elements and built the card base. I wanted to have a night sky in the back, so I used blueprint sketch, chipped sapphire and black soot oxide inks to make a dark background. I also cut three grass borders using the grass die from Picket Fence Border Die, and colored those borders using mowed lawn and rustic wilderness oxide inks.

Sunny Studio Stamps: Critter Campout Card by Marine Simon (featuring Picket Fence Dies, Seasonal Trees)

I attached five trees on the back panel using 1mm foam squares, and then the remaining images on the grass borders using 3mm glue dots. To decorate both sides of the card I used a plaid pattern paper from the Critter Country paper pack, and finally I white heat embossed my "Life with you is an adventure" greeting from Critter Campout on the front.

And that's it! I hope that you like this lovely little camping scene in the woods. Thank you so much for stopping by, and see you next time!

Sunny Studio Supplies Used:

Picket Fence Border Dies
Shop at:
Sunny Studio
Critter Campout Stamps
Shop at:
Sunny Studio
Critter Campout Dies
Shop at:
Sunny Studio
Happy Harvest Stamps
Shop at:
Sunny Studio
Happy Harvest Dies
Happy Harvest Dies
Shop at:
Sunny Studio
Seasonal Trees Stamps
Shop at:
Sunny Studio
Seaonal Trees Dies
Seaonal Trees Dies
Shop at:
Sunny Studio
Bunnyville Stamps
Bunnyville Stamps
Shop at:
Sunny Studio
Bunnyville Dies
Bunnyville Dies
Shop at:
Sunny Studio
Critter Country Paper
Shop at:
Sunny Studio

Wednesday, June 21, 2023

Perfect Popsicles Card with Catherine

Hello Crafty Friends! It’s Catherine here! Today, I am sharing a summer card created with the yummy Perfect Popsicles Stamps!

Sunny Studio Stamps: Perfect Popsicles Summer Themed Card by Catherine Cohen (featuring Passionate Penguins, Stitched Rectangle Dies)

To start, I die cut white cardstock with a stitched rectangle die, 4” x 5 ¼”. I lightly ink blended the panel with Squeezed Lemonade, Spun Sugar, and Salvage Patina Distress Oxides. I splattered the background with some yellow, pink, and blue watercolor.

For the popsicles, I die cut the popsicles using Perfect Popsicles Dies. I placed the negative back into my Misti and began stamping the popsicles.  I used the following Catherine Pooler inks:

Yellows: Glitz, Lemoncello, Chiffon
Reds: Do-Si-Do, Coral Cabana, Samba
Turquoise: Cummerbund, Fiesta Blue, All That Jazz
Beige: Lawn Fawn Sugar Cookie, Altenew Sand Dune

I added some sprinkles onto the popsicles using Nuvo Simply White Crystal Drops and Ice Cream Chocolate Sprinkles.

Sunny Studio Stamps: Perfect Popsicles Summer Themed Card by Catherine Cohen (featuring Passionate Penguins, Stitched Rectangle Dies)

Next, I stamped the adorable penguins from Passionate Penguin Stamps and die cut with the coordinating Passionate Penguins Dies. I added sunglasses from Beach Buddies Stamps. I colored the images with Copic Markers listed in my blog link below.

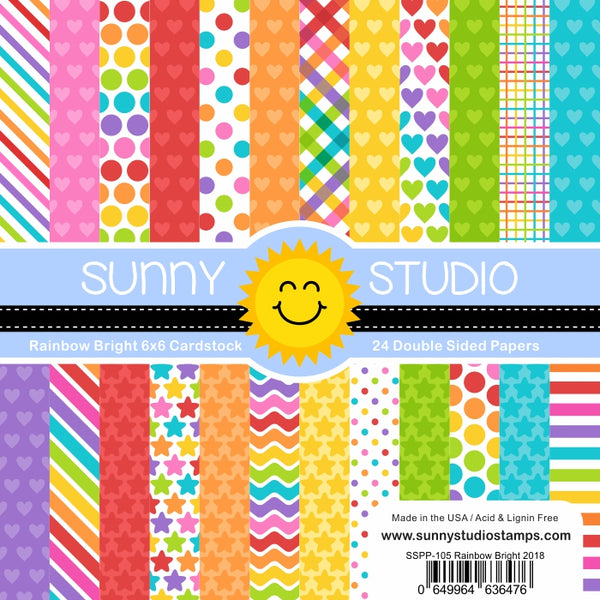
I stamped the sentiment from Sealiously Sweet Stamps onto the panel. I die cut “cool” from Perfect Popsicles Dies and ink blended with Salvage Patina and Tumbled Glass Distress Oxides. I adhered the panel onto a colorful stitched background using Stitched Rectangle Dies and Rainbow Bright 6x6 Paper. I finished off the card with a few clear enamel dots.

Thank you so much for joining me today. For a list of Copic Markers used, please visit me at Crafti-Cat.

Sunny Studio Supplies Used:

Perfect Popsicles Dies
Shop at:
Sunny Studio
Perfect Popsicles Stamps
Shop at:
Sunny Studio
Beach Buddies Stamps
Shop at:
Sunny Studio
Stitched Rectangle Dies
Shop at:
Sunny Studio
Rainbow Bright 6x6 Paper
Shop at:
Sunny Studio
Sealiously Sweet Stamps
Shop at:
Sunny Studio
Passionate Penguins Stamps
Shop at:
Sunny Studio
Passionate Penguins Dies
Shop at:
Sunny Studio

Tuesday, June 20, 2023

Turtley Awesome Card with Isha

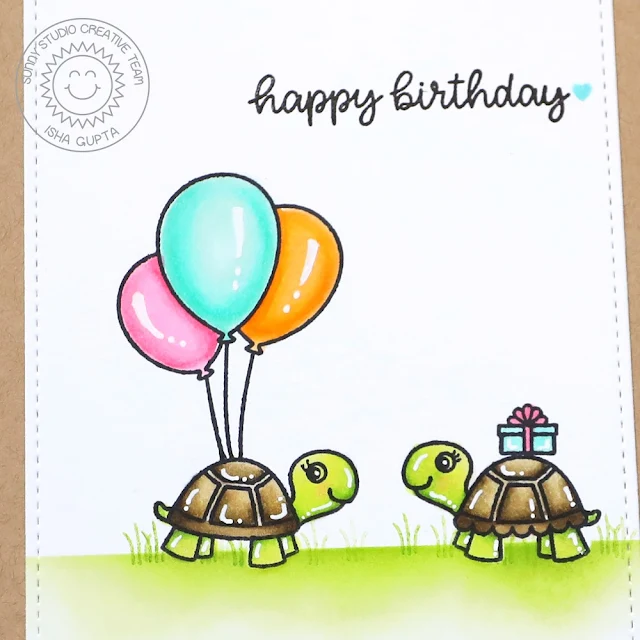
Hello everyone! Isha here today with a CAS one layer card using masking technique featuring the Turtley Awesome stamps. We can use masking paper to layer images to create a scene, still keeping it clean and simple.

Sunny Studio Stamps: Turtley Awesome Birthday Card by Isha Gupta (featuring Inside Greetings Birthday, Stitched Rectangle Dies)

I started by stamping the turtles and gift box onto masking paper. Fussy cut the images. Next I placed the images where I wanted them to be. First I stamped the gift box, put the mask on it. Now stamp the turtles, put masks on them. Now position a post-it to mask the sky area and sponge mowed lawn distress ink to create grass. Next stamp the grass from the Farm Fresh stamp set. I used 2nd. and 3rd generation stamping technique to keep them light.

Sunny Studio Stamps: Turtley Awesome Birthday Card by Isha Gupta (featuring Inside Greetings Birthday, Stitched Rectangle Dies)

Stamp the balloons from the Birthday Mouse stamp set onto the turtle back. Next remove all the masks. Stamp the sentiment from the Inside Greetings-Birthday stamp set. Die-cut the panel using the Stitched Rectangle dies. Color the images using copic markers. Adhere the panel to a kraft card base.

Thanks for dropping by and have a nice day!

Sunny Studio Supplies Used:

Turtley Awesome Dies
Shop at:
Sunny Studio
Turtley Awesome Stamps
Shop at:
Sunny Studio
Stitched Rectangle Dies
Shop at:
Sunny Studio
Inside Greetings Birthday
Shop at:
Sunny Studio
Birthday Mouse Stamps
Shop at:
Sunny Studio

Monday, June 19, 2023

Summer Sweets Card with Bobbi

Bobbi here with you today! Summertime is the season for sweet and cool treats like popsicles, ice cream cones and sandwiches, iced-tea, a favorite-flavored soda and a sundae. Sunny Studio Stamps has thought of all the favorite treats in this “cool” set called, “Summer Sweets.” I’m using the Summer Sweets stamp set and dies for this 5″ X 7″ card.

Sunny Studio Stamps: Summer Sweets Card by Bobbi Lemanski (featuring Stitched Circle Dies)

For this card, I created a “pattern” background by stamping all the cute treats and a few of the sentiments from the set in black on white cardstock. I splattered bright ink colors over the black and white using my Kuretake Gansai Tambi watercolor paints and a small fan brush. I also added some more bolder tiny squares of color using my Copic Markers. I used a very random pattern when adding the squares.

Sunny Studio Stamps: Summer Sweets Card by Bobbi Lemanski (featuring Stitched Circle Dies)

For the focal point, I stamped individual sweets (some of my favorites) and three tiny cherries and cut them using the coordinating dies. I colored them using Copic markers.  I attached them to a circle of watercolor paper that was also splattered and color washed with color.  I used foam tabs behind the three center treats – iced tea, soda and popsicle – to make them stand out. I stamped the sentiment, “You’re the Coolest” right under the treats using black ink. I added an aqua outline by attaching a larger circle of color around the watercolor circle (both using the Stitched Circle Large Dies and attached it to the middle of the card front panel. The entire panel was adhered to a white card base to complete the card.

Thanks for stopping by today. If you want to see more ideas and inspiration from me, subscribe to my blog, BobbiHartDesign.com. I’ll send you updates on new posts! You can also find me on Instagram as @BobbiHartDesign and on Facebook as BobbiHartDesign.

Sunny Studio Supplies Used:

1
1
Shop at:
Sunny Studio
Summer Sweets Dies
Summer Sweets Dies
Shop at:
Sunny Studio
Stitched Circle Large Dies
Shop at:
Sunny Studio