Monday, January 1, 2024

Spring Sneak Peek Week: Introducing Big Bunny & My Heart Stamps

Hello and welcome to the first day of our Spring Sneak Peek Week!  All this week I will be sharing cards showcasing our newest collection which will be available for purchase this Friday!

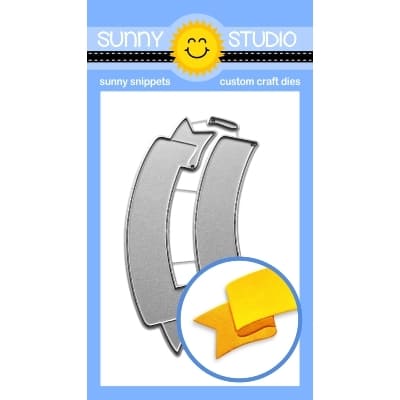
Card No. 1: Today I am sharing ideas using our new Big Bunny Stamps and My Heart Stamps. For this card, I started by pairing the rabbit with the oversized carrot from our Bunnyville Stamps. To frame him I layered our Stitched Arch Dies over a blue heart print from our Flirty Flowers Paper pack. The Big Bunny set includes a really versatile oversized "greetings" word stamp with several supporting words which I heat-embossed onto our Brilliant Banner 2 Dies cut from our Striped Silly Paper and Polka-dot Parade Paper packs. I love this complimentary color palette! 

Sunny Studio Blog: Spring Greetings Rabbit Holding Giant Carrot Easter Card using Big Bunny & Bunnyville Clear Stamps

Card No. 2:
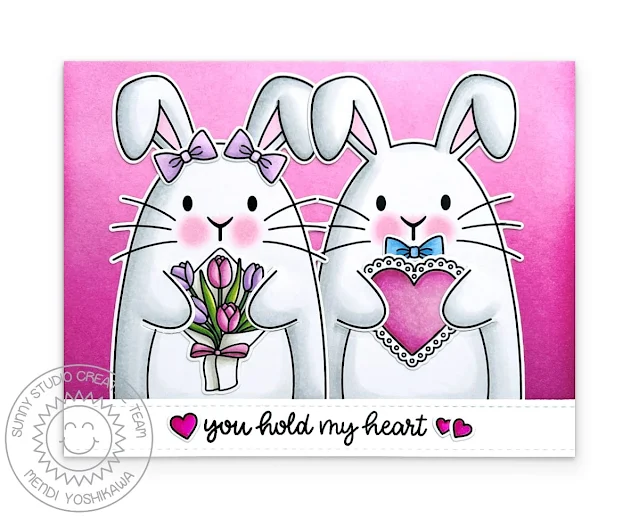
What's better than one Big Bunny? Two of course! I created a bunny couple using the bows for the girl's ears and the boy's neck. I was able to borrow the scalloped heart from the Holiday Hugs Stamps which I thought worked well with the Tulip bouquet. In my mind, they have just exchanged gifts for Valentine's Day! I was able to ink my background to match my Copic coloring by blending Picked Raspberry & Seedless Preserves Distress Inks. I completed my simple card by adding a stitched strip to the bottom by elongating our Slimline Pennant Dies. This gave me a nice place to stamp the greeting from our Heart Bouquet Stamps, paired with a couple of the mini hearts from the Big Bunny Stamps.

Sunny Studio Blog: You Hold My Heart Valentine's Day Card by Mendi Yoshikawa using Big Bunny & Heart Bouquet Clear Stamps

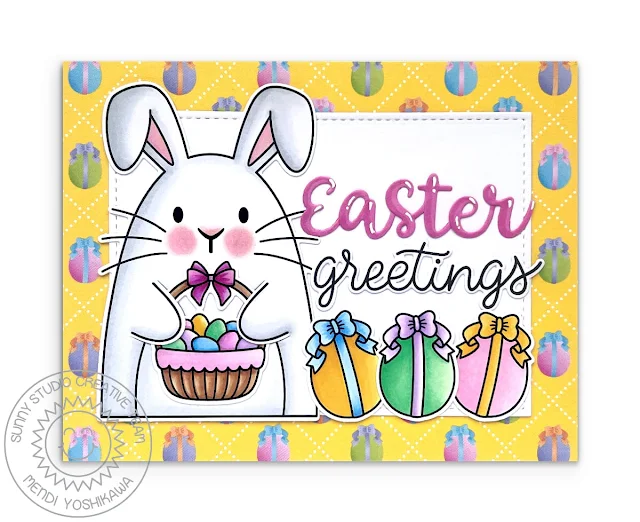
Card No. 3: Up next, I have an Easter card, focusing on the Easter basket and oversized egg from the Big Bunny Stamps. I started by adding the egg print patterned paper from our Spring Fever Paper pack and then layering a smaller Stitched Rectangle die-cut in the center. I was able to spell out the word "Easter" for my greeting using the letters from our Hayley Uppercase Alphabet and Hayley Lowercase Alphabet together with the "greetings" word from the Big Bunny Stamps. I was able to create a little border by lining up three of the large Easter eggs and I love how they tie in with the background paper.

Sunny Studio Rabbit Holding Easter Basket with Oversized Eggs Card by Mendi using Big Bunny Stamps & Spring Fever Paper

Card No. 4: For this Valentine's Day card using the Big Bunny Stamps, I paired the new rabbit with the bear from our Holiday Hugs Stamps for a fun slimline-style card. This time I focused on the two letters that come with the Big Bunny Stamps. For my background, I inked up my white cardstock using Picked Raspberry Distress Ink which I faced to white in the center. I then stamped the mini hearts from the set in a random pattern on the background in a similar Pink color for a tone-on-tone effect. I added stitching to the edges using the die from our Slimline Basic Border Dies. Adding the stitching to the short edges was tricky to get them to fit through my die-cutting machine, but I was able to roll it through halfway at an angle, flipping it around until all four corners were impressed with the stitching. Finally, I added my "Happy Valentine's Day" greeting stamped with Fuchsia ink from our new My Heart Stamps. This 3x4 stamp set comes with 2 really nice oversized handwritten greetings perfect for Valentine's Day!
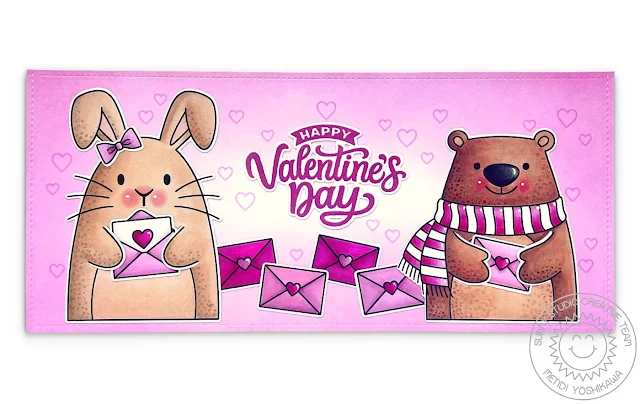
Sunny Studio Rabbit & Bear Sending Love Letters Slimline Valentine's Day Card using Big Bunny, Holiday Hugs & My Heart Clear Stamps

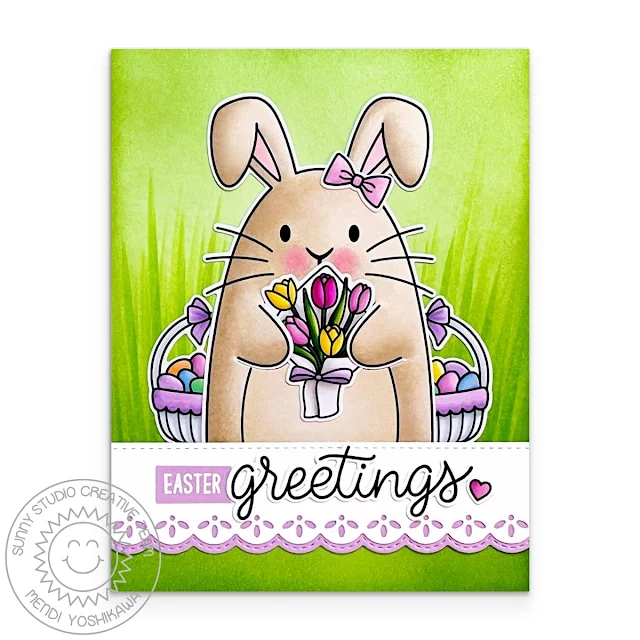
Card No. 5: For my last Big Bunny card of the day, I started by inking up my white cardstock panel using Twisted Citron Distress Ink. I then flicked on long blades of grass using my Copic Markers in G07, YG06, and FYG2, leaving about an inch untouched along the bottom portion of my card. I positioned my bunny in the center with two Easter baskets behind her on either side and colored the tulip bouquet she's holding in bright spring colors to match. 

I then added scalloped lace & stitched edges to a strip of 1" high white cardstock to ground my rabbit using our Ribbon & Lace Border Dies. I then cut a lavender scalloped border with a stitched edge from that same border die set to layer behind my lacey scallop to add a touch of color and make the lace stand out against my background. Lastly, I stamped heat embossed the word "Easter" with Versamark Ink and White Detail Embossing Powder onto a scrap of that same lavender cardstock and paired it with the "greetings" word stamped in VersaFine Onyx Black ink and die-cut it with the coordinating Big Bunny Dies

Sunny Studio Blog: Easter Greetings Rabbit Holding Tulip Bouquet with Easter Basket Card using Big Bunny Clear Stamps

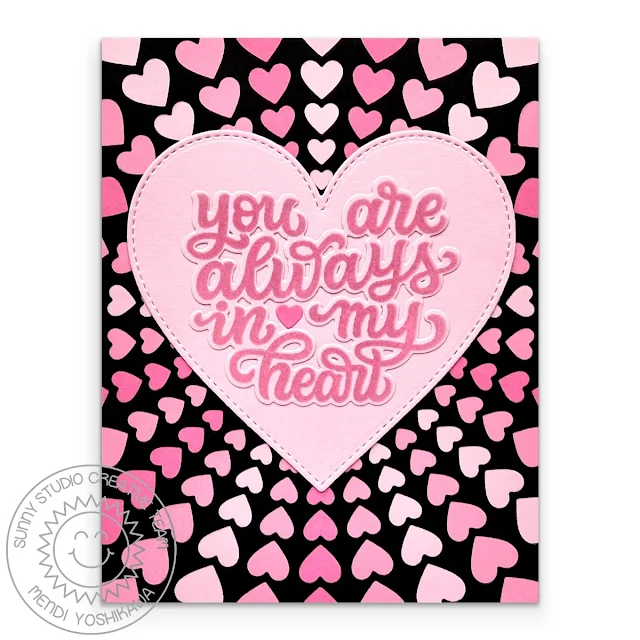
Card No. 6: For my last card of the day I have a card showcasing the second wonderful greeting from our new My Heart Stamps. This particular greeting is sized perfectly to fit within the largest heart from our Stitched Heart Dies (and Scalloped Heart Dies). I love how the coordinating My Heart Dies also allows you to cut out and layer these sentiments over floral arrangements and other busy backgrounds to help them stand out and take center stage. For this card, I cut my background from black cardstock using our Bursting Hearts Dies and then alternated three different shades of pink cardstock scraps in tapered strips which I adhered to the back of my die-cut so that my rows of hearts looked like sunbursts.

Sunny Studio Stamps You Are Always in My Heart Black & Hot Pink Bursting Heart Background Valentine's Day Card by Mendi

That wraps up today's sneak peek. I'm so happy you joined me today! I'd love to give a $50 gift code to one lucky winner using the Rafflecopter below. Our daily sneak peek contests run through Saturday, January 6th at Midnight PST with the winners announced here on Sunday, January 7th. 

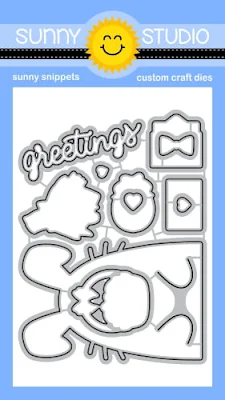
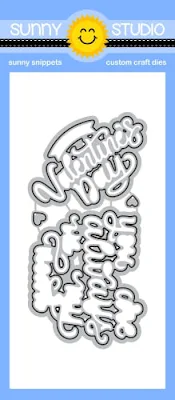
a Rafflecopter giveaway Here's a closer look at our new Big Bunny Stamps & Dies and My Heart Stamps & Dies used today and available for purchase on Friday, January 5th.

Sunny Studio Big Bunny Easter & Valentine's Day Spring Rabbit 4x6 Clear Photopolymer Stamps SSCL-367 Sunny Studio Stamps Big Bunny 12-Piece Metal Cutting Die Set SSDIE-359

Sunny Studio My Heart 3x4 Valentine's Day Sentiment Greetings Clear Photopolymer Stamps SSCL-366 Sunny Studio Stamps My Heart Sentiments Metal Cutting Die Set SSDIE-358

Other Sunny Studio Supplies Used:

Stitched Rectangle Dies
Shop at:
Sunny Studio
Tsukineko Jumbo Dauber
Shop at:
Sunny Studio
Versafine Onyx Black Ink
Shop at:
Sunny Studio
Striped Silly 6x6 Paper
Shop at:
Sunny Studio

Flirty Flowers 6x6 Paper
Shop at:
Sunny Studio
Stitched Arch Dies
Stitched Arch Dies
Shop at:
Sunny Studio
Slimline Basic Borders
Shop at:
Sunny Studio
Slimline Pennant Dies
Shop at:
Sunny Studio
Bunnyville Stamps
Bunnyville Stamps
Shop at:
Sunny Studio
Bunnyville Dies
Bunnyville Dies
Shop at:
Sunny Studio
Bursting Heart Die
Bursting Heart Die
Shop at:
Sunny Studio
Heart Bouquet Stamps
Shop at:
Sunny Studio
Heart Bouquet Dies
Heart Bouquet Dies
Shop at:
Sunny Studio
Stitched Heart 2 Dies
Shop at:
Sunny Studio
Hayley Lowercase Alphabet Dies
Shop at:
Sunny Studio
Hayley Uppercase Alphabet Dies
Shop at:
Sunny Studio
Ribbon & Lace Dies
Ribbon & Lace Dies
Shop at:
Sunny Studio
Spring Fever Paper
Spring Fever Paper
Shop at:
Sunny Studio
Brilliant Banner 2 Dies
Shop at:
Sunny Studio
Holiday Hugs Stamps
Holiday Hugs Stamps
Shop at:
Sunny Studio
Polka-dot Parade 6x6 Paper
Shop at:
Sunny Studio
Holiday Hugs Dies
Holiday Hugs Dies
Shop at:
Sunny Studio
Hero Arts Ultra Fine Clear
Shop at:
Sunny Studio

Sunday, December 31, 2023

Love Birds Card with Rachel

Hello crafty friends! It's Rachel here with a shadow box card featuring the adorable new Love Birds Stamp Set

Sunny Studio Stamps: Love Birds Card by Rachel Alvarado (featuring Picket Fence Border Dies)

To start, I first created my shadow box from scratch. When folded, it measures 5" x 6.5" and can fit easily in a standard 5"x7" envelope. When upright, it measures 4.5" wide by 5" tall. To create my base, I simply trimmed two pieces of white card stock to 5" x 7" and scored each piece at both 1/2" and 5". I die cut a stitched circle into one of the pieces to create a window, stamped my sentiment to the piece with the window, and then attached both the front and back pieces of my shadow box together by adding some glue to the 1/2" tab pieces.

I next stamped all of my images onto a sheet of Neenah Solar White 110lb Card Stock with some Memento Tuxedo Black Ink and colored them with Copic alcohol markers. I then used the coordinating Love Birds Die Set to cut them out. Prior to adding my images to the inside of my shadow box card, I first die cut a grass panel (from green card stock) and a fence (from white card stock) using the Picket Fence Border Die Set. I adhered the grass first directly behind the bottom opening of my circular window and then added the fence piece behind my grass.

Sunny Studio Stamps: Love Birds Card by Rachel Alvarado (featuring Picket Fence Border Dies)

For my background, I blended some Tumbled Glass Distress Ink onto a 4.5" x 5" piece of smooth white card stock. Lastly, I added some hearts using clear acetate in the areas where it would look like the hearts were floating.

Thanks so much for taking the time to drop by! I had so much fun working with this adorable set and hope you enjoyed my card today! For more card making inspiration, feel free to check out my Instagram Feed.

Sunny Studio Supplies Used:

Picket Fence Border Dies
Shop at:
Sunny Studio
Love Birds Stamps
Love Birds Stamps
Shop at:
Sunny Studio
Love Birds Dies
Love Birds Dies
Shop at:
Sunny Studio

Saturday, December 30, 2023

Love Birds Card with Tina

Hi crafty friends, Tina here and my last card for the year is a sweet love themed one. Star of the show are the adorable cuties from the Love Birds which comes with matching dies. How sweet is this Valentine’s Day set!

Sunny Studio Stamps: Love Birds Card by Tina Henkens (featuring Bursting Hearts Dies, Scalloped Heart Dies)

You can never have enough hearts on a love themed card, so I went all out with the beautiful Bursting Hearts die. I cut this panel from white cardstock. Not only do you get a gorgeous background, but also lots of cute hearts as an extra bonus. I put them in a little bag to use on later projects.

There are so many ways in which this panel can be used so today I decided to select a blue dotted paper from Dots & Stripes Pastel. Layering the white heart panel on top creates a fun contrast. Especially when you also add a heart (Scalloped Heart Dies) and ink it in a bright red color with blending brushes and Distress Oxide Lumberjack Plaid.

Sunny Studio Stamps: Love Birds Card by Tina Henkens (featuring Bursting Hearts Dies, Scalloped Heart Dies)

I selected two cuties from the Love Birds set and colored them with my Copics in happy colors that would match my background elements. The sentiment was selected from the same set and stamped onto a small white strip with Versafine Onyx Black ink and a red ink from my stash.

The two birds and the banner were mounted to the heart with foam tape, and they fit just perfect. It’s a great focal point for this multi-layer card. A few Silver Jewels were scattered around the cute couple as a final embellishment.

I had a lot of fun creating this sweet card and I hope to see your creations soon! Thank you for visiting the blog and a very Happy New Year!

Sunny Studio Supplies Used:

Dots & Stripes Pastels 6x6 Paper
Shop at:
Sunny Studio
Bursting Heart Die
Bursting Heart Die
Shop at:
Sunny Studio
Scalloped Heart Dies
Shop at:
Sunny Studio
Love Birds Stamps
Love Birds Stamps
Shop at:
Sunny Studio
Love Birds Dies
Love Birds Dies
Shop at:
Sunny Studio

Friday, December 29, 2023

Love Birds Ornaments with Marine

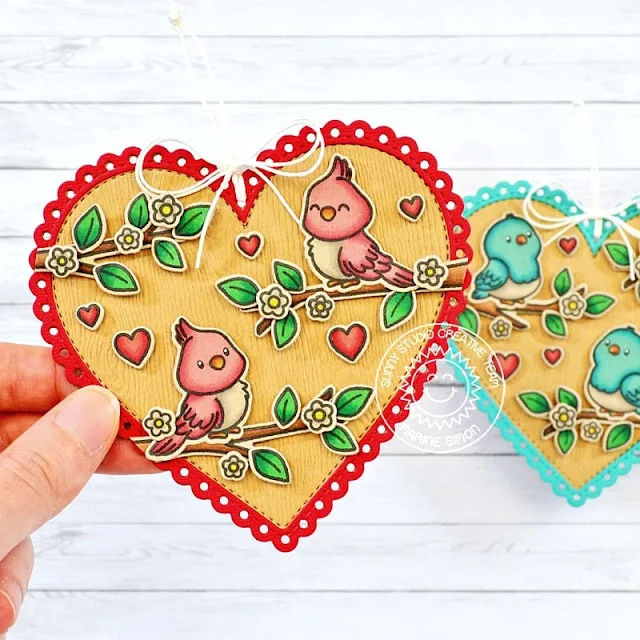
Hello crafty friends, Marine here, I'm back for the last time of the year with this duo of Valentine ornaments showcasing the ever so sweet Love Birds. And I had so much fun coloring on kraft cardstock for my Merry Mocha see-through tags that I decided to do it again with those lovely birdies.

Sunny Studio Stamps: Love Birds Valentine Ornaments by Marine Simon (featuring Scalloped Heart Dies, Stitched Heart Dies)

So I started off by stamping the four birds, the branches, multiple leaves, flowers and hearts on a light kraft cardstock using an alcohol marker friendly black ink, I used my Spectrum Noir Illustrator and Graph'it brush markers to color them all, and then used the coordinating dies to cut everything. And I don't know why, but when I color on kraft cardstock I don't feel the need of adding white highlights to my images, but in that case I did add a dot on each bird's eye using a white gel pen, just to make them pop a little bit more.

Sunny Studio Stamps: Love Birds Valentine Ornaments by Marine Simon (featuring Scalloped Heart Dies, Stitched Heart Dies)

Next I created my two heart shaped ornaments following the same design for both, so here are the different steps for one:

1. Cut a large Scalloped Heart out of a light brown woodgrain cardstock, another one out of a dark kraft cardstock, and attach them back to back using liquid glue

2. Cut a large Scalloped Heart out of a colored cardstock, and cut a heart shaped window out of it using the largest Stitched Heart 2 to create a heart frame

Sunny Studio Stamps: Love Birds Valentine Ornaments by Marine Simon (featuring Scalloped Heart Dies, Stitched Heart Dies)

3. Glue this heart frame on the woodgrain heart panel using liquid glue

4. Cut a small Stitched Heart 2 out of a darker brown cardstock than the one at step 1, stamp and emboss a greeting from Love Birds on that heart, and attach that heart at the back of the ornament using 1mm foam squares

Sunny Studio Stamps: Love Birds Valentine Ornaments by Marine Simon (featuring Scalloped Heart Dies, Stitched Heart Dies)

Next I attached my images using 1mm and 2mm foam squares, added hemp twine to create the handles, and tied bows that I added at the top of each ornament using liquid glue. And that's it! Very simple, but yet super cute. 

I hope that you like those ornaments! Thanks so much for stopping by, and see you very soon!

Sunny Studio Supplies Used:

Scalloped Heart Dies
Shop at:
Sunny Studio
Stitched Heart 2 Dies
Shop at:
Sunny Studio
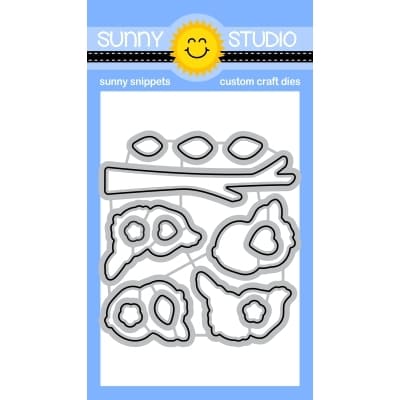
Love Birds Stamps
Love Birds Stamps
Shop at:
Sunny Studio
Love Birds Dies
Love Birds Dies
Shop at:
Sunny Studio

Thursday, December 28, 2023

Love Birds Card with Gladys

Hello crafty friends, Gladys here! I'm excited to be back on the blog with a sweet card featuring the new mini stamp set called Love Birds. It is perfect for Valentine's day but I can see it used year-round for birthdays, anniversary and the holiday season.

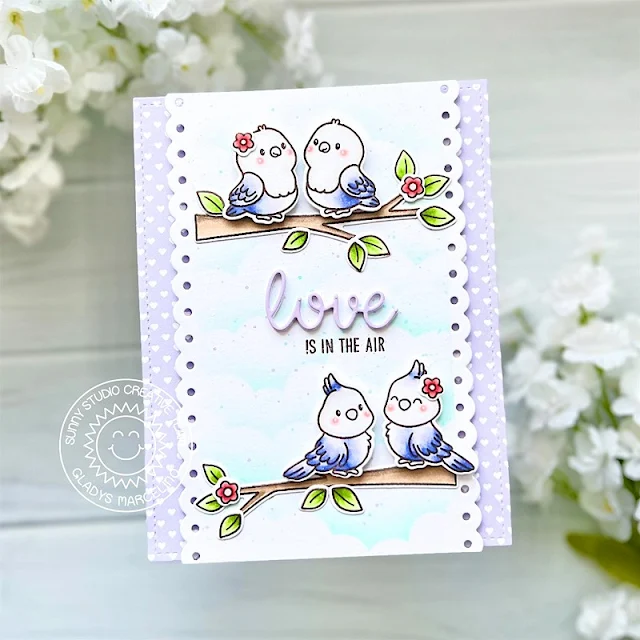
Sunny Studio Stamps: Love Birds Card by Gladys Marcelino (featuring Slimline Dies)

I started by stamping all the images from the set using alcohol-friendly ink. I colored them with Copic markers and used the coordinating dies to cut them all out. Although this is a mini set it has lots of images to build scenes with. It has multiple birds facing opposite directions as well as a branch, different sized leaves, flowers, hearts, and several sentiments. I really like how the birds are drawn in this set, so sweet and cute!

Next, I used the Slimline Scalloped Frame die to cut from thick white cardstock. I trimmed it down to fit on an A2 size card panel. For the background, I used a cloud stencil with salvaged patina distress oxide ink. I foam mounted the panel onto a lilac patterned paper which was cut from A2 size stitched rectangle die. 

Sunny Studio Stamps: Love Birds Card by Gladys Marcelino (featuring Slimline Dies)

I assembled the branch, leaves, flowers on the background panel and adhered them with liquid glue. I added double-sided foam tape on all the birds to give them dimension. For the sentiment I used the "love" word die from the Scalloped Oval Mat 2 die set to cut multiple times from white cardstock and lilac cardstock to match the pattern paper. I combined the word die with a sentiment from the love bird stamp set to complete this simple and sweet card.

Thanks so much for joining me. Have a wonderful day!

Sunny Studio Supplies Used:

Slimline Scalloped Frame
Shop at:
Sunny Studio
Scalloped Oval Mat 2 Dies
Shop at:
Sunny Studio
Love Birds Stamps
Love Birds Stamps
Shop at:
Sunny Studio
Love Birds Dies
Love Birds Dies
Shop at:
Sunny Studio