Tuesday, May 30, 2023

Crepe Paper Streamers Card with Isha

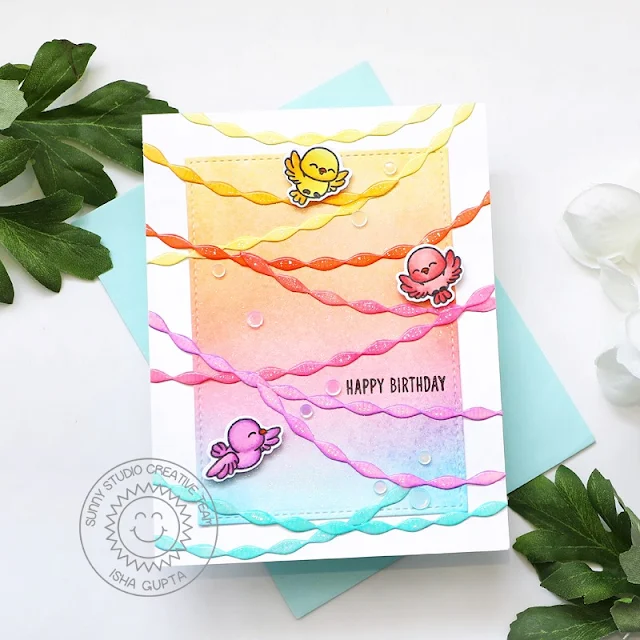
Hello everyone! Isha here with a fun, CAS rainbow theme card featuring the lovely Crepe Paper Streamer dies.

Sunny Studio Stamps: Crepe Paper Streamer Die Focused Birthday Card by Isha Gupta (featuring Little Birdie, Stitched Rectangle Dies)

I started by sponging squeezed lemonade, spiced marmalade, picked raspberry, peacock feathers, and abandoned coral distress oxide inks onto white cardstock. Die-cut using the Stitched Rectangle dies. Spray sparkle shimmer Spritz. This gives a beautiful subtle shimmer to the layer. Adhere this to a white card.

Sunny Studio Stamps: Crepe Paper Streamer Die Focused Birthday Card by Isha Gupta (featuring Little Birdie, Stitched Rectangle Dies)

Die-cut the streamers using the Crepe Paper Streamer dies. Sponge the same inks as we did on the mat layer. Apply nuvo shimmer pen and then add nuvo glaze to the streamers. Adhere to the card. Stamp the sentiment from the Floating By stamp. 

Stamp the birds from the Little Birdies stamp set, color using copic markers and die-cut using the coordinating diesAdhere to the card using 3d foam. Finally I added some rainbow confetti to finish the card.

Thank you for dropping by and have a nice day!

Sunny Studio Supplies Used:

Stitched Rectangle Dies
Shop at:
Sunny Studio
Floating By Stamps
Floating By Stamps
Shop at:
Sunny Studio
Little Birdie Stamps
Shop at:
Sunny Studio
Little Birdie Dies
Little Birdie Dies
Shop at:
Sunny Studio
Crepe Paper Streamers Dies
Shop at:
Sunny Studio

Monday, May 29, 2023

Special Day Card with Bobbi

Hi Sunny Studio friends! It’s Bobbi here with CAKE! Every special day deserves cake, in my opinion! I’m using the new Special Day stamps and coordinating dies. I am also using the pretty corners that come in the Notebook Photo Corners dies set on this card.

Sunny Studio Stamps: Special Day Wedding Themed Card by Bobbi Lemanski (featuring Notebook Dies)

To make this 5″ X 7″ card, I started with a card base and front panel made from white cardstock. I also cut the four photo corners from the same cardstock. I cut a piece of pink cardstock measuring 4″ square and inked the edges with Worn Lipstick Distress Oxide Ink. I attached the white photo corners to the edges.

Sunny Studio Stamps: Special Day Wedding Themed Card by Bobbi Lemanski (featuring Notebook Dies)

I stamped the 5″ X 7″ front panel using two smaller images from the Special Day set – the rose and candle – to make a patterned black and white background. I added shadowing around the images using a C3 Copic Sketch Marker. I attached the pink square with corners to the front of the pattern.

Sunny Studio Stamps: Special Day Wedding Themed Card by Bobbi Lemanski (featuring Notebook Dies)
 

I stamped, cut, and colored the two-tiered cake, the row of candles and rosette with leaves. Isn’t she a pretty one?! I colored the cake, cake stand, decor and flowers using Copics in BG11, G00, R29, R27, R17, R14, R22, R21, YG67, YG23, and YG03. I glued the rosette topper and candles to the top of the cake, added foam tabs to the back of the entire cake and attached it to the pink square. Lastly, I stamped the sentiment from the Special Day set below the cake to finish the card.


Thanks for stopping by today. If you want to see more ideas and inspiration from me, subscribe to my blog, BobbiHartDesign.com. I’ll send you updates on new posts! You can also find me on Instagram as @BobbiHartDesign and on Facebook as BobbiHartDesign.


Sunny Studio Supplies Used:

Notebook Photo Corners Dies
Shop at:
Sunny Studio
Special Day Stamps
Special Day Stamps
Shop at:
Sunny Studio
Special Day Dies
Special Day Dies
Shop at:
Sunny Studio

Sunday, May 28, 2023

Bright Balloons Card with Cathy

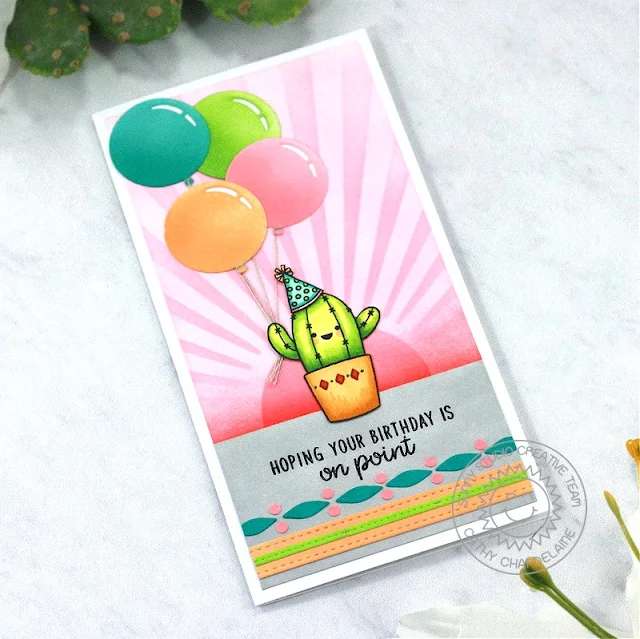
Hey friends! Cathy here today and this adorable little cactus is sending birthday wishes with the help of the Bright Balloons Dies!

Sunny Studio Stamps: Bright Balloons Birthday Card by Cathy Chapdelaine (featuring Looking Sharp, Crepe Paper Streamers, Ribbon & Lace Border Dies, Cupcake Shape Dies)

This is a mini slimline card (card base is 6 1/4" x 6 1/2", scored on the 6 1/2" side at 3 1/4" and folded in half) and I started by cutting a piece of white cardstock 3" x 6" for the card front. I placed a post-it note across the panel 1 3/4" from the bottom and inked with Lost Shadow Distress ink. I then masked the gray area and inked a sunrise stencil from my stash using Spun Sugar and Kitsch Flamingo Distress inks. I stamped the sentiment from the Looking Sharp Stamps 3/8" below the horizon line.

Next, I created a festive Southwestern pattern along the bottom of the panel using the Crepe Paper Streamer DiesRibbon & Lace Border DiesWindow Quad Square Dies (thin green strips) and the Cupcake Shape Die (pink circles). I die-cut these elements from white cardstock and inked them with Saltwater Taffy, Peacock Feathers, Dried Marigold and Twisted Citron Distress inks. I adhered them in the pattern shown and trimmed the excess from the edges. I then adhered the panel to the card front.

Sunny Studio Stamps: Bright Balloons Birthday Card by Cathy Chapdelaine (featuring Looking Sharp, Crepe Paper Streamers, Ribbon & Lace Border Dies, Cupcake Shape Dies)

For the balloons, I die-cut them from white cardstock and inked them with 2 colors of Distress ink each (Peacock Feathers/Salvaged Patina, Mowed Lawn/Twisted Citron, Spiced Marmalade/Dried Marigold and Saltwater Taffy/Spun Sugar). I backed each with white cardstock and placed a small piece of double-sided tape on the back of each balloon. I then wrapped/adhered a 5" long piece of gray embroidery floss to each balloon. I adhered the balloons starting with the ones at the top and kept the floss pulled tightly as I adhered the next balloons. To hold the floss tightly together, I applied a piece of double-sided tape where the cactus arm would cover the strings and adhered them together on the card front.

To finish, I stamped the cactus and birthday hat from the Looking Sharp Stamps on Neenah Classic Crest 80lb solar white cardstock, colored them with Copics and fussy cut them out.

I hope you enjoyed and thanks for stopping by! For more inspiration, please visit my blog www.inkredibleadventures.com and you can also find me on Instagram as @cathy.chapdelaine.

Sunny Studio Supplies Used:

Looking Sharp Stamps
Shop at:
Sunny Studio
Looking Sharp Dies
Looking Sharp Dies
Shop at:
Sunny Studio
Cupcake Shape Dies
Cupcake Shape Dies
Shop at:
Sunny Studio
Window Quad Square Die
Shop at:
Sunny Studio
Ribbon & Lace Dies
Ribbon & Lace Dies
Shop at:
Sunny Studio
Bright Balloons Dies
Shop at:
Sunny Studio
Crepe Paper Streamers Dies
Shop at:
Sunny Studio

Saturday, May 27, 2023

Guest Designer Spotlight: Birthday Cards with Rachel Alvarado

Hello crafty friends! It's Rachel here from RachelAlvaradoDesigns.com. I am happy to be back on the Sunny Studio Blog with some projects featuring items from the newest release.

Sunny Studio Stamps: Birthday Cat Birthday Card by Rachel Alvarado (featuring Fancy Frame Circle Dies, Slimline Scalloped Frame Dies)

For my first project, I created a slimline birthday card featuring the adorable Birthday Cats Stamp Set. To start my card, I first stamped all of my images with Memento Tuxedo Black Ink onto a sheet of Neenah Solar White 110lb Card Stock. I then used the Birthday Cats Die Set to cut them out. I set my images aside and die cut some white and teal pieces of card stock with the Slimline Scalloped Frame Dies to create my slimline card base.

Sunny Studio Stamps: Birthday Cat Birthday Card by Rachel Alvarado (featuring Fancy Frame Circle Dies, Slimline Scalloped Frame Dies)

Next, I die cut three white scalloped circles using the Fancy Frame Circle Dies. Before adding them to my card base, I used a basic circle die to cut three more circles from a piece of smooth white card stock. I added some Salvaged Patina to each circular piece before then splattering it with some diluted Copic Opaque White Paint. Once dry, I then layered these ink-blended pieces with the scalloped circle sections and then adhered them to my card base with double-sided adhesive. Lastly, I heat embossed my sentiment pieces with Fine Detail White Embossing Powder and then added my images with some 3D Foam Adhesive Tape for extra dimension.

Sunny Studio Stamps: Birthday Mouse Birthday Card by Rachel Alvarado

For my second project, I created a sweet, single layered birthday card featuring the new Birthday Mouse Stamp Set. I first stamped my images to a 4"x 5.25" piece of Neenah Solar White 110lb Card Stock and then stamped them a second time onto a piece of Gina K. Designs Masking Magic Sheets. I fussy cut my images from the masking paper and used them to cover/mask the images that I had just stamped onto my card base. 

Sunny Studio Stamps: Birthday Mouse Birthday Card by Rachel Alvarado

Once covered, I then lightly blended the background with some Milled Lavender Distress Oxide Ink, removed the masking pieces, and then added some diluted white ink spatters to my ink-blended portion for some added interest. Once dry, I then colored all of my images with Copic Markers. I finished my card by stamping my sentiment and adding this piece to a standard, top-folding, A2 sized card base.

Copic Colors Used:

  • Mouse: W00, W1, W3, W5
  • Purples: V01, V04, V15, V09
  • Indigo: V20, V22, V25, V28
  • Butterfly: B60, B63

I hope you enjoyed my card today! Thanks so much for taking the time to stop by! If you liked this card and want some more crafty inspiration, please feel free to check out my INSTAGRAM feed! Wishing you all a lovely day!

Sunny Studio Supplies Used:
 

Fancy Frames-Circle Dies
Shop at:
Sunny Studio
Slimline Scalloped Frame
Shop at:
Sunny Studio
Birthday Cat Stamps
Birthday Cat Stamps
Shop at:
Sunny Studio
Birthday Cat Dies
Birthday Cat Dies
Shop at:
Sunny Studio
Birthday Mouse Stamps
Shop at:
Sunny Studio

Friday, May 26, 2023

Birthday Cat Card with Tina

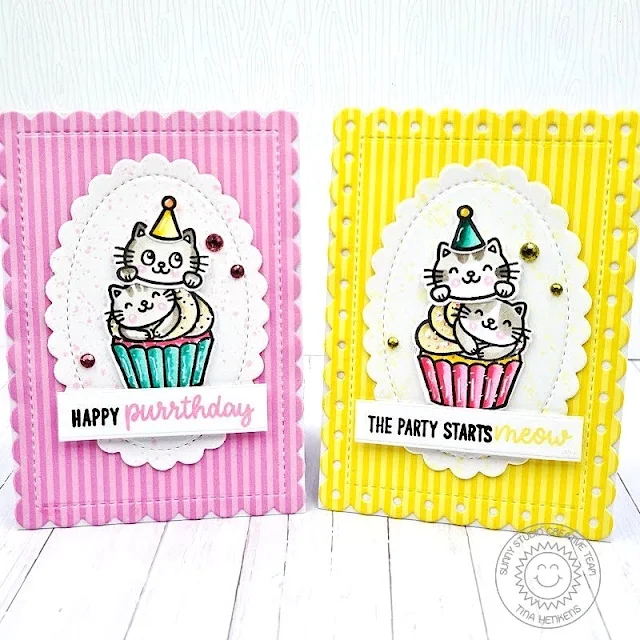
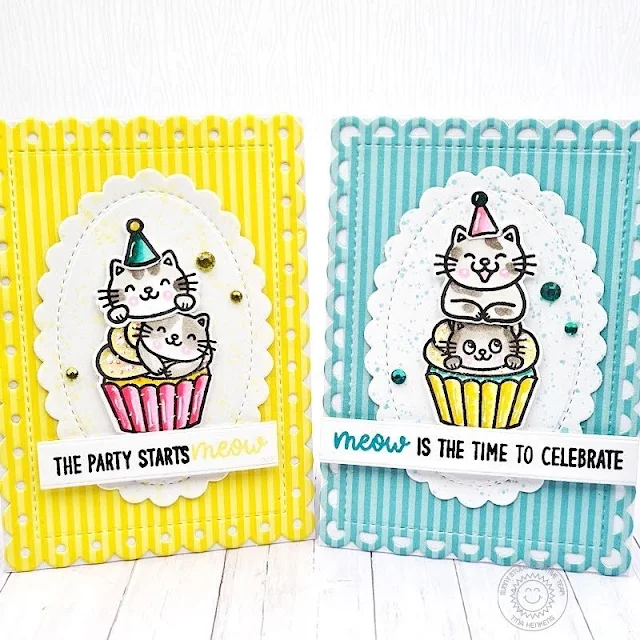
Hello crafty friends, it’s Tina and today’s project consists of three adorable mini cards featuring the sweet Birthday Cat stamp and die set. As usual, I browsed through my stash to create a mix and match design. It’s always fun to see how well old and new products can work together!

Sunny Studio Stamps: Birthday Cat Mini Birthday Card Set by Tina Henkens (featuring Mini Mat & Tag Dies, Scalloped Oval Mat Dies)

The cute birthday kitties take center stage in these cards. I love that you can stack them for a fun and whimsical look! I stamped all these images on Neenah Solar White paper, colored them with my Copic markers (trying to create a different fur pattern for each cat) and adding white details with a gel pen.

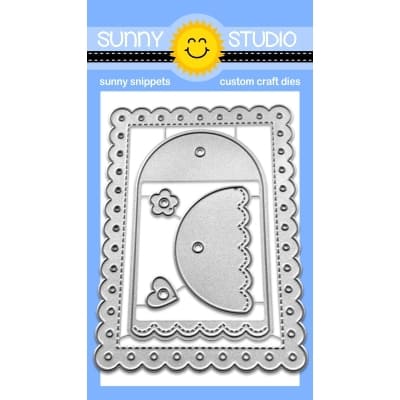
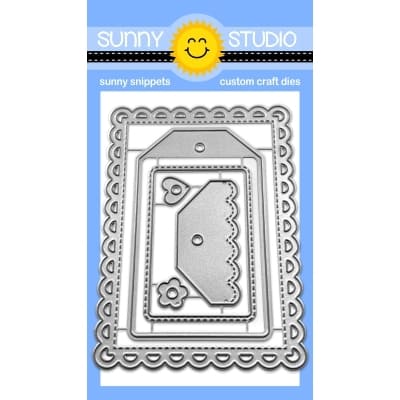
The card panels were made with a pink, yellow and teal pattern paper from the Dots & Stripes Pastel pad. I used the Mini Mat & Tag 1, Mini Mat & Tag 2 and Mini Mat and Tag 3 dies. Next, I cut three ovals from Neenah paper with the second smallest die from the Scalloped Oval Mat 1 set.

Sunny Studio Stamps: Birthday Cat Mini Birthday Card Set by Tina Henkens (featuring Mini Mat & Tag Dies, Scalloped Oval Mat Dies)

I didn’t want these ovals to be just stark white so I added ink splatters in matching Distress Oxide colors (Squeezed Lemonade for the yellow card, Peacock Feathers for the teal one and finally some pink Kitsch Flamingo). These Oxides were also used to stamp the ‘pun’ word in the sentiments from the Birthday Cat stamp set.

To assemble the cards, I first glued the pastel panels to mini white card bases. Next, I adhered the scalloped ovals directly to the bases. I send most of my cards through the mail, so I am trying to reduce bulk when stacking elements to my cards. But I did mount all the sweet cat images with thin foam tape so they would really stand out! Lastly, I added the sentiment strips at the bottom of the cupcakes.

Sunny Studio Stamps: Birthday Cat Mini Birthday Card Set by Tina Henkens (featuring Mini Mat & Tag Dies, Scalloped Oval Mat Dies)

I found the perfect matching embellishments in the Jewels Pastel Mix and Jewels Bright mix. These mixes contain so many gorgeous colors that I can use them on lots of my cards.

Since I often send birthday cards, I am super happy to have not one but three cute mini cards ready to go! Thank you for joining me and I hope you have fun creating cards with these adorable birthday cats! Happy crafting!

Sunny Studio Supplies Used:

Dots & Stripes Pastels 6x6 Paper
Shop at:
Sunny Studio
Scalloped Oval Mat 1 Dies
Shop at:
Sunny Studio
Mini Mat & Tag 1 Dies
Shop at:
Sunny Studio
Mini Mat & Tag 2 Dies
Shop at:
Sunny Studio
Mini Mat & Tag 3 Dies
Shop at:
Sunny Studio
Birthday Cat Stamps
Birthday Cat Stamps
Shop at:
Sunny Studio
Birthday Cat Dies
Birthday Cat Dies
Shop at:
Sunny Studio