Thursday, March 30, 2023

Garden Critters Cards with Waleska and Marine

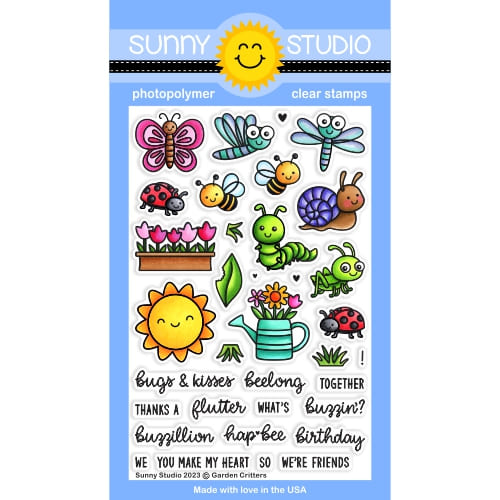
Hello it is me, Waleska! Today's inspiration project features the oh-so-cute Garden Critters Stamp Set mixed with the Just Bee-cause stamps I hope you like it!

Sunny Studio Stamps: Garden Critters Spring Themed Card by Waleska Galindo (featuring Out On A Limb Dies, Just Bee-cause)

I have to admit I am not so much of a bug kind of person but this cute little garden bugs are just too cute. I wanted to create a scene for all this critters so I decided to use the Out On a Limb dies to create some branches for the bugs. I used kraft cardstock and Vintage Photo Oxide ink for the branches and copic markers for the leaves. 

Sunny Studio Stamps: Garden Critters Spring Themed Card by Waleska Galindo (featuring Out On A Limb Dies, Just Bee-cause)

I stamped and cut with the coordinating dies all the bugs, but I also wanted to add some bees to this scene. I used a cloud stencil to create a cloudy background and started assembling the scene. There were some spaces left so I stamped and cut three clouds. I finally stamped the sentiment at the bottom of the scene and add it to a pattern paper base from the Spring Fever paper pad.

So cute don't you think? I just love all this adorable friends having a good time on a spring day! Thank you for stopping by have a great day!

-------------------------------------------------

Hello crafty friends, Marine here, super happy to be back on the blog with the cutest little bugs from Garden Critters. To fit as many as I could on my card, I went for a slimline design, which is definitely my favorite size when I want to showcase a whole bunch of images. And that happens very often!

Sunny Studio Stamps: Garden Critters Spring Themed Card by Marine Simon (featuring Feeling Froggy, Country Scenes, Just-Beecause)

I started off by stamping all my images on Transotype perfect coloring paper using an alcohol marker friendly black ink, and I cut them all using the coordinating dies. Next I cut an 8,5 x 3,5 inches Strathmore bristol smooth panel, and placed all my non colored images on top to help me visualize the different parts of the scene I wanted to create. For this card, I wanted most of the panel to be clouds, and to have a pond and a grass border at the bottom. So I marked those different parts on my panel using a pencil, and then I colored it using stencils from my stash and oxide inks.

Sunny Studio Stamps: Garden Critters Spring Themed Card by Marine Simon (featuring Feeling Froggy, Country Scenes, Just-Beecause)

Once the panel was done, I colored the images using my Spectrum Noir Illustrator markers and Graph'it Brush markers. And as written above, I stamped a bunch of images from different sets:

the bees, ladybugs and fireflies from Garden Critters
the beehive from Just Bee-Cause
the branch from Little Birdie
the frog and flies from Feeling Froggy
the cattails and water lilies from Country Scenes

Sunny Studio Stamps: Garden Critters Spring Themed Card by Marine Simon (featuring Feeling Froggy, Country Scenes, Just-Beecause)

I white heat embossed my "Sending bugs & kisses" greeting at the very bottom of my panel. The word "Sending" is from Bear Hugs, and the words "Bugs & kisses" are from Garden Critters. And next I stuck the images on my panel using a combination of 1mm foam squares, liquid glue and 3mm glue dots.

Sunny Studio Stamps: Garden Critters Spring Themed Card by Marine Simon (featuring Feeling Froggy, Country Scenes, Just-Beecause)

The last final step was to add highlights and details on the images using a white gel pen, and that's it, super adorable, I hope that you like this lovely scene. Feel welcome to check the process video for more details (click the image above)! Thank you so much for stopping by, and see you next time.

Sunny Studio Supplies Used:

Bear Hugs Stamps
Bear Hugs Stamps
Shop at:
Sunny Studio
Just Bee-cause Stamps
Shop at:
Sunny Studio
Just Bee-cause Dies
Just Bee-cause Dies
Shop at:
Sunny Studio
Country Scenes Stamps
Shop at:
Sunny Studio
Country Scenes Dies
Country Scenes Dies
Shop at:
Sunny Studio
Feeling Froggy Stamps
Shop at:
Sunny Studio
Feeling Froggy Dies
Feeling Froggy Dies
Shop at:
Sunny Studio
Little Birdie Stamps
Shop at:
Sunny Studio
Little Birdie Dies
Little Birdie Dies
Shop at:
Sunny Studio
Out on A Limb Dies
Out on A Limb Dies
Shop at:
Sunny Studio
Garden Critters Stamps
Shop at:
Sunny Studio
Garden Critters Dies
Shop at:
Sunny Studio

Wednesday, March 29, 2023

Spring Fever Patterned Paper Focused Cards with Catherine and Marie

Hello Crafty Friends! Catherine here, and today I am sharing a colorful spring card created with Spring Fever Paper and Rainy Days Dies.

Sunny Studio Stamps: Spring Fever Paper Focused Rainy Day Friendship Card by Catherine Cohen (featuring Scalloped Tag Dies)

To start, I added a stitched border by die cuting a stitched rectangle die onto a piece of  A2 white card stock.  Using Versamark Ink, I stamped the rain drops onto the background with the Rain Showers Stamp. I heat embossed the rain drops with clear embossing powder and set the card background aside.

For the tag, I die cut paper from Spring Fever Paper using Scalloped Tag Square Dies. Next, I die cut the cloudy background using a square die 3”x 3”.  Using the same die, I die cut a piece of acetate and wiped it with a dryer sheet to avoid static.  To make the white frame, I nested a 2.5” x 2.5” square die inside the 3”x 3” square die and ran it through my die cut machine with white cardstock. I repeated this with a piece of double-sided foam. I glued the acetate onto the white cardstock frame and then adhered it onto the foam frame. 

Sunny Studio Stamps: Spring Fever Paper Focused Rainy Day Friendship Card by Catherine Cohen (featuring Scalloped Tag Dies)

The umbrella was made using Rainy Days Dies with paper from Spring Fever Paper. I ink blended the umbrella frame and the tip with Hickory Smoke Distress Oxide. I glued the umbrella onto the cloudy background and added Crystal Clear Jewels and attached the acetate frame onto the background forming the shaker.  I glued the umbrella shaker onto the square tag. I adhered the entire tag onto the white embossed card background.

I added a colorful border using paper from the same pack die cut with Ribbon & Lace Border Dies. I added some rain drops from the Rainy Days Dies using blue cardstock and  highlighted a few with Clear Rain DropsI finished the card by tying a bow with yellow twine and a White Heat Embossed sentiment from Spring Showers Stamps.

Thank you so much for joining me today! Have a wonderful week!

--------------------------------------

Hello Crafty Friends, Marie here! I hope you are having a great Spring season so far! I'm happy to be back on the blog sharing a brand new card inspiration featuring Sunny Studio Stamps' Spring Fever Paper. Bright cheerful colors, and an array of beautiful patterns of polka dots, and florals are among the features I absolutely love about this amazing 6x6  paper pack! I love the variety of papers that can be used all year round and for so many different occasions, makes this pack one of my favorites in my stash! Today, I paired the Spring Fever pattern papers with Sunny's adorable Looking Sharp Stamps to create a fun and extra happy birthday card. 

Sunny Studio Stamps: Spring Fever Paper Focused Looking Sharp Birthday Card by Marie Marco

To start, I cut an A2 sized base panel from 110 lb. Neenah Solar white heavyweight cardstock. I cut another A2 sized panel of rainbow pattern paper from the Spring Fever Paper. I adhered the pattern paper to my base using double sided tape adhesive to ensure the paper lay super flat without any bubbles. Then,  I cut out three circles using 2 different sized circle dies from a bright yellow polka dot paper. I played around with the placement of the circles before adhering them to my card front. 

Next, I stamped out all the adorable cacti images on watercolor paper using Antique Linen Distress Ink. I also used a birthday cupcake image from the Panda Party Stamps.  I then water colored my images using Faber-Castell watercolor pencils. I used the corresponding Looking Sharp Dies to cut out the cacti images and used the Panda Party Dies to cut out the cupcake. I adhered all the images inside the yellow circles using double sided tape adhesive, and used small cuts of double sided foam strips to give the cupcakes dimension. 

Sunny Studio Stamps: Spring Fever Paper Focused Looking Sharp Birthday Card by Marie Marco

Lastly, I stamped out my sentiment onto some banner strips and adhered them to the card, and presto! A super fun birthday card for any of your cacti and succulent loving friends or family! I certainly have many people in my life that are  huge fans of these prickly plants so this card will find a home soon! Thank you so much for joining me today, friends! I hope I've inspired you to use more pattern papers in your creations! Until next week, stay safe and Happy Cardmaking! 

Sunny Studio Supplies Used:

Rain Showers Stamps
Rain Showers Stamps
Shop at:
Sunny Studio
Scalloped Tags-Square
Shop at:
Sunny Studio
Spring Showers Stamps
Shop at:
Sunny Studio
Panda Party Stamps
Panda Party Stamps
Shop at:
Sunny Studio
Panda Party Dies
Panda Party Dies
Shop at:
Sunny Studio
Rainy Days Dies
Rainy Days Dies
Shop at:
Sunny Studio
Ribbon & Lace Dies
Ribbon & Lace Dies
Shop at:
Sunny Studio
Spring Fever Paper
Spring Fever Paper
Shop at:
Sunny Studio

Tuesday, March 28, 2023

Slimline Ribbon & Lace Die Focused Cards with Lien and Isha

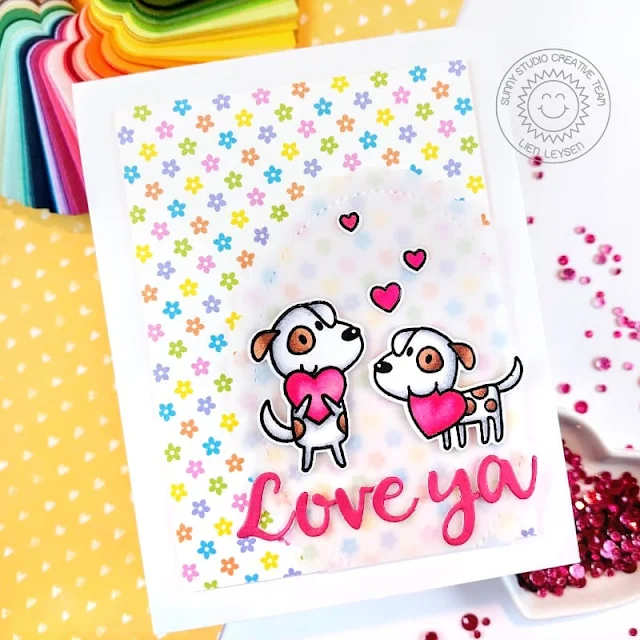
Hi crafty friends! It's Lien here, with a simple card using the beautiful Hayley Alphabet dies to create a custom sentiment.

Sunny Studio Stamps: Puppy Love Card by Lien Leysen (featuring Hayley Alphabet Dies)

I really love these adorable puppies from the mini Puppy Love stamp set, perfect for a cute card to let someone know you're thinking of them. I stamped both of the puppies and three hearts with alcohol marker friendly ink and colored them in with my Ohuhu markers. Once they were colored, I put the paper back in my Misti and stamped them all again with Versafine Onyx Black ink so I could add clear gloss embossing powder for a nice shiny outline. I cut them out with the coordinating dies and set them aside to work on my background. 

I always like to keep things simple, so for a quick background I used this fun and bright paper from the Spring Fever paper pack. I trimmed it down slightly smaller than an A2 card, so I could leave a nice margin all the way around. I propped it up on a piece of cardboard for some sturdy dimension. To ground the puppies a bit better on this patterned paper, I cut one of the Scalloped Oval Mat 1 dies from vellum. I adhered it down in the bottom right corner, slightly hanging off the edges, trimming off the excess with my scissors. 

Sunny Studio Stamps: Puppy Love Card by Lien Leysen (featuring Hayley Alphabet Dies)

To create a simple custom sentiment I used both the Uppercase Hayley Alphabet and the Lowercase Hayley Alphabet die sets. Before diecutting any letters, I covered the back of a scrap of pink cardstock with foam tape. Leave the backing on, the dies will easily cut through the cardstock and the foam tape creating your very own puffy alphabet stickers. I arranged the sentiment slightly below the puppies and finished it off with some hearts.

-------------------------------------------

Hello everyone! Isha here with an elegant birthday card featuring the Slimline Ribbon and Lace dies. Also, simply by combining various dies, we can get different kinds of cuts and I love to stretch my supplies like this.

Sunny Studio Stamps: Ribbon & Lace Die Focused Birthday Card by Isha Gupta (featuring Big Bold Greetings, Spring Greenery)

I started by adding tape to two of the dies so to die-cut the delicate lace format from white cardstock. Adhere these die-cuts onto off-white card base. I adhered the center cuts to the edges of the card. Adhere this piece to a white cardbase.

Stamp the sentiment from the Big Bold Greetings stamp onto white card using versamark ink. Sprinkle WOW! Gold Pearl embossing powder, heat set. Die-cut using the coordinating dies. Die-cut 3 more times using a coral card, stack them behind the sentiment.

Sunny Studio Stamps: Ribbon & Lace Die Focused Birthday Card by Isha Gupta (featuring Big Bold Greetings, Spring Greenery)

I love the monochromatic look of this card with a touch of color peeking from behind the sentiment.Die-cut the leaves from the Spring Greenery dies. Adhere to the card behind the sentiment. To finish, I added some gold fever confetti by Studio Katia.

Thank you for dropping by and have a nice day!

Sunny Studio Supplies Used:

Scalloped Oval Mat 1 Dies
Shop at:
Sunny Studio
Spring Greenery Dies
Shop at:
Sunny Studio
Big Bold Greetings Stamps
Shop at:
Sunny Studio
Big Bold Greetings Dies
Shop at:
Sunny Studio
Puppy Love Stamps
Puppy Love Stamps
Shop at:
Sunny Studio
Puppy Love Dies
Puppy Love Dies
Shop at:
Sunny Studio
Hayley Lowercase Alphabet Dies
Shop at:
Sunny Studio
Hayley Uppercase Alphabet Dies
Shop at:
Sunny Studio
Ribbon & Lace Dies
Ribbon & Lace Dies
Shop at:
Sunny Studio
Spring Fever Paper
Spring Fever Paper
Shop at:
Sunny Studio

Monday, March 27, 2023

Spring Bouquet Cards with Cathy and Bobbi

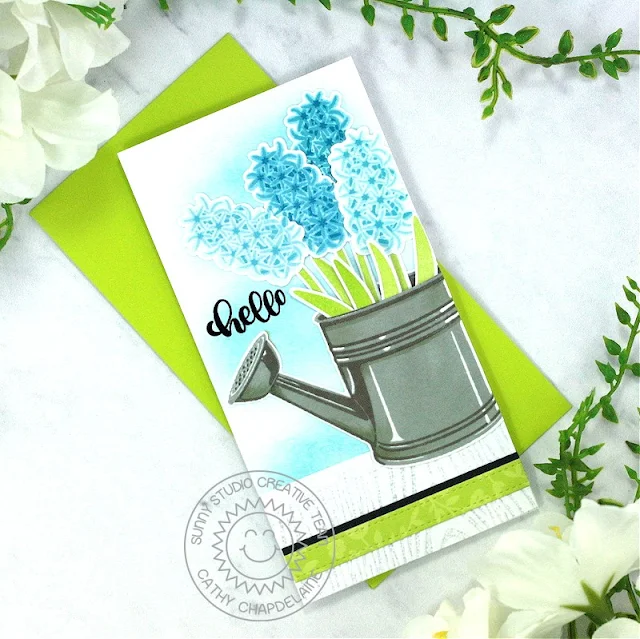
Hey friends! Cathy here today with a clean and simple mini slimline card featuring the beautiful Spring Bouquet Stamps. The hyacinth is one of my favorite Spring flowers and I love the gorgeous details of these stamped images!

Sunny Studio Stamps: Spring Bouquet Everyday Card by Cathy Chapdelaine (featuring Watering Can, Ribbon & Lace Border Dies)

To begin this card, I cut a piece of white cardstock 3 1/4" x 6 1/2" for the card front. (The card base is 6 1/4" x 6 1/2", scored on the 6 1/2" side at 3 1/4" and folded in half) I inked the panel with Tumbled Glass Distress ink avoiding the outside edges and heat embossed the sentiment in black on the left side approximately 2 1/2" from the top edge. I then adhered the panel to the card base.

Next, I inked the inside of the Woodgrain Embossing Folder with Lost Shadow Distress ink and embossed a 1 1/2" x 3 1/4” piece of white cardstock. I adhered this piece to the bottom of the card front.

To bring a little more green and black in, I die-cut a piece of Spring Fever Paper and a piece of black cardstock using the ribbon die from the Ribbon & Lace Border Dies. I cut them to 3 1/4" long, overlapped the green ribbon on the black ribbon and adhered them 3/8” from the bottom of the card front.

Sunny Studio Stamps: Spring Bouquet Everyday Card by Cathy Chapdelaine (featuring Watering Can, Ribbon & Lace Border Dies)

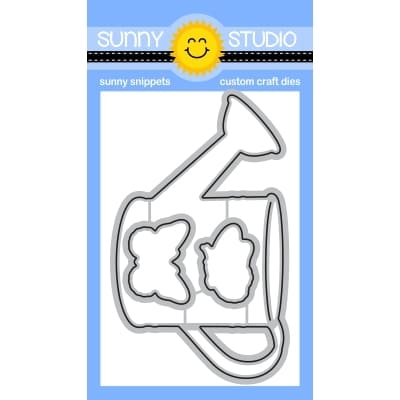
To finish, I stamped a watering can from the Watering Can Stamps on white cardstock, die-cut it using the coordinating dies and adhered it slightly overlapping the right edge. I used scissors to trim the excess from the right edge of the card. I then stamped the hyacinth, stems and leaves on white cardstock and die-cut them using the coordinating dies. I applied adhesive to the back of each piece and tucked them individually inside the watering can starting with the farthest pieces to the back and working my way towards the front of the can.

I hope you enjoyed my simplistic bouquet today and thanks for stopping by! For more inspiration, please visit my blog www.inkredibleadventures.com and you can also find me on Instagram as @cathy.chapdelaine.

--------------------------------------------------

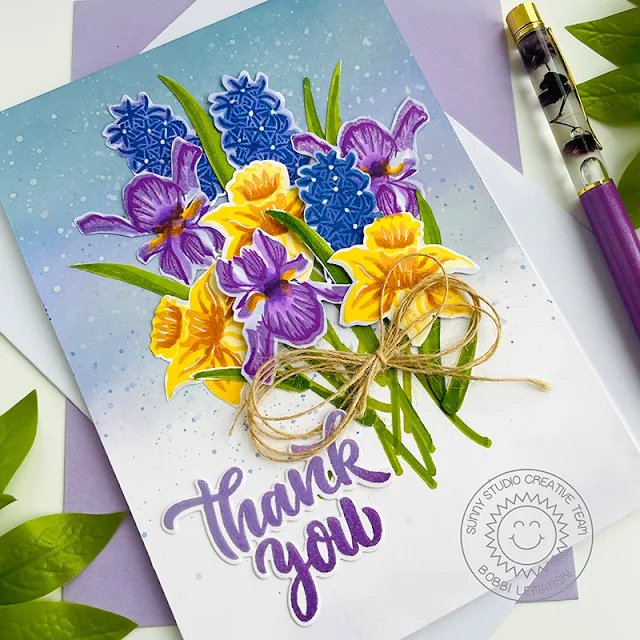
Hi friends, Bobbi here with you. Spring is finally here TODAY! I’m so excited. It’s only fitting I feature the Spring Bouquet stamps and dies today on my card. This set includes the iris, daffodil and hyacinth flower. I stamped three of each flower for my card. I also used the "thank you" from the set, Big Bold Greetings stamps and dies set.

Sunny Studio Stamps: Spring Bouquet Everyday Card by Bobbi Lemanski (featuring Big Bold Greetings)

These layered flowers require no coloring, just inking! I used my MISTI tool to make the stamping quick and easy. For each layer, I set the stamps on my tool once, then stamped three sheets, one after another, to make the process efficient. I cut the pieces using the dies and arranged them on my front panel.

Sunny Studio Stamps: Spring Bouquet Everyday Card by Bobbi Lemanski (featuring Big Bold Greetings)

For the backdrop, I blended Distress Oxide Ink from the top down using shades of blue and lavender and a gray. I also splattered watercolor ink over the background in blues, purples and an iridescent white. This background really sparkles! I added the “thank you,” stamped in two shades of purple, to the bottom left corner. A hemp twine bow finishes the look.

Thanks for stopping by today. If you want to see more ideas and inspiration from me, subscribe to my blog, BobbiHartDesign.com. I’ll send you updates on new posts! You can also find me on Instagram as @BobbiHartDesign and on Facebook as BobbiHartDesign.

Sunny Studio Supplies Used:

Woodgrain Embossing
Woodgrain Embossing
Shop at:
Sunny Studio
Watering Can Stamps
Watering Can Stamps
Shop at:
Sunny Studio
Watering Can Dies
Watering Can Dies
Shop at:
Sunny Studio
Big Bold Greetings Stamps
Shop at:
Sunny Studio
Big Bold Greetings Dies
Shop at:
Sunny Studio
Spring Bouquet Stamps
Shop at:
Sunny Studio
Spring Bouquet Dies
Spring Bouquet Dies
Shop at:
Sunny Studio
Ribbon & Lace Dies
Ribbon & Lace Dies
Shop at:
Sunny Studio
Spring Fever Paper
Spring Fever Paper
Shop at:
Sunny Studio