Wednesday, November 2, 2022

Snow One Like You Cards with Marie and Alma

Hello Crafty Friends, Marie here with you! Can you even believe that it's November?? Time is just flying by so super fast these days and before you know it, Christmas will be here! I have been slowly building up my Holiday card stash trying very hard to avoid the last minute stressful card making rush like years past. Among the cards I will be sending out this year is this sweet and festive Christmas Card featuring the oh so sweet Snow One Like You stamps! I also used the Autumn Greenery Dies to create a lush festive Christmas tree perfect for my vintage vibe scene.

Sunny Studio Stamps Snow One Like You Girl with Snowman Gingerbread Inspired Christmas Tree Holiday Card by Marie Marco

I started off my card by stamping my Snow One Like You image onto watercolor paper using Antique Linen Distress Ink. I colored my image using Derwent Inktense Water Soluble Pencils. Using the Snow One Like You Dies I cut out my image. 

I then die cut a bunch of leaves using the 2 main rounded edged leaves from the Autumn Greenery Dies.  After cutting out all my leaves from bristol smooth cardstock, I inked them up using Distress Inks in the Colors "Mowed Lawn", "Rustic Wilderness", and "Uncharted Mariner."  My next step was to die cut my sturdy base panel from 110 lb Neenah Solar White heavyweight cardstock. I then use the Frilly Frames Eyelet Lace Die to die cut my background from kraft paper. Then taking some watered down white acrylic paint, I splattered my kraft paper and my leaves for some fun snow-like texture.

Sunny Studio Stamps Snow One Like You Girl with Snowman Gingerbread Inspired Christmas Tree Holiday Card by Marie Marco

After paint splattering, I adhered the scalloped kraft paper onto my white cardstock using double sided tape adhesive. I then adhered the leaves to create my Christmas tree using Bearly Art Precision Craft Glue. I embellished my tree by adding some red Christmas bling using Sunny Studio's Red Zircon Jewels. I then added my cute image using some double sided foam strips for added dimension. To finish off my card, I added the sentiment from the Snowman Kisses Stamps which really worked so well with the adorable image and scene!  

Sunny Studio Stamps Snow One Like You Girl with Snowman Gingerbread Inspired Christmas Tree Holiday Card by Marie Marco

And That does it for this week's holiday card inspiration!! Thanks so much for stopping by! Until next week, have a fun and super productive holiday crafting time!!! I really hope you have an amazing day or night! 

------------------------------------------

It's Alma here and today I want to show you a happy shaker card with the amazing Snow One Like You Stamps. I colored the stamps with Copics and die-cutted the image with the Snow One Like You Dies. Then I colored a night sky with the Copic Markers in a lot of shades of Violet and Blue. I used the colors BV66 BV63 and BV60 and RV95, RV93 and RV91. After that I added some snowflake dots with the white gel pen.

Sunny Studio Stamps Snow Once Like You Girl with Snowman Stitched Arch Mini Sequin Winter Holiday Shaker Card by Alexandra Stork

After that I cut a rectangle card and die-cutted a window with the Stitched Arch Dies and designed a snow landscape with the Slimline Nature Borders and tree from the Happy Camper Dies.

Sunny Studio Stamps Snow Once Like You Girl with Snowman Stitched Arch Mini Sequin Winter Holiday Shaker Card by Alexandra Stork

Finally I glued all together and added the Pure White Jewels to create a wonderful winter wonderland shaker card. Thank you so much for joining us today.  

For those who many not have already heard the news, Sunny Studio's big annual sale is also going on right now. Use discount code "HOLIDAY" at checkout to save 20% on all Sunny Studio branded products through Saturday, November 5 at Midnight PST. Limit one promo code per order.

Sunny Studio Stamps: Use discount code HOLIDAY at checkout to save 20% on all Sunny Studio branded products through Saturday, November 5, 2022 at Midnight PST. Limit one promo code per order.

Sunny Studio Supplies Used:

Versafine Onyx Black Ink
Shop at:
Sunny Studio
Happy Camper Dies
Happy Camper Dies
Shop at:
Sunny Studio
Frilly Frames-Eyelet Lace
Shop at:
Sunny Studio
Stitched Arch Dies
Stitched Arch Dies
Shop at:
Sunny Studio

Snowman Kisses Stamps
Shop at:
Sunny Studio
Snowman Kisses Dies
Snowman Kisses Dies
Shop at:
Sunny Studio
Snow One Like You Stamps
Shop at:
Sunny Studio
Snow One Like You Dies
Shop at:
Sunny Studio
Autumn Greenery Dies
Shop at:
Sunny Studio
Red Zircon Jewels
Red Zircon Jewels
Shop at:
Sunny Studio
Hero Arts Acetate Sheets
Shop at:
Sunny Studio
Pure White Jewels
Pure White Jewels
Shop at:
Sunny Studio
Slimline Nature Borders
Shop at:
Sunny Studio
Domed Ink Blending Foam
Shop at:
Sunny Studio

Tuesday, November 1, 2022

Joyful Holiday Paper Focused Cards with Kavya and Isha

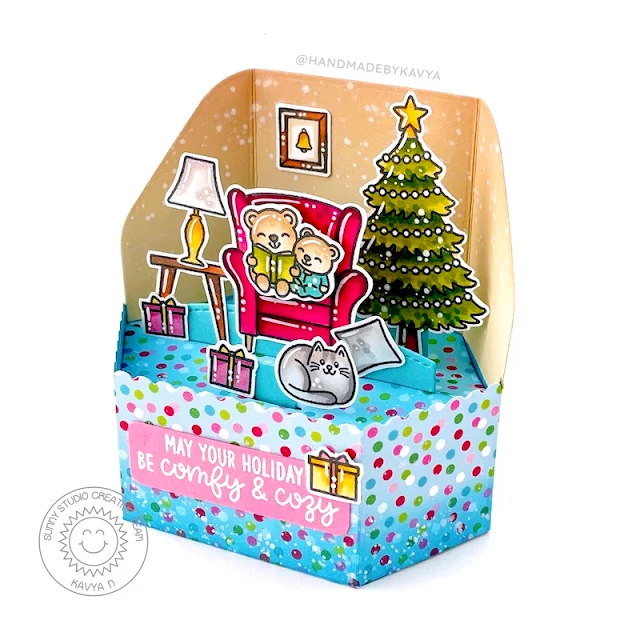
Hi folks, Kavya here. I am back on the blog with another fun project. I love using the pattern paper from Sunny Studio Stamps whenever I want to add some more color to my cards. They are also perfect for matting! Lately, I have been using them as bases for my 3D cards. Today, I have another fun Christmas themed 3D card that I made using Lawn Fawn’s platform die.

Sunny Studio Stamps: Joyful Holiday Paper Focused Holiday Card by Kavya (featuring Cozy Christmas)

I first started off by creating my base using Joyful Holiday Paper and some cardstock for the back. Ink blended the edges to make them more 3D. 

Sunny Studio Stamps: Joyful Holiday Paper Focused Holiday Card by Kavya (featuring Cozy Christmas)

Then, I stamped and colored a bunch of images from Cozy Christmas. Adhered the images to the base and added a heat embossed sentiment to finish off the card!

Sunny Studio Stamps: Joyful Holiday Paper Focused Holiday Card by Kavya (featuring Cozy Christmas)

Wasn’t that simple? I hope you liked this fun and easy project :) Happy Crafting.

-----------------------------------------------

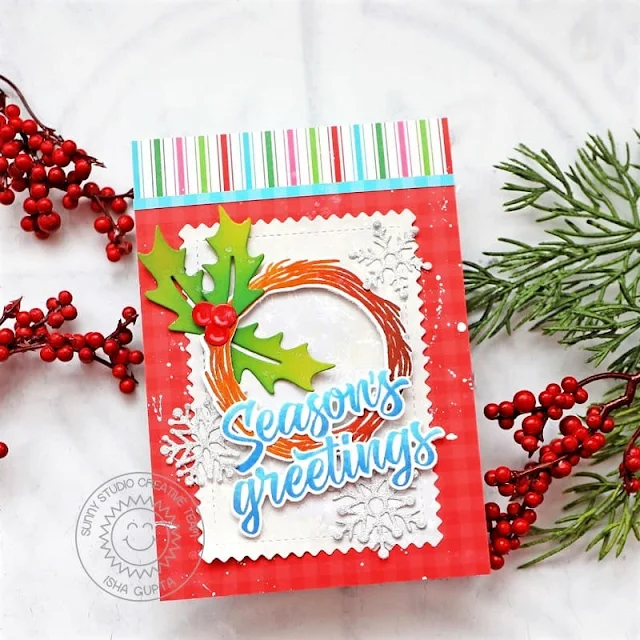
Hello everyone! Isha here with a card using various patterns from the Joyful Holiday Paper pack. I love creating layers using patterns and this set has a GORGEOUS collection of patterns, which compliment each other so well.

Sunny Studio Stamps: Joyful Holiday Paper Focused Holiday Card by Isha Gupta (Winter Greenery, Holiday Greetings, Winter Wreaths, Mini Mat & Tag Dies)

I started by cutting some of the papers to create the background. Next I die-cut the grey snowflake paper using the Mini Mat and Tag 4 dies. Adhere to the card and flick white paint for a snow feel. Stamp the wreath from the Winter Wreath stamp and die-cut using the coordinating dies. Die-cut the Holly leaves and berries using the Winter Greenery dies, add colour using copic markers. Die-cut some snowflakes using the Lacy Snowflakes dies from silver shimmer paper. 

Sunny Studio Stamps: Joyful Holiday Paper Focused Holiday Card by Isha Gupta (Winter Greenery, Holiday Greetings, Winter Wreaths, Mini Mat & Tag Dies)

Stamp the sentiment from the Holiday Greetings stamp and die-cut using the coordinating dies. Assemble everything as per the card.

Thank you for dropping by and have a nice day!

Sunny Studio Supplies Used:

Lacy Snowflakes Die
Lacy Snowflakes Die
Shop at:
Sunny Studio
Winter Greenery DIes
Shop at:
Sunny Studio
Cozy Christmas Stamps
Shop at:
Sunny Studio
Cozy Christmas Dies
Cozy Christmas Dies
Shop at:
Sunny Studio
Holiday Greetings Stamps
Shop at:
Sunny Studio
Holiday Greetings Dies
Shop at:
Sunny Studio
Winter Wreaths Stamps
Shop at:
Sunny Studio
Winter Wreaths Dies
Winter Wreaths Dies
Shop at:
Sunny Studio
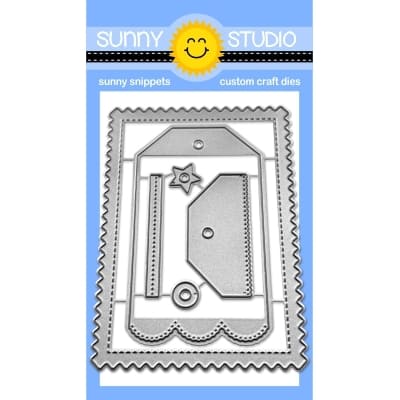
Mini Mat & Tag 4 Dies
Shop at:
Sunny Studio
Joyful Holiday Paper
Shop at:
Sunny Studio

Monday, October 31, 2022

Snowman Kisses Cards with Cathy and Bobbi

Hey friends! Cathy here today sharing a card today with my favorite non-traditional Holiday season colors. I love how well they worked with the Snowman Kisses Stamps giving it a playful, dreamy feel!

Sunny Studio Stamps: Snowman Kisses Winter Themed Holiday Card by Cathy Chapdelaine (featuring Holiday Greetings, Seasonal Trees, Slimline Dies)

I began inking the sky on a 4 1/4” x 5 1/2” piece of Neenah Classic Crest 80lb solar white cardstock using Saltwater Taffy, Speckled Egg and Evergreen Bough Distress inks. I splattered a little watered down white acrylic paint with a paintbrush and adhered this panel to an A2 card base. For the snow drifts, I cut 2 pieces of white cardstock (2” x 5 1/2" and 1 1/4" x 5 1/2") and die-cut the top edge of both pieces using a Slimline Nature Borders Die. I adhered these to the bottom of the card front.

Next, I heat embossed the Happy Holidays sentiment from the Holiday Greetings Stamps on white cardstock using Ranger Aqua Tinsel embossing powder and die-cut it using the coordinating dies. I also heat embossed snowflakes from the Snowman Kisses Stamps on Evergreen Bough inked cardstock, die-cut them with the coordinating dies and adhered them around the sky.

Sunny Studio Stamps: Snowman Kisses Winter Themed Holiday Card by Cathy Chapdelaine (featuring Holiday Greetings, Seasonal Trees, Slimline Dies)

I stamped all of the images on Neenah Classic Crest 80lb solar white cardstock and colored them with Copics. I used 2 trees from the Seasonal Trees Stamps and their coordinating dies in my scene and added ornaments to one tree from the Cozy Christmas Stamps and coordinating dies. After adding the happy adorable snowmen from the Snowman Kisses Stamps, I decided to include a few little birdie friends from the Seasonal Trees Stamps. They all look so full of joy!

I hope you enjoyed and thanks for stopping by today! For more inspiration, please visit my blog www.inkredibleadventures.com and you can also find me on Instagram as @cathy.chapdelaine.

--------------------------------------------------

Hi crafty friends! It’s Bobbi sharing a holiday card featuring the Snowman Kisses stamp set and coordinating diesThis stamp set just makes me happy. How cute are these snowmen?! I paired this set with the Scenic Route Stamps and coordinating dies and the Forest Trees Stencil set.

Sunny Studio Stamps: Snowman Kisses Winter Themed Holiday Card by Bobbi Lemanski (featuring Scenic Route, Forest Tree Stencils)

For this 5″ X 7″ card, I used a combination of pinks, lavenders and blue violets for this color story. I started with a card front panel and card base made from 80lb Neenah Solar White cardstock. I used the Forest Trees Stencil set to add trees to the background. Using a blending brush, I stenciled two layers of trees in Spun Sugar Distress Oxide Ink in the far background and Kitch Flamingo Distress Oxide Ink in the forest foreground. I ink blended Shaded Lilac and Broken China (very light touch) on the top of the front for the sky. I used my Gelly Roll white pen and my Copics to add white and blue-violet dots in the sky to make it look like snow is falling.

Sunny Studio Stamps: Snowman Kisses Winter Themed Holiday Card by Bobbi Lemanski (featuring Scenic Route, Forest Tree Stencils)

Next, I stamped the snowmen and the Scenic Route scene, including the string of lights on separate cardstock and die cut them using their coordinating dies. I colored them using pinks, lavenders, purples and blue violets using Copic Markers:

Red-Violets: RV09, RV55, RV02, RV0
Violets: V09, V04, V12
Blue-Violet: BV000,
Yellow-Green: YG67, YG03
Cool Grays: C3, C1, and Black 100

In keeping with the color combination, I used blue-violet markers for all the shading around the snowmen and trees and for the falling snowflakes. The only exception to the colors listed above is the string of lights. I used bright and festive colors to color in the tiny light bulbs including yellow, orange, teal, etc.

Sunny Studio Stamps: Snowman Kisses Winter Themed Holiday Card by Bobbi Lemanski (featuring Scenic Route, Forest Tree Stencils)

I attached the snowy hill image in the foreground and added the snowmen. Because my card is an A7 size versus A2, the string of lights do not reach from side to side on my card front.  To make them work, I hand drew some wood posts to attach the string lights to at the top to make it fit my wider card.  I placed the posts and lights in the scene and glued everything in place. I added white accents to the trees and more falling snow right on the snowmen and scene. Finally, I stamped the sentiment at the bottom to finish this holiday card.

Thanks for stopping by today. If you want to see more ideas and inspiration from me, subscribe to my blog, BobbiHartDesign.com. I’ll send you updates on new posts! You can also find me on Instagram as @BobbiHartDesign and on Facebook as BobbiHartDesign.

Sunny Studio Supplies Used:

Seasonal Trees Stamps
Shop at:
Sunny Studio
Seaonal Trees Dies
Seaonal Trees Dies
Shop at:
Sunny Studio
Scenic Route Stamps
Scenic Route Stamps
Shop at:
Sunny Studio
Scenic Route Dies
Scenic Route Dies
Shop at:
Sunny Studio
Slimline Nature Borders
Shop at:
Sunny Studio
Forest Trees Stencils
Shop at:
Sunny Studio
Cozy Christmas Stamps
Shop at:
Sunny Studio
Cozy Christmas Dies
Cozy Christmas Dies
Shop at:
Sunny Studio
Holiday Greetings Stamps
Shop at:
Sunny Studio
Holiday Greetings Dies
Shop at:
Sunny Studio
Snowman Kisses Stamps
Shop at:
Sunny Studio
Snowman Kisses Dies
Snowman Kisses Dies
Shop at:
Sunny Studio

Saturday, October 29, 2022

Guest Designer Spotlight: Cozy Christmas Cards with Anja Bytyqi

Hi everyone, Anja here with you today. I'm so happy to be back again as a guest on the Sunny Studio Blog. Today I'm showcasing the wonderful Cozy Christmas Stamps from the latest Holiday Release.

Sunny Studio Stamps: Cozy Christmas Holiday Card by Anja Bytyqi (featuring Stitched Rectangle Dies)

On my first sample, I used the stamps for a non-holiday card and created a sweet little living room scene.

First, I started off with a white A2 card base and die cut the largest of the Stitched Rectangle Dies from light blue cardstock. In the next step, I die cut the stitched scalloped mat from the Mini Mat & Tag 3 Dies set out of white cardstock. I masked off the scallop border as well as the stitching and did some ink blending with Distress Oxide Inks. For the wall background, I blended on Tattered Rose and a little bit of Saltwater Taffy. The floor was done in Pumice Stone. I let it dry completely and stamped one of the Penguin Party sentiments in VersaMark Ink. I heat embossed it with Ranger Platinum Embossing Powder. For a bit of dimension, I popped up the scalloped mat with foam tape.

Next, I stamped the images in Memento Tuxedo Black Ink and colored them with Copic markers. I used the coordinating dies to cut everything out. On the armchair, I did some Paper Piecing with blue gingham paper from the Joyful Holiday Paper Pack. I also created a little rug from a piece of Flirty Flowers patterned paper. Finally, I assembled the scene by adhering the images and floral rug with liquid glue and adding a red enamel heart next to the heat embossed sentiment.

Sunny Studio Stamps: Cozy Christmas Holiday Card by Anja Bytyqi (featuring Stitched Oval Dies)

The second sample just had to be a holiday card and I really wanted to use the comfy sofa.

I created a landscape A2 card base from white cardstock and covered the front with a striped Joyful Holiday paper. I cut the largest of the Stitched Oval 2 Dies from white cardstock. I also used it on a piece of woodgrain patterned paper (Subtle Grey Tones Paper Pack) and a thin white cardstock strip. In the background, I did some faded ink blending with Tumbled Glass and Salvaged Patina Distress Oxide Ink. Then, I adhered the woodgrain floor and white strip to the bottom half of the oval. I stamped the sentiment on top using aqua blue pigment ink.

The images were stamped in Memento Tuxedo Black Ink and colored with Copic markers. I paper pieced the pillows and cut everything out with the coordinating dies. I adhered the images to finish off the scene and applied some Crystal Stickles to the white parts of the christmas tree decor.

Thank you so much for stopping by! Have a cozy weekend!

Sunny Studio Supplies Used:

Stitched Rectangle Dies
Shop at:
Sunny Studio
Flirty Flowers 6x6 Paper
Shop at:
Sunny Studio
Subtle Grey Tones Paper
Shop at:
Sunny Studio
Stitched Oval 2 Dies
Shop at:
Sunny Studio
Cozy Christmas Stamps
Shop at:
Sunny Studio
Cozy Christmas Dies
Cozy Christmas Dies
Shop at:
Sunny Studio
Penguin Party Stamps
Shop at:
Sunny Studio
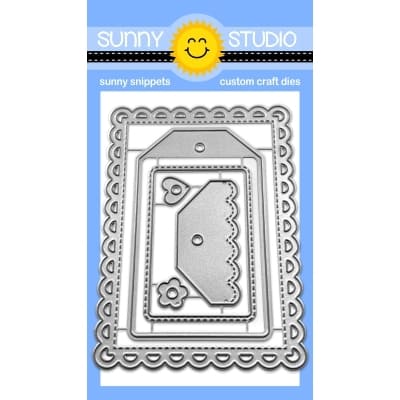
Mini Mat & Tag 3 Dies
Shop at:
Sunny Studio
Joyful Holiday Paper
Shop at:
Sunny Studio