Friday, October 14, 2022

Reindeer Games Cards with Tina and Vanessa

Hello crafty friends, Tina here with my first Christmas card for the new release! Although I love card making all year round, snowy holiday cards are my favorite, so fun to add lots of snow or sparkle! Today I am featuring the sweet Reindeer Games stamp and die die set. This set contains all the elements for your cute festive cards. Love the adorable reindeer and fun Santa!

Sunny Studio Stamps: Reindeer Games Holiday Card by Tina (featuring Bear Hugs)

I wanted to create a winter mini slimline card using a sheet of snowy acetate I had in my stash for a while. But there are several ways you can make your own embellished acetate, like for instance with heat embossing snowflakes, stamping with white Stazon ink, or using a stencil and paste.  

The most important part of this card was getting the base structure in place. First, I die cut three rectangles out of Neenah Solar White cardstock. One of these was used to create two snowy hills for my front panel.

Sunny Studio Stamps: Reindeer Games Holiday Card by Tina (featuring Bear Hugs)

My acetate piece was sized down to the same width as the rectangles but for the height I kept it two inches taller. I then scored the acetate the same height as the white base. This created an acetate front piece the same size as the rectangles but with a two-inch flap I could sandwich between the two remaining rectangle pieces.

Before adhering the inside rectangle I ink blended this die cut with Distress Oxides, I used Salvaged Patina and Evergreen Bough. I selected one of the sentiments from Reindeer Games and used my Misti to stamp it on the smallest of the snow slopes. To finish the card structure, I added the two snowy hills to the acetate.

Next, I stamped and die cut the adorable Santa, Reindeer and a few gift packages from the Reindeer Games stamp set. To create the scene, I included the birch trees from Bear Hugs.

Sunny Studio Stamps: Reindeer Games Holiday Card by Tina (featuring Bear Hugs)

All the coloring was done with Copic markers, and since this is a winter card, I added tons of snowflakes with a white gel pen to the images and background panel!! Of course, one of the reindeer had to be Rudolph with the red nose! As embellishment I added a few of the Chrystal Clear Jewels scattered around the sentiment.

That finishes my snowy Christmas card, thank you so much for stopping by and happy crafting!

------------------------------------------------------

Hello to you! Vanessa here with my first Christmas card of the year, using the adorable Reindeer Games set.

Sunny Studio Stamps: Reindeer Games Holiday Card by Vanessa Menhorn

I trimmed a panel of patterned paper from the Joyful Holiday paper pad slightly smaller than my card base and adhered it. Now I stamped my images onto white cardstock, always masking the previously stamped image before stamping the next. After I had removed the masks, I colored everything with Copics. 

Sunny Studio Stamps: Reindeer Games Holiday Card by Vanessa Menhorn

Then I trimmed the stamped piece into a square, inked the edges with black ink and adhered this to a white rectangle. Finally, I stamped the sentiment and adhered the "selfie" to the card, adding a piece of washi tape to the top.

I hope you like my idea of grouping these cuties together for a photo shoot! Enjoy your weekend and thanks for stopping by today!

Sunny Studio Supplies Used:

Bear Hugs Stamps
Bear Hugs Stamps
Shop at:
Sunny Studio
Bear Hugs Dies
Bear Hugs Dies
Shop at:
Sunny Studio
Reindeer Games Stamps
Shop at:
Sunny Studio
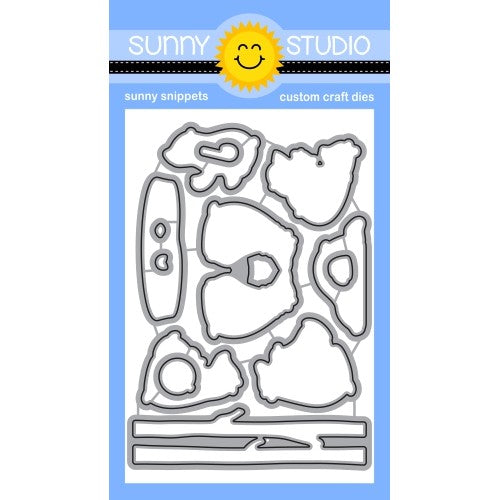
Reindeer Games Dies
Reindeer Games Dies
Shop at:
Sunny Studio
Joyful Holiday Paper
Shop at:
Sunny Studio

Thursday, October 13, 2022

Mini Mat & Tag Die Focused Cards with Waleska and Marine

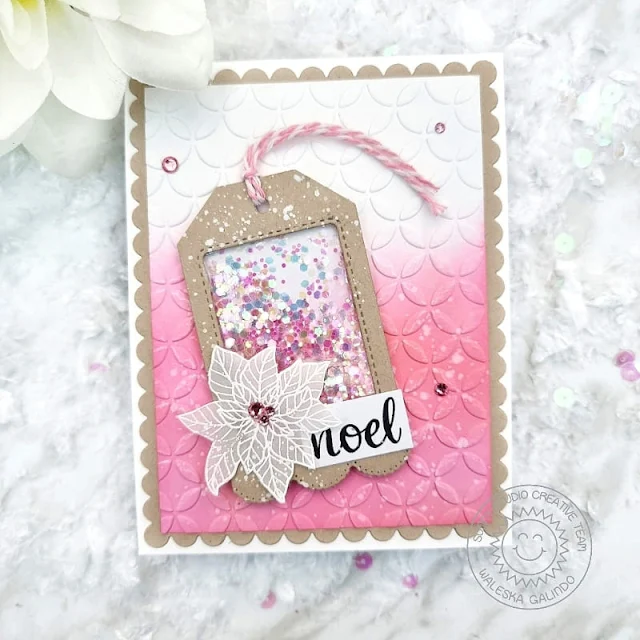
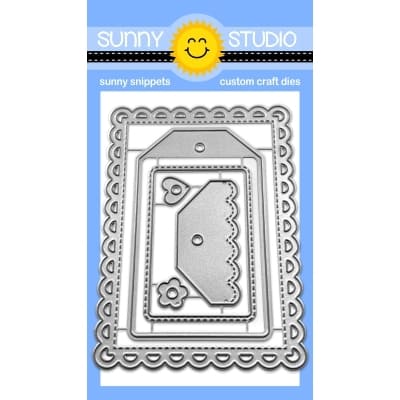
Hello Friends!! Waleska here with you. It is Thursday and that means I have a new Sunny Studio Stamps project for you! I am very excited to share the tags I created with the new Mini Mat and Tag #4 dies. I hope I can share inspiration that will get you excited to create!

Sunny Studio Stamps: Mini Mat & Tag Die Focused Holiday Card by Waleska Galindo (featuring Classy Christmas, Fancy Frame Dies)

I love this tag dies, they are beautiful and very easy to use. I started this shaker tags by die cutting them with kraft cardstock, I wanted to use some non-traditional Christmas colors for them so, I decided to go with pink, purple and teal. To ink the inside of the shaker I used oxide inks in colors Kitsch Flamingo, Shaded Lilac and Peacock Feathers. I used matching glitter for the shakers. I added an embossed vellum poinsettia from the Classy Christmas Stamps.

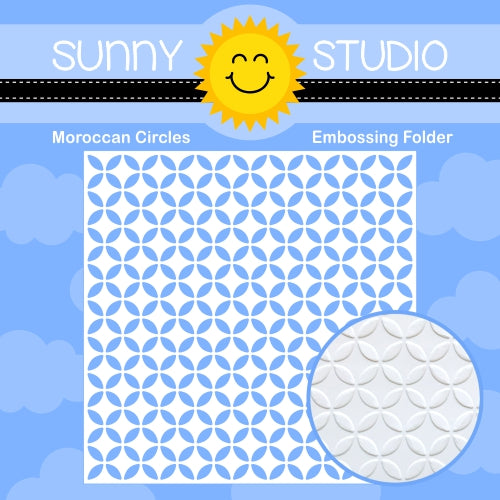
I wanted to create a card with one of the tags, to do that I used the Moroccan Circles Embossing folder for the front panel of the card inked with the same color I used for the shaker and I frame it with the Fancy Frames Rectangle Dies in kraft cardstock.

Sunny Studio Stamps: Mini Mat & Tag Die Focused Holiday Card by Waleska Galindo (featuring Classy Christmas, Fancy Frame Dies)

To finish the rest of the tags I added some Pastel Jewels Mix in the center, the sentiment Noel is also from the Classy Christmas stamps stamped with Versafine Clair Nocturne. Finally I mixed some white acrylic paint with water and splatter some onto the tags to simulate snow.

Thank you so much for stopping by today! I hope your day is full of crafty time!

-----------------------------------------------

Hello crafty friends, Marine here with you today! I'm thrilled to be back on the blog with this trio of spooky cute shaker tags I created using the new Mini Mat & Tag 3 die set, as well as a mix & match of images from different stamp sets.

Sunny Studio Stamps: Mini Mat & Tag Die Focused Holiday Tags by Marine Simon (featuring Garden Fairy, Too Cute to Spook)

As very often I started off by stamping the images using an alcohol marker friendly black ink, cut them all using the coordinating dies and then colored everything using traditional Halloween colors: green, orange, purple and black. The images are from:

Too Cute to Spook for the pumpkins and spiders
Garden Fairy for three fairies and wands
Farm Fresh for the crows

Sunny Studio Stamps: Mini Mat & Tag Die Focused Holiday Tags by Marine Simon (featuring Garden Fairy, Too Cute to Spook)

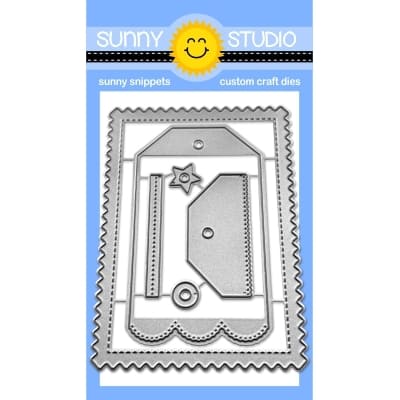
Once everything was colored, I cut all the different pieces to build the tags using dies from the Mini Mat & Tag 3 die set, as well as the star die from the Mini Mat & Tag 4 die set, and pattern papers from the Dots & Stripes Jewel Tones paper pack + Heroic Halftone paper pack.

I first attached a piece of clear acetate at the back of each black frame, as well as foam strips all around the opening. I added powder on the inside edges of the foam strips to make those edges non sticky, and then I poured a few spoons of sequins mix inside each frame. I closed the shaker tags using a plain tag panel at the back of each frame, and then I attached the topper pieces and stars.

Sunny Studio Stamps: Mini Mat & Tag Die Focused Holiday Tags by Marine Simon (featuring Garden Fairy, Too Cute to Spook)

I used black ribbon to create a handle at the top of each tag, and next I stuck the images on the tags. I also white heat embossed one "You're bewitching" and two "Trick or treat" sentiments from Bewitching on black cardstock, trimmed them into slim banners and attached them at the top of the tags. And finally I added sparkles to the fairies wings, and added highlights and details to the images using a white gel pen.

Sunny Studio Stamps: Mini Mat & Tag Die Focused Holiday Tags by Marine Simon (featuring Garden Fairy, Too Cute to Spook)

And that's it! I hope that you like those fun, cute and colorful Halloween shaker tags. As always you will find more details and information in the process video so feel welcome to check it out (click on the image above). Thank you so much for stopping by, and see you next time! 

Sunny Studio Supplies Used:

Bewitching Stamps
Bewitching Stamps
Shop at:
Sunny Studio
Fancy Frames- Rectangles
Shop at:
Sunny Studio
Dots & Stripes Jewel Tones 6x6 Paper
Shop at:
Sunny Studio
Heroic Halftones 6x6 Paper
Shop at:
Sunny Studio
Moroccan Circles Embossing
Shop at:
Sunny Studio
Classy Christmas Stamps
Shop at:
Sunny Studio
Farm Fresh Stamps
Farm Fresh Stamps
Shop at:
Sunny Studio
Farm Fresh Dies
Farm Fresh Dies
Shop at:
Sunny Studio
Garden Fairy Stamps
Garden Fairy Stamps
Shop at:
Sunny Studio
Garden Fairy Dies
Garden Fairy Dies
Shop at:
Sunny Studio
Too Cute To Spook Stamps
Shop at:
Sunny Studio
Too Cute To Spook Dies
Shop at:
Sunny Studio
Mini Mat & Tag 3 Dies
Shop at:
Sunny Studio
Mini Mat & Tag 4 Dies
Shop at:
Sunny Studio

Wednesday, October 12, 2022

Winter Wreaths Cards with Marie and Alma

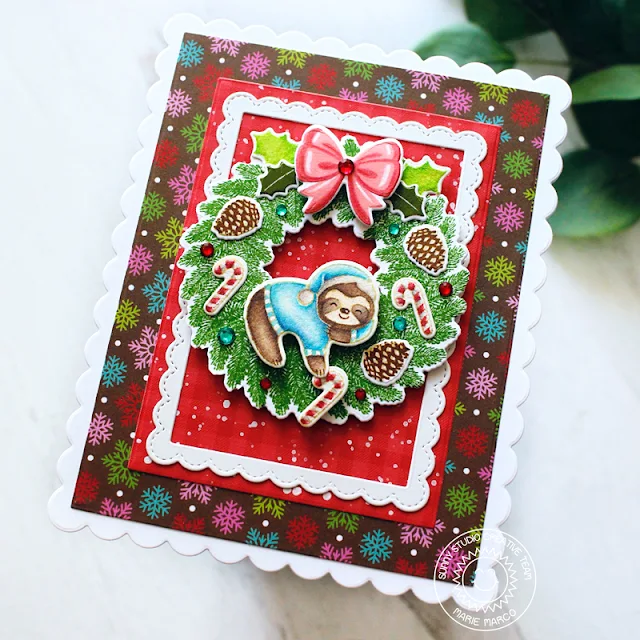
Hello Crafty Friends! Marie here back to share another festive Holiday card featuring the gorgeous recently released Winter Wreaths Stamp Set. I absolutely adore this set for creating quick and easy beautiful wreaths that you can layer up and decorate on its own or pair it with other stamps like I did for today's card! It is perfect if you have to mass produce cards! Alongside my wreath, I also used the Lazy Christmas Stamps which features the cutest Christmas sloths ever

Sunny Studio Stamps: Winter Wreaths Holiday Card by Marie Marco (featuring Penguin Party, Lazy Christmas, Fancy Frame Dies)

To create this card, I first started by die cutting 2 white scalloped panels from Neenah Solar White 110 lb cardstock. Next, I die cut  an A2 sized snowflakes pattern paper from the All Is Bright 6x6 paper Pack and a smaller size solid red gingham pattern paper from the new Joyful Holiday paper. I also cut a white scalloped frame for my smaller rectangle using the Fancy Frames Rectangle Dies

For my wreath, I used Distress Ink in the color Mowed Lawn to stamp my image on to Neenah solar white 110 lb cardstock paper. In my experience, using a thicker paper is better when stamping with distress inks rather than a smooth cardstock because it absorbs better and creates a sharper image. I love that the Winter Wreaths layering stamps have tiny reference numbers with letters that indicate the order in which to layer the stamps so you don't get confused. For my Pine cones, I first stamped my base layer in  Antique Linen Distress Ink then stamped my next layer using Vintage Paper Distress Ink. For my holly leaves I used bright green watercolor on my big leaves and an Olive green Ink for my smaller leaves. For the Bow, I used Spun Sugar Distress Ink as my base, then I used Saltwater Taffy distress oxide as my 2nd Stamp layer and for the 3rd stamp layer, I used Festive Berries Distress Oxide Ink. I cut out my wreath using the Winter Wreaths Die Set

Sunny Studio Stamps: Winter Wreaths Holiday Card by Marie Marco (featuring Penguin Party, Lazy Christmas, Fancy Frame Dies)

For my sloth image and candy cane images which comes from the Penguin Party stamp set. I colored everything using Derwent Inktense Water Soluble pencils. I cut all my colored images using the Lazy Christmas Dies and the Penguin Party Dies for my candy cane images. I arranged all my images and glued everything using Bearly art Precision Craft Glue and Foam squares. I also added a touch of glitz using Sunny Studio Embellishments in the Bright Jewels Mix for my aqua jewels and the Ruby Red Jewels.

Sunny Studio Stamps: Winter Wreaths Holiday Card by Marie Marco (featuring Penguin Party, Lazy Christmas, Fancy Frame Dies)

For the inside of my card, I used the Lazy Christmas Sloth image and Sentiment to carry over my Holiday theme. And that finishes off my card inspiration for today! I really enjoyed creating this card, and I love how it came together! Thank You so much for joining me today and I hope I've been able to inspire you to get started on Holiday Card Making for before you know it, it will be upon us again!  

-----------------------------------------------

Hi dear ones, Alma here with you. Today I want to show you a card with the beautiful Winter Wreaths Stamps

Sunny Studio Stamps: Winter Wreaths Holiday Card by Alma Störk (featuring Santa Clause Lane)


First of all I stamped the wreath with a stamping tool in 3 colors (Distress Oxide Inks Mowed Lawn, Pine needles and Ground Espresso). After that I colored the sweet Santa from the 
Santa Claus Lane Stamps and the supplies from the set. I colored the images with Copics. I love the result of the no line technique so much!

Sunny Studio Stamps: Winter Wreaths Holiday Card by Alma Störk (featuring Santa Clause Lane)

Then I cut a rectangular card and add a embossed texture with the Moroccan Circles Embossing
Finally I stamped the text of the Santa Claus Lane Stamps and I glued all together!

I can´t wait for Christmas!!!

Sunny Studio Supplies Used:

Lazy Christmas Stamps
Shop at:
Sunny Studio
Lazy Christmas Dies
Lazy Christmas Dies
Shop at:
Sunny Studio
Fancy Frames- Rectangles
Shop at:
Sunny Studio
Moroccan Circles Embossing
Shop at:
Sunny Studio
Santa Claus Lane Stamps
Shop at:
Sunny Studio
Santa Claus Lane Dies
Shop at:
Sunny Studio
All Is Bright Paper
All Is Bright Paper
Shop at:
Sunny Studio
Penguin Party Stamps
Shop at:
Sunny Studio
Penguin Party Dies
Penguin Party Dies
Shop at:
Sunny Studio
Winter Wreaths Stamps
Shop at:
Sunny Studio
Winter Wreaths Dies
Winter Wreaths Dies
Shop at:
Sunny Studio
Joyful Holiday Paper
Shop at:
Sunny Studio

Tuesday, October 11, 2022

Penguin Party Cards with Kavya and Isha

Hi folks, Kavya here. I am back on the blog with another fun project using my favorite critters from the release - Penguin Party! Here is a fun gingerbread scene that I am sure you would enjoy :)

Sunny Studio Stamps: Penguin Party Winter Themed Card by Kavya (featuring Jolly Gingerbread, Reindeer Games)

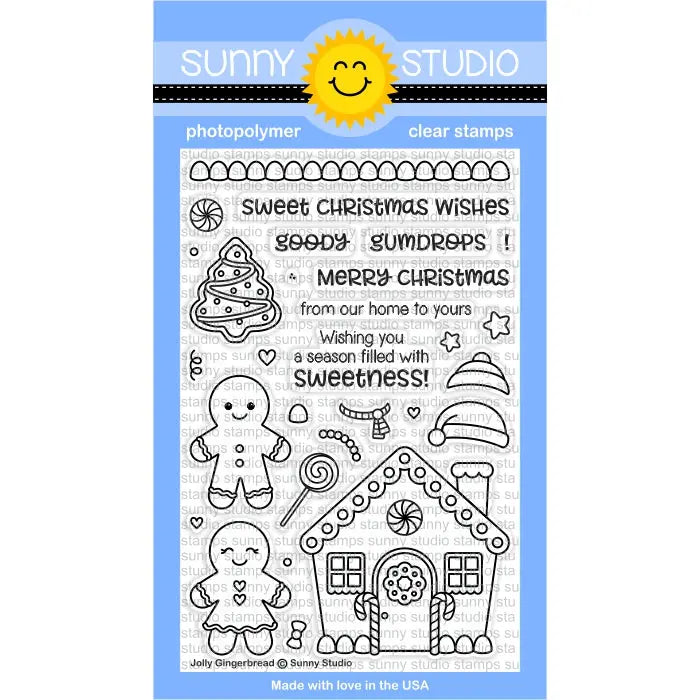
I first started off by stamping and coloring a bunch of images from Jolly GingerbreadPenguin Party and Reindeer Games. Then, I created my background using a generic sunburst stencil and ink blended it using blue dye ink. 

Sunny Studio Stamps: Penguin Party Winter Themed Card by Kavya (featuring Jolly Gingerbread, Reindeer Games)

Added some paint splatters and some line cardstock for the ground to finish the background. After adhering all the images, I added a heat embossed sentiment and I was done! 

I hope you liked this fun project! Check back tomorrow for more inspiration :) Happy Crafting!

----------------------------------------

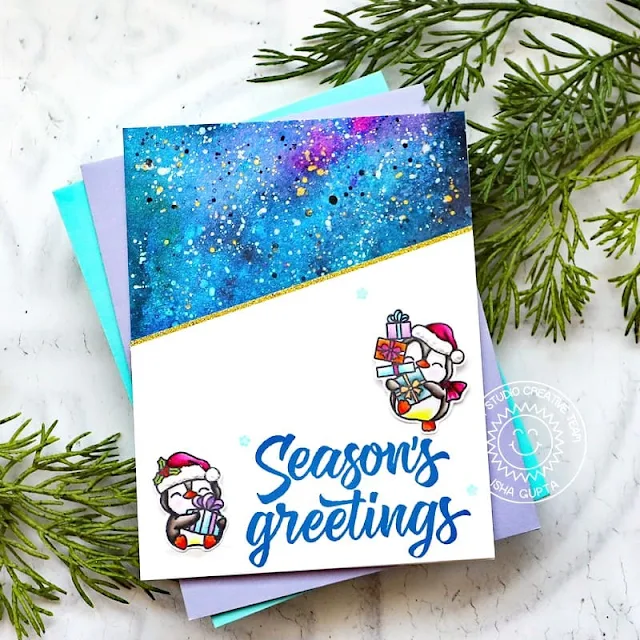
Hello everyone, Isha with a cute Season's Greetings card featuring the new Penguin Party stamp and dies. This set has so many cute and adorable images. When it comes to Penguins, my first thought is Nordic lights, galaxy and that's the inspiration behind this creation.

Sunny Studio Stamps: Penguin Party Winter Themed Card by Isha Gupta (featuring Holiday Greetings)

To start I created the sky using various Nuvo shimmer powders. Flick gold, silver and white paint. Stamp the sentiment from the Holiday Greetings stamp set onto a white card. Cut this piece to a diagonal and adhere it to the sky part. Stamp the images from the Penguin Party stamp set onto alcohol friendly cardstock, color using copic markers and die-cut using the coordinating dies.

Sunny Studio Stamps: Penguin Party Winter Themed Card by Isha Gupta (featuring Holiday Greetings)

Stamp the solid star. Add some midas touch nuvo shimmer pen to the images. Adhere the penguins using 3d foam. Thanks for dropping by and have a nice day!

Sunny Studio Supplies Used:

Jolly Gingerbread Stamps
Shop at:
Sunny Studio
Jolly Gingerbread Dies
Shop at:
Sunny Studio
Holiday Greetings Stamps
Shop at:
Sunny Studio
Penguin Party Stamps
Shop at:
Sunny Studio
Penguin Party Dies
Penguin Party Dies
Shop at:
Sunny Studio
Reindeer Games Stamps
Shop at:
Sunny Studio
Reindeer Games Dies
Reindeer Games Dies
Shop at:
Sunny Studio