Thursday, May 13, 2021

Happy Hamster Cards with Anja and Vanessa

Hello everyone, Anja here with you today. I love creating cards with cute critters and today I'm showcasing the Happy Hamsters Stamps.

Sunny Studio Stamps: Happy Hamster Everyday Cards by Anja Bytyqi

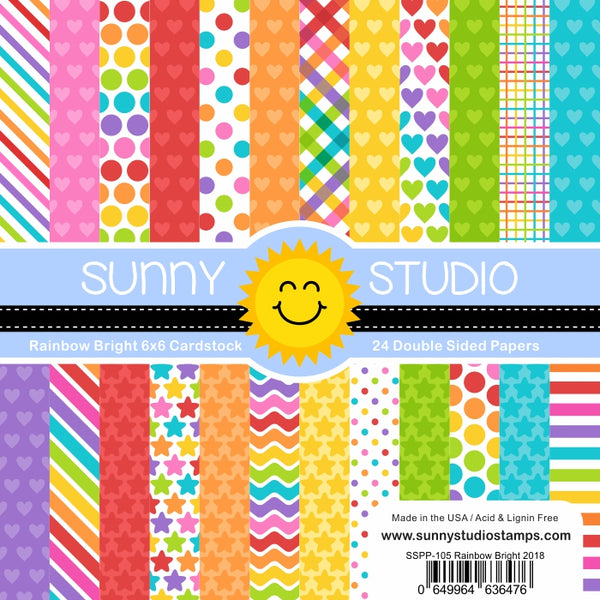
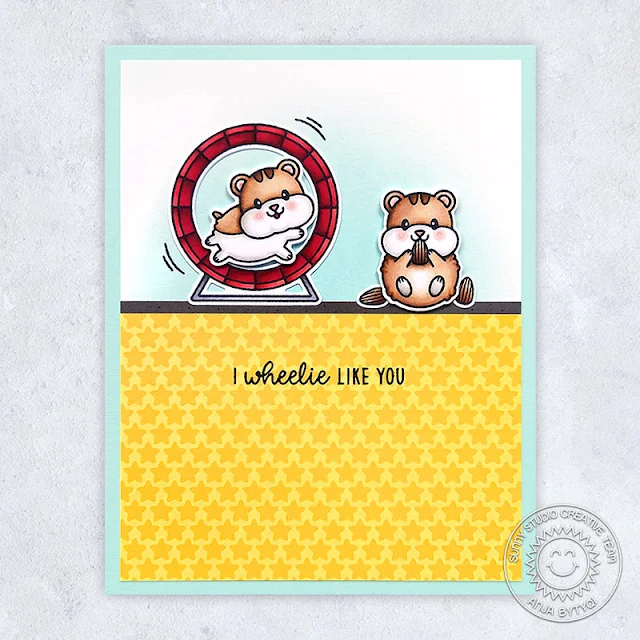
I started off with a light aqua A2 card base and trimmed down the yellow stars patterned paper from the Rainbow Bright Paper pack. For the top part, I blended some Tumbled Glass Distress Oxide Ink in circular motions on a Bristol cardstock panel. I adhered both pieces to the card base and added a thin grey paper strip.

Sunny Studio Stamps: Happy Hamster Everyday Cards by Anja Bytyqi

Next, I stamped the images in Memento Tuxedo Black Ink and colored them with Copic Markers. I cut everything out with the coordinating dies and used liquid glue as well as foam tape to adhere them. Finally, I stamped the motion lines and punny sentiment in VersaFine Onyx Black Ink.

Thank you so much for stopping by! Have a fabulous day!

----------------------------------------------

Hello to you! Vanessa here with an interactive CAS card using the Happy Hamster Stamps. These critters are the cutest!

Sunny Studio Stamps: Happy Hamster Everyday Card by Vanessa Menhorn

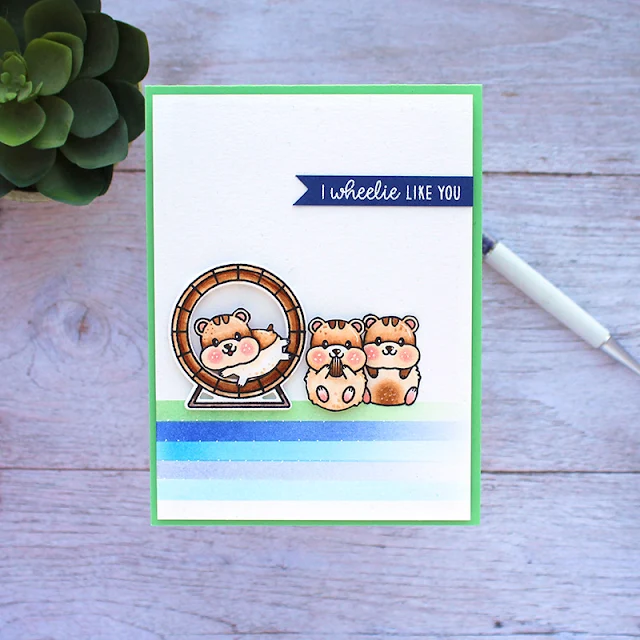
I first trimmed a panel of white cardstock slightly smaller than the card base and masked off stripes with masking tape. Now I applied the following Distress Oxide Inks: Cracked Pistachio, Blueprint Sketch, Salty Ocean and Tumbled Glass. Then I stamped the images onto white cardstock, colored everything with Copic markers, die-cut the wheel and fussy-cut the hamsters. 

Sunny Studio Stamps: Happy Hamster Everyday Card by Vanessa Menhorn

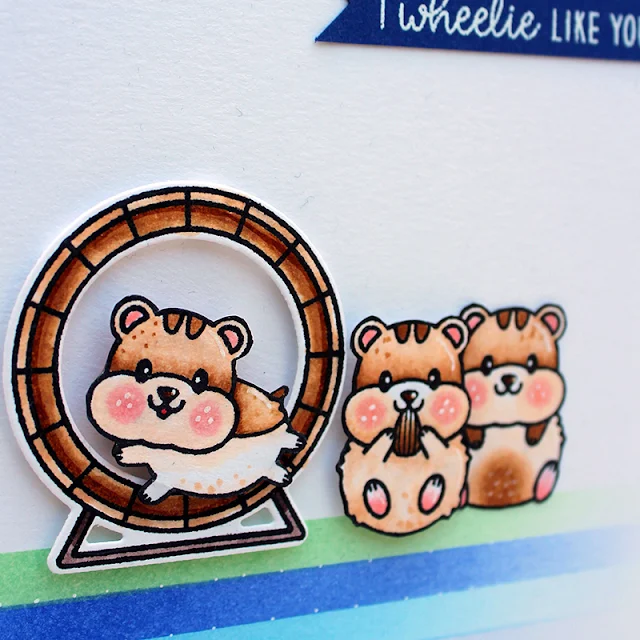
I punched a small circle into the panel where the hamster in the wheel would be placed, adhered the wheel, then a small coin to the hamster, then a square foam pad and a second coin behind the panel to put the hamster into his wheel. After I had adhered the panel to the card, I adhered the remaining images, stamped and heat-embossed the sentiment onto a strip of blue cardstock, trimmed it and adhered it.

Here comes the cutie in action:

Such fun, isn't it? These adorable faces make me smile. I hope you got to smile today, too!

Sunny Studio Supplies Used:

Happy Hamsters Stamps
Shop at:
Sunny Studio
Happy Hamsters Dies
Happy Hamsters Dies
Shop at:
Sunny Studio
Rainbow Bright 6x6 Paper
Shop at:
Sunny Studio

Wednesday, May 12, 2021

Color My World Cards with Julia and Franci

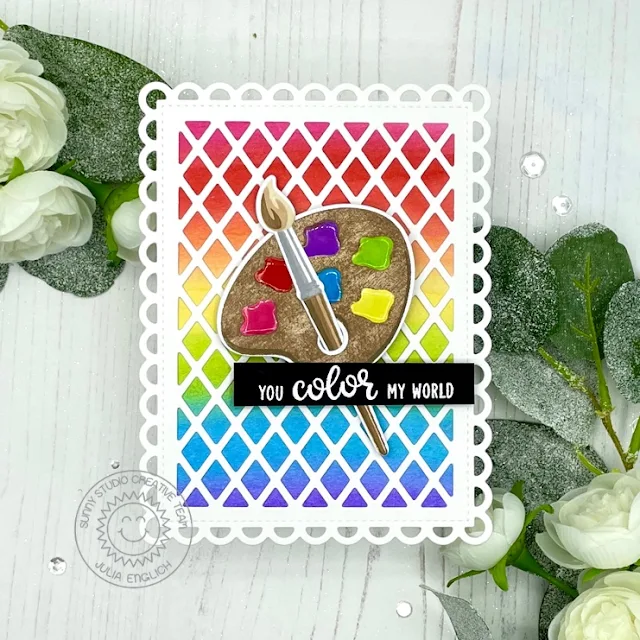
Hey crafty friends! It’s Julia here with a super colorful card! For this card, I started by stamping out the brush and the color palette from the layering stamp set Color My World

Sunny Studio Stamps: Color My World Frilly Frame Dies Teacher Card by Julia Englich

I still don't own a lot of layering inks, so I went back to my trusty Distress Inks! I stamped the base layers for the paint palette in Vintage Photo and Gathered Twigs. I normally would have tried to stamp the lightest color a few times, since the Distress Inks don't really give a smooth finish when stamping, but in this case it actually created a wood-like texture that I really liked - so I just left it as it! For the based of the paint brush, I used the same colors, I just added in Tea Dye as my lightest shade. For the barrel I used Hickory Smoke and for the tip of the brush I used Antique Linen, Tea Dye and Vintage Photo. For all the fun paint colors I stamped each Distress ink multiple times per layer to darken up the image each time and create the 3D-effect. It is definitely more subtle, than with layering inks, but it works! The colors I used were Squeezed Lemonade, Twisted Citron, Salty Ocean, Wilted Violet, Candied Apple and Picked Raspberry.

Then, to create my background, I used the re-inkers for my colorful inks and watercolored a rainbow fade with them. Once dried, I attached the panel to a card base and I layered the Frilly Frame Lattice die cut in white over top. 

Sunny Studio Stamps: Color My World Frilly Frame Dies Teacher Card by Julia Englich


I stamped my sentiment from Color My World and heat embossed it in white onto black cardstock. After that, I used the coordinating dies for Color My World to cut out the paint palette and brush and I used liquid glue to adhere both together. I attached them with foam squares and added my sentiment strip on top. Finally, I added shimmer and and Nuvo Crystal Glaze to the fun colors in the paint palette. I really hope you like it!

Thank you so much for stopping by! Have a wonderful day!

-----------------------------------------------

Happy Wednesday everyone! Franci here with a colorful card today, perfect for all the inspiring people in your life.

Sunny Studio Stamps: Color My World Teacher Appreciation Teacher Card by Franci Vignoli

First of all I created my card base out of white cardstock and inked the front with pink Distress ink, then I stamped my sentiment from the Teacher Appreciation set at the bottom. I created my palette using the Color My World coordinated dies and I hope this will give you inspiration to look at all your coordinated dies and create something original with them :)

Sunny Studio Stamps: Color My World Teacher Appreciation Teacher Card by Franci Vignoli

I die cut all the elements out of solid colored cardstocks and some patterned paper from the Spring Fling paper. I assembled the palette using both liquid glue and foam adhesive and coated all the color splashes with Glossy Accent. Finally I glued down the palette and added a little red heart + some little dots onto my background with a white gel pen.

I'm so in love with this and I can't wait to create more palette like this and turn them into paper clips, magnets. Hope you are now inspired to create and thanks a lot for stopping by today!

Sunny Studio Supplies Used:

Color My World Stamps
Shop at:
Sunny Studio
Color My World Dies
Color My World Dies
Shop at:
Sunny Studio
Teacher Appreciation Stamps
Shop at:
Sunny Studio
Frilly Frames Lattice Dies
Shop at:
Sunny Studio
Spring Fling Paper
Spring Fling Paper
Shop at:
Sunny Studio

Tuesday, May 11, 2021

Poppy Fields Cards with Kavya and Isha

Hi folks, Kavya here. I am back on the blog with another fun card! If you follow me on IG, you might have heard about my recent paper debacle. I ended up with 100lb of cardstock (no regrets!). With this tiny incident, I am no longer frugal with my cardstock and I have started exploring color combinations that I haven’t tried before! Here is a card made using some mustard yellow cardstock for the first time :) 

Sunny Studio Stamps: Poppy Fields Inside Greetings Floral Birthday Cards by Kavya

This card is super easy to put together with the new Poppy Fields stamp set. I also picked a sentiment that is perfect for anyone and any special occasion.. Father’s Day, Mother’s Day, Birthday, Valentine’s Day etc.

Sunny Studio Stamps: Poppy Fields Inside Greetings Floral Birthday Cards by Kavya

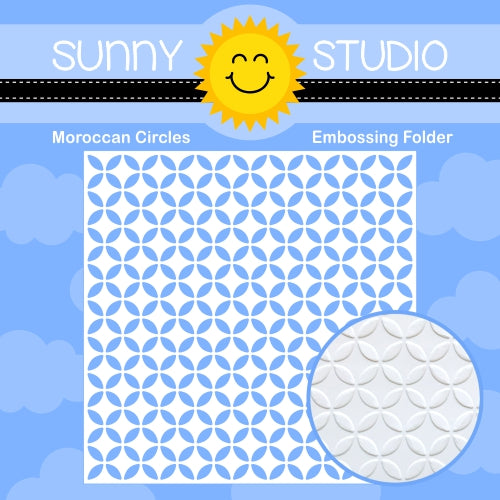
I first started off by ink blending the top half of yellow mustard cardstock with shades of brown. I then embossed this panel using the Moroccan embossing folderFor the sentiment panel, I partially die cut the edge using a die from the Sliding Window die set and stamped a sentiment from Inside Greetings Birthday. The ‘for you’ was die cut using rose gold foil cardstock and Gift Card Pocket die. Then, I stamped a bunch of poppies using the Poppy Field stamp set and arranged them around the sentiment panel! I finished it off by adding some bling using Snow White Crystals

I hope you liked this fun card! Check back tomorrow for more inspiration!

-------------------------------------------------

Hello everyone! Isha today, with a card featuring the Poppy Fields stamps and dies from the new release. You will love this layering stamp as it makes the florals look so real by simply stamping. 

Sunny Studio Stamps: Poppy Fields Inside Greetings Floral Birthday Card by Isha Gupta

I started by stamping all the layers of the images from Poppy Fields as per the layering guide HERE. I then die-cut the images using the coordinating dies.

Take a black mat layer and create floral clusters. This is the step where I take the most time. Once, I was happy, I adhered the elements using liquid glue and also 3d foam for added depth and dimension. Flick some gold splatters. Adhere this to a black card base.

Sunny Studio Stamps: Poppy Fields Inside Greetings Floral Birthday Card by Isha Gupta

Stamp the sentiment from the Inside Greetings Birthday onto black card, sprinkle WOW! opaque white embossing powder and heat set. Adhere the sentiment stripe to a vellum mat. Add gold floss behind this and adhere to the card.

The colors I used for the flowers and leaves are: Red Flowers: Altenew Pink Pearl, Coral Bliss, Heart Beat, Vineyard Berry, Grapevine, Black and Moon Rock; Orange Flowers: Altenew Sunkissed, Orange Cream, Autumn Blaze, Fire Brick, Grapevine, Moon Rock, Black; Leaves: Altenew Parrot, Moss

Thank you for dropping by. Have a nice day!

Sunny Studio Supplies Used:

Gift Card Pocket
Gift Card Pocket
Shop at:
Sunny Studio
Poppy Fields Stamps
Poppy Fields Stamps
Shop at:
Sunny Studio
Poppy Fields Dies
Poppy Fields Dies
Shop at:
Sunny Studio
Sliding Window Dies
Sliding Window Dies
Shop at:
Sunny Studio
Moroccan Circles Embossing
Shop at:
Sunny Studio
Inside Greetings Birthday
Shop at:
Sunny Studio

Monday, May 10, 2021

Candy Shoppe Cards with Mayra and Ashley

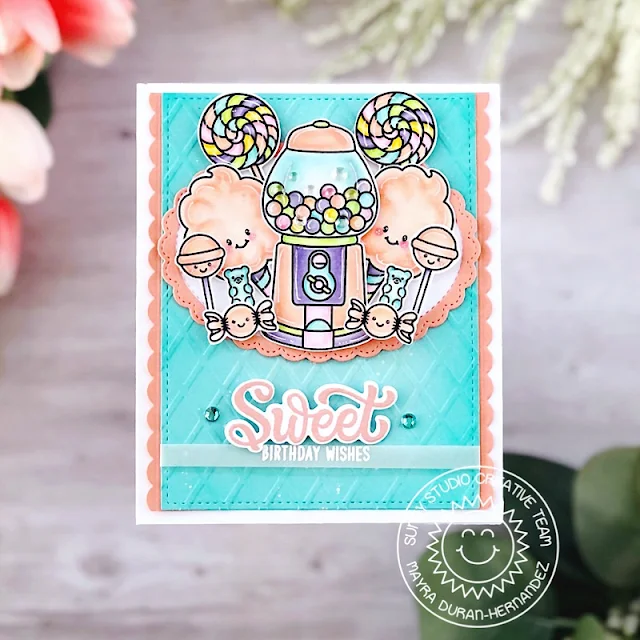
Hello everyone. Happy Monday. Mayra here with you today, yay! I am sharing this super sweet birthday card using the new Candy Shoppe stamp set. 

Sunny Studio Stamps: Candy Shoppe Stitched Rectangles Stitched Oval Dies Candy Themed Card by Mayra Duran-Hernandez

I began by coloring the images from the set. I used Copic markers. For the peach color, I used E95, E93, R02, YR00, and YR000. For the pink, I used RV00, RV10, RV52, and RV13. For the soft purple, I used BV000, BV00, BV11, and BV01. For the lime green, I used, YG01, FYG1, YG06, and YG0000. 

I then used the larger of the stitched rectangles from the Stitched Rectangles set. Next, I used the Dapper Diamonds Embossing folder to add dimension to the die-cut panel. I then added a bit of color to the edges using Peacock Feathers Distress Oxide ink. Next, I used the scalloped edge from the Slimline Basic Borders dies set to add a scalloped border to each of the sides of the base panel. I then die-cut an oval from white cardstock using the Stitched Oval dies set and the scalloped oval from peach colored cardstock using the Fancy Frames Oval dies set. 

Sunny Studio Stamps: Candy Shoppe Stitched Rectangles Stitched Oval Dies Candy Themed Card by Mayra Duran-Hernandez

For the sentiment, I stamped the word 'sweet' from the set using the Peach Bellini Gina K. Designs ink, I then die-cut it using the coordinating die

I hope you enjoy the card I created to share with you. I pray you each have a wonderful and blessed day. Thank you so much for taking the time to stop by.

---------------------------------------------

Hi friends! It's Ashley with a card featuring the adorable new Candy Shoppe set! I was inspired by the gumballs to create a fun rainbow bubble background to go along with it and I think it turned out pretty cute!

Sunny Studio Stamps: Candy Shoppe Frilly Frame Dies Stitched Circle Dies Candy Themed Card by Ashley Ebben

I started by die cutting a piece of white cardstock with the frame from Frilly Frames - Quatrefoil and the inside pattern from Frilly Frames - Herringbone. Remember that all of the Frilly Frames series are interchangeable so you can come up with lots of different options! I added my die cut piece to a white card base, so my background was still all white, but with some interest! I used the Stitched Circle Small and Stitched Circle Large dies to make six different sized white circles. I used different colored dye inks to blend color onto each circle starting from the outside and blending in so I had a rainbow of bubbles! I added these to the background on a diagonal in rainbow order to finish it.

Sunny Studio Stamps: Candy Shoppe Frilly Frame Dies Stitched Circle Dies Candy Themed Card by Ashley Ebben

I stamped the gumball machine and an extra gumball from Candy Shoppe in Lawn Fawn Jet Black ink along with the little bear from Beach Buddies. I colored everything with Copic markers, then stamped the smiley face from the cotton candy onto the gumball machine. I cut all the images out with their matching dies, then added them to the card with foam tape. I also used a small square of foam tape to add the bubble to the bear's mouth. I stamped my sentiment in VersaMark ink onto black cardstock and embossed with white. Then I added the sentiment strip to the card with foam tape and was finished!

Thank you so much for stopping by! Have a wonderful day!

Sunny Studio Supplies Used:

Beach Buddies Stamps
Shop at:
Sunny Studio
Beach Buddies Dies
Beach Buddies Dies
Shop at:
Sunny Studio
Candy Shoppe Stamps
Candy Shoppe Stamps
Shop at:
Sunny Studio
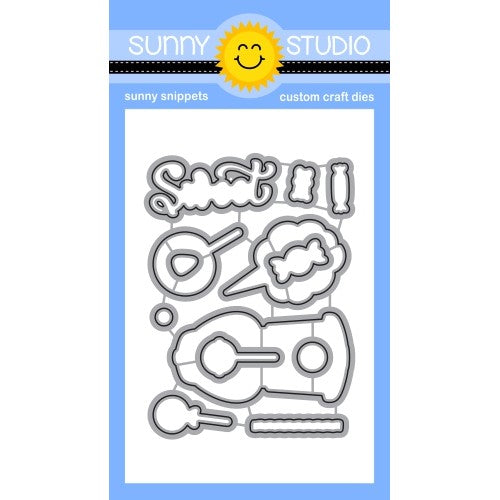
Candy Shoppe Dies
Candy Shoppe Dies
Shop at:
Sunny Studio
Stitched Rectangle Dies
Shop at:
Sunny Studio
Fancy Frames- Ovals
Fancy Frames- Ovals
Shop at:
Sunny Studio
Dapper Diamonds Embossing
Shop at:
Sunny Studio
Stitched Oval Dies
Stitched Oval Dies
Shop at:
Sunny Studio
Frilly Frames Herringbone
Shop at:
Sunny Studio
Frilly Frames Quatrefoil
Shop at:
Sunny Studio
Slimline Basic Borders
Shop at:
Sunny Studio
Stitched Circle Small Dies
Shop at:
Sunny Studio
Stitched Circle Large Dies
Shop at:
Sunny Studio

Saturday, May 8, 2021

Guest Designer Spotlight: Cards with Jane Trivedi

Hi Friends! Jane here today, and I'm so thrilled to be guest designing for Sunny Studio Stamps! I've got two fun slimline cards to share with you today using products from the Summer Release!

Sunny Studio Stamps: Tiki Time Tropical Scenes Chloe Alphabet Summer Themed Card by Jane Trivedi

For my first card, I cut a slimline card panel (3.25 inches by 8 inches) and ink blended a background using distress oxide inks and homemade stencils cut from acetate sheets. You can use any dies you have to cut acetate and create your own custom stencils for background blending. I love the tropical feel the background gives to the focal images! 

Next, I stamped the images from the new Tiki Time stamp set and the Tropical Scenes stamp set using copic friendly black ink. I colored the images using Copic markers and added highlights using a white gel pen. The images were then cut using the coordinating dies. Foam tape was added to the die cut images to create dimension and they were arranged on the card. 

Sunny Studio Stamps: Tiki Time Tropical Scenes Chloe Alphabet Summer Themed Card by Jane Trivedi

The sentiment "aloha" was cut using the new Chole Alphabet dies. The letters were cut three times from white cardstock and stacked together using liquid glue to create dimension. I used a T-square ruler to align the letters. Finally, the entire card front was adhered to an slimline card base using liquid glue and that completes the card!   

Sunny Studio Stamps: Chloe Alphabet Looking Sharp Birthday Slimline Card by Jane Trivedi

My second card uses the new Looking Sharp stamp and coordinating dies. For the background, I again did some custom ink blending using stencils I had in my stash, although you can create your own wave by cutting masking paper or cutting acetate sheets for a similar look. I used soft yellows, oranges, green and blue dye inks to create a muted background in contrast to the brightly colored cacti.

The images from the new Looking Sharp stamp set were stamped using copic friendly black ink on white cardstock. Copic markers used to color the images and I added rosy cheeks and white highlights for interest.  

Sunny Studio Stamps: Chloe Alphabet Looking Sharp Birthday Slimline Card by Jane Trivedi

Thin foam squares were used to adhere the images to the back of the card. The new Chole Alphabet dies were used to the cut the letters for "on point" from white cardstock. I stacked the letters twice and adhered them together using liquid glue. The bottom part of the letters have very thin strips of foam tape added in order to prop them up so they are at level with the cacti images. 

The top sentiment is from the looking sharp stamp set and was stamped using black ink with the help of my stamp positioning tool. The entire card front was adhered to a slimline card base and that completes the card!  

Thanks so much for stopping by today! I hope you stop by and check out the amazing new summer release by Sunny Studio Stamps!

Sunny Studio Supplies Used: 

Looking Sharp Stamps
Shop at:
Sunny Studio
Looking Sharp Dies
Looking Sharp Dies
Shop at:
Sunny Studio
Tiki Time Stamps
Tiki Time Stamps
Shop at:
Sunny Studio
Tiki Time Dies
Tiki Time Dies
Shop at:
Sunny Studio
Chloe Alphabet Dies
Chloe Alphabet Dies
Shop at:
Sunny Studio
Tropical Scenes Stamps
Shop at:
Sunny Studio
Tropical Scenes Dies
Shop at:
Sunny Studio