Thursday, December 24, 2020

Classy Christmas Cards with Vanessa and Anja

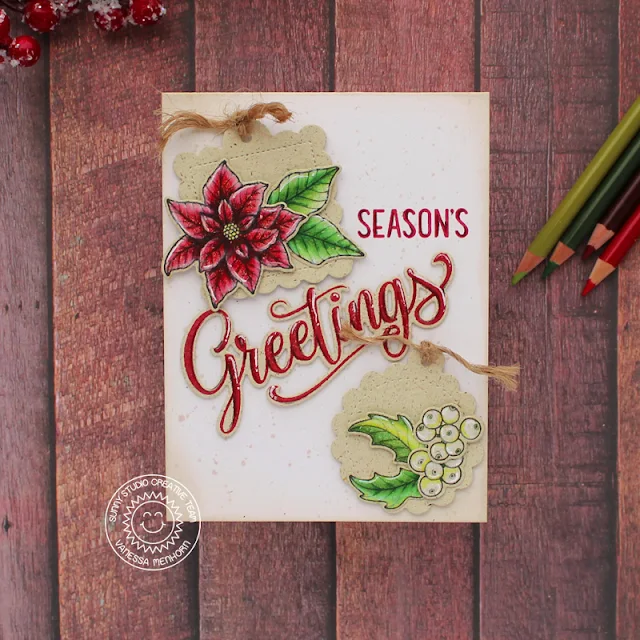
Hello to you! Vanessa here with a vintage style Christmas card using Classy Christmas.

Sunny Studio Stamps: Classy Christmas Season's Greetings Scalloped Tag Dies Christmas Cards by Vanessa Menhorn

For this card, I first inked the edges of a rustic cream card base with cream ink and applied ink droplets. Then I die-cut two tags from the package box of my favorite tea. I love the paper they use for the package and didn't want to throw it away. Now I stamped the images onto another piece of the paper and colored them with colored pencils. After adding highlights with a white gel pen, I die-cut the elements with the matching dies and arranged them onto the tags. 

Stamps and dies used today:
Classy Christmas stamps dies (images)
Season's Greetings stamps + dies (sentiment)
Scalloped Tag Square Dies (tags)

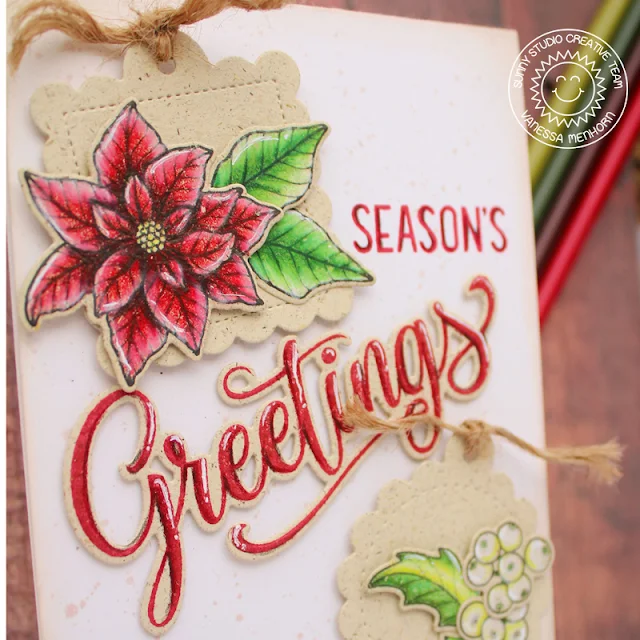
Sunny Studio Stamps: Classy Christmas Season's Greetings Scalloped Tag Dies Christmas Cards by Vanessa Menhorn

I tied-on rustic twine to the tags and adhered them with foam tape. Then I stamped the "greetings" with red ink, added shadows with the colored pencils and highlights with the white gel pen, die-cut the word and adhered it. Finally, I stamped "season's" onto the card.

I am wishing you and your loved ones a wonderful Christmas! Thank you for stopping by!

--------------------------------------------------

Hello everyone, Anja here today and since it is Christmas Eve, I have the matching card for you, showcasing the beautiful Classy Christmas Stamps.

Sunny Studio Stamps: Classy Christmas Christmas Card by Anja Bytyqi

I started off with a white A2 card base and adhered a navy blue cardstock panel which is slightly smaller. Next, I die cut a thin white frame to use as a decorative design element for my cluster of stamped images.

Sunny Studio Stamps: Classy Christmas Christmas Card by Anja Bytyqi

The images were stamped in Memento Tuxedo Black Ink and colored with Copic markers. For the tree branch sprigs I used three tones of green dye inks. I used the coordinating dies to cut everything out and arranged the images at the bottom of the card. Finally, I stamped the sentiment from the Merry Mice set in VersaMark Ink and heat embossed it with white embossing powder.

Thank you so much for stopping by! Wishing you all a very Merry Christmas!

Sunny Studio Supplies Used:

Season's Greetings Stamps
Shop at:
Sunny Studio
Season's Greetings Dies
Shop at:
Sunny Studio
Merry Mice Stamps
Merry Mice Stamps
Shop at:
Sunny Studio
Scalloped Tags-Square
Shop at:
Sunny Studio
Classy Christmas Stamps
Shop at:
Sunny Studio
Classy Christmas Dies
Shop at:
Sunny Studio

Wednesday, December 23, 2020

North Pole Cards with Ana and Christy

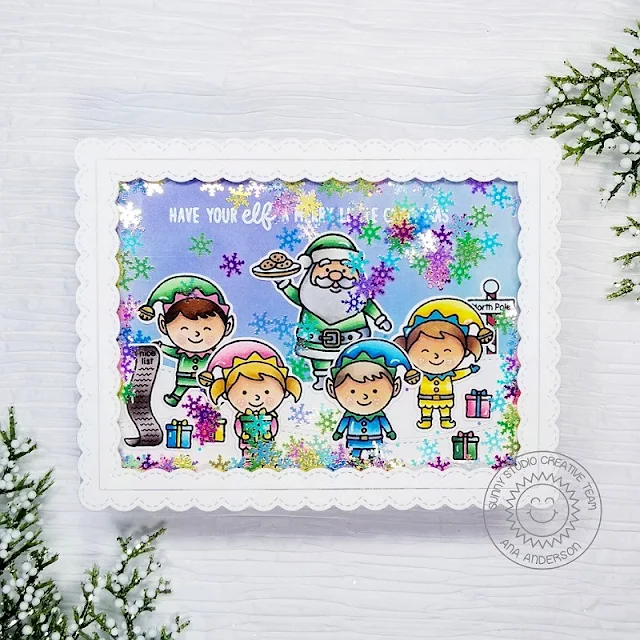
Hello Sunny friends and welcome back! It’s Ana today with a colorful card showcasing North Pole stampscoordinating dies and Fancy Frames Rectangles and Colorful Snowflake Sequins.

Sunny Studio Stamps: North Pole Fancy Frame Dies Christmas Card by Ana Anderson

After stamping the images from the North Pole set, I pulled the colors from Colorful Snowflake Sequins and colored the Santa, elves and presents in green, blue, yellow and pink, then cut them with coordinating dies. I added highlights with white gel pen to the images.

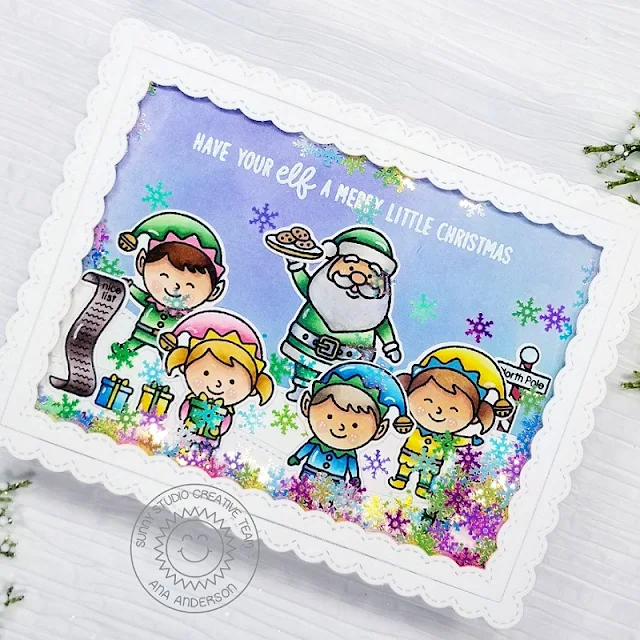
The background was created by lightly inking the sky with Broken China and Tumbles glass distress inks on watercolor paper. I used Slimline Nature Borders dies to create snowy hills and adhered them to the inked background.

Sunny Studio Stamps: North Pole Fancy Frame Dies Christmas Card by Ana Anderson

I white heat embossed the sentiment (from North Pole set) and added the images, adhering them with liquid glue. I cut the scalloped frame (Fancy Frames Rectangle dies) added the acetate and backed it with foam tape. I filled the background with colorful snowflakes sequins and added the frame.

Such a fun, colorful Christmas shaker don’t you think!? I just adore those little elves and colorful snowflakes. Thank you so much for stopping by today – I am wishing you all a beautiful holiday season!

----------------------------------------------------

Hey friends, it's Christy here with a card using North Pole just in time for Christmas! I chose to feature the fun-loving elves, aren't their expressions just so joyful? I also added some accessories from Penguin Pals. I colored them with Copics and trimmed them out with their matching dies.

Sunny Studio Stamps: North Pole Penguin Pals Window Quad Dies Christmas Card by Christy Reuling

For my focal panel, I took a sheet of patterned paper from the Holiday Cheer 6x6 pack, and trimmed that down with the outer die from Frilly Frames Quatrefoil. Then I die cut the windows out of it using Window Quad Circle and trimmed off the bottom with one of the Slimline Basic Borders

Sunny Studio Stamps: North Pole Penguin Pals Window Quad Dies Christmas Card by Christy Reuling

I stamped my sentiment in turquoise ink at the bottom of the panel. I popped that up on foam tape and backed it with the polkadot patterned paper, then added the peppermints paper at the bottom for a little extra fun. And as a finishing touch, I added a bit of Stardust Stickles.

If you'd like to see how this card came together, check out the video tutorial on my YouTube channel, Christy Gets Crafty!

Sunny Studio Supplies Used:

Fancy Frames- Rectangles
Shop at:
Sunny Studio
Holiday Cheer 6x6 Paper
Shop at:
Sunny Studio
Frilly Frames Quatrefoil
Shop at:
Sunny Studio
Slimline Basic Borders
Shop at:
Sunny Studio
Slimline Nature Borders
Shop at:
Sunny Studio
Window Quad Circle Die
Shop at:
Sunny Studio
North Pole Stamps
North Pole Stamps
Shop at:
Sunny Studio
North Pole Dies
North Pole Dies
Shop at:
Sunny Studio
Penguin Pals Stamps
Penguin Pals Stamps
Shop at:
Sunny Studio
Penguin Pals Dies
Penguin Pals Dies
Shop at:
Sunny Studio

Tuesday, December 22, 2020

Victorian Christmas Cards with Juliana and Isha

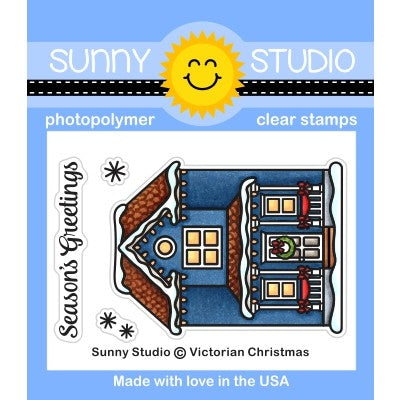
Hello Sunny Studio friends! It's Juliana and today I'm here sharing a shaker card I created using the Victorian Christmas Stamp Set combined with the Stitched Semi-circle Die.

Sunny Studio Stamps: Victorian Christmas Snowflake Circle Frame Dies Stitched Semi-Circle Dies Christmas Card by Juliana Michaels

I began with stamping, coloring and die cutting the images from the Victorian Christmas Stamp Set. To create a snowy landscape behind the house, I used the Scenic Route Stamps Set and trimmed it to size. I also ink blended a piece of white cardstock with Tumbled Glass Distress Ink for the main background.

To create the shaker, I used the Stitched Semi-circle Die. I die cut a piece of green paper from the Very Merry 6x6 Paper Pad and backed it with a piece of acetate. I then built up the frame for the shaker using double sided foam tape. I then filled this with a mix of sequins and fillers including the Blue Snowflake Confetti and Majestic Fusion Sequins.

Sunny Studio Stamps: Victorian Christmas Snowflake Circle Frame Dies Stitched Semi-Circle Dies Christmas Card by Juliana Michaels

The base of the shaker was created with a strip of green cardstock trimmed to size using a corner rounder punch to round the top two corners. I then stamped the sentiment from the Victorian Christmas Stamp Set and heat embossed it with white embossing powder. I then finished off the card by adding some die cut snowflakes created using the Snowflake Circle Frame Die.

Thanks so much for stopping by today and I hope you enjoyed learning how this shaker card came together using the Victorian Christmas Stamp Set and Stitched Semi-circle Die.

----------------------------------------------------

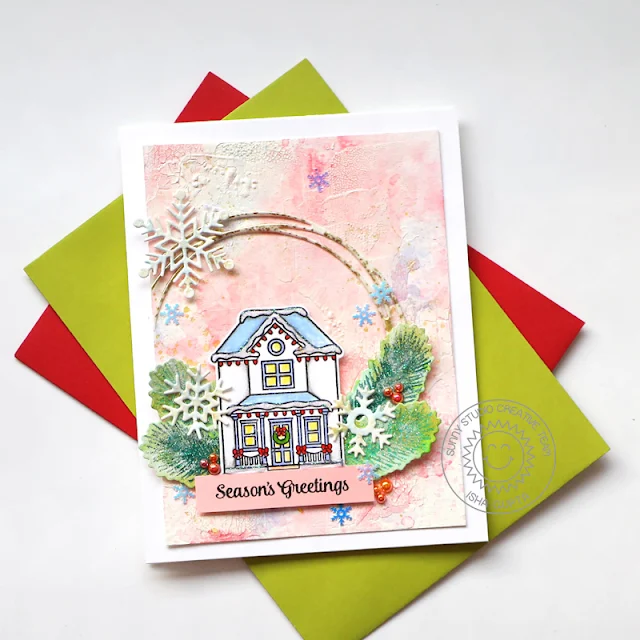
Hello everyone! Isha here with you today featuring the Victorian Christmas Stamp and dies. I chose to create a mixed media card with a delicate color palette. 

Sunny Studio Stamps: Victorian Christmas Snowflake Circle Frame Dies Classy Christmas Christmas Card by Isha Gupta

To start, I created the background by applying various distress inks mixed with water to a watercolor panel. Let it dry. Add some Distress crackle paint picket fence. Let this dry. Flick some gold watercolor from the Gansai Tambi Starry Colors.

Die-cut the wreath and snowflakes from the Snowflake Circle Frame. Add Versamark ink to the wreath, sprinkle WOW! embossing powder Karin's Dream, heat set. Add some light blue and gold watercolor to the snowflakes.

Take another sheet of watercolor paper, apply some green and teal distress inks mixed with water, let dry. Stamp the pine leaves using Versamark ink from the Classy Christmas stamp set. Sprinkle WOW! embossing powder - Aventurine and Green Glitz. Heat set. Die-cut using the coordinating dies.

Sunny Studio Stamps: Victorian Christmas Snowflake Circle Frame Dies Classy Christmas Christmas Card by Isha Gupta

Stamp the house from the Victorian Christmas stamp set. Add some color using watercolor markers. Die-cut using the coordinating die. Stamp the sentiment onto a strip of pink cardstock. Assemble the cluster as per the card photo.

To finish, I added some pearls from Iridescent Pearls and snowflakes from the Colorful Snowflake Sequins mixes. Add a touch of nuvo glitter drops for the snow.

Hope you enjoyed the creation. Thank you for stopping by!

Sunny Studio Supplies Used:

Very Merry 6x6 Paper
Shop at:
Sunny Studio
Snowflake Circle Frame
Shop at:
Sunny Studio
Stitched Semi-Circle Dies
Shop at:
Sunny Studio
Classy Christmas Stamps
Shop at:
Sunny Studio
Classy Christmas Dies
Shop at:
Sunny Studio
Victorian Christmas Stamps
Shop at:
Sunny Studio
Victorian Christmas Dies
Shop at:
Sunny Studio

Monday, December 21, 2020

Sledding Critters Cards with Ashley and Mayra

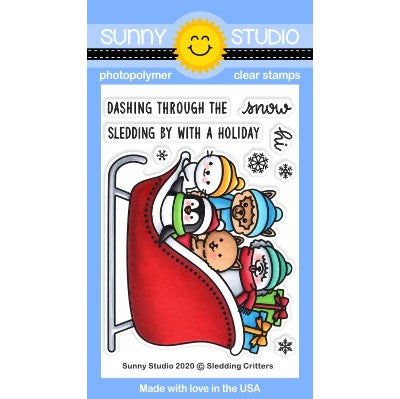
Hello friends! It's Ashley with one more Christmas card for you all! I can't believe Christmas is this week already! I decided to use more non-traditional colors, and go with a pink scene this week featuring the adorable Sledding Critters

Sunny Studio Stamps: Sledding Critters Christmas Garland Frame Winter Themed Christmas Card by Ashley Ebben

I started by blending Distress Oxide inks in Picked Raspberry and Spun Sugar onto white cardstock. I splattered the piece with water and white paint for a snowy look and dried it with my heat gun. I cut a snowy hill from white cardstock with a Slimline Nature Borders die and added it to the bottom of the card. I then die cut the Christmas Garland Frame from light pink cardstock and glue it on top.

Sunny Studio Stamps: Sledding Critters Christmas Garland Frame Winter Themed Christmas Card by Ashley Ebben

I stamped the image from Sledding Critters in Lawn Fawn Jet Black ink on white cardstock. I colored it with Copics, sticking with pinks and greys for a monochromatic feel, then cut it out with the matching die. I used the snowflakes from the Snowflake Circle Frame die on both white and white glitter cardstocks and scattered them around the edge of the card. I stamped a sentiment from Feeling Frosty in VersaMark ink onto black cardstock and embossed with white before adding it to the card with foam tape. I finished with some pink snowflake sequins from Colorful Snowflake Sequins for extra shine.

Thank you so much for stopping by! Have a wonderful day and Christmas!

-------------------------------------------------

Hello everyone, Mayra here with you today. WOW!! Christmas is this Friday!! I hope you all have been having a wonderful Holiday season so far. I created this card to share with you. I used the very cute Sledding Critters stamp set. 

Sunny Studio Stamps: Sledding Critters Rustic Winter Winter Themed Christmas Card by Mayra Duran-Hernandez

I began by coloring the image using Copic markers. I then die cut the stitched rectangle from the Frilly Frames Quatrefoil dies set. I die cut it using Bristol Smooth Cardstock. I also used the same stitched rectangle to die cut a layer from glittery cardstock. Next, I created two layers of snowy hills using the Slimline Nature Border dies. I also die cut a couple of birch trees using the Rustic Winter dies set. I then die cut the larger of the two tags from the Scalloped Tag Square dies set using red cardstock. I then cut a smaller square to fit within the tag. I also die cut a smaller square using the glittery cardstock. I then die cut the snowy slopes from the smaller glittered square. 

Copic colors used: Red: R46, R17, R05; Green: YG03, YG17, YG67, G29; Tan: E31, E55, E35, E41; Gray/Off White: E40, E41, W1, N3, W3

Sunny Studio Stamps: Sledding Critters Rustic Winter Winter Themed Christmas Card by Mayra Duran-Hernandez

I used Distress Inks to add color to both the stitched rectangle panel and the small square panel. I started with Chipped Sapphire Distress Ink, Blueprint Sketch Distress Oxide, Chipped Sapphire Distress Oxide, and a bit of Black Soot Distress Ink. I then added white splatters over both panels and a bit over the colored image and tag. Next, I used Copic markers to add some color to the die cut Birch trees. 

I hope you enjoy the card I created to share with you today. I pray you each have a wonderful and super blessed Christmas. 

Sunny Studio Supplies Used:

Rustic Winter Dies
Rustic Winter Dies
Shop at:
Sunny Studio
Feeling Frosty Stamps
Shop at:
Sunny Studio
Snowflake Circle Frame
Shop at:
Sunny Studio
Scalloped Tags-Square
Shop at:
Sunny Studio
Christmas Garland Frame
Shop at:
Sunny Studio
Frilly Frames Quatrefoil
Shop at:
Sunny Studio
Slimline Nature Borders
Shop at:
Sunny Studio
Scaredy Cat Dies
Scaredy Cat Dies
Shop at:
Sunny Studio
Sledding Critters Dies
Shop at:
Sunny Studio

Sunday, December 20, 2020

North Pole Card with Ashley

Hi friends! It's Ashley with a bright and fun Christmas card featuring the North Pole set! These little elves are just the cutest and they go so well with all of the Sunny Studio Christmas sets!

Sunny Studio Stamps: North Pole Season's Greetings Frilly Frame Dies Christmas Card by Ashley Ebben

I started by die cutting a piece of light green ray patterned paper from the Classic Sunburst paper pack with the stitched frame of Frilly Frames Retro Petals. I added it to an A2 sized piece of red and white paper from the Holiday Cheer paper pack for a super Christmasy base.

I stamped the "Merry Christmas" from Season's Greetings in VersaMark ink on vellum and embossed with gold glitter. I wasn't super happy with the vellum alone on this card, so I used the matching die twice on white cardstock to make a layered piece. It turned into a lovely soft white!

Sunny Studio Stamps: North Pole Season's Greetings Frilly Frame Dies Christmas Card by Ashley Ebben

I stamped the elves and Santa from North Pole in Lawn Fawn Jet Black ink on white cardstock and colored with Copics. I cut them out with the matching dies, then tucked the images behind the large sentiment on the card front. I love how it looks like they are peeking out around a big Merry Christmas sign!

Thank you so much for stopping by! Have a wonderful day!

Sunny Studio Supplies Used:

Holiday Cheer 6x6 Paper
Shop at:
Sunny Studio
Frilly Frames Retro Petals Dies
Shop at:
Sunny Studio
Season's Greetings Stamps
Shop at:
Sunny Studio
Season's Greetings Dies
Shop at:
Sunny Studio
North Pole Stamps
North Pole Stamps
Shop at:
Sunny Studio
North Pole Dies
North Pole Dies
Shop at:
Sunny Studio
Classic Sunburst Paper
Shop at:
Sunny Studio