Thursday, December 10, 2020

Surfing Santa Cards with Vanessa and Anja

Hello to you! Vanessa here with a colorful card using the adorable Surfing Santa set. This cute little set is such fun!

Sunny Studio Stamps: Surfing Santa Stitched Arch Dies Tropical Themed Christmas Card by Vanessa Menhorn

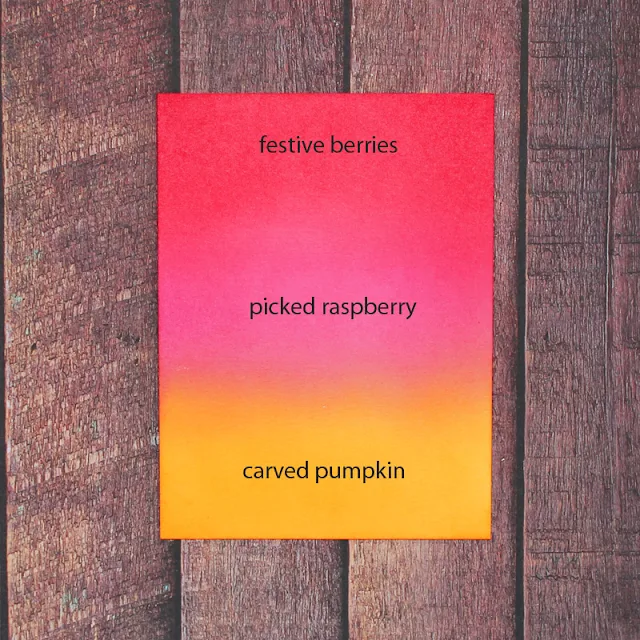
I first inked a panel of white cardstock with Distress Oxide Inks and an ink blending tool, using these colors:

Sunny Studio Stamps: Surfing Santa Stitched Arch Dies Tropical Themed Christmas Card by Vanessa Menhorn

Now I die-cut the mason jar from this panel and adhered a piece of clear cardstock behind it, created a shaker window and filled it with faux ice crystals. Then I stamped the images, colored the Santa and his board with Copic markers, die-cut the elements with the matching dies, adhered the images to the die-cut mason jar and adhered this behind the shaker window before adhering the panel to the card base. I die-cut the lid of the jar from white cardstock, inked it with black soot Distress Oxide Ink, tied-on the baker's twine and adhered the lid to the jar. 

Stamps and dies used for this card:
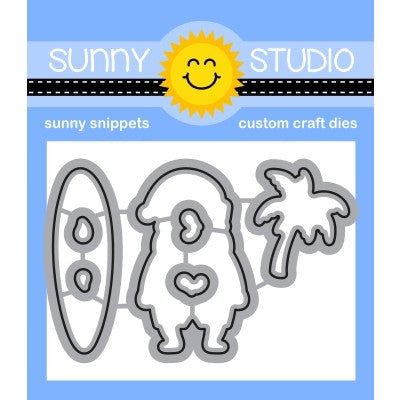
Surfing Santa stamps + dies
Vintage Jar dies
Stitched Arch dies

Sunny Studio Stamps: Surfing Santa Stitched Arch Dies Tropical Themed Christmas Card by Vanessa Menhorn

I die-cut the tag from white cardstock, inked it with festive berries Distress Oxide ink, stamped the sentiment and tied it on with the baker's twine. Finally I added the little trees.

We got our first snow this week so it felt strange to create a summery Christmas card. But I loved playing with this set and hope you like my take :) Thanks for visiting!

---------------------------------------------

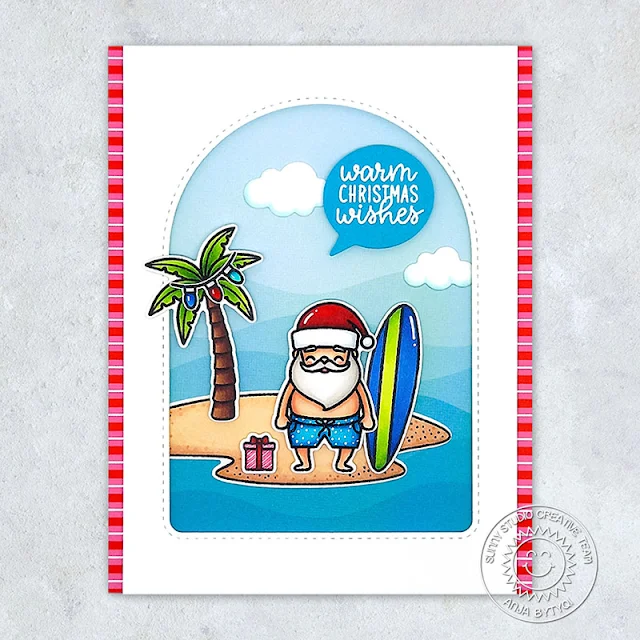
Hello everyone, Anja here and today's card makes me giggle! It features the Surfing Santa mini stamp set and I just love this cutie in his swim trunks!

Sunny Studio Stamps: Surfing Santa Stitched Arch Dies Tropical Scenes Tropical Themed Christmas Card by Anja Bytyqi

Of course I had to create a fun little ocean scene using the palm tree and sandy island from the Tropical Scenes set. For the background, I picked the waves patterned paper from the Summer Splash Paper pack. I added some light bulbs (Gleeful Reindeer Stamps) to the palm tree and a small gift (North Pole Stamps) next to Santa. The clouds are included in the Comic Strip Everyday Dies set.

I stamped the images in Memento Tuxedo Black Ink and colored them with Copic Markers. I used the coordinating dies to cut everything out and added some details with a white gelly roll pen. To frame my scene, I die cut a window from white cardstock using the largest of the Stitched Arch Dies. I trimmed off the sides a bit and adhered the striped paper from the Holiday Cheer Paper pack behind it.

Sunny Studio Stamps: Surfing Santa Stitched Arch Dies Tropical Scenes Tropical Themed Christmas Card by Anja Bytyqi

The sentiment was stamped in VersaMark Ink onto blue cardstock. I white heat embossed it and used a speech bubble die from the Comic Strip Speech Bubbles Dies set. Finally, I popped up the arch frame panel as well as some of the images with foam tape. The rest was adhered flat with liquid glue.

Thank you so much for stopping by! Hope you're having an awesome day!

Sunny Studio Supplies Used:

Gleeful Reindeer Dies
Shop at:
Sunny Studio
Gleeful Reindeer Stamps
Shop at:
Sunny Studio
Vintage Jar Dies
Vintage Jar Dies
Shop at:
Sunny Studio
Comic Strip Everyday Dies
Shop at:
Sunny Studio
Holiday Cheer 6x6 Paper
Shop at:
Sunny Studio
Summer Splash 6x6 Paper
Shop at:
Sunny Studio
Comic Strip Speech Bubble Dies
Shop at:
Sunny Studio
Tropical Scenes Stamps
Shop at:
Sunny Studio
Tropical Scenes Dies
Shop at:
Sunny Studio
Stitched Arch Dies
Stitched Arch Dies
Shop at:
Sunny Studio
North Pole Stamps
North Pole Stamps
Shop at:
Sunny Studio
North Pole Dies
North Pole Dies
Shop at:
Sunny Studio
Surfing Santa Stamps
Shop at:
Sunny Studio
Surfing Santa Dies
Surfing Santa Dies
Shop at:
Sunny Studio

Wednesday, December 9, 2020

Classy Christmas Cards and Video Tutorial with Ana and Christy

Hi friends and happy Wednesday! It’s Ana today with a festive Christmas card showcasing gorgeous Classy Christmas stamps and coordinating dies!

Sunny Studio Stamps: Classy Christmas Season's Greetings Frilly Frame Dies Christmas Card by Ana Anderson

I started by stamping the images from Classy Christmas set, colored them with Copic markers and cut them with coordinating dies. Next, I stamped the Merry Christmas sentiment in red ink and cut them with coordinating dies (from Season’s Greetings stamp set and coordinating die set).

I really wanted to keep the background white, but wanted to add some interest so I used Botanical Backdrop die to emboss the leaves on the background.

Sunny Studio Stamps: Classy Christmas Season's Greetings Frilly Frame Dies Christmas Card by Ana Anderson

I adhered the sentiments first, then arranged the images in corners. Once I had them all in place, I used liquid glue and foam tape to adhere them to the background. For finishing touches I added highlights and accents with white and gold gel pens, and added few White Pearls to embellish.

Isn’t this stamp set so beautiful!? I love the way those poinsettias, leaves and berries stand out on the white background!

----------------------------------------------

Hey friends, it's Christy here with a card featuring our beautiful Classy Christmas stamp set. I stamped all the images that I wanted to color in black ink and then colored them with my Copic markers. The pine boughs I stamped in a sage green ink, and then I cut out all the images with the matching dies.

Sunny Studio Stamps: Classy Christmas Frilly Frame Dies Fancy Frame Dies Christmas Card by Christy Reuling

I wanted to make a shaker card, so I die cut the Frilly Frames Lattice out of dark gray cardstock, then lined the back with acetate. I popped that up on foam tape over the same color card base, after filling the inside with sequins and stars in coordinating colors.

Sunny Studio Stamps: Classy Christmas Frilly Frame Dies Fancy Frame Dies Christmas Card by Christy Reuling

For my sentiment, I heat embossed the word "noel" on the same color cardstock in Platinum embossing powder, and then trimmed it out with a flag banner die from Fancy Frames Rectangle. I layered my images along the left side of the card and tucked my sentiment inside the cluster so it extended over to the right side. Then I finished off the card with some Stickles glitter glue for some added bling.

If you'd like to see how this card came together, you can check out the video tutorial below: 


Sunny Studio Supplies Used:

Fancy Frames- Rectangles
Shop at:
Sunny Studio
Botanical Backdrop Die
Shop at:
Sunny Studio
Frilly Frames Lattice Dies
Shop at:
Sunny Studio
Season's Greetings Stamps
Shop at:
Sunny Studio
Season's Greetings Dies
Shop at:
Sunny Studio
Classy Christmas Stamps
Shop at:
Sunny Studio
Classy Christmas Dies
Shop at:
Sunny Studio

Tuesday, December 8, 2020

Retro Ornament Cards with Juliana and Isha

Hello Sunny Studio friends! It's Juliana and today I'm here sharing a slimline card I created using the Retro Ornaments Stamp Set.

Sunny Studio Stamps: Retro Ornaments Christmas Garland Frame Dies Slimline Dies Christmas Cards by Juliana Michaels

I began with the the Retro Ornaments Dies and cut the base shape from various colors of cardstock. I then used the coordinating Retro Ornaments Stamp for that shape and stamped the image with embossing ink. I then heat embossed it with gold embossing powder. To finish off each ornament I added a gold bow.

For the card base, I used the Slimline Scallop Frame Die. Once the base was completed, I used the Christmas Garland Frame Die to cut green cardstock and create the foliage/tree for the ornaments to hang from. I trimmed it to fit the size of the slim line card front and glued it in place.

Sunny Studio Stamps: Retro Ornaments Christmas Garland Frame Dies Slimline Dies Christmas Cards by Juliana Michaels

To complete the card, I adhered the ornaments using double sided foam adhesive to give them a little dimension. I then finished it off by adding the sentiment to the bottom right hand corner.

Thanks so much for stopping by today and I hope you enjoyed learning how I created this slimline card using the Retro Ornaments Stamp Set

---------------------------------------------

Hello everyone! Isha here with a playful Christmas card featuring the Retro Ornaments Stamp and dies.

Sunny Studio Stamps: Retro Ornaments Christmas Card by Isha Gupta

I started by stamping the ornaments from the Retro Ornaments stamp set. I inked the stamp using the lighter ink first, then I added a bit of darker ink towards the bottom and stamped it again to get slight depth. Die-cut the image using the coordinating dies. Stamp the metal part of the ornaments using embossing ink, sprinkle with WOW! metallic silver embossing powder and heat set.

Take a watercolor panel. Add a wash of twisted citron and peacock feathers distress inks. Let dry. Stamp and emboss the sentiment. Place the ornaments to see the placements and then die-cut this panel using the dies. I overlapped the ornaments on the right, so die-cut it accordingly. Tie the twine to hang the ornaments.

Sunny Studio Stamps: Retro Ornaments Christmas Card by Isha Gupta

Cut a striped black paper from the Sleek Stripes paper pad. Adhere to the card base on the left side. Adhere the panel using 3d foam. Adhere the ornaments to the card using liquid glue. To finish, I added some snowflakes from the Colorful Snowflake sequin mix.

Hope you enjoyed this creation. Thank you for dropping by!

Sunny Studio Supplies Used:

Christmas Garland Frame
Shop at:
Sunny Studio
Slimline Scalloped Frame
Shop at:
Sunny Studio
Retro Ornaments Stamps
Shop at:
Sunny Studio
Retro Ornaments Dies
Shop at:
Sunny Studio
Sleek Stripes Paper
Sleek Stripes Paper
Shop at:
Sunny Studio

Monday, December 7, 2020

Victorian Christmas Cards by Ashley and Mayra

Hi friends! It's Ashley with a nighttime Christmas scene featuring the Victorian Christmas mini set. This card has a special surprise too - press the snowflake, and the moon lights up to illuminate Santa and his reindeer!

Sunny Studio Stamps: Victorian Christmas Here Comes Santa Winter Scenes Winter Holiday Card by Ashley Ebben

I started by blending a night sky background with Distress Oxides in Wilted Violet, Blueprint Sketch, Chipped Sapphire, and Black Soot. I splattered the piece with white acrylic paint for stars and zapped it with a heat gun to set. I used the small circle tag die in Sliding Window dies to cut out the moon, then backed it with vellum. I stamped the Santa and reindeer from Here Comes Santa across the sky and moon with Versafine Onyx Black ink and embossed with clear embossing powder to prevent smearing on the vellum.

I stamped the house from Victorian Christmas and one of the background scenes from Winter Scenes on white cardstock in Lawn Fawn Jet Black ink and colored with Copics. I also blended a bit of Pinkfresh Studio Ocean Breeze ink to the snow on the bottom of the scene to save some time. I cut them out with the matching dies and adhered them to the card. I stamped a sentiment from Inside Greetings Holiday in Versafine Onyx Black and embossed with clear. I also stamped a snowflake from Winter Scenes in VersaMark and embossed with white to mark where to press for the lights.

Sunny Studio Stamps: Victorian Christmas Here Comes Santa Winter Scenes Winter Holiday Card by Ashley Ebben

On a white card base, I created my light up mechanism using Chibitronics lights and a Pear Blossom Press Power Pack. I placed the lights just outside the edge of the moon to soften the effect a bit. Once I had my circuit set up correctly and the lights were working, I added a border of thick foam tape around the card base. All that was left was to add my card front on top! Before sending this card, I will put a note inside to tell the recipient to press the snowflake for a surprise! 

Thank you so much for stopping by! Have a wonderful day!

---------------------------------------------------

Happy Monday everyone, Mayra here with you today. I have a CAS Christmas card that I am sharing with you. I used the lovely Victorian Christmas stamp set. 

Sunny Studio Stamps: Victorian Christmas Frilly Frame Die Winter Holiday Card by Mayra Duran-Hernandez

I began by coloring my images using Copic markers. For the dark gray areas, I used W3, W5, and W7. For the red areas, I used R05, R17, and R46. And for the greens, I used YG17. I added a bit of E40, E41, C1, and W3 to the areas that are off white. 

Sunny Studio Stamps: Victorian Christmas Frilly Frame Die Winter Holiday Card by Mayra Duran-Hernandez

I then die cut the panels for my card base. The scalloped rectangle is from the Frilly Frames Eyelet die set. This was such a fun and quick card to put together. I hope you enjoy this inspiration. 

Thank you very much for taking the time to stop by. I pray you each have a wonderful and blessed day. 

Sunny Studio Supplies Used:

Sliding Window Dies
Sliding Window Dies
Shop at:
Sunny Studio
Here Comes Santa Stamps
Shop at:
Sunny Studio
Frilly Frames-Eyelet Lace
Shop at:
Sunny Studio
Inside Greetings-Holidays
Shop at:
Sunny Studio
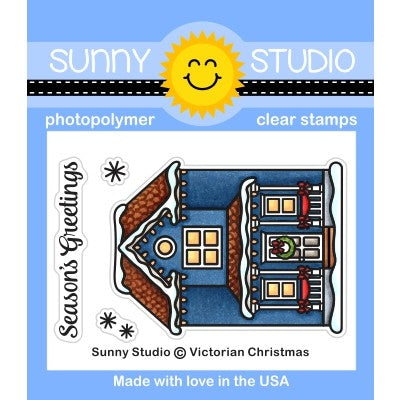
Victorian Christmas Stamps
Shop at:
Sunny Studio
Victorian Christmas Dies
Shop at:
Sunny Studio
Winter Scenes Stamps
Shop at:
Sunny Studio
Winter Scenes Dies
Winter Scenes Dies
Shop at:
Sunny Studio