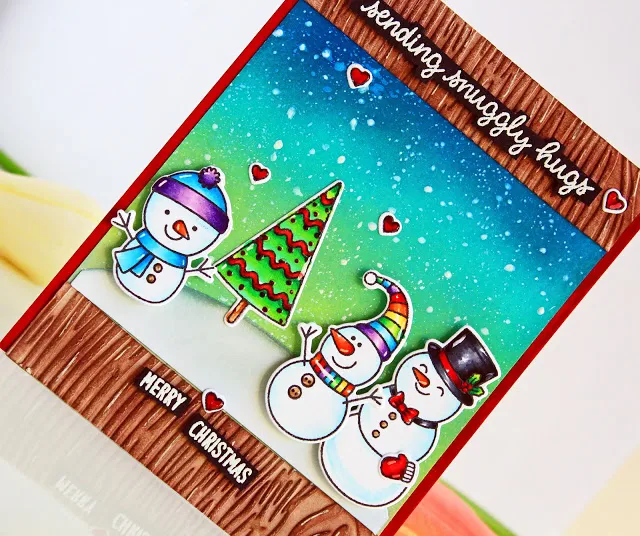
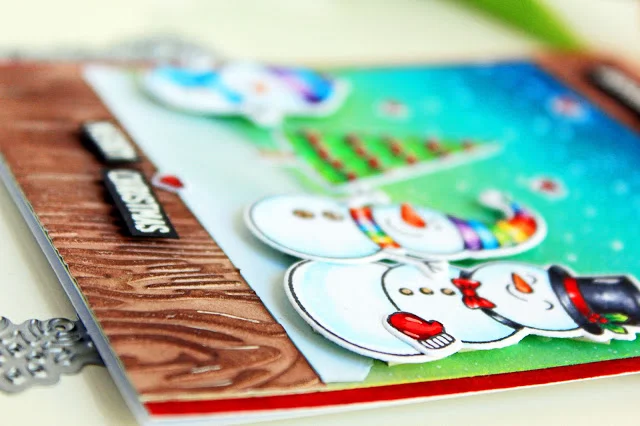
The background is ink blended using distress oxide inks (Mermaid Lagoon, Peacock Feather, and Twisted Citron), then I splattered some water and dried it out using a towel. Once the background was dry I splattered some white acrylic paint and left it to dry. Then I took another piece of white cardstock and embossed it with Woodgrain embossing folder and applied some Rich Cocoa Memento Ink for that wood look. I colored the sides of the white card base with a red marker before adhering anything down.
First I adhered the colored panel, then I adhered the woodgrain embossed
piece on top and bottom to frame the scene. I wanted a snow ground for my
snowmen so took another piece of white cardstock and die-cut it out using an
oval die to get that curvy snow mountain, adhered that flat and the used some
foam squares to adhere my little snowmen.
The sentiment is heat embossed using WOW white embossing powder on black
cardstock and cut out with scissor and adhered that to the card using foam
squares. Lastly I added few hearts and then added white highlights using white
signo gel pen and also added little Nuvo clear glaze to the buttons.
My second card is little more simple. This beautiful Layered Snowflake frame die alone
is enough to perk up your winter cards. For this card I used
rest of the snowmen in the set, stamped them using Memento black ink and
colored with Copics and used their coordinating dies to
cut them out.
I took a white cardstock and used oxide inks (Antique Linen, Salty Ocean, Blueprint Sketch and Black Soot) to create my snowy sky background, splattered little water and dried out using towel. Once everything dried I stamped some snowflakes with a white pigment ink and then splattered white acrylic paint for the snow.
I took a white cardstock and used oxide inks (Antique Linen, Salty Ocean, Blueprint Sketch and Black Soot) to create my snowy sky background, splattered little water and dried out using towel. Once everything dried I stamped some snowflakes with a white pigment ink and then splattered white acrylic paint for the snow.
I die-cut out snowflake frame (I used the larger frame) out of white
cardstock and also I die-cut out few snowflakes and the word winter out of white
cardstock, then ink blended the word winter using the same oxide inks. I
adhered the colored panel flat on an A2 white card base and also gave a snow
ground for the snowmen to stand on. Then I adhered the snowflake frame and the
snowmen, I used foam squares for the snowmen.
I adhered the snowflakes directly to the card base before adhering the
sentiment and the word winter is adhered flat on top of the
snowflakes. The sentiment is white heat embossed on black cardstock and
cut out with scissor and adhered using foam squares. I added few hearts
and lots of white details using my white Signo gel pen.
Hope you got inspired to use this cute set and the amazing dies!! Thanks for stopping by and have a great day. Hugs!
Hope you got inspired to use this cute set and the amazing dies!! Thanks for stopping by and have a great day. Hugs!
Sunny Studio Supplies Used:
 Woodgrain Embossing Shop at: Sunny Studio |
 Feeling Frosty Stamps Shop at: Sunny Studio |
 Feeling Frosty Dies Shop at: Sunny Studio |
 Layered Snowflake Frame Shop at: Sunny Studio |


