Tuesday, June 4, 2019

Silly Sloths Cards with Juliana and Angelica

Hello friends! It's Juliana with you to share a fun interactive card I created using the Silly Sloths Stamps and Sliding Window Die! Interactive cards are always so much fun and the addition of the adorable Silly Sloth Stamps makes this card even more entertaining!

Sunny Studio Stamps: Silly Sloths Sliding Window Dies Staggered Circle Dies Punny Cards by Juliana Michaels and Angelica Conrad

To begin, I began by stamping and coloring a bunch of the images from the Silly Sloth Stamps using Copic Markers. I then die cut them using the Silly Sloth Dies. Next, I took a practice Sliding Window I have assembled from cardstock and laid out the images to create my scene. I have found having this already assembled Sliding Window very helpful. I can use it to help me lay out my stamped and die cut images and get an idea of what papers I might want to use before I cut into them.

Sunny Studio Stamps: Silly Sloths Sliding Window Dies Staggered Circle Dies Punny Cards by Juliana Michaels and Angelica Conrad

Once I had an idea of how I wanted to position the images, I picked out some patterned papers. I began by following the instructions (you can find printable instructions here) on how to cut the Sliding Window and used the striped paper from the Rainbow Bright 6x6 Paper. As you might notice from the images, I didn't follow the instructions super well as I accidentally cut the opening on the wrong end of the paper. Since I didn't have another piece of this paper and I was set on using this one, I decided to just go with it and cut another opening at the top where it should be. I then backed the bottom opening with a piece of polka dot paper from the Rainbow Bright 6x6 Paper.

Sunny Studio Stamps: Silly Sloths Sliding Window Dies Staggered Circle Dies Punny Cards by Juliana Michaels and Angelica Conrad

For the front of the sliding window, I decided to go with a solid piece to keep my scene together. I cut a piece of green foliage paper from the Summer Splash 6x6 Paper to the size of that opening and adhered only the bottom part to the bottom layer. I then set about adhering the Silly Sloth images to create the scene.

Sunny Studio Stamps: Silly Sloths Sliding Window Dies Staggered Circle Dies Punny Cards by Juliana Michaels and Angelica Conrad

On the inside of the card, I stamped the sentiment using the Silly Sloth Stamps and then added some extra images to keep the fun going on the inside! I will recommend stamping your sentiment.

Sunny Studio Stamps: Silly Sloths Sliding Window Dies Staggered Circle Dies Punny Cards by Juliana Michaels and Angelica Conrad

One last thing to share is the pull tab. If you go back and look at the main photo, you will see a little sloth at the top! I adhered him to the open area so you can use him to pull on and slide the card open!

I hope you enjoyed this Silly Sloth Sliding Window card I created and shared with you today! Thanks so much for stopping by!!

---------------------------------------------------

Hi friends, Angelica here with a card featuring the Silly Sloths stamp set. These sloths are super easy to color, and come with a great selection of accessory stamps in the set.

Sunny Studio Stamps: Silly Sloths Sliding Window Dies Staggered Circle Dies Punny Cards by Juliana Michaels and Angelica Conrad

I picked a handful of Copic Markers to color the images. After coloring, I used a gel pen to add highlights. I die cut them with the coordinating dies.

Sunny Studio Stamps: Silly Sloths Sliding Window Dies Staggered Circle Dies Punny Cards by Juliana Michaels and Angelica Conrad

I used pattern paper from Summer Splash Paper Pack for my card front. I trimmed the blue clouds and green leaves papers to 4.25" x 5.5". I die-cut circle windows from the cloud paper with the Staggered Circles Dies, added foam adhesive to the back, and attached it to the green paper. I used foam adhesive to attach the sloths in the windows. 

Sunny Studio Stamps: Silly Sloths Sliding Window Dies Staggered Circle Dies Punny Cards by Juliana Michaels and Angelica Conrad

I added a stamped sentiment I trimmed down to a strip with thin foam squares. My last step was attaching the card front to an A2 size card base with double-sided adhesive.

I hope I have given you ideas for this adorable stamp set. That's all I have for today. See you next week!

Sunny Studio Supplies Used:
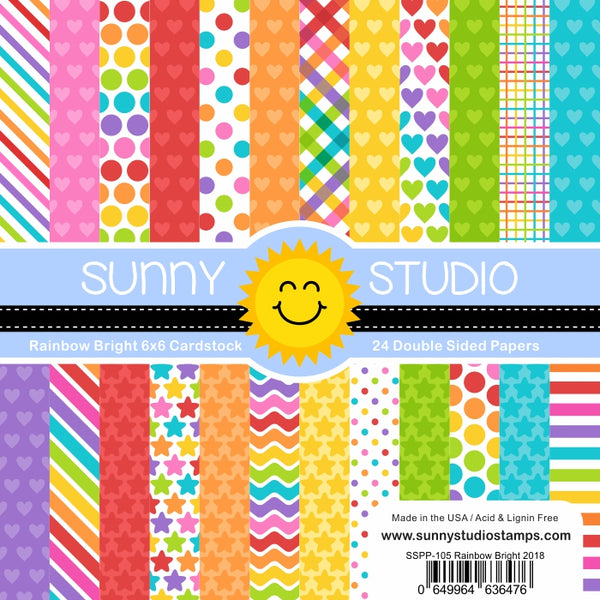
Rainbow Bright 6x6 Paper
Shop at:
Sunny Studio
Sliding Window Dies
Sliding Window Dies
Shop at:
Sunny Studio
Staggered Circles Die
Shop at:
Sunny Studio
Silly Sloths Stamps
Silly Sloths Stamps
Shop at:
Sunny Studio
Silly Sloths Dies
Silly Sloths Dies
Shop at:
Sunny Studio
Summer Splash 6x6 Paper
Shop at:
Sunny Studio

Monday, June 3, 2019

Sweater Vest Cards with Eloise and Leanne

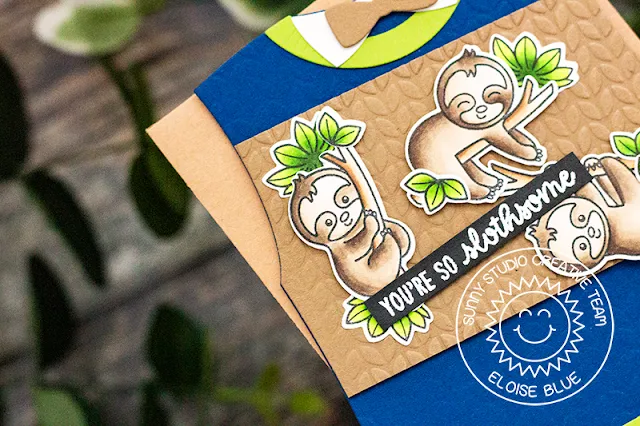
Hello friends, Eloise here and today I have a Father’s Day Card using the Sweater Vest Dies along with the Silly Sloths Stamp Set.

Sunny Studio Stamps: Sweater Vest Dies Silly Sloths Loopy Letters Dies Team Player Happy Thoughts Shaped Cards by Eloise Blue and Leanne West

I started off with die cutting the Sweater Vest Die from some navy cardstock and a few of the accent dies from green, white and brown cardstock. I also die cut an additional panel from brown cardstock as well. I ran through the brown and navy pieces with the Cable Knit Embossing Folder to give it some texture as well. I cut down the brown panel, added some foam tape and adhered it on the top of the navy piece. I also added liquid glue to the accent pieces and adhered them into place as well.

Sunny Studio Stamps: Sweater Vest Dies Silly Sloths Loopy Letters Dies Team Player Happy Thoughts Shaped Cards by Eloise Blue and Leanne West

I then stamped the sloths from the Silly Sloths Stamp Set and coloured them in with Copic Markers. I then cut them out. I added foam tape to the sloths and liquid adhesive to the leaves and adhered them into place on the brown panel.

Sunny Studio Stamps: Sweater Vest Dies Silly Sloths Loopy Letters Dies Team Player Happy Thoughts Shaped Cards by Eloise Blue and Leanne West

Lastly, I white heat embossed the ‘You’re So Slothsome’ sentiment onto a black strip of cardstock and adhered it down in the middle of the scene.

Thanks so much for stopping by today and I’ll see you next time.

------------------------------------------------------

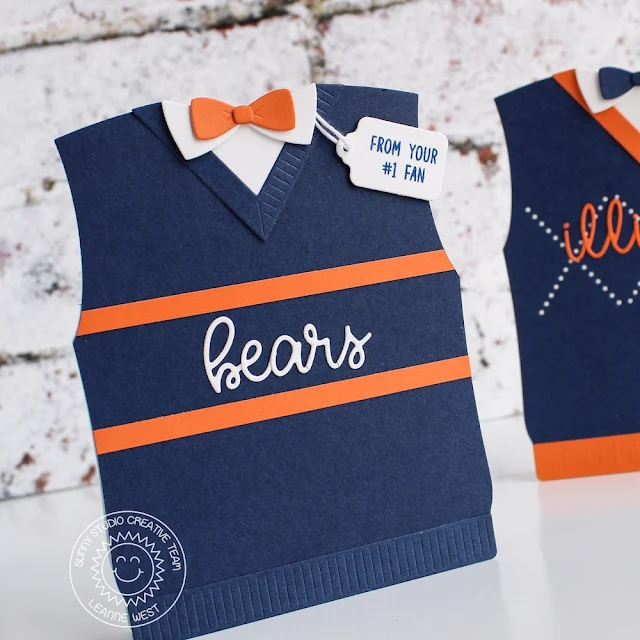
Hi everyone! Leanne here to share an idea I had for customizing some Sweater Vest cards. Tis the season for grads and dads which led me to this idea. For today’s cards, I’ve customized them with the school colors from my college alma mater and my husband’s favorite pro football team.  

Sunny Studio Stamps: Sweater Vest Dies Silly Sloths Loopy Letters Dies Team Player Happy Thoughts Shaped Cards by Eloise Blue and Leanne West

I think these custom Sweater Vest cards could be used for more than just graduation and Father’s Day. They would be great as a birthday card too!  And the best part is that they are so quick and easy to make. Just pick out card stock colors in the recipient’s high school, college, or favorite pro sports team colors. 

Sunny Studio Stamps: Sweater Vest Dies Silly Sloths Loopy Letters Dies Team Player Happy Thoughts Shaped Cards by Eloise Blue and Leanne West

I used the Loopy Letter dies to create the names. One tip I have for getting them nice and straight is glue the letters together on a cutting mat with grid lines. That way you can use the grid lines to line up the letters up as you glue and it’s much easier to add the complete name onto the sweater vest. 

I wanted to add something that would resemble a little price tag to the outside of these cards so I used a tiny die cut tag and stamped a sentiment. The sentiments I used are from the Team Player stamp set

Sunny Studio Stamps: Sweater Vest Dies Silly Sloths Loopy Letters Dies Team Player Happy Thoughts Shaped Cards by Eloise Blue and Leanne West

On the inside of the Bears sweater vest card, I stamped "Happy Father's Day" using the Happy Thoughts stamp set and added a football image which is also from the Team Player stamp setYou could even take it a step further and add a mascot image to either the outside or inside of these cards if you have a stamp that fits the bill. Really the sky’s the limit with customizing these sweater vest cards. Just have fun with it!

Sunny Studio Supplies Used:

Team Player Stamps
Team Player Stamps
Shop at:
Sunny Studio
Team Player Dies
Team Player Dies
Shop at:
Sunny Studio
Happy Thoughts Stamps
Shop at:
Sunny Studio
Cable Knit Embossing
Shop at:
Sunny Studio
Loopy Letters Dies
Loopy Letters Dies
Shop at:
Sunny Studio
Sweater Vest Dies
Sweater Vest Dies
Shop at:
Sunny Studio
Silly Sloths Stamps
Silly Sloths Stamps
Shop at:
Sunny Studio
Silly Sloths Dies
Silly Sloths Dies
Shop at:
Sunny Studio

Saturday, June 1, 2019

Guest Designer Spotlight: Cards with Karin Ã…kesdotter

Hi Everyone! This is Karin Ã…kesdotter from Peppermint Patty’s Papercraft and I am so excited to be guest designing for Sunny Studio this month too. I have absolutely LOVED to play with the stamps, papers and dies from and am with Sunny’s wonderful Summer Release. Thank You Mendi for making such amazing products!

Sunny Studio Stamps: Silly Sloths Fabulous Flamingos Frilly Frames Dies Birthday Card Summer Card by Karin Ã…kesdotter

The sloths Silly Sloths are just so super adorable I wanted to make a design where I could share as many of them as possible :) They are so sweet on their own so I just wanted some leaves in the background. Here I stamped the leaves on green cardstock before coloring which I think turned out beautiful for this design. The panel is from the lovely Frilly Frames Stripes dies.

Sunny Studio Stamps: Silly Sloths Fabulous Flamingos Frilly Frames Dies Birthday Card Summer Card by Karin Ã…kesdotter

For my second card - the Fabulous Flamingos card - I die cut the Frilly Frames Stripes panel and adhered it to acetate with my xyron tape runner  before making my little flamingo scene on the stitched rectangle die from Wrap Around Box die setI inked the background to create some ocean waves (tip- the new waves dies can be perfect for creating your own wave stencil) and then added some kraft cardstock for the sand. 

Sunny Studio Stamps: Silly Sloths Fabulous Flamingos Frilly Frames Dies Birthday Card Summer Card by Karin Ã…kesdotter

Last but not least I wanted a fast and easy card design where the cute flamingo is the center of attention. I think this design would be perfect for making a card set with different colored inked backgrounds and then a new flamingo and new sentiment for each panel. A great gift for some of your non card-making friends!

Sunny Studio Supplies Used:

Frilly Frames Stripes Die
Shop at:
Sunny Studio
Wrap Around Box Die
Wrap Around Box Die
Shop at:
Sunny Studio
Fabulous Flamingos Stamps
Shop at:
Sunny Studio
Fabulous Flamingos Dies
Shop at:
Sunny Studio
Silly Sloths Stamps
Silly Sloths Stamps
Shop at:
Sunny Studio
Silly Sloths Dies
Silly Sloths Dies
Shop at:
Sunny Studio

Friday, May 31, 2019

Wrap Around Box Dies Projects with Rachel and Lexa

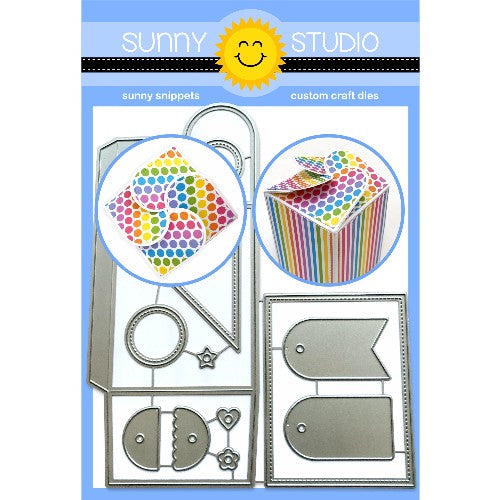
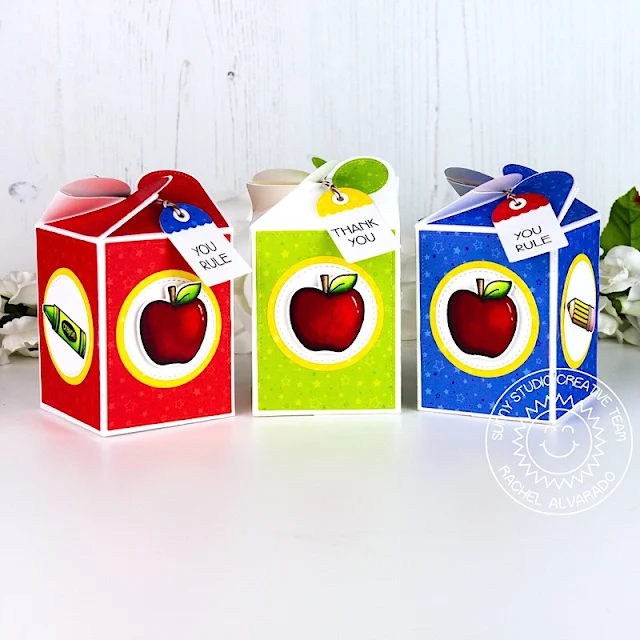
Hello everyone! It's Rachel here today and I have a few fun Wrap Around Boxes to share with you! I just love these fun treat boxes and how easy it is to customize them for whatever occasion you desire. They're actually quite large when put together and make the perfect size for party favors and/or decorations.

Sunny Studio Stamps: Wrap Around Box Hawaiian Hibiscus School Time Treat Boxes by Rachel Alvarado and Lexa Levana

Since it's the end of the school year here in the US, I went with school-themed boxes that would be perfect to give to either the teacher as a cute handmade thank you gift or to children who are finishing another year in school.

Sunny Studio Stamps: Wrap Around Box Hawaiian Hibiscus School Time Treat Boxes by Rachel Alvarado and Lexa Levana

I used some white card stock with the Wrap Around Box Dies for the bases and decorated the panels with some gorgeous patterned paper from the new Surprise Party Paper Pack

Sunny Studio Stamps: Wrap Around Box Hawaiian Hibiscus School Time Treat Boxes by Rachel Alvarado and Lexa Levana

I then used images from the School Time Stamps Set to decorate the sides. I stamped all of my images with Memento Tuxedo Black Ink onto a sheet of Neenah Solar White 110 lb Card Stock and colored them with Copic Sketch Markers. I used the coordinating School Time Dies to cut them out.

Sunny Studio Stamps: Wrap Around Box Hawaiian Hibiscus School Time Treat Boxes by Rachel Alvarado and Lexa Levana

Aren't these boxes gorgeous? I love the petal closure on the top of the box. It really makes these treat boxes look so stylish and helps them be very easy to open and close.

Sunny Studio Stamps: Wrap Around Box Hawaiian Hibiscus School Time Treat Boxes by Rachel Alvarado and Lexa Levana

If you haven't given these boxes a try yet and are looking to make some fun homemade gifts, party favors and/or decorations, then I highly recommend these! I hope you all have a lovely weekend!

--------------------------------------------------------

Hi everyone! Lexa here today with a project using Wrap Around Gift Box Dies along with other products of Sunny Studio Stamps.

Sunny Studio Stamps: Wrap Around Box Hawaiian Hibiscus School Time Treat Boxes by Rachel Alvarado and Lexa Levana

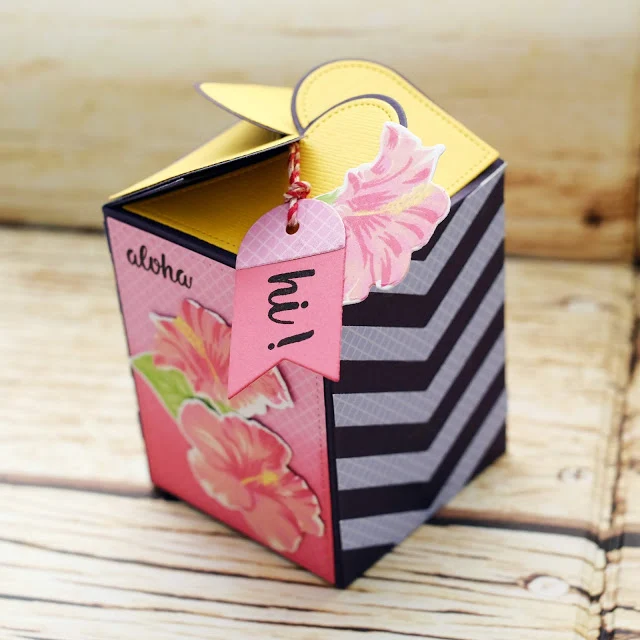
I use deep purple cardstock for the base of my box then add some decoration around it. On two sides, I add chevron pattern using Frilly Frames Chevron Dies with purple patterned paper from Gingham Pastel Paper. On two other sides, I use pink gingham patterned paper from the same pad. I blend Worn Lipstick Distress Inks on them. 

Sunny Studio Stamps: Wrap Around Box Hawaiian Hibiscus School Time Treat Boxes by Rachel Alvarado and Lexa Levana

Then I stamp some pretty pink hibiscus from Hawaiian Hibiscus Stamps. After finished with the stamping I use the coordinating dies to cut them all. Then arrange them to my box. Look how pretty they are! I just adore the layering stamps from Sunny Studio, I personally think they are all so gorgeous. There's also a little tag with a little saying on it and I won't miss the hibiscus for it.

Sunny Studio Stamps: Wrap Around Box Hawaiian Hibiscus School Time Treat Boxes by Rachel Alvarado and Lexa Levana


That's all for today. I hope you like it as much as I do. Thank you so much for stopping by today. Have a wonderful day to you and yours!

Sunny Studio Supplies Used:

School Time Dies
School Time Dies
Shop at:
Sunny Studio
School Time Stamps
School Time Stamps
Shop at:
Sunny Studio
Gingham Pastels 6x6 Paper
Shop at:
Sunny Studio
Frilly Frames Chevron Die
Shop at:
Sunny Studio
Wrap Around Box Die
Wrap Around Box Die
Shop at:
Sunny Studio
Hawaiian Hibiscus Stamps
Shop at:
Sunny Studio
Hawaiian Hibiscus  Dies
Hawaiian Hibiscus Dies
Shop at:
Sunny Studio
Surprise Party 6x6 Paper
Shop at:
Sunny Studio