Wednesday, January 9, 2019

Make A Wish Cards with Mona & Franci

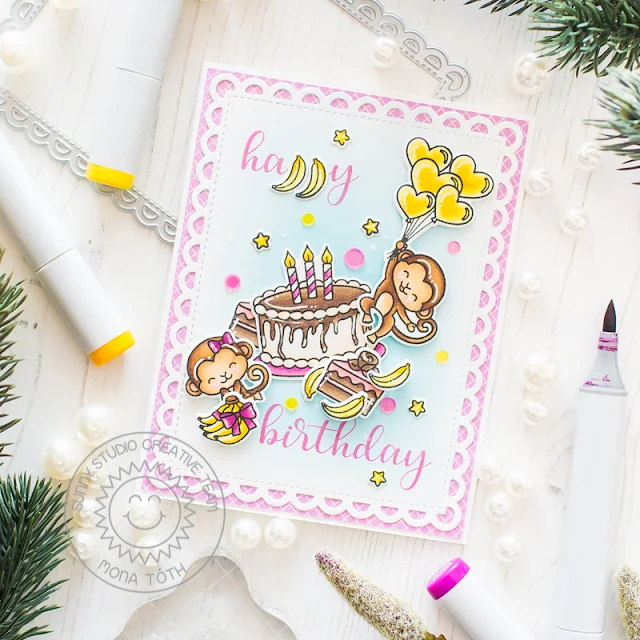
Hi crafty friends! It's Mona here and I am super excited for joining the Sunny Studio Team! For my first post I made a birthday card with the sweet Make a Wish stamp set which is really versatile! I used this set with the super cute Love Monkey stamp set and I am in love how it turned out to be a sweet birthday card. 

Sunny Studio Stamps: Make A Wish Love Monkey Frilly Frames Birthday Card by Mona Toth

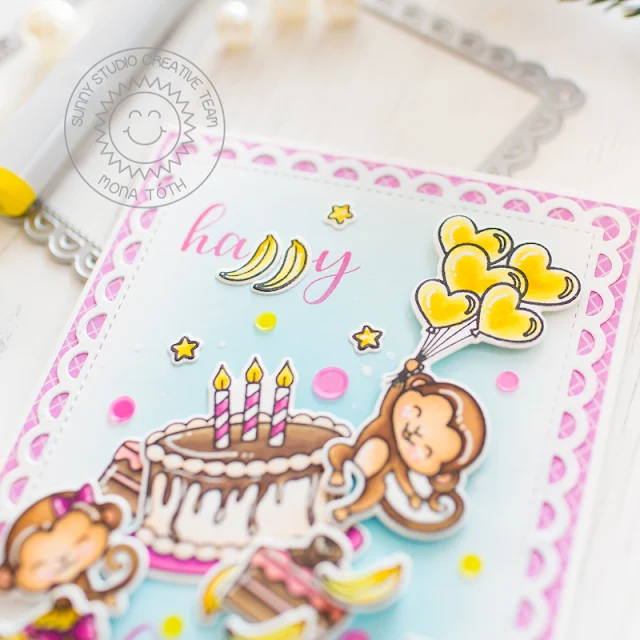
I started the card making with stamping and coloring. I stamped the images from the Make a Wish and Love Monkey stamp sets then I colored them with Copic Markers. After the coloring I used the coordinating dies to cut the images and added highlights with Signo Uniball white pen.

(Copic Markers used: Y11, Y13, Y19, E0000, E51, E53, E55, E57, E43, E44, E47, R20, EV55, RV66)

Sunny Studio Stamps: Make A Wish Love Monkey Frilly Frames Birthday Card by Mona Toth

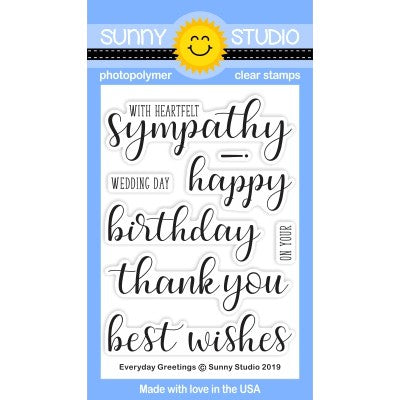
For the background I run the Frilly Frames Lattice dies with Neenah Solar White Cardstock then I made ink blending on it with Tumbled Glass Distress Oxide Ink. Then I stamped the "happy birthday" sentiments from the Everyday Greetings stamp set with Picked Raspberry Distress Oxide Inks. 

Sunny Studio Stamps: Make A Wish Love Monkey Frilly Frames Birthday Card by Mona Toth

I added a beautiful pink cardstock from Gingham Pastels 6x6 paper pad behind the background die-cut. In the end I styled my card and adhered everything together.

Sunny Studio Stamps: Make A Wish Love Monkey Frilly Frames Birthday Card by Mona Toth

Thank you very much for reading through my post, I hope that you have enjoyed it and I have inspired you! If you like my creations follow me on InstagramHave an amazing day, see you soon!

----------------------------------------------------------------

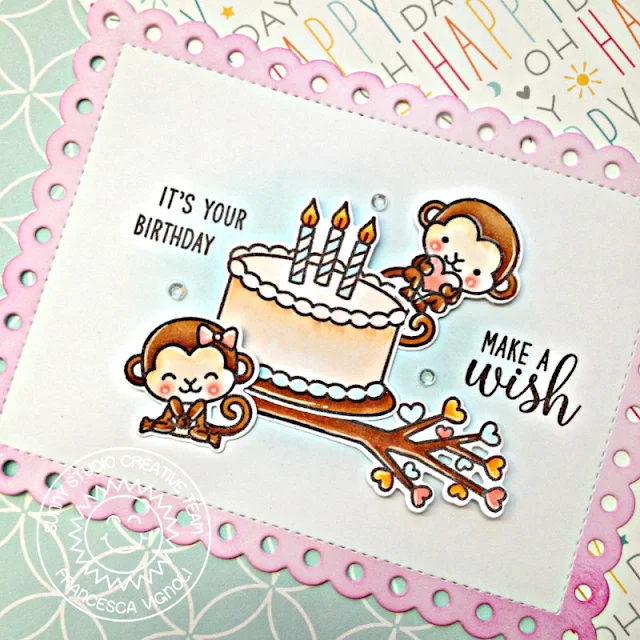
Hello there and happy Wednesday! Franci here with you today with a "Happy Birthday" themed card. I'm in love with all the new pieces from the latest release and I decided to combine a couple here to create this design.

Sunny Studio Stamps: Make A Wish Love Monkey Frilly Frames Birthday Card by Franci Vignoli

First, I die cut the card panel with the Frilly Frames Polka-Dot die. I then masked the center and inked up the "lacy" edges with a light pink ink. I also inked the center with a light blue ink to create a soft background.

I stamped all the images in a brown Copic friendly ink, colored them with Copics and die cut them with their coordinating dies. I had so much fun combining the Make a Wish set and the Love Monkey one, they're so cute together!

Sunny Studio Stamps: Make A Wish Love Monkey Frilly Frames Birthday Card by Franci Vignoli

Finally I glued down all the images with a combo of liquid glue and foam tape, stamped my sentiments with the same brown ink used before so everything nicely coordinate and added some sparkling clear sequins.

Sunny Studio Supplies Used:


Gingham Pastels 6x6 Paper
Shop at:
Sunny Studio
Love Monkey Stamps
Love Monkey Stamps
Shop at:
Sunny Studio
Love Monkey Dies
Love Monkey Dies
Shop at:
Sunny Studio
Make A Wish Stamps
Make A Wish Stamps
Shop at:
Sunny Studio
Make A Wish Dies
Make A Wish Dies
Shop at:
Sunny Studio
Frilly Frames Lattice Dies
Shop at:
Sunny Studio
Frilly Frames Polka-Dot
Shop at:
Sunny Studio
Everyday Greetings Stamps
Shop at:
Sunny Studio

Tuesday, January 8, 2019

Botanical Backdrop Cards with Angelica & Juliana

Hello friends, Angelica here with my first blog as a Sunny Studio Stamps Design Team member! I’m so excited and honored to be here, and can’t wait for you all to see the amazing creations the design team has made with this gorgeous release!

Sunny Studio Stamps: Botanical Backdrop Hello Word Die Hello Card by Angelica Conrad

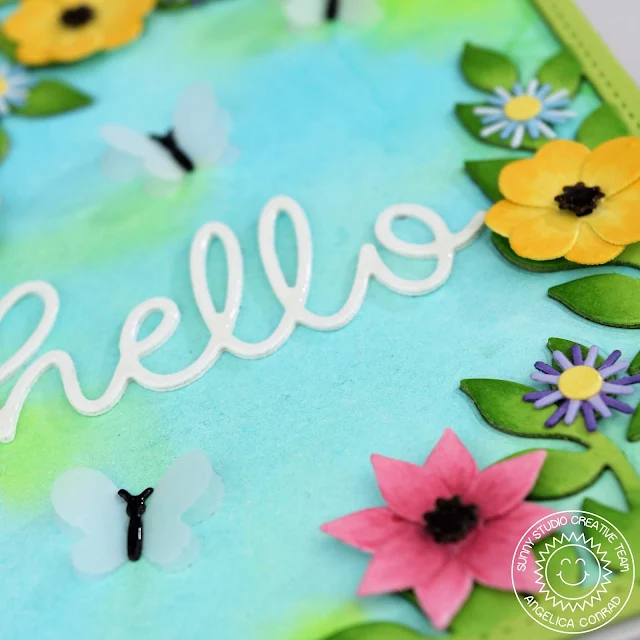
Today's card is all about die-cutting, starting with the amazing Botanical Backdrop die. I die cut the backdrop twice out of green card stock, then glued and stacked them together. I masked off the edges with purple tape, and used Copic markers to add shading to the leaves. 

Sunny Studio Stamps: Botanical Backdrop Hello Word Die Hello Card by Angelica Conrad

Next I went through my scraps of card stock (this die set is a perfect way to use your scraps!) and pulled out several different pastel colors. I die cut 3 different styles of small flowers, and again used Copic markers to add shade to the petals. I glued the flowers together, and started work on a background. 

I used Atlantis Burst, Blue Blitz, and Solar Flare Tonic Shimmer Powders on watercolor paper, blending the powders together with water. Once I was happy with the blend, I used my heat tool to dry the paper. I glued the frame onto the background paper, then attached it to an A2 size card base with double-sided adhesive. I glued the flowers onto the petals, then assembled the word Hello and the butterflies.

Sunny Studio Stamps: Botanical Backdrop Hello Word Die Hello Card by Angelica Conrad

I die-cut each butterfly (it was a website exclusive freebie) twice out of vellum and used a small dot of glue to adhere them together. I die-cut the butterflies again with black card stock, and glued the black bodies onto the vellum. My last die cut was the with the Hello Word die. I die-cut the words three times out of white card stock, stacked and glued them together, then glued the word to the card. 

I arranged the butterflies around the word, then glued the bottom layer of vellum to the card. My final touch was brushing the butterfly bodies, flower middles, and Hello word with a Nuvo shimmer pen, then adding Nuvo Crystal Glaze for shine. 

That's all I have for today. Thanks so much for joining me, and I will see you again next week!

----------------------------------------------------------------

Hello Sunny Studio Friends! It's Juliana here with you today to share two ways to use the Botanical Backdrop die to create two quick, but elegant cards. One card uses the actual die cut itself and the other uses the negative pieces that we often just throw away.

Sunny Studio Stamps: Botanical Backdrop Everyday Greetings Sympathy And Wedding Cards by Juliana Michaels

For the first card, begin by die cutting a piece of sage green cardstock using the Botanical Backdrop die. Make sure to save the negative pieces. You're going to use them to create your second card. While you have the Botanical Backdrop die out, die cut a piece of kraft cardstock too and set all of these pieces to the side.
Sunny Studio Stamps: Botanical Backdrop Everyday Greetings Sympathy And Wedding Cards by Juliana Michaels

To create the card base for the first card, cut a piece of cream or off white cardstock to 4 1/8 x 5 3/8 inches. Layer this on top of a piece of gold foil cardstock that measure 4.25 x 5.5 inches.
Sunny Studio Stamps: Botanical Backdrop Everyday Greetings Sympathy And Wedding Cards by Juliana Michaels

Next, position the Botanical Backdrop that you die cut from sage cardstock on top of the cream cardstock. Take the negative pieces and use a liquid adhesive to adhere only the negative pieces to the cream cardstock.
Lift up the main die cut and set it to the side to use on your next card. To complete this card, stamp a sentiment from the Everyday Greetings stamp set using a slightly darker ink than your cardstock. This will allow the sentiment to stand out, but still achieve an elegant design.
Sunny Studio Stamps: Botanical Backdrop Everyday Greetings Sympathy And Wedding Cards by Juliana Michaels

For the second card, cut a piece of cream cardstock to 4.25 x 5.5 inches and adhere the kraft Botanical Backdrop on top of it. Repeat this with the sage die cut, but rotate the image to achieve an offset of the shape.
Sunny Studio Stamps: Botanical Backdrop Everyday Greetings Sympathy And Wedding Cards by Juliana Michaels

To complete this card, stamp a sentiment from the Everyday Greetings stamp set using Versamark embossing ink and emboss it with gold embossing powder. Don't you just love the touch of elegance the gold embossing adds?
Sunny Studio Stamps: Botanical Backdrop Everyday Greetings Sympathy And Wedding Cards by Juliana Michaels

Thanks so much for joining me today. I hope you enjoyed learning how to use the Botanical Backdrop die in two ways...using the actual die cut image itself and using the negative pieces. This is a great way to stretch your dies and make the most of your stash! This is always a win-win in my book!
Sunny Studio Supplies Used:

Hello Word Die
Hello Word Die
Shop at:
Sunny Studio
Botanical Backdrop Die
Shop at:
Sunny Studio
Everyday Greetings Stamps
Shop at:
Sunny Studio

Monday, January 7, 2019

Love Monkey Cards with Leanne & Eloise

Hi everyone! Leanne West here with you today and I’m so happy to be sharing my first post as a Sunny Studio design team member. I've made a Valentine’s card featuring the new and oh so cute Love Monkey stamp set. For those of you interested in the Copic colors used, I’ve listed them at the bottom of the post.

Sunny Studio Stamps: Love Monkey Stitched Hearts Valentines Day Card by Leanne West

I started with an A2 card base and very lightly sponged on some Festive Berries Distress Oxide Ink around the all the edges of the card front. I then inked up the center with Tumbled Glass Distress Oxide Ink. I trimmed a piece of white card stock to be slightly smaller than the card base. I used a die from the Stitched Hearts die set to create three heart shaped cut outs in a staggered vertical arrangement. 

Sunny Studio Stamps: Love Monkey Stitched Hearts Valentines Day Card by Leanne West

I stamped and Copic colored the images from Love Monkey and used the coordinating dies to cut them out. I adhered the vines on the back of the white panel centered within the heart cut outs. The tree branch is also tucked behind one of the cut outs.  After I had all the images in place, I stamped the sentiments. The “swinging by to say” is from Love Monkey. The “happy valentine’s day” is from Happy Thoughts. I then added the completed panel to the card front using foam tape so it's popped up slightly from the card base.  


Sunny Studio Stamps: Love Monkey Stitched Hearts Valentines Day Card by Leanne West

(Copic makers used: monkeys - E30, E31, E34, E37; brown on vines and tree branch - E43, E44; leaves - YG61, G46; hearts and bows - R22, R24; flowers and envelope - R00, R01)

Thank you for joining me today! I’ll be back next Monday with another card share using products from the new release. Have a wonderful week!

----------------------------------------------------------------

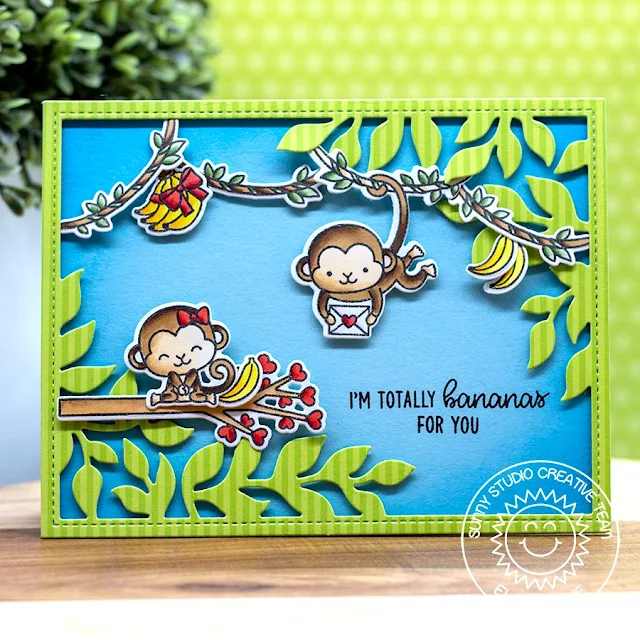
Hey everyone, it's Eloise here. I started off with stamping out all my images from the Love Monkey stamp set and coloured them in with Copic Markers. I then cut them out using the coordinating dies and added foam tape to the back of them. 

Sunny Studio Stamps: Love Monkey Botanical Backdrop Love Themed Card by Eloise Blue
I then die cut the Botanical Backdrop out of some Dots & Stripes Pastel paper. I added foam tape to the back of that as well. I adhered the frame to a blue card base that I has inked with a little Tumbled Glass Distress Ink.

(Copic Markers Used: E50, E51, E53, E55, E57 / Y13, Y18, YR23 / R000, R00, R20 / N2 / 0 / R14, R24, R29 / YG61, YG63, YG67)

Sunny Studio Stamps: Love Monkey Botanical Backdrop Love Themed Card by Eloise Blue

I then adhered my monkey images over top as well. For the sentiment I used "I'm totally bananas for you" and stamped that in a gap with black ink. 

Sunny Studio Supplies Used:

Stitched Heart Dies
Stitched Heart Dies
Shop at:
Sunny Studio
Happy Thoughts Stamps
Shop at:
Sunny Studio
Dots & Stripes Pastels 6x6 Paper
Shop at:
Sunny Studio
Love Monkey Stamps
Love Monkey Stamps
Shop at:
Sunny Studio
Love Monkey Dies
Love Monkey Dies
Shop at:
Sunny Studio
Botanical Backdrop Die
Shop at:
Sunny Studio

Sunday, January 6, 2019

Spring 2019 Release & Seasons of Giving Blog Hop Winners

Thank you to everyone who helped us celebrate the past week as we counted down to our new release for Spring!  Your excitement and sweet feedback always means so much!

The winners of our $25 gift code for sneak peek week are...

Monday- L Wright
Tuesday- Dena Byerley
Wednesday- Kristie Wilson
Thursday- Kristina Daniels
Friday- Jean Marmo

And the winner of the prize package for the Seasons Givings blog hop is:


Dina Roedel Kowal 

I hope your new year is off to a fabulous start so far!  I'm so excited for you to see what the new team is up to in the coming weeks.  The sharing all begins tomorrow... ;)


Saturday, January 5, 2019

Introducing our Newest Design Team Members

Sunny Studio Stamps: Introducing 2019 Creative Team with 5 New Team Members!

So happy to finally announce that our team is doubling in size this year, which means blog subscribers will have twice as many inspiring ideas to look forward to each day!

Here's where you can find the five fresh faces joining us plus the rest of our amazing team.  They have so much talent and I'm giddy to see what cool projects they have up their sleeves!


Angelica Conrad


Anja Bytyqi


Leanne West


Mona Toth


Rachel Alvarado


Eloise Blue

Vanessa Menhorn

Lexa Levana