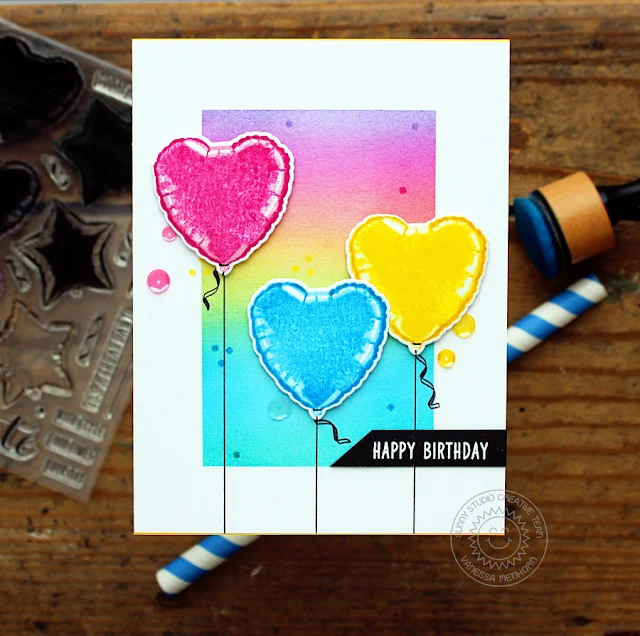
I masked
off a rectangle on the front of my card base and inked it with various inks to
create the rainbow. After I had removed the mask, I stamped the tiny dots with
matching inks. Now I stamped the balloons, die-cut them with the matching dies
and adhered them with foam tape. I drew the strings with a black marker and
stamped the bands.
Next, I stamped and
heat-embossed the sentiment from Polar
Playmates onto a strip of black cardstock, trimmed it and adhered it to the
card. Finally, I added matching sequins.
Fun and colorful, don't you
think? This stamp set makes it so easy to create! Have a wonderful day
everyone!!
Sunny Studio Supplies Used:
 Polar Playmates Stamps Shop at: Sunny Studio |
 Bold Balloons Stamps Shop at: Sunny Studio |
 Bold Balloons Dies Shop at: Sunny Studio |


Can you please post a video showing how to stamp the balloons? I bought this set and love it. But I can’t get the balloons to look decent. Please help
ReplyDeleteHi Sally! As a one person company, unfortunately I am swamped creating cards for the summer release, but I am attaching a link for the layering guide which you can print out. In the guide, I started with the darkest color, working to the lightest. The black outlines show where the stamp touches the previous layer. Hope it helps. :)
Deletehttps://www.dropbox.com/s/wlteooaw47y5idu/Bold%20Balloons%20Layering%20Guide-WEB.jpg?dl=0
I was going to ask the same question. These balloons are GREAT!!!!!!!
ReplyDeleteWish you were closer to me...I'd love to help you with your company.
I don't know how you do it all! Outstanding products, fast service & very fair prices & card ideas every day. I'm a big fan!
Thank you Karen. You're so sweet! I discovered there are several other creative people who have shared videos on YouTube with the set that you can see at this link here:
Deletehttps://www.youtube.com/results?search_query=sunny+studio+bold+balloons