Tuesday, December 12, 2017

Advent Calendar Extravaganza 2017 with Holiday Card by Nancy

Welcome!  Were so excited to be partipating in the Advent Calendar Extravaganza with Taheerah Atchia today!


Advent Calendar Extravaganza is the festive event of the season! This 'hop with a twist' was dreamed up by Taheerah Atchia and features surprise destinations each day! Joining in the fun with Taheerah are ONE HUNDRED special guests - each serving up some fantastic Christmas inspiration! Just like an Advent Calendar, you'll never know where you're going to be visiting next until you 'open the door'!

And that's not all! With 25 *amazing* sponsors taking part as guests as well, your crafty wish list is bound to get a boost with a chance to win a prize EVERY SINGLE DAY!!

Join in the fun every day at taheerah-atchia.com to see what special surprises await behind the door!

Sunny Studio Stamps: Holiday Style and Christmas Chapel Christmas Ornament Card by Nancy Damiano

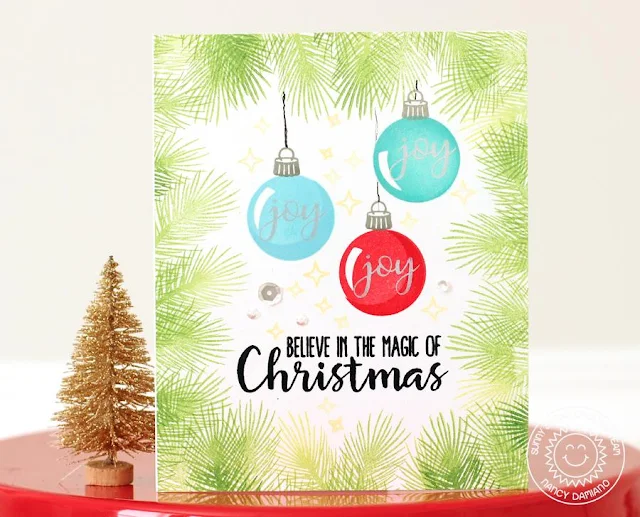
Hey everyone, Nancy here! To create this card use the Holiday Style stamp set to create the illusion of a wreath all around the edges of the background. Using 2-3 shades of green pigment ink gives a textured and dimensional effect to the stamping. Next, stamp three Christmas ornaments randomly in the center of the card using the layered stamps to create a bit of shading. Don't forget to stamp the hangers and draw in the hooks! Personalize the ornaments with a scrip sentiment in glittery silver ink. 

Sunny Studio Stamps: Holiday Style and Christmas Chapel Christmas Ornament Card by Nancy Damiano

To fill in some of the white space and tie all of the elements together, stamp the shining stars from the Christmas Chapel stamp set randomly in the center of the card in a nice, buttery yellow ink. Last, the bold sentiment from the Holiday Style stamp set gives a warm greeting, while a scattering of sequins gives us some shine!

It's not a party without a prize and with prizes every day there are several chances to win! We are the sponsor for today's post so simply leave a comment on this post, then head back to taheerah-atchia.com and leave a comment there too!  (you must leave a comment on Taheerah's blog as well as ours in order to be eligible to win) Don't forget to grab the other surprise destinations from Taheerah's blog and head over to them to leave comments there as well to improve your odds even more! You have until 23:59 EST on December 31, 2017 to enter.

The Advent Calendar Extravaganza runs from December 1st through the 25th so make sure you visit taheerah-atchia.com every day for fabulous inspiration and amazing prizes every day! Merry Christmas!

Sunny Studio Supplies Used:

Holiday Style Dies
Holiday Style Dies
Shop at:
Sunny Studio
Holiday Style Stamps
Shop at:
Sunny Studio
Christmas Home Stamps
Shop at:
Sunny Studio

Monday, December 11, 2017

Playful Polar Bears Snowy Background Christmas Card with Eloise

Hi everyone, Eloise here and today I'll be using the Playful Polar Bears stamp set to create a snowy Christmas scene card for you all.

Sunny Studio Stamps: Playful Polar Bears Snowy Background Christmas Card by Eloise Blue

To begin my card today, I stamped, colored, and die-cut my images from the Playful Polar Bears. I used Copic Markers to color my images in as that's my favorite way to color images. Next, I took some post- tape and free-hand cut a snowy hill and adhered it down to a piece of watercolor paper, I then ink blended some Tumbled Glass and Salty Ocean Distress Ink over top, fading out the edges to white. Then I splattered some white paint on the background and dried it off with a heat tool.

Sunny Studio Stamps: Playful Polar Bears Snowy Background Christmas Card by Eloise Blue

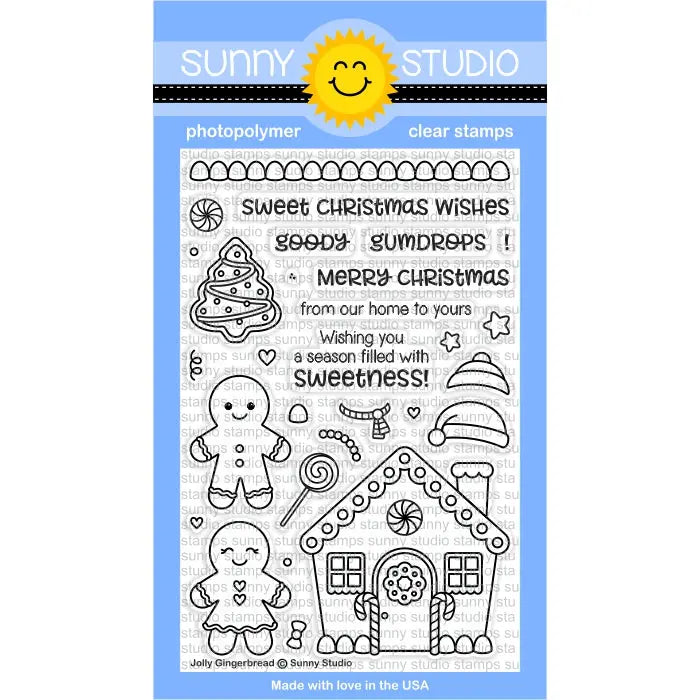
Next, I went and adhered my two Polar Bears and the sled next to each other onto my card with some foam tape. I then stamped the sentiment 'Wishing You Beary' in black ink from the Playful Polar Bears stamp set and then the 'Merry Christmas' from Jolly Gingerbread underneath my scene. To finish, I adhered my panel to a piece of Perfectly Plaid Chill Paper from Lawn Fawn and then onto a card base.

Thanks so much for stopping by today and I'll catch you next week! 

Sunny Studio Supplies Used:

Jolly Gingerbread Stamps
Shop at:
Sunny Studio
Playful Polar Bears Stamps
Shop at:
Sunny Studio
Playful Polar Bears Dies
Shop at:
Sunny Studio

Saturday, December 9, 2017

Guest Designer Spotlight: Cards with Karin Akesdotter

Hi everyone! It's Karin Akesdotter here. I'm so excited to be back guesting for Sunny Studio today. I had a chance to play with the Polar Playmates set, the Playful Polar Bears set, and the Petite Poinsettias set.

Sunny Studio Stamps: Polar Playmates Winter Love Themed Card by Karin Akesdotter

For my first card, I used the Polar Playmates stamp set. I started by making a card base and then die cut a panel from white cardstock. I stamped and masked the seal, and then stamped the hole in the ice. I then colored the seal using Copic markers and stamped my sentiment. I also die cut some hearts from red cardstock and adhered them around the image. I adhered the finished panel to my card base with foam adhesive.

Sunny Studio Stamps: Playful Polar Bears Winter Themed Birthday Card by Karin Akesdotter

For my second card, I used the Playful Polar Bears stamp set and coordinating dies. I created a snow scene layering white die cut hills on blue polka dot paper. I stamped, colored, and cut my images and then adhered to create my scene with foam adhesive.

Sunny Studio Stamps: Playful Polar Bears Christmas Card by Karin Akesdotter

This next card also features the Playful Polar Bears stamp set and coordinating diesI inked my white cardstock with Distress inks to create an ombre like sky background. Once it was completely dry, I sprinkled embossing powder on the background and heat embossed it to create snow. I cut a frame and then stamped, colored and die cut three cute bears. I assembled all my pieces together to create a little snowy bear scene.

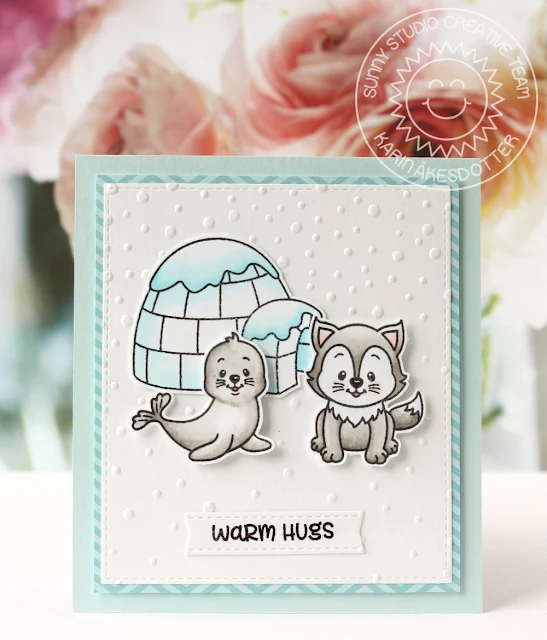
Sunny Studio Stamps: Polar Playmates Winter Hugs Card by Karin Akesdotter

Once again, I used the Polar Playmates stamp set and coordinating dies for a fun little card. I started by making a square card base from light blue cardstock, and then created a snow background by dry embossing a panel of white cardstock. I stamped, colored and die cut the cute images from the stamp set and assembled them all on my card to create a cute arctic scene.

Sunny Studio Stamps: Petite Poinsettias Christmas Card by Karin Akesdotter

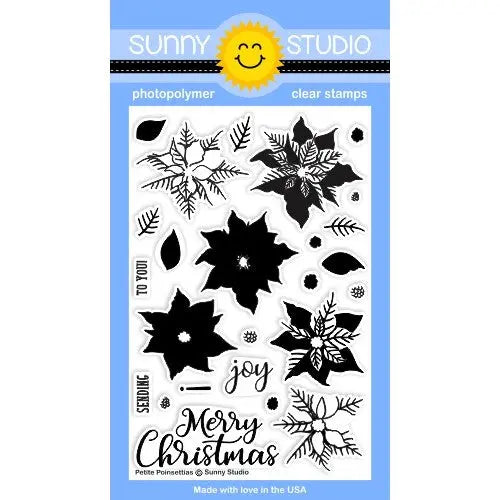
For my last card, I used the Petite Poinsettias stamp set and coordinating dies. I stamped the poinsettia and leaves using different shades of red and green ink, and then die cut them with the coordinating dies. I then made a window card from white cardstock. I created a pretty background for the window opening by stamping snowflakes onto blue cardstock. I stamped the sentiment and adhered the finished panel to my card base. I then added my stamped flower and leaves to the center of the window.

Thanks so much for having me back today. I hope you enjoyed my cards. 

Sunny Studio Supplies Used:

Petite Poinsettias Stamps
Shop at:
Sunny Studio
Petite Poinsettias Dies
Shop at:
Sunny Studio
Playful Polar Bears Stamps
Shop at:
Sunny Studio
Playful Polar Bears Dies
Shop at:
Sunny Studio
Polar Playmates Stamps
Shop at:
Sunny Studio
Polar Playmates Dies
Shop at:
Sunny Studio

Friday, December 8, 2017

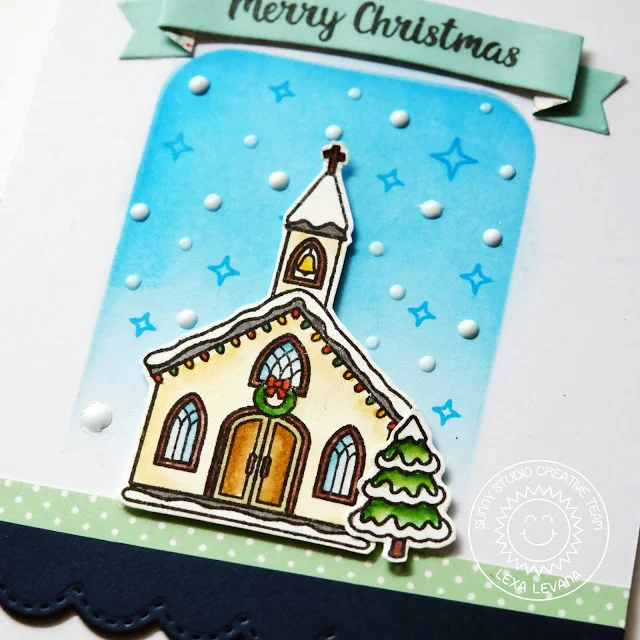
Christmas Chapel Elegant Merry Christmas Card with Lexa

Hi everyone! Lexa here today with another inspirational idea for Christmas cards. Today, I made a simple, yet elegant, card featuring Christmas Chapel stamp and it's coordinating dies.

Sunny Studio Stamps: Christmas Chapel Elegant Navy Blue Mint Christmas Card by Lexa Levana

When it comes to creating a clean and simple design, I always focus on the color combination and the layout first. Today I chose blue, navy and mint as my color muse. I created my own mask by die cutting a rounded edged rectangle on a piece of acetate. Then I blended some Salty Ocean and Tumbled Glass Distress Inks in gradation. Once I was happy with the blending, I stamped the stars from the same stamp set with blue dye ink. The white dots are created with Nuvo Drops, as it adds such amazing dimensions to my card. 

I stamp my images with Versafine black ink and watercolor them with Distress Markers. I also stamp a snowy Christmas tree from Christmas Home stamp set to complete my scene. I also bent the "Merry Christmas" sentiment to follow the banner on top -this one of main reason why I love clear stamps! 

Sunny Studio Stamps: Christmas Chapel Elegant Navy Blue Mint Christmas Card by Lexa Levana

The border on the bottom part is to fill in an empty space, but I still want to keep it simple using the smaller Stitched Scallop Dies on navy cardstock against the mint polka dot patterned paper. 

I really hope you enjoy today's card. Thank you so much for stopping by today, I wish you an amazing day!

Sunny Studio Supplies Used:

Stitched Scallop Dies
Shop at:
Sunny Studio
Christmas Chapel Stamps
Shop at:
Sunny Studio
Christmas Chapel Dies
Shop at:
Sunny Studio
Christmas Home Stamps
Shop at:
Sunny Studio
Christmas Home Dies
Christmas Home Dies
Shop at:
Sunny Studio

Thursday, December 7, 2017

Silver Bells Die Green, White, and Silver Christmas Card with Vanessa

Hi everyone! Vanessa here and today I am sharing a Christmas card using the cute Silver Bells dieHere is what I came up with:

Sunny Studio Stamps: Silver Bells Die Green, White, and Silver Christmas Card by Vanessa Menhorn

I started with a panel of white cardstock and stamped the branch from Holiday Style. Then I inked the edges with an ink blending tool and stamped and heat-embossed the sentiment from Petite Poinsettias.

Sunny Studio Stamps: Silver Bells Die Green, White, and Silver Christmas Card by Vanessa Menhorn

Now I die-cut the bells from white glittered cardstock and adhered them, popping up the bottom one with foam tape. After I had added silver twine to the bells, I adhered the panel to the card. Finally, I added green sequins.

I love those bells, they look like they are covered in sugar, don't you agree? Thank you for stopping by today!

Sunny Studio Supplies Used:

Holiday Style Stamps
Shop at:
Sunny Studio
Petite Poinsettias Stamps
Shop at:
Sunny Studio
Silver Bells Die
Silver Bells Die
Shop at:
Sunny Studio

Wednesday, December 6, 2017

Snow Flurries Little Husky Christmas Tree Ornament with Franci

Hi everyone and happy Wednesday! It's Franci here with you today with a pretty Christmas ornament to decorate your tree! I had so much fun with the new Snow Flurries stamp set, and that little husky from the Polar Playmates is just perfect! 

Sunny Studio Stamps: Snow Flurries Little Husky Christmas Tree Ornament by Franci Vignoli

First, I die cut a circle to fit inside my plastic ornament. Then I embossed the snow flurries with white embossing powder and sponged some Picked Raspberry distress ink on top. Next, I stamped my little husky with memento ink, colored it with Copics and die cut it with its coordinating diesI glued it in the center of my circle with foam tape and drew some details with a white gel pen.

Then I created the snowball with some fake snow and added some candies behind the decorated circle in the other half of the ball. To secure your decorated circle just glue a little string behind it (it will be closed in the middle between the 2 halves of the ball, or you can also glue it down to the first half). I added some twine and a cute bow and you can also write a little secret message and put it inside! 

Hope you like my project and thank you so so much for stopping by! 

Sunny Studio Supplies Used:

Polar Playmates Stamps
Shop at:
Sunny Studio
Polar Playmates Dies
Shop at:
Sunny Studio
Snow Flurries Stamps
Shop at:
Sunny Studio

Tuesday, December 5, 2017

Jolly Gingerbread Starry Sky Background Christmas Card with Nancy

Hey there Sunny Studio fans, Nancy here with you today with a look at the Jolly Gingerbread stamp set in all its holiday glory! This my favorite set from the holiday to color. There are so many possibilities and color schemes for a village of gingerbread houses. 

Sunny Studio Stamps: Jolly Gingerbread Starry Sky Background Christmas Card by Nancy Damiano

I created a starry sky background with a splash of ombre watercolor using Distress Inks in Blueprint Sketch, Faded Jeans, and Broken China. A splatter of water lends a twinkling sky effect that gives the background great depth. The gingerbread house was colored with Zig Clean Watercolor Pens for a bright splash of color. 

Sunny Studio Stamps: Jolly Gingerbread Starry Sky Background Christmas Card by Nancy Damiano

The smaller Christmas trees are from the Christmas Home stamp set. The title was stamped and embossed in white ink on a black background to give it some pop. Last, a shower of Christmas lollipops were added just beneath the starry sky to give the card some movement and color.

​This was such a fun card to create with some simple watercolor techniques. Check out the Jolly Gingerbread stamp and steel die set for your next round of Christmas cards!

Sunny Studio Supplies Used:

Christmas Home Stamps
Shop at:
Sunny Studio
Christmas Home Dies
Christmas Home Dies
Shop at:
Sunny Studio
Jolly Gingerbread Stamps
Shop at:
Sunny Studio
Jolly Gingerbread Dies
Shop at:
Sunny Studio