Thursday, October 29, 2020

Victorian Christmas Cards with Vanessa and Anja

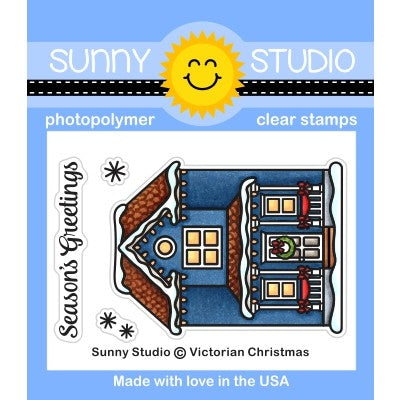
Hello to you! Vanessa here with a wintery Christmas card using the lovely little house from Victorian Christmas.

Sunny Studio Stamps: Victorian Christmas Petite Poinsettias Winter Scene Christmas Card by Vanessa Menhorn

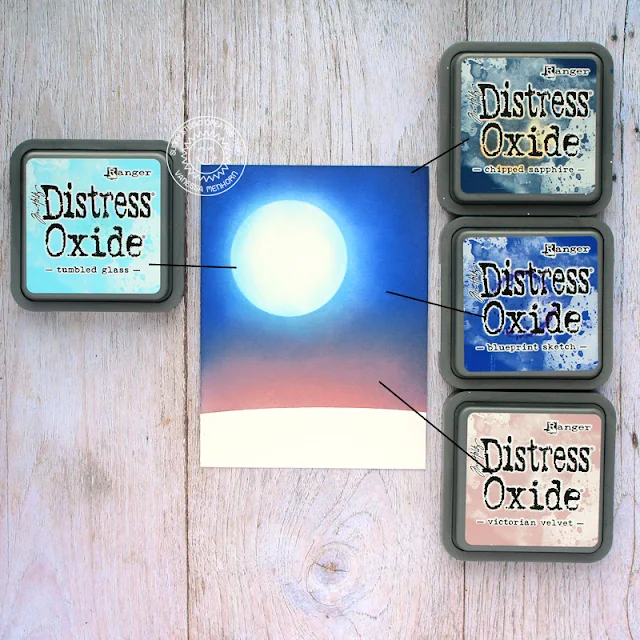
I created a night sky using various Distress Oxide Inks. First, I masked off a circle for the moon. Then I applied the inks with an ink blending tool. After removing the mask, I softly blended light blue ink towards the center of the moon. Here you can see what inks I've used:

Sunny Studio Stamps: Victorian Christmas Petite Poinsettias Winter Scene Christmas Card by Vanessa Menhorn

Stamps and dies used:
Victorian Christmas stamps
Petite Poinsettias stamps
Winter Scene dies

After I had stamped the sentiment from Petite Poinsettias into the moon, I die-cut the snow using the Winter Scene dies, inked it with light blue Distress Oxide Ink, adhered it to the panel and the panel to the card. Now I stamped the house onto white cardstock, colored it with Copic markers, fussy-cut the image and adhered it to the card with foam tape. Finally, I added snow with a white gel pen.

Thank you for visiting today! Have a wonderful day!

----------------------------------------------------

Hello everyone, Anja here today with another holiday card made with the Victorian Christmas mini stamp set.

Sunny Studio Stamps: Victorian Christmas Winter Scene Season's Greetings Christmas Card by Anja Bytyqi

This darling house which is decorated for the holidays can be used with the older Christmas Home Stamps. Since I don't own this set, I used the City Street Stamps (car, lamp post and dog) instead to build my little winter scene.

For the night background, I blended together the Distress Oxide Inks Stormy Sky, Faded Jeans, Chipped Sapphire and Black Soot. I let it dry and sprinkled on white paint with a brush. Next, I die cut a snow hill using the stitched border from the Slimline Nature Borders Dies set. The sentiment was stamped in Barn Door Distress Oxide Ink and heat embossed with clear embossing powder.

Sunny Studio Stamps: Victorian Christmas Winter Scene Season's Greetings Christmas Card by Anja Bytyqi

I picked two tree images from other stamp sets (Winter Scenes and Scenic Route) and stamped everything in Memento Tuxedo Black Ink. I did some Copic coloring and cut out the images with the matching dies or with my scissors. Finally, I assembled my card using liquid glue and foam adhesive.

Thank you so much for stopping by! Have a wonderful day!

Sunny Studio Supplies Used:

City Streets Dies
City Streets Dies
Shop at:
Sunny Studio
City Streets Stamps
City Streets Stamps
Shop at:
Sunny Studio
Petite Poinsettias Stamps
Shop at:
Sunny Studio
Petite Poinsettias Dies
Shop at:
Sunny Studio
Scenic Route Stamps
Scenic Route Stamps
Shop at:
Sunny Studio
Scenic Route Dies
Scenic Route Dies
Shop at:
Sunny Studio
Slimline Nature Borders
Shop at:
Sunny Studio
Victorian Christmas Stamps
Shop at:
Sunny Studio
Victorian Christmas Dies
Shop at:
Sunny Studio
Winter Scenes Stamps
Shop at:
Sunny Studio
Winter Scenes Dies
Winter Scenes Dies
Shop at:
Sunny Studio

Wednesday, October 28, 2020

Sledding Critters Cards with Ana and Christy

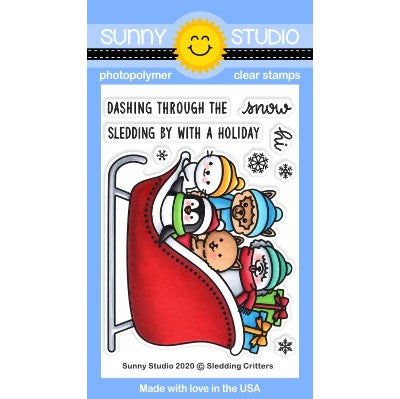
Hi crafty friends and welcome back! Ana here today with a card showcasing Sledding Critters stamps and coordinating dies, as well as Fancy Frames Circle dies and Holiday Cheer paper pack.

Sunny Studio Stamps: Sledding Critters Fancy Frame Dies Winter Holiday Card by Ana Anderson

I started by stamping and coloring Sledding critters with Copic markers, then cutting them out with coordinating dies. I die cut the word snow out of white cardstock next and started working on the background.

I chose red polka dot paper from the Holiday Cheer paper pack, and white heat embossed the snowflakes and the sentiment (Sledding Critters set). I ink blended Salty Ocean distress ink on a piece of white cardstock, then added white splatter and trimmed it to fit the white Fancy Frame (Fancy Frames Circles dies).

Sunny Studio Stamps: Sledding Critters Fancy Frame Dies Winter Holiday Card by Ana Anderson

I adhered the circle frame to the inked background, then the entire piece to red patterned paper. I added the Sledding Critters and the word snow and my card was finished!

Thank you so much for stopping by, I hope you have a great week.

----------------------------------------------------------

Hey friends, it's Christy here with a card using the sweet Sledding Critters stamp set. These guys look like they're ready to hit the town on a snowy Winter's eve! I had so much fun coloring this image with Copics, and then I trimmed it out with the matching dies.

Sunny Studio Stamps: Sledding Critters Frilly Frame Dies Winter Holiday Card by Christy Reuling

I chose two patterns from the Very Merry 6x6 paper pack. The red print I die cut with the outer part of Frilly Frames Lattice. I popped that up with foam tape onto a green card base. Then I trimmed the second patterned paper print down to fit inside the stitched detail of the red print. I love how quick and easy this made it to create my scene! 

Sunny Studio Stamps: Sledding Critters Frilly Frame Dies Winter Holiday Card by Christy Reuling

To finish off the card, I stamped a dark green sentiment, adhered my image, and added some Stickles Glitter Glue to my critter's accessories and to the edge of the two snowbanks, plus a few of the dots of falling snow.

If you'd like to watch how this card came together, please check out the video tutorial on my YouTube channel, Christy Gets Crafty.

Sunny Studio Supplies Used:

Fancy Frames-Circle Dies
Shop at:
Sunny Studio
Holiday Cheer 6x6 Paper
Shop at:
Sunny Studio
Frilly Frames Lattice Dies
Shop at:
Sunny Studio
Very Merry 6x6 Paper
Shop at:
Sunny Studio
Scaredy Cat Dies
Scaredy Cat Dies
Shop at:
Sunny Studio
Sledding Critters Dies
Shop at:
Sunny Studio

Tuesday, October 27, 2020

Quatrefoil Die Focused Cards with Juliana and Isha

Hello Sunny Studio friends! It's Juliana and today I'm sharing a Christmas card I created using the beautiful Frilly Frame Quatrefoil Dies. This card incorporates lots of die cutting and is finished off with an elegant sentiment from the Season's Greetings Stamp Set.

Sunny Studio Stamps: Frilly Frame Dies Season's Greetings Stitched Oval Dies Christmas Card by Juliana Michaels

I began by die cutting a piece of white cardstock using the mat and background from the Frilly Frame Quatrefoil Dies and adhered this to a piece of kraft cardstock. Next, I die cut a piece of white cardstock using the middle size from the Stitched Oval Dies and adhered this to the center of the card front.

The cute little poinsettias are from the Window Quad Circle Dies. I then added some leaves die cut using the leaf dies from the Season's Greetings Dies. These dies are made to be used with the stamps however they worked perfectly without the stamps to create leaves for the flowers.

Sunny Studio Stamps: Frilly Frame Dies Season's Greetings Stitched Oval Dies Christmas Card by Juliana Michaels

To finish off the card, I stamped Merry Christmas from the Season's Greetings Stamp Set and heat embossed it with gold embossing powder. I then die cut it using the Season's Greetings Die Set and adhered it to the center of the card.

Don't you just love the look of die cuts? They can make for fast and easy card making if you don't have time to do a lot of coloring. I hope this card inspires you to pull out your dies to create some of your Christmas cards this year!

------------------------------------------------

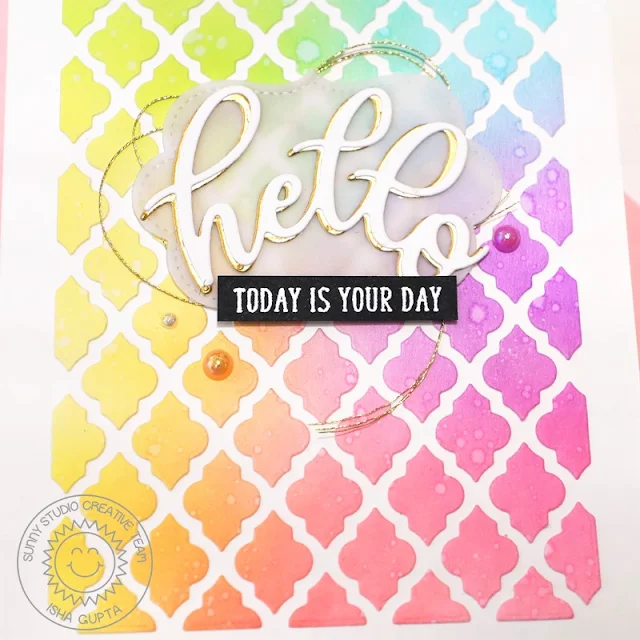
Hello everyone! Isha here today with a rainbow color card featuring the Frilly Frames Quatrefoil Dies. This is such a pretty die and really cuts beautifully.

Sunny Studio Stamps: Frilly Frame Dies Slimline Dies Hello Card by Isha Gupta

I started by sponging a white panel using Distress Oxide inks in wilted violet, picked raspberry, wild honey, scattered straw, twisted citron and peacock feathers. Flick some water and dab using a kitchen towel.

Die-cut this panel using the Frilly Frames Quatrefoil die. The outer die cuts a beautiful stitched border. The inside cuts an intricate Quatre pattern. For this card, I've used the negative die-cut pieces only.

Put the positive onto a white card base using temporary adhesive. Adhere all the negative die-cut pieces through this and remove the positive piece. We are left with a beautiful soft background.

Sunny Studio Stamps: Frilly Frame Dies Slimline Dies Hello Card by Isha Gupta

I die-cut the word "HELLO" twice using the Slimline Scalloped Frame dies from white and gold cardstock. Adhere the gold word behind the white word in a slight offset position.

Die-cut 2 labels using vellum from the Sliding Windows Dies. Adhere the hello to it, adhere both the labels together. Adhere some gold floss behind the label and adhere this to the card. Stamp and emboss the sentiment from the Bold Balloons Stamps. Add 3D foam and add to the card. To finish, adhere some Iridescent Pearls.

Thank you for stopping by. Have a nice day!

Sunny Studio Supplies Used:

Bold Balloons Stamps
Shop at:
Sunny Studio
Sliding Window Dies
Sliding Window Dies
Shop at:
Sunny Studio
Stitched Oval Dies
Stitched Oval Dies
Shop at:
Sunny Studio
Season's Greetings Stamps
Shop at:
Sunny Studio
Season's Greetings Dies
Shop at:
Sunny Studio
Frilly Frames Quatrefoil
Shop at:
Sunny Studio
Slimline Scalloped Frame
Shop at:
Sunny Studio
Window Quad Circle Die
Shop at:
Sunny Studio

Monday, October 26, 2020

Winter Scenes Cards with Ashley and Mayra

Hello friends! It's Ashley with a soft watercolor scene today featuring one of the Winter Scenes stamps! I love how these scene stamps make it so easy to compose a card!

Sunny Studio Stamps: Winter Scenes Feeling Frosty Inside Greetings Winter Holiday Card by Ashley Ebben

I started by stamping my images onto white watercolor cardstock. I wanted a soft scene, so I decided to give no-line watercolor a try. I stamped the snowmen from Feeling Frosty in Inkon3 Fade Out ink, then masked them. I stamped a scene from Winter Scenes on top also using Fade Out ink, then removed the masks. I slowly painted everything in using my Zig Clean Color Real Brush markers, a paint brush, and water. I probably should have gone with a less detailed stamp for my first attempt at no-line watercoloring, but I am happy with the result!

Sunny Studio Stamps: Winter Scenes Feeling Frosty Inside Greetings Winter Holiday Card by Ashley Ebben

Once I was done with watercoloring, I splattered the whole piece with a bit of watered down white acrylic paint to mimic snow. I die cut the piece with the stitched frame from Frilly Frames Retro Petals and added it to a dark gray card base. I added a sentiment from Inside Greetings Holiday stamped in Pinkfresh Studio Rocky Slope from the Urban Raincoat cube pack. I know these sentiments were designed for the inside of cards, but I just can't stop using them on the front!

Thank you so much for stopping by! Have a wonderful day!

---------------------------------------------------

Happy Monday everyone, Mayra here with you today. I have a super fun card to share with you. I used the super cute Winter Scenes stamp set. 

Sunny Studio Stamps: Winter Scenes North Pole Inside Greetings Winter Holiday Card by Mayra Duran-Hernandez

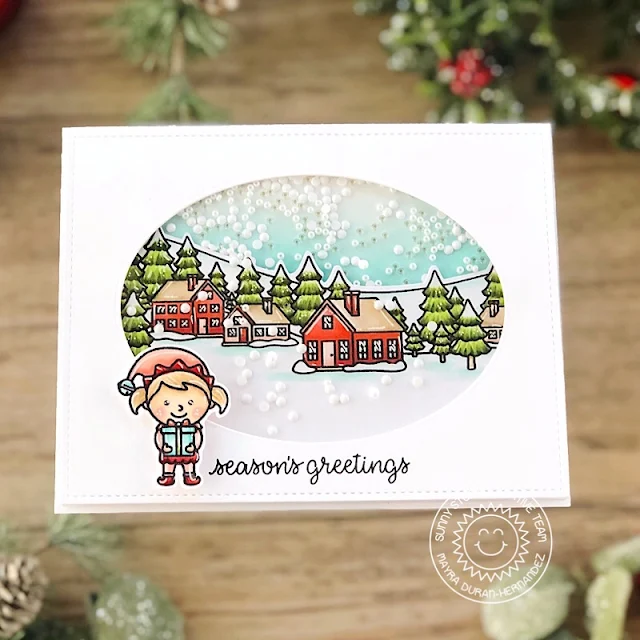
I began by die-cutting a piece of white cardstock using the large stitched rectangle from the Frilly Frames Quatrefoil dies set. I also cut a second rectangle using Bristol Smooth cardstock.  Next, I stamped the image I would be using onto the white die-cut panel using Copic safe black ink. I then colored in my images. For the red areas, I used R05, R22, R17, and R46. For the soft pink areas, R00, R01, and R21. For the trees, I used YG01, BG90, G29, G94, YG99, and YG17. I added a bit of color to the snowy areas by using my Copic markers in BG000, and G000. I also colored one of the cute little elves from the North Pole stamp set. 

Sunny Studio Stamps: Winter Scenes North Pole Inside Greetings Winter Holiday Card by Mayra Duran-Hernandez

Next, I added a bit of color to the panel die cut from Bristol Smooth cardstock. I used Peacock Feathers Distress Oxide ink. I then used the Winter Scenes Dies to die cut the image. I adhered it to the base panel using foam tape. I then die cut another stitched rectangle using the Frilly Frames Quatrefoil dies set from white cardstock. This would be the top layer. I used the Stitched Oval Dies set to create a window. I then stamped the sentiment from the Inside Greetings Holiday stamp set onto the top layer. I added acetate and foam tape to create a shaker card. I wanted to give it a snow globe effect. 

I hope you enjoy the card I created to share with you and feel inspired to create. Thank you very much for taking the time to stop by. I hope you each have a wonderful and blessed day. 

Sunny Studio Supplies Used:

Stitched Oval Dies
Stitched Oval Dies
Shop at:
Sunny Studio
Frilly Frames Retro Petals Dies
Shop at:
Sunny Studio
Feeling Frosty Stamps
Shop at:
Sunny Studio
Frilly Frames Quatrefoil
Shop at:
Sunny Studio
Inside Greetings-Holidays
Shop at:
Sunny Studio
North Pole Stamps
North Pole Stamps
Shop at:
Sunny Studio
North Pole Dies
North Pole Dies
Shop at:
Sunny Studio
Winter Scenes Stamps
Shop at:
Sunny Studio
Winter Scenes Dies
Winter Scenes Dies
Shop at:
Sunny Studio