Thursday, October 5, 2023

Holiday Hugs Card with Marine

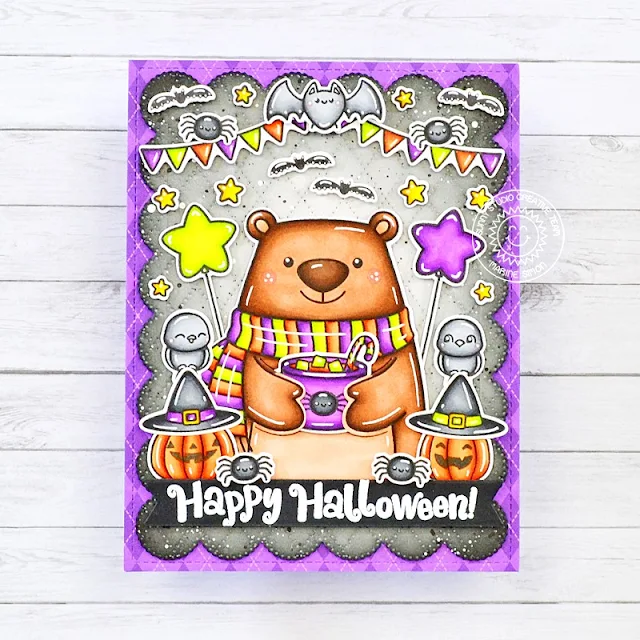
Hi crafty friends, Marine here with you today, I'm thrilled to be back with this cute Halloween card showcasing Holiday Hugs, and once again, I'm happy to show you that this set can be used all year long. I've already used it on a Fall themed card, and today we're getting in a spooky mood.

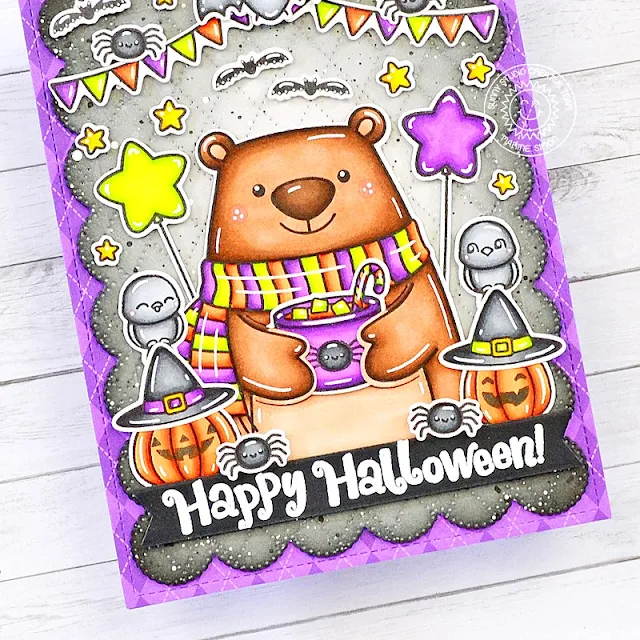
Sunny Studio Stamps: Holiday Hugs Halloween Card by Marine Simon (featuring Frilly Frame Dies, Dotted Diamond Background Dies, Too Cute To Spook)

I used the same design as my Fall themed card, and started by stamping all my images on 80lb Neenah solar white cardstock using an alcohol marker friendly black ink, I cut them all using the matching dies, and colored everything using my Spectrum Noir Illustrator markers and Graph'it brush markers. And to get in a spooky mood, I did what I often do: I went through my Sunny Studio collection to find images that would fit the theme perfectly. Here are the sets I used:

• Holiday Hugs: bear, cup

• Bewitching: witch hat

• Little Birdie: birds (to make crows)

• Fall Scenes: small bats

• Baby Elephants: star balloons

• Too Cute To Spook: pumpkins, smiles, big bat, stars

• Balloon Rides: banners

Sunny Studio Stamps: Holiday Hugs Halloween Card by Marine Simon (featuring Frilly Frame Dies, Dotted Diamond Background Dies, Too Cute To Spook)

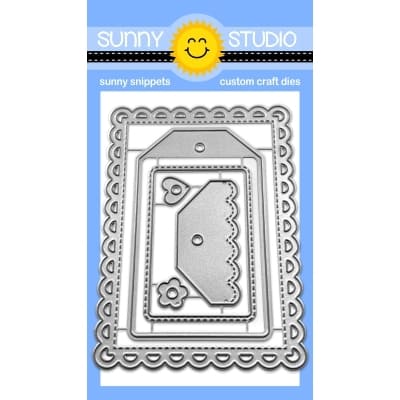
Next I cut a Frilly Frame Eyelet Lace Strathmore bristol smooth panel, added texture to it using the Dotted Diamond Portrait backdrop, and colored it using hickory smoke and black soot distress inks. I mixed some black soot distress ink with water and used a small brush to make splatters on the panel, and did the same with white ink.

Sunny Studio Stamps: Holiday Hugs Halloween Card by Marine Simon (featuring Frilly Frame Dies, Dotted Diamond Background Dies, Too Cute To Spook)

I cut a 5,5 x 4,25 inches Amazing Argyle purple pattern paper, stuck it to an A2 purple card base, and attached my Frilly Frame panel on top of it using foam tape. I white heat embossed my "Happy Halloween!" greeting from Too Cute To Spook on a black banner, and attached it on my panel, along with all the images using 1mm and 2mm foam squares.

As always I finished my card by adding highlights and details to the images using a white gel pen. And that's it! I hope that this card will inspire you to think outside the box and to use your supplies in a different way than the way you're originally supposed to use them. Thanks so much for stopping by, and see you next time.

Sunny Studio Supplies Used:

Bewitching Stamps
Bewitching Stamps
Shop at:
Sunny Studio
Bewitching Dies
Bewitching Dies
Shop at:
Sunny Studio
Amazing Argyle 6x6 Paper
Shop at:
Sunny Studio
Frilly Frames-Eyelet Lace
Shop at:
Sunny Studio
Balloon Rides Stamps
Shop at:
Sunny Studio
Balloon Rides Dies
Balloon Rides Dies
Shop at:
Sunny Studio
Little Birdie Stamps
Shop at:
Sunny Studio
Little Birdie Dies
Little Birdie Dies
Shop at:
Sunny Studio
Baby Elephants Stamps
Shop at:
Sunny Studio
Baby Elephants Dies
Baby Elephants Dies
Shop at:
Sunny Studio
Fall Scenes Stamps
Fall Scenes Stamps
Shop at:
Sunny Studio
Fall Scenes Dies
Fall Scenes Dies
Shop at:
Sunny Studio
Too Cute To Spook Stamps
Shop at:
Sunny Studio
Too Cute To Spook Dies
Shop at:
Sunny Studio
Dotted Diamond Portrait
Shop at:
Sunny Studio
Holiday Hugs Stamps
Holiday Hugs Stamps
Shop at:
Sunny Studio
Holiday Hugs Dies
Holiday Hugs Dies
Shop at:
Sunny Studio

Wednesday, October 4, 2023

Woolen Mitten Die Card with Gladys

Hello crafty friends! Gladys here and I'm back to share two fun projects using the awesome Woolen Mitten dies!! Let's get started shall we.

Sunny Studio Stamps: Woolen Mitten Winter Themed Holiday Card and Tag by Gladys Marcelino (featuring Cable Knit Embossing Folder, Mini Mat & Tag Dies)

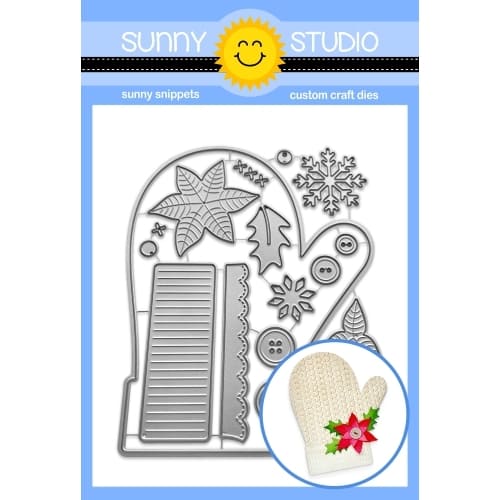
First, I created a shape card using the mitten cut from blue cardstock. To add more interest, I used the Cable Knit embossing folder. Then ink blended white pigment ink on the raised pattern. For more depth I inked the edges with chipped sapphire and splattered white paint using a small paint brush. To complete the assembly, I glued the cuff and stitch on the mitten. Finally, I stamped the sentiment from Holiday Hugs stamp set and used the coordinating dies to cut them out.

Sunny Studio Stamps: Woolen Mitten Winter Themed Holiday Card and Tag by Gladys Marcelino (featuring Cable Knit Embossing Folder, Mini Mat & Tag Dies)

For my next project I made a tag using the poinsettia dies from the Woolen Mitten set. I used the Mini Mat & Tag 3 cut from the same blue cardstock and added lots of details like the mitten card. I cut the poinsettia petals from white cardstock and ink blended using spun sugar and picked raspberry distress oxide inks. For details I splattered white paint and glued a silver pearl and vellum leaves to add some elegance. 

That is all for me, I had a blast creating these projects! Thank you for stopping and I hope you found some inspiration. Have a wonderful day!

Sunny Studio Supplies Used:

Cable Knit Embossing
Shop at:
Sunny Studio
Mini Mat & Tag 3 Dies
Shop at:
Sunny Studio
Woolen Mitten Dies
Woolen Mitten Dies
Shop at:
Sunny Studio
Holiday Hugs Stamps
Holiday Hugs Stamps
Shop at:
Sunny Studio
Holiday Hugs Dies
Holiday Hugs Dies
Shop at:
Sunny Studio

Tuesday, October 3, 2023

Bells & Baubles Card with Isha

Hello everyone! Isha here with a festive season's greetings card featuring the Bells & Baubles stamps and coordinating dies. These are beautiful sets of layering stamps for a quick fun look.

Sunny Studio Stamps: Bells & Baubles Christmas Card by Isha Gupta (featuring Holiday Greetings, Dotted Diamond Dies, Basic Mini Shape Dies)

I started by sponging various green distress inks to create the ombré background. Add texture using the Dotted Diamond Portrait die. I love this die so much for its subtle texture. Stamp the fir leaves to the top and bottom of this panel. Next I stamped the images from the Bells & Baubles stamp set, die-cut using the coordinating dies

Stamp the sentiment from the Holiday Greetings stamp set using veramark ink. Sprinkle WOW! platinum embossing powder and heat set. Die-cut using the coordinating dies.

Sunny Studio Stamps: Bells & Baubles Christmas Card by Isha Gupta (featuring Holiday Greetings, Dotted Diamond Dies, Basic Mini Shape Dies)

Die-cut the poinsettia flower from the Basic Mini Shape Dies 4. Die-cut the leaves from the Basic Mini Shape dies. Assemble the flowers and adhere all the images to the card. Adhere this panel to a white card base. Flick some silver watercolor to it. Thank you for dropping by and have a nice day!

Sunny Studio Supplies Used:

Mini Basic Shape Dies
Shop at:
Sunny Studio
Basic Mini Shape Dies 4
Shop at:
Sunny Studio
Holiday Greetings Stamps
Shop at:
Sunny Studio
Holiday Greetings Dies
Shop at:
Sunny Studio
Dotted Diamond Portrait
Shop at:
Sunny Studio
Bells & Baubles Stamps
Shop at:
Sunny Studio
Bells & Baubles Dies
Shop at:
Sunny Studio

Monday, October 2, 2023

Baking Spirits Bright Tags with Bobbi

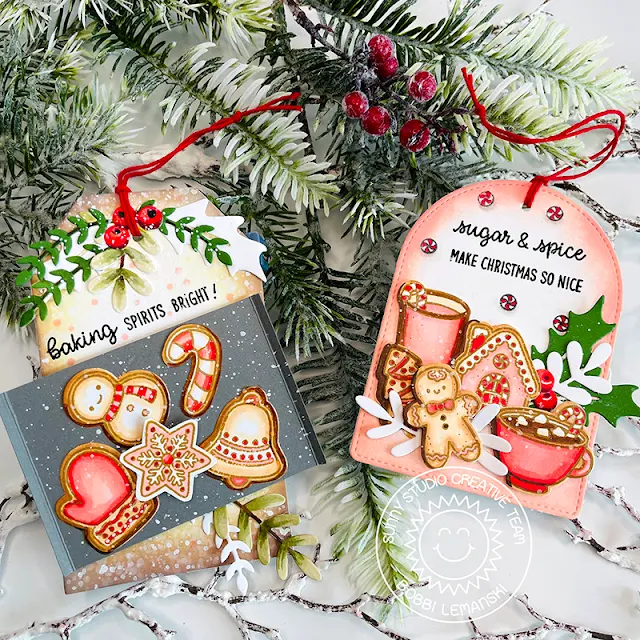
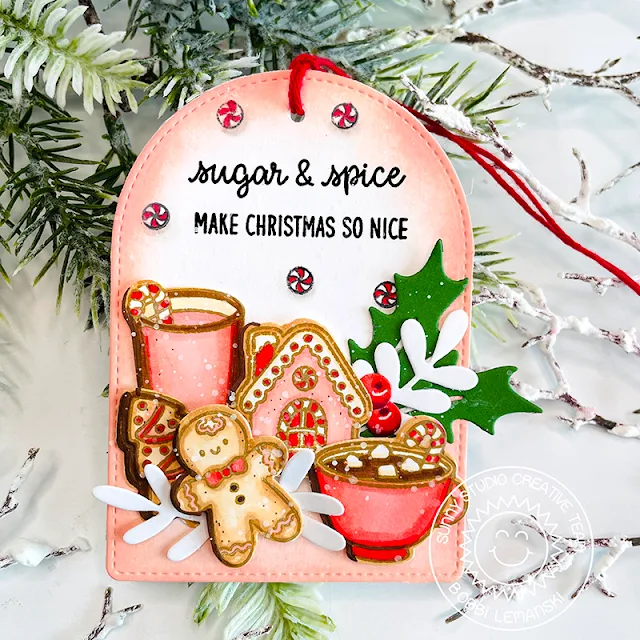
Hello friends! It’s Bobbi here with holiday tags for happy bakers and cookie lovers! I am using the new, Baking Spirits Bright stamps and diesThe first tag was made using the largest die of the Stitched Arch dies for the tag base. Both tags feature greenery from the Winter Greenery dies, too.

Sunny Studio Stamps: Baking Spirits Bright Holiday Tags by Bobbi Lemanski (featuring Stitched Arch Dies, Winter Greenery)

For the first tag, I ink-blended Ranger’s Saltwater Taffy Distress Oxide Ink around the edges of the largest arch of the Stitched Arch die set cut from white cardstock. Tip: I always cut two tags so that I have a nice finished backing for my tags to add a to/from or message on the back.

Sunny Studio Stamps: Baking Spirits Bright Holiday Tags by Bobbi Lemanski (featuring Stitched Arch Dies, Winter Greenery)

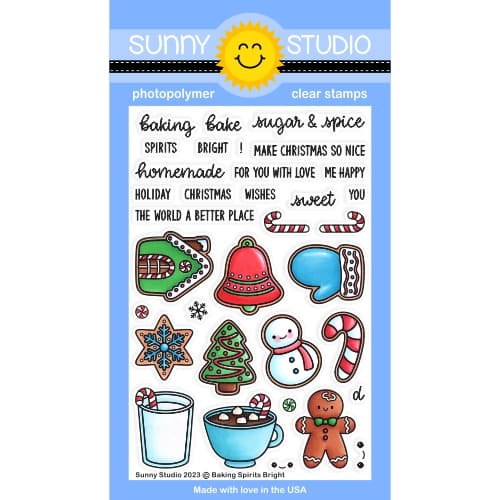
Next, I stamped all of the images from the Baking Spirits Bright stamps and dies on a separate piece of white cardstock. I used Brushed Corduroy ink for the stamping. I colored all of the images using Copic Sketch Markers in R89, R46, R29, R17, R14, R22, and R20. I also used E57, E55, E53, and E51 for the brown tones. I stamped a sentiment from the same set at the top of the tag and then attached the images below it, popping up the gingerbread man and hot cocoa with foam tabs for added dimension.


I added some greenery sprigs and berries to the tag using the Winter Greenery dies and white and green cardstock. I splattered the whole tag with a little "white snow" using white paint and a fan brush. I attached a piece of baker’s twine string in red to finish the tag.


Sunny Studio Stamps: Baking Spirits Bright Holiday Tags by Bobbi Lemanski (featuring Stitched Arch Dies, Winter Greenery)

For the second tag, I clipped two corners of a 4-3/4" X 2-3/4″ rectangular-shaped piece of white cardstock to create a large-sized tag. I blended Vintage Photo, Brushed Corduroy and Antique Linen Distress Oxide Ink around the edges and splattered water over the ink and blotted it with a paper towel for the splotchy effect.


I made a grey metal cookie sheet from a 2-1/4″ X 3-1/2″ piece of dark gray cardstock, I simply scored the two short edges 1/4″ in on both ends of the rectangle. It looks just like a cookie sheet I have in my cabinet!  I added five decorated sugar cookies to the cookie sheet, adding a foam tab under the center snowflake cookie to make it stand out a bit more, as if it is resting on the other cookies. I sprinkled the entire tag using Dr. PH Marten's white ink and a fan-shaped paint brush. I think it looks like powdered sugar all over the baking area!

Sunny Studio Stamps: Baking Spirits Bright Holiday Tags by Bobbi Lemanski (featuring Stitched Arch Dies, Winter Greenery)


I added some greenery sprigs to the tag using the 
Winter Greenery dies cut from white and green cardstock. I stamped the sentiment from the Baking Spirits Bright stamp set. Baker’s twine in red finishes the tag.

Thanks for stopping by today. If you want to see more ideas and inspiration from me, subscribe to my blog, BobbiHartDesign.com. I’ll send you updates on new posts! You can also find me on Instagram as @BobbiHartDesign and on Facebook as BobbiHartDesign.

Sunny Studio Supplies Used:

Stitched Arch Dies
Stitched Arch Dies
Shop at:
Sunny Studio
Winter Greenery DIes
Shop at:
Sunny Studio
Baking Spirits Bright Stamps
Shop at:
Sunny Studio
Baking Spirits Bright Dies
Shop at:
Sunny Studio

Sunday, October 1, 2023

Too Cute To Spook Card with Tammy

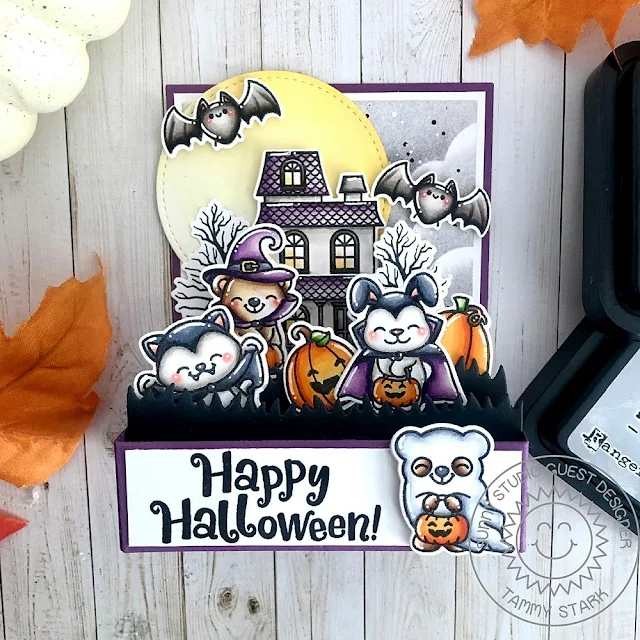
Hi friends! Tammy here with a fun Halloween box card featuring the adorable set, Too Cute To Spook. 

Sunny Studio Stamps: Too Cute To Spook Halloween Card by Tammy Stark (featuring Picket Fence Border Dies, Stitched Circle Dies)

To begin, I stamped the images from Too Cute To Spook, colored with Copic markers, and die cut using the Too Cute To Spook Dies. Next, I created a basic rectangle base using purple cardstock. I then cut the back panel pieces from Purple, white, and Bristol smooth cardstock. I created a cloudy background on the Bristol cardstock with Hickory Smoke and Lost Shadow Distress Oxide inks, adding white and black paint splatters. Once dry, I layered the back pieces together and attached to the inside of the box. I die cut three grassy borders from black cardstock using the Picket Fence Border Die and attached them to the inside of the box.

Sunny Studio Stamps: Too Cute To Spook Halloween Card by Tammy Stark (featuring Picket Fence Border Dies, Stitched Circle Dies)

I die cut the moon from Bristol cardstock using the Stitched Circle Large Dies, lightly inking the edges with Scattered Straw Distress Oxide ink, before attaching to the back of the card.

Sunny Studio Stamps: Too Cute To Spook Halloween Card by Tammy Stark (featuring Picket Fence Border Dies, Stitched Circle Dies)

Next, I attached the die cut images to the box, using foam tape for dimension and stability. I cut a piece of white cardstock to fit the front of the box and stamped the 'Happy Halloween' sentiment in black ink. I then attached the cute ghost to the front with foam tape to complete my card!

Thanks so much for stopping by! Hugs!

Sunny Studio Supplies Used:

Picket Fence Border Dies
Shop at:
Sunny Studio
Stitched Circle Large Dies
Shop at:
Sunny Studio
Too Cute To Spook Stamps
Shop at:
Sunny Studio
Too Cute To Spook Dies
Shop at:
Sunny Studio