Hello Friends, Waleska here with you! The most recent release is full of cute stamps but the one I am featuring today in my card is one of my favorites, the Clucky Chicken Stamp Set, it is so much fun!
This card is kind of clean and simple I had to stop myself when adding all this chicks. I started creating the front panel of my card, I cut a white 3 1/4 panel and cut two stripes from the red and white gingham paper from Joyful Holiday Cardstock and adhere it to a white card base. I then cut a circle and used a cloud and a grass stencil to create the little scene, I used Oxide inks Tumbled Glass for the sky and Mowed Lawn and Lucky Clover for the grass.
I stamped all the cute chicks, chickens and hen house, color and cut them with their coordinating dies and started assembling the scene.
To
finish my card I stamped one of the funny sentiments on this set with Versafine
Nocturne Ink. So cute and ready to make someone smile! Thanks for
stopping by, have a great day!
-------------------------------------------
Hello crafty
friends! Marine here! I'm thrilled to be back
on the blog with this super cute and busy interactive scene showcasing the
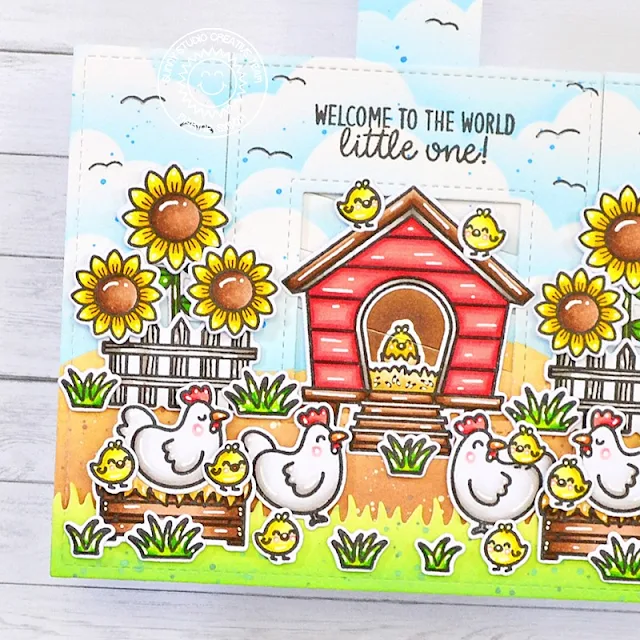
most adorable hens and chicks from Clucky Chickens. The
moment I saw this stamp set I knew that I wanted to make a Magic Picture
Changer card to make one of the eggs crack open and make a sweet little chick
appear inside the chicken coop.
I started off with the background. I cut a 5,5 x 4,25 inches Strathmore bristol smooth panel, and did some stenciling to create a farm landscape. At the bottom of the panel, I created a muddy/sandy section using antique linen + vintage photo oxide inks. And on the top section, I used a cloud stencil from my stash along with tumbled glass + salty ocean oxide inks to create a lovely cloudy sky. Next I cut another 5,5 x 4,25 inches bristol panel, I cut a grass border out of it using a die from Picket Fence Border Dies, and I colored that border using shabby shutters + mowed lawn oxide inks.
Once my landscape elements were done, I centered and stamped my "Welcome to the world little one" greeting from Inside Greetings Congrats on top of the panel, and then I created the whole interactive mechanism. Please check the video down below to watch the process from start to finish.
Next I stamped a
bunch of images that I picked from different sets:
most of the
images from Clucky Chickens
the grass
from Garden Critters
the sunflowers
from Happy Harvest
the fence
from Barnyard Buddies
the small
scalloped details from Spring Scenes + Country Scenes to
create birds
As always I used the coordinating dies to cut them all, and then colored everything using my Spectrum Noir Illustrator markers + Graph'it Brush markers. And once all the images were done, I attached them on my panel using 1mm + 2mm foam squares mostly, as well as 3mm glue dots and liquid glue at some places. And finally I added highlights on the images using a white gel pen.
And that's it! Super cute and fun, I love those tiny chicks, they're just so adorable! And I love how Sunny Studio stamp sets can be combined to create little scenes! Well, I hope that you like this new card, don't forget to check the process video for more details! Thanks so much for stopping by, and see you next week!
Sunny Studio Supplies Used:
 Picket Fence Border Dies Shop at: Sunny Studio |
 Barnyard Buddies Dies Shop at: Sunny Studio |
 Barnyard Buddies Stamps Shop at: Sunny Studio |
 Happy Harvest Stamps Shop at: Sunny Studio |
 Happy Harvest Dies Shop at: Sunny Studio |
 Spring Scenes Stamps Shop at: Sunny Studio |
 Spring Scenes Dies Shop at: Sunny Studio |
 Country Scenes Stamps Shop at: Sunny Studio |
 Country Scenes Dies Shop at: Sunny Studio | |
 Inside Greetings Congrats Shop at: Sunny Studio |
 Joyful Holiday Paper Shop at: Sunny Studio |
 Clucky Chickens Stamps Shop at: Sunny Studio |
 Clucky Chickens Dies Shop at: Sunny Studio | |
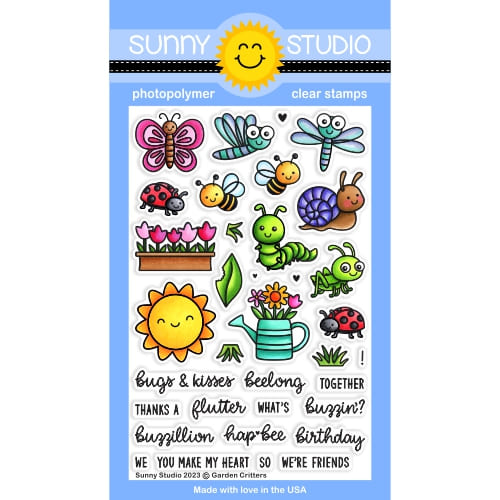 Garden Critters Stamps Shop at: Sunny Studio |
 Garden Critters Dies Shop at: Sunny Studio |


