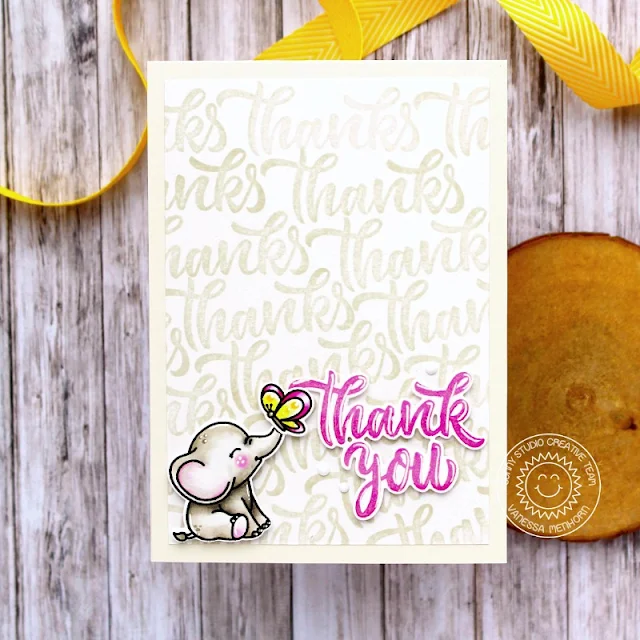
Hello to you! Vanessa here with a simple Thank You card using the Big Bold Greetings stamps.
I trimmed a panel of white cardstock slightly
smaller than my card base and stamped the thanks with grey ink to create my
patterned background. After I had adhered the panel to the card, I stamped the Baby Elephant and the Garden Fairy butterfly onto a piece of cardstock, colored
everything with Copics, die-cut the elements with the matching dies and adhered them with foam tape.
Then I
stamped the sentiment, die-cut it and added it to the card. Finally, I
added white gems and used
a white gel pen to add highlights.
I love big, bold
greetings! Have a lovely weekend, see you next week!
--------------------------------------------
Hello crafty friends, it’s Tina with
a sweet birthday card featuring the beautiful Big
Bold Greetings stamp and die
set. There are a lot of sentiments in this set which makes it a
super versatile addition to your stash!
Since you can never have enough
birthday cards; I choose the ‘Happy Birthday’ and stamped it in a dark pink
Memento ink. After die cutting the sentiment, I also cut two extra layers in
white Neenah cardstock so I could stack them for dimension.
Next, I stamped and die cut all my
images using the adorable elephants from Baby
Elephants, the hats from Panda
Party and the cake from Make
A Wish. I used my Copics for the coloring, selecting bright Spring
colors.
In my design I included a wreath
arch made with large and small branches from the Spring
Greenery dies. To decorate this arch I also cut a bunch of colorful
little flowers from the Wonderful
Windows die set. These flowers were the perfect size to scatter all
over the greenery.
My card panel was cut from a piece
of Neenah Solar White paper using the Frilly
Frame Eyelet Lace die. I really love this die as a panel because it
has a lovely scalloped edge. I didn’t want my background to be too distracting,
so I just added a hint of purple with a shiplap stencil from my stash and Distress
Oxide Dusty Concord.
Next I die cut an arch shape out of the panel using the largest of the Stitched
Arched dies. To assemble the card, I first glued
the remaining rectangle part of my panel directly to a white card base. Next, I
mounted the stitched arch portion with foam tape to the base.
After building the greenery arch
following the shape of the stitched arch, I added the little flowers and
embellished them with a Pure
White jewel to the centers. I completed the card
by adhering the cake, elephants, and bold sentiment.
Another birthday card
ready to send! Thank you for joining me and
happy crafting!
Sunny Studio Supplies Used:


