Thursday, January 5, 2023

Valentine's Day Cards with Marine and Waleska

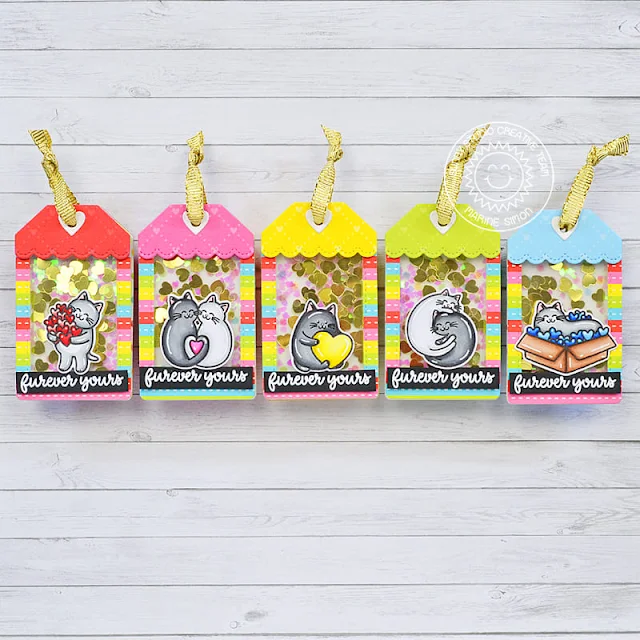
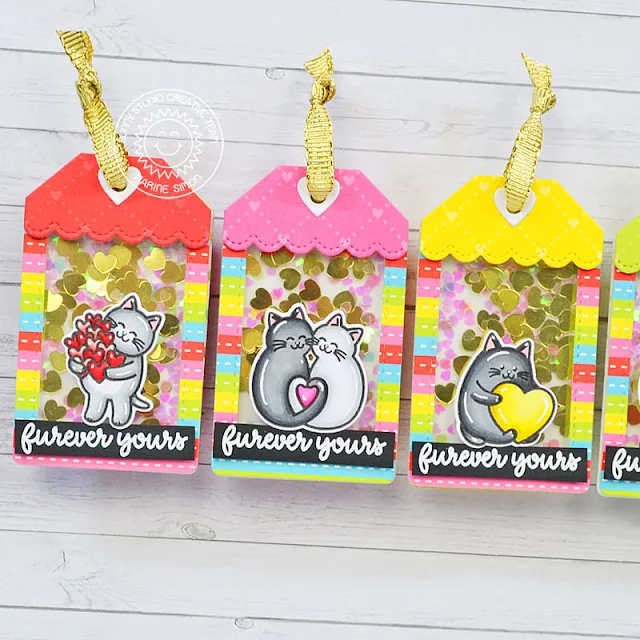
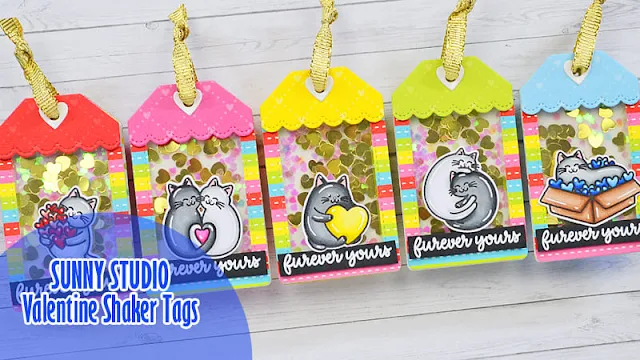
Hello crafty friends! Happy new year! Marine here with you today, I'm thrilled to be back on the blog with those cute and colorful Valentine shaker tags showcasing some adorable kitties from Meow & Furever. You might have noticed that I like to use rainbow colors on my cards, especially on Christmas cards, well today I decided to use those colors once again to create my Valentine tags, and I added golden accents to make them super bright and shiny.

Sunny Studio Stamps: Meow & Furever Shaker Tags by Marine Simon (featuring Mini Mat & Tag Dies)

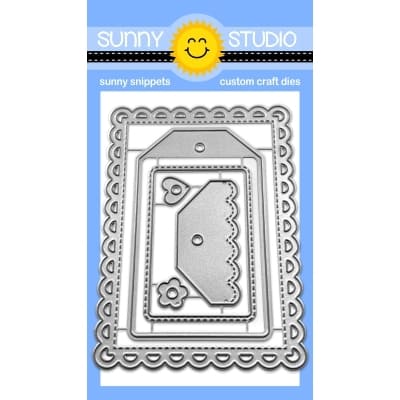
I started off by creating the shaker tags, and cut all the different pieces I needed to build them using the Mini Mat & Tag 3 die set. I cut five tag bases out of a polka dotted paper from the Very Merry paper pack and five vellum tags to tone these down. I also cut five colorful window pieces out of a stripy paper from the Very Merry paper pack, five toppers out of heart papers from the Flirty Flowers paper pack, and finally five white decorative hearts. So, I built the five shaker tags (feel welcome to check the process video) and then I colored some cute kitties.

Sunny Studio Stamps: Meow & Furever Shaker Tags by Marine Simon (featuring Mini Mat & Tag Dies)

I stamped five images from Meow & Furever on white cardstock using an alcohol marker friendly black ink, cut them all using the coordinating dies, and colored everything using my alcohol markers. And because the tags were very colorful, I decided to keep the kitties pretty neutral and only used black, grey and white to color them.

Sunny Studio Stamps: Meow & Furever Shaker Tags by Marine Simon (featuring Mini Mat & Tag Dies)

Once the coloring was done, I added highlights on the images using a white gel pen, I white heat embossed five "Furever yours" greetings from Meow & Furever on black banners, and attached both the images and banners on the tags using foam squares.

Sunny Studio Stamps: Meow & Furever Shaker Tags by Marine Simon (featuring Mini Mat & Tag Dies)

And that's it! I hope you like those bright and shiny tags. Once again, feel welcome to check the process video for more details (click on the image above). Thanks so much for stopping by, and see you next time!

---------------------------------------------

Hello Friends, Waleska here! How was your end of the year celebration? Are you ready for a new year full of inspiration and fun projects we have for you? I have a sweet and lovely card for you today.

Sunny Studio Stamps: Passionate Penguins Card by Waleska Galindo (featuring Stitched Heart Dies)

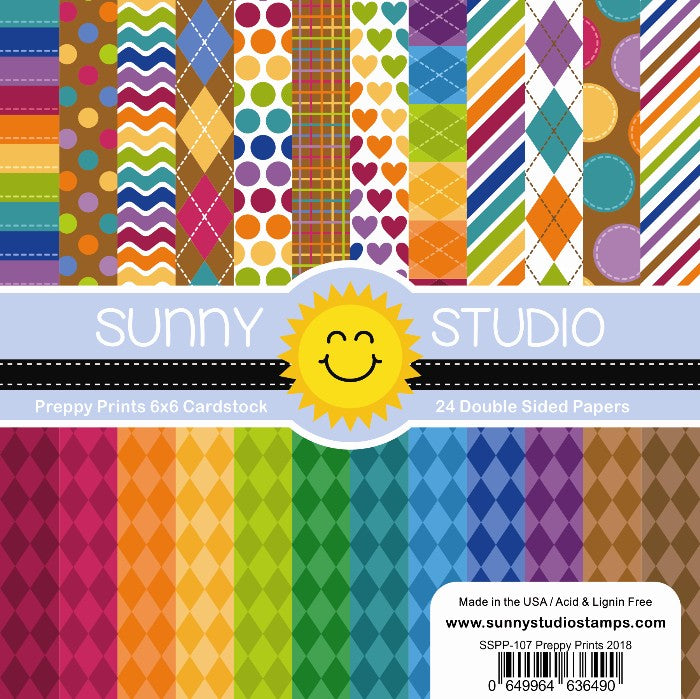
For this card I started by cutting an A2 white cardstock panel and die cut different sizes of hearts along this front panel from the Stitched Heart Dies 2, I adhered the Preppy Prints 6 x 6 Paper in the back of this piece, I choose the rainbow hearts paper. I stamped and color three of the sweetest penguins from the Passionate Penguins Stamp. I love this penguin that is saying hello.

Sunny Studio Stamps: Passionate Penguins Card by Waleska Galindo (featuring Stitched Heart Dies)

I cut and adhered this piece to a black panel. I adhered the adorable penguins inside three of the hearts and stamped the sentiment from the same set. Finally I adhered this panel to an A2 white card base. This is a super sweet and easy card to make for someone you love! Thank you so much for stopping by have a wonderful rest of your day!

Sunny Studio Supplies Used:
Preppy Prints 6x6 Paper
Shop at:
Sunny Studio
Flirty Flowers 6x6 Paper
Shop at:
Sunny Studio
Very Merry 6x6 Paper
Shop at:
Sunny Studio
Meow & Furever Stamps
Shop at:
Sunny Studio
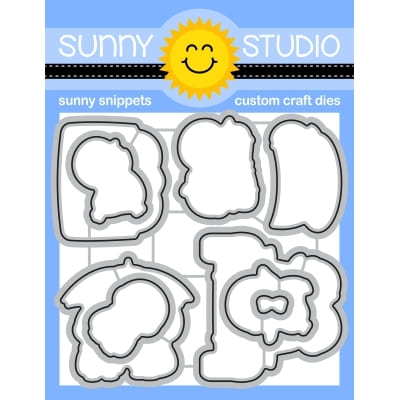
Meow & Furever Dies
Meow & Furever Dies
Shop at:
Sunny Studio
Passionate Penguins Stamps
Shop at:
Sunny Studio
Passionate Penguins Dies
Shop at:
Sunny Studio
Stitched Heart 2 Dies
Shop at:
Sunny Studio
Mini Mat & Tag 3 Dies
Shop at:
Sunny Studio

Wednesday, January 4, 2023

Valentine's Day Cards with Marie and Catherine

Happy New Year Crafty Friends, Marie here! I hope you had a wonderful Christmas! I still can't believe we are at the beginning of a brand new year! To kick off the New Year, I am sharing my first card inspiration of 2023 featuring Sunny Studio's Love Monkey Stamps. This stamp set is full of so many adorable monkey images perfect for projects all year round! 

Sunny Studio Stamps: Love Monkey Card by Marie Marco (featuring Fancy Frame Rectangle Dies)

To create this Valentine's themed card, I cut out 3 A2 sized panels from Bristol Smooth Cardstock. For the first panel, I used the Fancy Frames Rectangle Dies for the scalloped frames. I then inked the outer frame with Seedless Preserves Distress Ink. For the second panel, I die cut an oval from the center and with a leaf pattern embossing folder gave it texture. For the 3rd panel, I distress inked my night time background using a combination of Seedless Preserves, Uncharted Mariner, and Chipped Sapphire Distress Inks. I gave it some water splatter for a subtle star texture. 

I stamped all my images onto watercolor paper with distress ink in Antique Linen, and used water color pencils to color them. I cut them out using the Love Monkey Dies

Sunny Studio Stamps: Love Monkey Card by Marie Marco (featuring Fancy Frame Rectangle Dies)

I then adhered the panel with the cut out oval center to the inked background panel, and adhered my scalloped frames as well. I also adhered the monkey images using double sided foam tape. I used bearly art precision craft glue to adhere all the other images. I stamped out my sentiments onto 110 lb cardstock and fussy cut them out and adhered them in wonky positions to mimic the playfulness of my card. I also die cut some random hearts and incorporated them into my scene. I decided to give my elements some dimension by using Ranger Glossy Accents on the tree leaves and vines, and all the hearts. I just love how the glossy accents make things you want to highlight just pop!

And that does it for today's card inspiration! Thank You so much for joining me today!!! Until Next time, Happy Crafting!!

---------------------------------------------

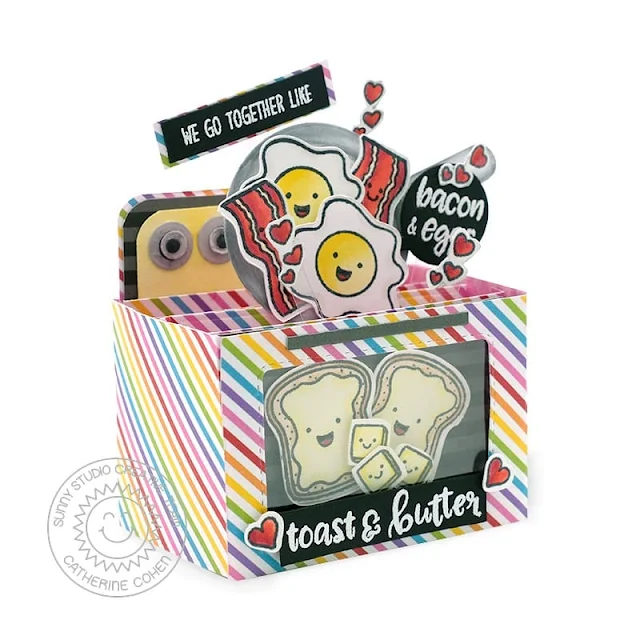
Hello and Happy New Year Crafty Friends! Catherine here and I am so excited to be back on the Sunny Studio Creative Team for the Spring 2023 term! For my Valentine’s Day Card, I created a pop-up oven card featuring the cute Breakfast Puns Stamps.

Sunny Studio Stamps: Breakfast Puns Card by Catherine Cohen (featuring Mini Mat & Tag Dies, Comic Strip Speech Bubble Dies)

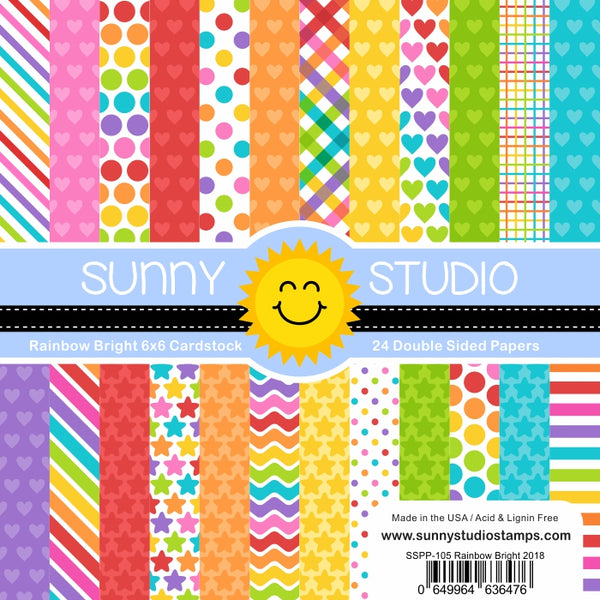
For the base, I pieced together a pop up box card without the flaps using some colorful cardstock from Rainbow Bright 6x6 Paper Pack. I created an oven window using the rectangle die from Mini Mat & Tag 3 Dies and added a piece of acetate. I adhered cardstock from Sleek Stripes Paper for the inside of the oven. For the oven control panel, I layered three pieces of cardstock with rounded corners made with a corner punch. I used the colorful cardstock from Rainbow Bright 6x6 Paper Pack for the first layer (bottom), followed by cardstock from Sleek Stripes Paper Pack, and the top layer was created by ink blending white cardstock with Squeezed Lemonade Distress Oxide.

I added some stove knobs made with circle dies from Candy Shoppe Dies using white cardstock ink blended with Hickory Smoke and Black Soot Distress Oxide. For the oven door handle, I cut a thin strip of paper out of white cardstock sized 2”x ¼” and I ink blended it with Hickory Smoke Distress Oxide.

Sunny Studio Stamps: Breakfast Puns Card by Catherine Cohen (featuring Mini Mat & Tag Dies, Comic Strip Speech Bubble Dies)

Next, I stamped the images from Breakfast Puns Stamps and die cut with Breakfast Puns Dies. I made the frying pan using a 2’1/4’ circle die and trimmed the baseball bat from Team Player Stamps for the handle. I colored the pan and images with Copic Markers listed in my blog link below. I adhered the images onto the box card using Acetate strips.

I added two White Heat Embossed sentiments. I thought it would be fun to use Comic Strip Speech Bubbles Die for one of them. I finished off the card by added some adorable cascading hearts from Passionate Penguins Stamps.

Thank you so much for stopping by. For more inspiration, please visit me at Crafti-Cat!  Wishing you and your families a healthy and happy 2023!

Sunny Studio Supplies Used:

Candy Shoppe Dies
Candy Shoppe Dies
Shop at:
Sunny Studio
Breakfast Puns Stamps
Shop at:
Sunny Studio
Breakfast Puns Dies
Breakfast Puns Dies
Shop at:
Sunny Studio
Team Player Stamps
Team Player Stamps
Shop at:
Sunny Studio
Fancy Frames- Rectangles
Shop at:
Sunny Studio
Rainbow Bright 6x6 Paper
Shop at:
Sunny Studio
Love Monkey Stamps
Love Monkey Stamps
Shop at:
Sunny Studio
Love Monkey Dies
Love Monkey Dies
Shop at:
Sunny Studio
Comic Strip Speech Bubble Dies
Shop at:
Sunny Studio
Sleek Stripes Paper
Sleek Stripes Paper
Shop at:
Sunny Studio
Passionate Penguins Stamps
Shop at:
Sunny Studio
Passionate Penguins Dies
Shop at:
Sunny Studio
Mini Mat & Tag 3 Dies
Shop at:
Sunny Studio

Tuesday, January 3, 2023

Valentine's Day Cards with Isha and Lien

Hello everyone! Isha here today with a fun and cheerful card featuring the Passionate Penguins stamps and dies. I went with my favorite rainbow theme :)

Sunny Studio Stamps: Passionate Penguins Card by Isha Gupta (featuring Heart Bouquet, Fishtail Banner Dies)

To start, I created a cloud background using wild honey, kitsch flamingo and salvaged patina distress ink. Stamp the hearts from the Beach Buddies stamp to this panel. Flick the same inks to the panel. Die-cut a white panel using the Fishtail Border die. Adhere to the card.

Sunny Studio Stamps: Passionate Penguins Card by Isha Gupta (featuring Heart Bouquet, Fishtail Banner Dies)

Stamp the penguins from the Passionate Penguin stamp, color and die-cut using the coordinating dies. Stamp the balloons from the Heart Bouquet stamp, color and die-cut using the coordinating dies.

Adhere to the card. Stamp the sentiment from the Color My World stamp. Thank you for dropping by and have a nice day!

---------------------------------------------

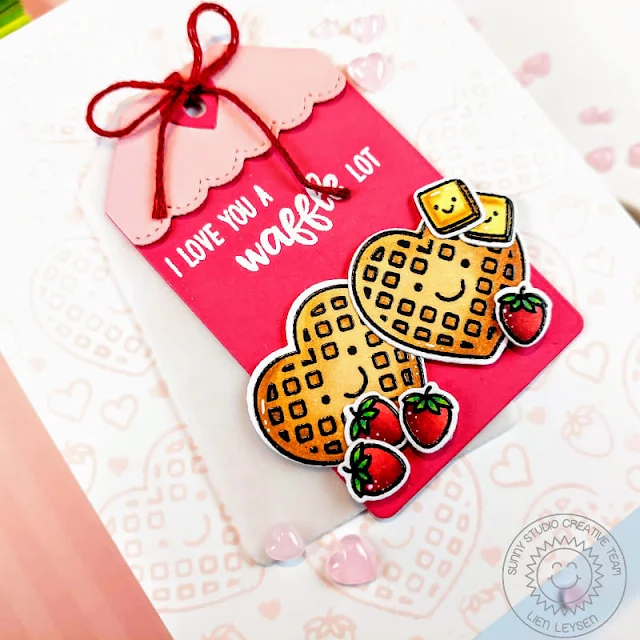
Hi crafty friends! It's Lien here for the first time on the Sunny Studio blog with a cutesy valentine's day card using one of my favorite stamping techniques. 


Sunny Studio Stamps: Breakfast Puns Card by Lien Leysen (featuring Mini Mat & Tag Dies)

For this card I'm using the Breakfast Puns stamp set for my focal point and my background. I absolutely adore these heart shaped waffles and I couldn't bring enough of them on my card. I first stamped my background onto white cardstock with Ballet Slipper ink from Concord & 9th, a subtle soft pink. I just put the waffle image, the strawberry image, and two heart images onto an acrylic block and got to building my pattern. 


The easiest way to do this is to start with your largest image and stamp it over and over again on your card panel first, then fill in the gaps with smaller and smaller stamps. If you really want to make sure you don't leave empty spots, try starting from the center of the card and working your way outwards. 


Sunny Studio Stamps: Breakfast Puns Card by Lien Leysen (featuring Mini Mat & Tag Dies)

Once the background is done, I stamped the waffle and the strawberries a few times in black ink and colored them in with my Ohuhu alcohol markers. I used my misti for this and I did stamp everything again after coloring with Versafine Onyx Black ink so I could add clear gloss embossing powder to my outlines as well. I love a glossy black embossed outline and I definitely think it's worth the extra minute for your stamping!


I cut everything out with the coordinating dies and also die cut a tag from the Mini Mat and Tag 3 die set. I used some hot pink cardstock, light pink cardstock and I also cut the tag once more from vellum just to add a little extra something to peek out from behind the bold colored tag. 


I tied it all together with a piece of red embroidery floss and adhered everything on my card with some foam tape to add a little bit of dimension. Et voilà, a really fun and very pink Valentine's day card!


Sunny Studio Supplies Used:

Fishtail Banner Dies
Shop at:
Sunny Studio
Beach Buddies Stamps
Shop at:
Sunny Studio
Color My World Stamps
Shop at:
Sunny Studio
Breakfast Puns Stamps
Shop at:
Sunny Studio
Breakfast Puns Dies
Breakfast Puns Dies
Shop at:
Sunny Studio
Heart Bouquet Stamps
Shop at:
Sunny Studio
Heart Bouquet Dies
Heart Bouquet Dies
Shop at:
Sunny Studio
Passionate Penguins Stamps
Shop at:
Sunny Studio
Passionate Penguins Dies
Shop at:
Sunny Studio
Mini Mat & Tag 3 Dies
Shop at:
Sunny Studio

Monday, January 2, 2023

Valentine's Day Cards with Bobbi and Cathy

Hello Sunny friends. It’s Bobbi sharing some love in this little, red valentine featuring the Turtley Awesome Stamps and coordinating dies, the Scallop Heart Dies, and the Stitched Hearts 2 dies. This card measures 4-1/4″ wide X 5-1/2″ tall.

Sunny Studio Stamps: Turtley Awesome Card by Bobbi Lemanski (featuring Scalloped Heart Dies)

Using the heart dies, white cardstock and pattern papers from the All is Bright pattern paper pack, I cut hearts in various sizes as well as a front panel in red gingham and a 1/2″ wide pattern strip for an accent piece. I also stamped and cut out the turtles using the Turtley Awesome Stamps and coordinating dies. The turtles were colored using Copic Markers in YG67, YG07, YG05, YG03, YG00, RV55, and RV10.

Sunny Studio Stamps: Turtley Awesome Card by Bobbi Lemanski (featuring Scalloped Heart Dies)

I attached the hearts, layering the stitched white heart over the pretty pink scallop one. The turtles were attached using dimensional foam dots in front of the heart to make them stand out. I stamped the phrase and added faux stitches around the heart and the striped strip.

While the pattern paper I used is from a holiday-inspired pattern pack, I love that it can also be used any time of the year. The pattern paper looks like a colorfully striped ribbon with a little faux stitching on the edges. The red and pink ginghams are great for Valentines, too.

Sunny Studio Stamps: Turtley Awesome Card by Bobbi Lemanski (featuring Scalloped Heart Dies)


Inside, I kept it simple by adding one striped stitched heart. I like that it includes all the colors from the front. A heartfelt, personal message to my valentine around the heart will be the best part of the card.

Thanks for stopping by today. If you want to see more ideas and inspiration from me, subscribe to my blog, BobbiHartDesign.com. I’ll send you updates on new posts! You can also find me on Instagram as @BobbiHartDesign and on Facebook as BobbiHartDesign.

--------------------------------------------------

Hey friends! Cathy here today and as we’re anxiously awaiting a new Sunny Studio release, I thought it would be fun to share a little love themed inspiration with the adorable Meow & Furever Stamps!


Sunny Studio Stamps: Meow & Furever Card by Cathy Chapdelaine (featuring Cherry Blossoms, Stitched Circle Dies, Frilly Frame Dies)
 

I chose a clean and simple design for this card and started by die-cutting a piece of white cardstock for the card front using the frame portion of the Frilly Frames Quatrefoil Dies. I lightly inked the upper left and bottom right corners using Saltwater Taffy Distress ink and splattered a little watered down black acrylic paint in those areas with a paintbrush.


Next, I heat embossed a sentiment from the Critter Campout Stamps with black embossing powder approximately 3” from the top of the panel. I then heat embossed the “furbulous” sentiment with white embossing powder on black cardstock, cut around it and adhered it below.


Sunny Studio Stamps: Meow & Furever Card by Cathy Chapdelaine (featuring Cherry Blossoms, Stitched Circle Dies, Frilly Frame Dies)
 

For the focal point, I die-cut circles from white and light kraft cardstock using the Stitched Circle Small Dies, slightly overlapped them and adhered them to the card front. The Cherry Blossoms Stamps created a pretty accent. I stamped the petals using Spun Sugar and Saltwater Taffy Distress inks on white cardstock and the stamens using Scattered Straw and Frayed Burlap Distress inks. I also added colored pencil accents to the blossoms and then die-cut them using the coordinating dies.


To finish, I stamped the cat image on Neenah Classic Crest 80lb solar white cardstock, colored it with Copics and die-cut it using the coordinating dies.


I hope you enjoyed and thanks for stopping by today! For more inspiration, please visit my blog www.inkredibleadventures.com and you can also find me on Instagram as @cathy.chapdelaine.


Sunny Studio Supplies Used:

Turtley Awesome Dies
Shop at:
Sunny Studio
Turtley Awesome Stamps
Shop at:
Sunny Studio
Critter Campout Stamps
Shop at:
Sunny Studio
Frilly Frames Quatrefoil
Shop at:
Sunny Studio
Meow & Furever Stamps
Shop at:
Sunny Studio
Meow & Furever Dies
Meow & Furever Dies
Shop at:
Sunny Studio
Stitched Circle Small Dies
Shop at:
Sunny Studio
All Is Bright Paper
All Is Bright Paper
Shop at:
Sunny Studio
Cherry Blossoms Stamps
Shop at:
Sunny Studio
Cherry Blossoms Dies
Shop at:
Sunny Studio
Scalloped Heart Dies
Shop at:
Sunny Studio
Stitched Heart 2 Dies
Shop at:
Sunny Studio