Saturday, December 7, 2019

Guest Designer Spotlight: Winter Themed Cards with Mona Toth

Hi crafty friends! It's Mona Toth here and I am super excited for be a guest on the Sunny Studio Blog! I have two cards for today what I made with the Merry Mice, Scenic Route and Cruising Critters stamp sets.

Sunny Studio Stamps: Merry Mice Scenic Route Frilly Frame Dies Winter Themed Holiday Card by Mona Toth

For my first card I started the cardmaking with stamping and coloring. I stamped the images from the Merry Mice and the Scenic Route stamp sets then I colored them with Copic Markers. After the coloring I die-cut the images with coordinating dies and added highlights with Signo Uniball white pen.

Sunny Studio Stamps: Merry Mice Scenic Route Frilly Frame Dies Winter Themed Holiday Card by Mona Toth

For the background added Frilly Frames Chevron Dies with Neenah Solar White cardstock then I cut a little smaller cardstock made ink blending on it with Spun Sugar and Tattered Rose Distress Oxide Ink. After the ink blending I stamped the "Merry Christmouse" sentiments with clear watermark ink and made a quick heat embossing on it.

Sunny Studio Stamps: Merry Mice Scenic Route Frilly Frame Dies Winter Themed Holiday Card by Mona Toth

To the background I added a beautiful red cardstock from Striped Silly 6x6 Paper Pad behind the background die-cut. In the end I styled my card and adhered everything together.

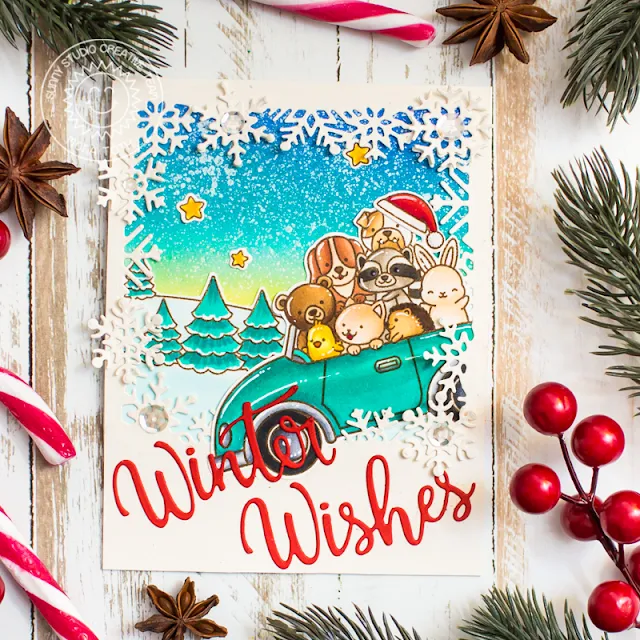
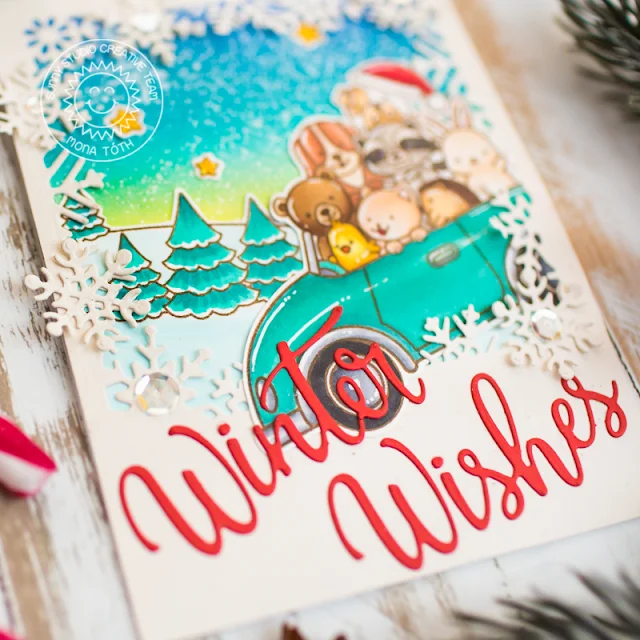
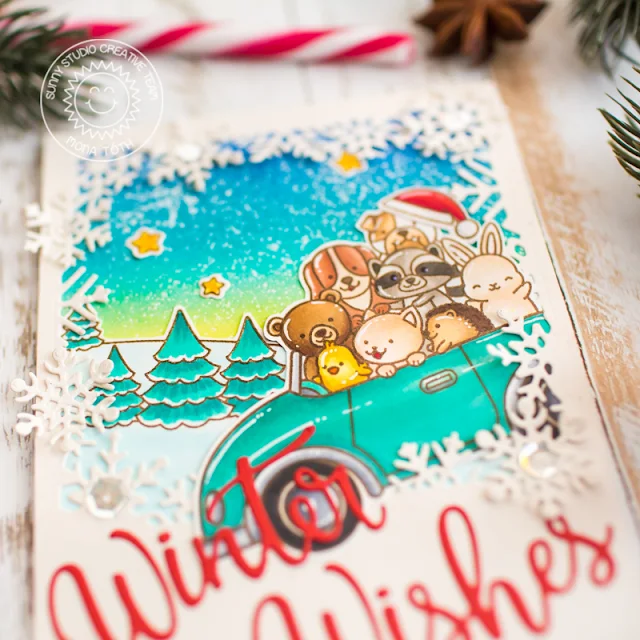
Sunny Studio Stamps: Scenic Route Cruising Critters Layered Snowflake Frame Dies Winter Themed Holiday Card by Mona Toth

For my second card I made almost the same process, but this time I have used the Cruising Critters stamp set together with the Scenic Route set. I colored them with Copic markers as well.

Sunny Studio Stamps: Scenic Route Cruising Critters Layered Snowflake Frame Dies Winter Themed Holiday Card by Mona Toth

For the background I die-cut the Layered Snowflake Frame Die from a cream cardstock and created with it this sweet but festive scene.

Sunny Studio Stamps: Scenic Route Cruising Critters Layered Snowflake Frame Dies Winter Themed Holiday Card by Mona Toth

In the end I run the "Winter Wishes" sentiment through my die-cut machine with red cardstock, adhered to my card and it was ready. 

Thank you very much for reading through my post, I hope that you have enjoyed it, feel free to comment which one you like more. Feel free to check my Instagram for more inspiration. :)

Have an amazing day, big hugs, Mona!

Sunny Studio Supplies Used:

Striped Silly 6x6 Paper
Shop at:
Sunny Studio
Frilly Frames Chevron Die
Shop at:
Sunny Studio
Cruising Critters Stamps
Shop at:
Sunny Studio
Cruising Critters Dies
Shop at:
Sunny Studio
Merry Mice Stamps
Merry Mice Stamps
Shop at:
Sunny Studio
Merry Mice Dies
Merry Mice Dies
Shop at:
Sunny Studio
Scenic Route Stamps
Scenic Route Stamps
Shop at:
Sunny Studio
Scenic Route Dies
Scenic Route Dies
Shop at:
Sunny Studio
Layered Snowflake Frame
Shop at:
Sunny Studio

Friday, December 6, 2019

Merry Mice Cards with Rachel and Candice

Hello everyone! It's Rachel here and I have a winter slimline card to share with you today that focuses on the Merry Mice Stamp Set. To start my card, I first stamped all of my images onto a sheet of Neenah Solar White 110lb Card Stock with some Memento Tuxedo Black Ink. I then used Copic Markers to color everything and the coordinating dies to cut them out.

Sunny Studio Stamps: Merry Mice Woodland Borders Santa Claus Lane Christmas Cards by Rachel Alvarado

Copic Colors Used:
  • Light Teal: BG10, BG15
  • Dark Teal: BG11, BG13, BG49
  • Light Ears: RV0000, RV11
  • Dark Pink Ears: RV0000, R81, R85
  • Grays: W0, W2, W4, W5
  • Whites: 0, C00, C2, C4
  • Reds: R35, R37, R59
  • Browns: E40, E41, E42, E44
For my background, I trimmed a piece of smooth white card stock to 8.5" x 3.5" and then blended it with some Peacock Feathers. Evergreen Bough, and Tumbled Glass Distress Oxide Inks. I splattered this piece with some water and then lightly blotted it dry with a paper towel. I then splattered it with both diluted white and green paints. 


Sunny Studio Stamps: Merry Mice Woodland Borders Santa Claus Lane Christmas Cards by Rachel Alvarado

For some added interest, I stamped some trees from the Santa Claus Lane Set with Galactic Stream, Teal Cave, and Aqualicious Inks from Altenew. I used the Woodland Borders Die Set to add a stitched snow drift. Lastly, I adhered all of my images with some 3D Foam Adhesive Squares for added dimension.

I hope you enjoyed my card today! Wishing you all a safe and wonderful weekend!

--------------------------------------------------

Welcome back this fantastic Friday! Candice with you today sharing a sweet Christmouse scene with you today using the adorable Merry Mice stamp set!


Sunny Studio Stamps: Merry Mice Woodland Borders Frosty Flurries Christmas Card by Candice Fisher

I began my card by creating an 8 1/2 x 3 1/2 card base that fits perfectly into a standard or size 9A envelope. For the background, I first heat embossed the snow in white using the Frosty Flurries stamp set and lightly inked with squeezed lemonade and twisted citron.


Sunny Studio Stamps: Merry Mice Woodland Borders Frosty Flurries Christmas Card by Candice Fisher

I then die cut three snowhills from the Woodland Borders dies, two of them at an angle to get the dip in the center of my card. Next, I stamped all the adorable mice, trees, presents, and accessories from the Merry Mice stamp set, colored with Copic markers, and die cut out using the Merry Mice coordinating dies.

To finish the card, I heat embossed the sentiment in white and inked over with milled lavender and trimmed into a long banner. Thank you for visiting today!

Sunny Studio Supplies Used:

Frosty Flurries Stamps
Shop at:
Sunny Studio
Woodland Borders Dies
Shop at:
Sunny Studio
Santa Claus Lane Stamps
Shop at:
Sunny Studio
Santa Claus Lane Dies
Shop at:
Sunny Studio
Merry Mice Stamps
Merry Mice Stamps
Shop at:
Sunny Studio
Merry Mice Dies
Merry Mice Dies
Shop at:
Sunny Studio

Thursday, December 5, 2019

Hogs & Kisses Cards with Anja and Vanessa

Hi everyone, Anja here and today I'm back again with another Christmas card featuring the Hogs & Kisses set. I combined the cute piggy with the house border stamp from the Scenic Route set.
Sunny Studio Stamps: Hogs & Kisses Scenic Route Christmas Garland Frame Christmas Cards by Anja Bytyqi

For my background, I blended together some blue Distress Oxide Inks (Stormy Sky, Faded Jeans and Chipped Sapphire) onto a piece of Bristol paper and added white paint splatters with a brush. I stamped the row of houses and the pig in Memento Tuxedo Black Ink and did some coloring with Copic Markers. I used the coordinating dies to cut out the images.

Sunny Studio Stamps: Hogs & Kisses Scenic Route Christmas Garland Frame Christmas Cards by Anja Bytyqi

The pun sentiment is a combination of the gold heat embossed word 'Hoggy' and the scripty 'Christmas' die which is included in the Christmas Garland Frame set and stretches across the whole width of my card. I die cut it from red glitter cardstock. Finally, I adhered the house border panel and pig with foam tape for a little bit of dimension.

Thank you so much for stopping by! Have a wonderful day!

-------------------------------------------------

Hello to you! Vanessa here with a card using the cute Hogs & Kisses set. I created a little scene and loved digging through my beloved Sunny Studio stash to find elements to add to this.

Sunny Studio Stamps: Hogs & Kisses Scenic Route Santa Claus Lane Seasonal Trees Christmas Card by Vanessa Menhorn

I first covered the front of my card with patterned paper from the Subtle Grey Tones 6x6 paper pad to create the background of my scenery. Then I stamped all the images onto white cardstock, colored the elements with Copics, die-cut everything with the matching dies and adhered the images to the card. 

Sunny Studio Stamps: Hogs & Kisses Scenic Route Santa Claus Lane Seasonal Trees Christmas Card by Vanessa Menhorn

Finally, I stamped the sentiment onto a strip of red cardstock, heat-embossed it with white embossing powder, trimmed the strip and adhered it to the card.

I used so many different sets, I decided to give you a list of them:

Thank you for visiting today, hope to see you again next week!

Sunny Studio Supplies Used:

Blissful Baking Dies
Shop at:
Sunny Studio
Blissful Baking Stamps
Shop at:
Sunny Studio
Summer Picnic Dies
Summer Picnic Dies
Shop at:
Sunny Studio
Summer Picnic Stamps
Shop at:
Sunny Studio
Happy Owlidays Stamps
Shop at:
Sunny Studio
Happy Owlidays Dies
Happy Owlidays Dies
Shop at:
Sunny Studio
Seasonal Trees Stamps
Shop at:
Sunny Studio
Seaonal Trees Dies
Seaonal Trees Dies
Shop at:
Sunny Studio
Subtle Grey Tones Paper
Shop at:
Sunny Studio
Santa Claus Lane Stamps
Shop at:
Sunny Studio
Santa Claus Lane Dies
Shop at:
Sunny Studio
Scenic Route Stamps
Scenic Route Stamps
Shop at:
Sunny Studio
Scenic Route Dies
Scenic Route Dies
Shop at:
Sunny Studio
Hogs & Kisses Stamps
Shop at:
Sunny Studio
Hogs & Kisses Dies
Hogs & Kisses Dies
Shop at:
Sunny Studio
Christmas Garland Frame
Shop at:
Sunny Studio

Wednesday, December 4, 2019

Sweet Treat Projects with Ana and Franci

Hello crafty friends! It Ana here today with a Christmas Sweet Treat Bag and Sweet Treat House Add-On

Sunny Studio Stamps: Sweet Treat Gift Bag Sweet Treat House Add-On Woodland Border Dies Christmas Treat Bag by Ana Anderson

To create this bag, I used several patterned papers that matched my winter theme. Subtle Grey Tones 6x6 paper for the bag base. Very Merry 6x6 paper for the roof, door, bows, ornaments and tag topper. Holiday Cheer 6x6 paper for the trees and hedges. White 110lb cardstock for tag base, window and door frame. I started with die cutting the bag base from 2 pieces of grey paper and adhering them together.

Out of red paper, I die cut the roof base and 6 pieces of shingles layering them together with glue tape then adding them to the top of the bag. I cut the door, bows ornaments and a star out of the same red paper.

Sunny Studio Stamps: Sweet Treat Gift Bag Sweet Treat House Add-On Woodland Border Dies Christmas Treat Bag by Ana Anderson

I used Woodland Borders dies to die cut the trees, wreath and hedges (which are mini tag toppers turned upside down). Using the same die set (Woodland Borders) I die cut the snow out of glitter paper.

I adhered all the elements to the bag and added Glossy accents to the wreath bow and ornaments and Wink of Stella to the other two bows. Finally, I stamped the To/From to the tag and tied it to the handle with twine.

This adorable treat bag was so much fun to make and I love the way it turned out! I really hope you enjoyed today’s post and got inspired. Thank you so much for stopping by today and until next week I wish you happy crafting!

--------------------------------------------------

Hello there and happy Wednesday! Franci here with you today showcasing the Sweet Treat Bag die set.

Sunny Studio Stamps: Sweet Treat Gift Bag Merry Mice Circle Snowflake Frame Dies Christmas Treat Bag by Franci Vignoli

Aww look at this cute festive treat bag!! First of all I created my bag by die-cutting the main piece out of white cardstock.  Then I trimmed to size this red patterned paper panel (using a design from the Very Merry Paper pad) and I glued it on the front.

I cut out another piece of patterned paper from the same pad (I love this snowy design!) and glued it down too. I left this a little bit taller than my goodie bag so I could fold it over and secure my treat box closed.

Sunny Studio Stamps: Sweet Treat Gift Bag Merry Mice Circle Snowflake Frame Dies Christmas Treat Bag by Franci Vignoli

Then I stamped colored and die cut some cute images from the Merry Mice set, colored them with Copics and cut them out with their coordinated dies. I stuck them in this fun design and secured them to my goodie bag with some foam adhesive.

Finally I die cut the little tag and the snowflake (using the Snowflake Circle Frame die set) out of white cardstock and I stamped my "to: & from:" using some little stamps included in the Season's Greetings Stamps.

Finally I added some details with a white gel pen and close my little Christmas treat bag at the top with a small wooden clip. Thanks a lot for stopping by!

Sunny Studio Supplies Used:

Woodland Borders Dies
Shop at:
Sunny Studio
Holiday Cheer 6x6 Paper
Shop at:
Sunny Studio
Subtle Grey Tones Paper
Shop at:
Sunny Studio
Very Merry 6x6 Paper
Shop at:
Sunny Studio
Season's Greetings Stamps
Shop at:
Sunny Studio
Merry Mice Stamps
Merry Mice Stamps
Shop at:
Sunny Studio
Merry Mice Dies
Merry Mice Dies
Shop at:
Sunny Studio
Snowflake Circle Frame
Shop at:
Sunny Studio
Sweet Treats Gift Bag
Shop at:
Sunny Studio
Sweet Treats House Add-on
Shop at:
Sunny Studio