Wednesday, August 21, 2019

Just Bee-cause Cards with Franci and Ana

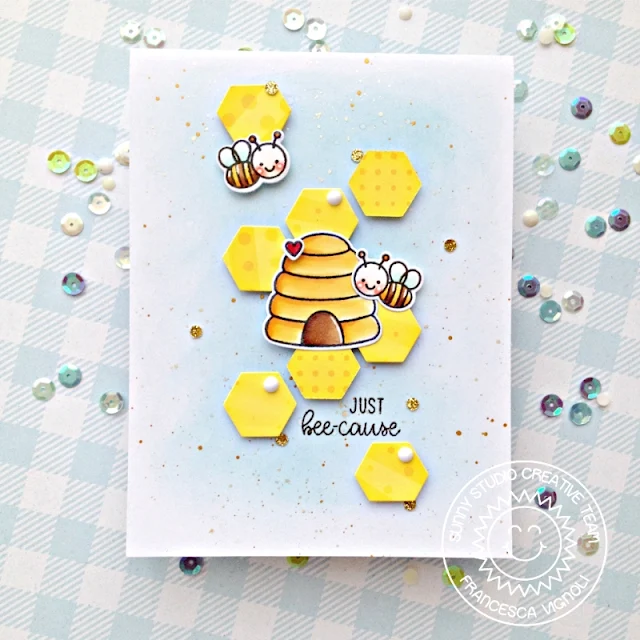
Hello there and happy Wednesday! Franci here with you today with a sweet card showcasing the Just Bee-cause mini set!

Sunny Studio Stamps: Just Bee-cause Frilly Frame Dies Because Cards by Franci Vignoli

First I created my card base out of white cardstock and I lightly inked the front blending Distress inks. I added some little sparkle watercolors and water splatters and let it sit to dry completely. I die cut the yellow patterned cardstock from the Heroic Halftones set using the Frilly Frames Hexagons dies and glued some of the inside pieces to my card using foam adhesive. 

Sunny Studio Stamps: Just Bee-cause Frilly Frame Dies Because Cards by Franci Vignoli

I stamped, colored with Copics and die cut all the images and glued them down as well.
Finally I added some little gold sparkle dots embellishments here and there and some white Nuvo drops as well.

Hope you like my card and thanks a lot for stopping by today!

--------------------------------------------------

Hello everyone! Ana here today with two cards featuring super adorable Just Bee-cause stamps and dies from the newest fall 2019 release.

Sunny Studio Stamps: Just Bee-cause Fluffy Clouds Border Dies Frilly Frame Dies Fancy Frames Dies Just Because Cards by Ana Anderson

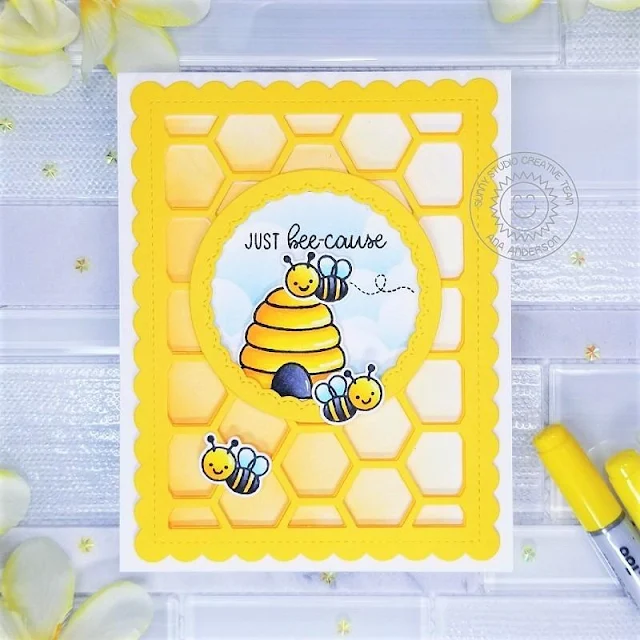
I started with stamping, Copic coloring and die cutting the images for both of my cards. Once the images were cut, I created the background for my first card, using new Frilly Frames Hexagon die set for the honeycomb, as well as Fancy Frames Circle Dies for the circle frame. I inked Spiced Marmalade and Mustard Seed distress inks to create the panel behind the hexagon die cut.

Sunny Studio Stamps: Just Bee-cause Fluffy Clouds Border Dies Frilly Frame Dies Fancy Frames Dies Just Because Cards by Ana Anderson

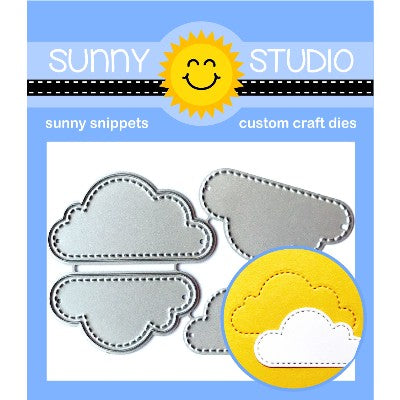
For the clouds in the middle of the circle frame, I used Fluffy Clouds Border Dies and die cut acetate to create a stencil, then inked Salty Ocean Distress ink over the stencil.

Sunny Studio Stamps: Just Bee-cause Fluffy Clouds Border Dies Frilly Frame Dies Fancy Frames Dies Just Because Cards by Ana Anderson

I stamped the sentiment on the cloud background then adhered both inked panels behind the hexagon die cut and circle frame. Using foam tape, I added the bees and the beehive then adhered completed panel to an A2 sized card base. 

Sunny Studio Stamps: Just Bee-cause Fluffy Clouds Border Dies Frilly Frame Dies Fancy Frames Dies Just Because Cards by Ana Anderson

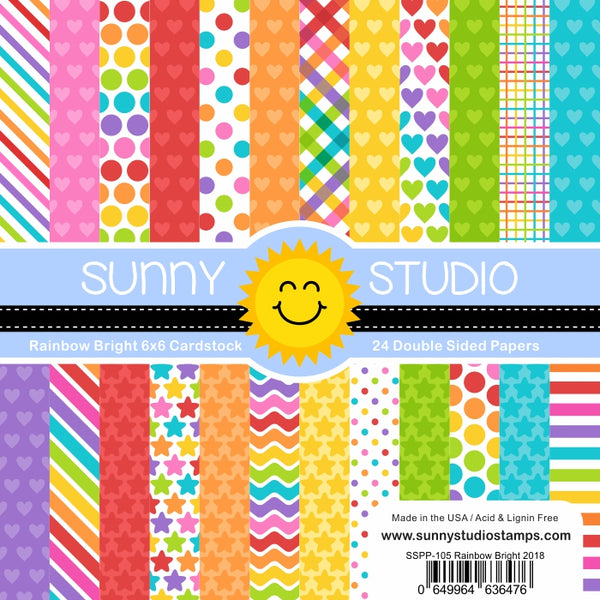
I went with a square shape for my second card and started with Fancy Frames Square Dies and yellow hearts patterned paper from Rainbow Bright 6x6 paper pack.

Sunny Studio Stamps: Just Bee-cause Fluffy Clouds Border Dies Frilly Frame Dies Fancy Frames Dies Just Because Cards by Ana Anderson

For the background, I lightly inked Salty Ocean Distress ink on a piece of light blue cardstock, then used Fluffy Clouds Dies to add stitched clouds shapes, then die cut several clouds from blue and white cardstock using dies from the same set. I adhered die cut clouds and white heat embossed the sentiment.

Sunny Studio Stamps: Just Bee-cause Fluffy Clouds Border Dies Frilly Frame Dies Fancy Frames Dies Just Because Cards by Ana Anderson

Once my sky was completed I adhered the bees and the beehive, as well as the branch and flowers from A Bird’s Life stamp set, then finished off the card by adhering the yellow heart frame and red hearts.

Copic colors used - beehive/bees: Y38, Y17, Y15, Y08, Y02, C7, C5, C3, B00; branch: E47, E37, E33, G05, YG06, YG03; flowers: Y15, Y08, R13, R21; hearts: R29, R17

Thank you so much for stopping by today and spending some time with us! Have a wonderful day!

Sunny Studio Supplies Used:

A Bird's Life Stamps
Shop at:
Sunny Studio
A Bird's Life Dies
A Bird's Life Dies
Shop at:
Sunny Studio
Fancy Frames-Circle Dies
Shop at:
Sunny Studio
Fancy Frames-Square Dies
Shop at:
Sunny Studio
Rainbow Bright 6x6 Paper
Shop at:
Sunny Studio
Fluffy Clouds Dies
Fluffy Clouds Dies
Shop at:
Sunny Studio
Heroic Halftones 6x6 Paper
Shop at:
Sunny Studio
Just Bee-cause Stamps
Shop at:
Sunny Studio
Just Bee-cause Dies
Just Bee-cause Dies
Shop at:
Sunny Studio
Fluffy Clouds Border Dies
Shop at:
Sunny Studio
Frilly Frames Hexagon Dies
Shop at:
Sunny Studio

Tuesday, August 20, 2019

Embossing Folder Focused Cards with Juliana and Angelica

Hello friends! It's Juliana here today to share a mixed media style card featuring the new Lots of Dots Embossing Folder.

Sunny Studio Stamps: Rainbow Word Die Over The Rainbow Fluffy Clouds Frilly Frames Dies Everyday Card by Juliana Michaels

To get started, I die cut a piece of Bristol Paper using the stitched border die from the Frilly Frames Retro Petals Die. I then embossed this using the Lots of Dots Embossing Folder. Next, I took a rainbow of Distress Oxide inks and applied them at a diagonal  rainbow order across the embossed paper. For this card I used Wilted Violet, Blueprint Sketch, Mowed Lawn, Spiced Marmalade, Squeezed Lemon, Picked Raspberries and Candied Apple. I then splattered water onto the paper using a small paint brush and dabbed it dry with a paper towel.

Sunny Studio Stamps: Rainbow Word Die Over The Rainbow Fluffy Clouds Frilly Frames Dies Everyday Card by Juliana Michaels

To further add to the mixed media style I then splattered a slightly darker Distress Ink onto each section. I used Seedless Preserves, Faded Jeans, Peeled Paint, Carved Pumpkin, Mustard Seed, and Festive Berries. To do this, I tapped the ink pad onto my glass mat, added a bit of water and then picked up the ink and water with a small paint brush and splattered it into the corresponding section of color.

Sunny Studio Stamps: Rainbow Word Die Over The Rainbow Fluffy Clouds Frilly Frames Dies Everyday Card by Juliana Michaels

Once the background was complete, I then went about adding the sentiment. I die cut the Rainbow Word Die from black cardstock 3 times and glued them together. I then stamped the sentiments from the Over The Rainbow Stamp Set onto white cardstock and trimmed it into small strips.

Sunny Studio Stamps: Rainbow Word Die Over The Rainbow Fluffy Clouds Frilly Frames Dies Everyday Card by Juliana Michaels

Since you can't have a rainbow without a little rain, I decided to add some clouds cut from white cardstock using the Fluffy Clouds Dies. I then finished it off with some Clear Drops Mix #2 to represent the rain!

Thanks so much for stopping by today! I hope you enjoyed this mixed media style card featuring the Lots of Dots Embossing Folder.

--------------------------------------------

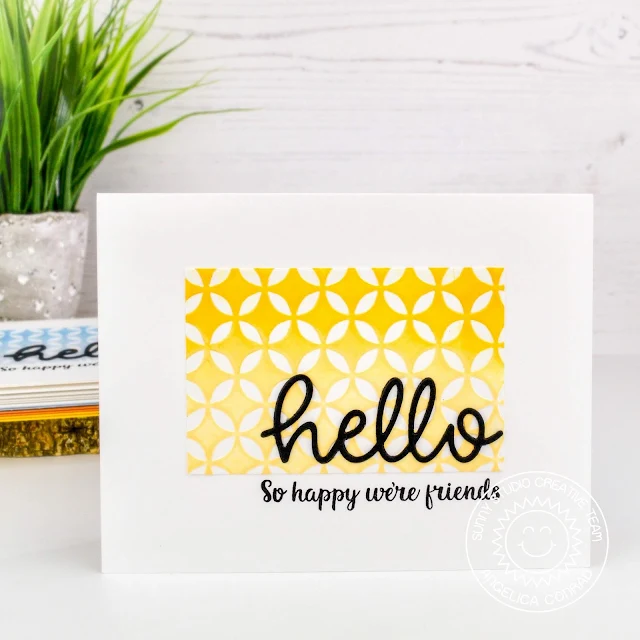
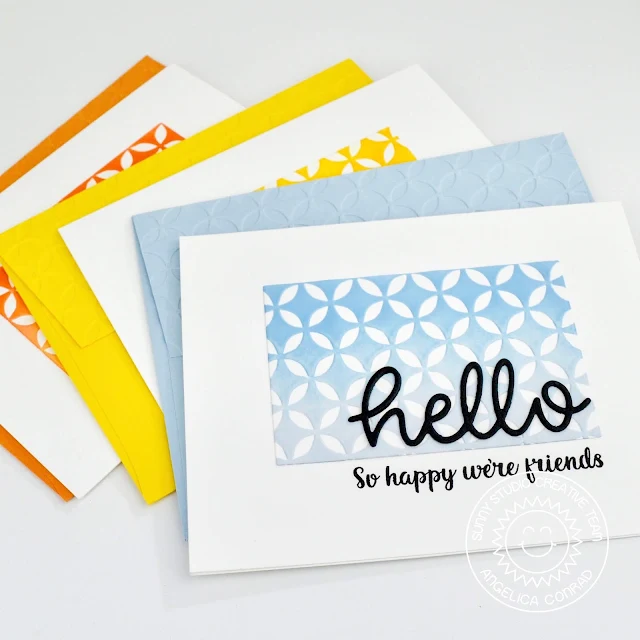
Hi friends, Angelica here with a set of Hello cards showcasing the Moroccan Circles Embossing Folder. These cards are great to have on hand, and are an easy gift to make for a loved one. 

Sunny Studio Stamps: Hello Word Die Embossing Folders Everyday Card by Angelica Conrad

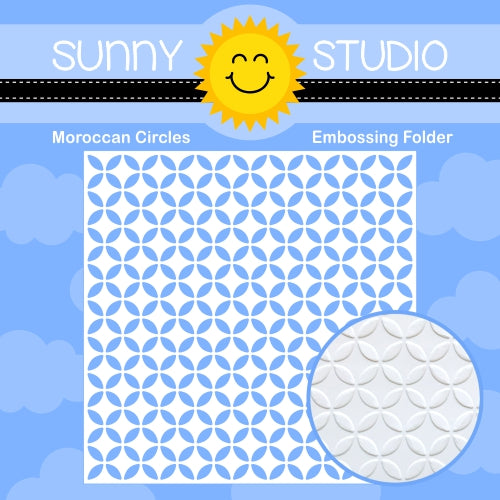
I started with three panels of white card stock. I put each panel into the embossing folder and ran it through my die-cut machine. I picked the back-side of the embossed panels to add ink to. 

Sunny Studio Stamps: Hello Word Die Embossing Folders Everyday Card by Angelica Conrad

I used ink cubes to add color. I picked a light and a medium light ink from a few Altenew color families. I rubbed the the ink cubes directly onto the paper, using light pressure in a circular motion. I blended light into medium light twice on each panel. Once I was finished, I set the panels aside to dry.

I used the Hello die to die-cut twelve words from black card stock. I glued and stacked two words together for each card. I made six card bases, and used my MISTI to stamp a sentiment onto each card from the Cute As A Button stamp set.  

Sunny Studio Stamps: Hello Word Die Embossing Folders Everyday Card by Angelica Conrad

My last step before assembling the cards was getting envelopes ready. I picked coordinating colors, put the back flap of each envelope into the Moroccan Circles embossing folder, and ran them through my die-cut machine. 

Sunny Studio Stamps: Hello Word Die Embossing Folders Everyday Card by Angelica Conrad

I cut each panel down to two small rectangles, and used double-sided adhesive to attach the rectangles to the card bases. I added the words with glue to finish the cards. 

I love how these cards turned out. And the embossed envelopes finish the set with a wonderful subtle touch. hope I have given you new ideas on how to use embossing folders. Thanks for stopping by! 

Sunny Studio Supplies Used:

Cute As A Button Stamps
Shop at:
Sunny Studio
Hello Word Die
Hello Word Die
Shop at:
Sunny Studio
Over The Rainbow Stamps
Shop at:
Sunny Studio
Rainbow Word Die
Rainbow Word Die
Shop at:
Sunny Studio
Fluffy Clouds Dies
Fluffy Clouds Dies
Shop at:
Sunny Studio
Lots of Dots Embossing
Shop at:
Sunny Studio
Moroccan Circles Embossing
Shop at:
Sunny Studio
Frilly Frames Retro Petals Dies
Shop at:
Sunny Studio

Monday, August 19, 2019

Woodsy Autumn Cards with Eloise and Leanne

Hello friends, Eloise here and today I have a card showcasing the Woodsy Autumn Stamp Set. I paired it with the Fancy Frames Oval Dies to help create my scene.

Sunny Studio Stamps: Woodsy Autumn Fluffy Clouds Frilly Frames Dies Bundle Of Hugs Card by Eloise Blue

I started off with stamping and colouring my images from Woodsy Autumn. I used Copic Markers and then cut them out. While die cutting, I cut out a white frame from the Fancy Frames Oval Set, as well.

(Copic Markers Used: YG21, YG23, YG17, YG67 / B91, B93, B95, B97 / R00, R30, R20 / 0 / R81, R83, R85, R89 / Y13, Y35, YR23, YR27 / E97, E99, E07, E09 / E82, E83, E87, E89 / YR12, YR14, YR16, YR18 / W00, W0, W1, W3, W5, W7 / E50, E51, E53, E55, E57, E59 / E40, E41, E42, E43, E44, E47, E49 / RV63, RV66, RV69, RV99)

Sunny Studio Stamps: Woodsy Autumn Fluffy Clouds Frilly Frames Dies Bundle Of Hugs Card by Eloise Blue

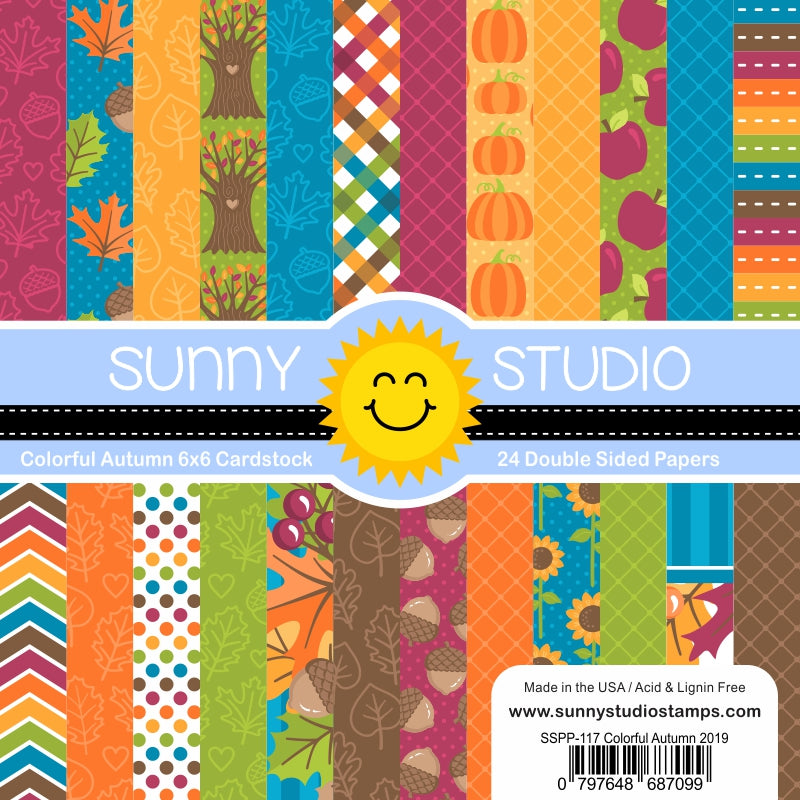
I then took a piece of patterned paper from Colorful Autumn Paper Pad and traced oval die on top of a piece of striped paper and then cut it out with scissors. I added adhesive onto the back of the white frame and adhered it on top of the patterned paper. I tied a hemp cord bow onto the left-hand side of the panel. Next, I took a piece of natural cardstock and ink blended a little Tumbled Glass to the top, Twisted Citron to the middle and Scattered Straw to the bottom. I then adhered my oval panel on top.

Sunny Studio Stamps: Woodsy Autumn Fluffy Clouds Frilly Frames Dies Bundle Of Hugs Card by Eloise Blue

I adhered my scene together using foam tape and liquid glue and then white heat embossed the ‘Bundles of Hugs’ sentiment onto a thin strip of black cardstock and adhered it to the right-hand side.

Thanks so much for stopping by today and I’ll see you next week.

------------------------------------------------------

Hi everyone! Leanne here and I have a fun fall scene card to share today. Anyone who knows my card making style, is well aware of my love for building scenes. Fall scenes are some of my favorite to create. I like my scenes to have several layers and lots of dimension so I've used a combination of stamps and dies to create a complete scene from top to bottom. 

Sunny Studio Stamps: Woodsy Autumn Fluffy Clouds Dies Woodland Border Dies Bundle Of Hugs Card by Leanne West

I started with an A2 sized panel of white card stock. I wanted to create a sky with a lot of interest. I blended Peacock Feathers Distress Oxide ink onto the top half of the panel. I then used the Fluffy Cloud dies to add stitched cloud shapes right into the sky. I also added a few die cut white clouds overtop.

Sunny Studio Stamps: Woodsy Autumn Fluffy Clouds Dies Woodland Border Dies Bundle Of Hugs Card by Leanne West

Next I created 3 layers of rolling hills with the Woodland Borders dies and colored by ink blending on Bundled Sage Distress Oxide ink. I stamped and Copic colored images from the Woodsy Autumn set. I added lots of extra details to the colored images with a white gel pen. I can never leave a scarf plain on any cute critter. I just love to add stripes or polka dots or plaids.

Sunny Studio Stamps: Woodsy Autumn Fluffy Clouds Dies Woodland Border Dies Bundle Of Hugs Card by Leanne West

After I adhered all the images in place, I had plenty of room to add a greeting in the top left portion of the sky. I white heat embossed a sentiment from the Woodsy Autumn set onto light brown card stock. I trimmed into a thin strip and adhered flush to the left edge of the card.   

Sunny Studio Supplies Used:

Fancy Frames- Ovals
Fancy Frames- Ovals
Shop at:
Sunny Studio
Woodland Borders Dies
Shop at:
Sunny Studio
Fluffy Clouds Dies
Fluffy Clouds Dies
Shop at:
Sunny Studio
Colorful Autumn 6x6 Paper
Shop at:
Sunny Studio
Woodsy Autumn Stamps
Shop at:
Sunny Studio
Woodsy Autumn Dies
Woodsy Autumn Dies
Shop at:
Sunny Studio

Sunday, August 18, 2019

Guest Designer Spotlight: Plane Awesome Video with Mindy Baxter


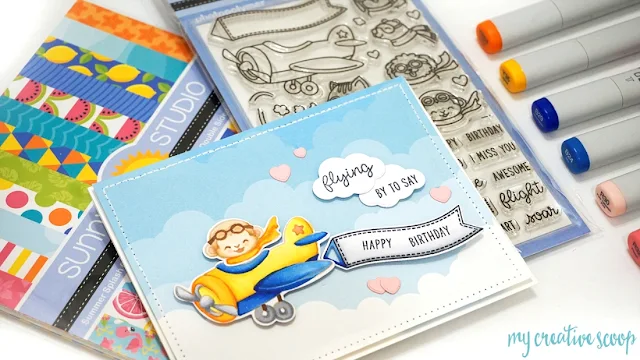
Sunny Studio Stamps: Plane Awesome Critter in Airplane Card with Copic No Line Coloring Video Tutorial by Mindy Baxter

Hello! It’s Mindy from My Creative Scoop and I’m so excited to be guest designing for Sunny Studios Stamps! I’ve been card-making for going on 13 years! My favorite part is coloring with my Copic Markers – I just love to bring a stamped image to life. I live in Southern California with my hubby and our 3 kids, Ralphy 20, Belle 16 and Katie 12. I’m fortunate enough to have made my hobby a full-time business where I teach online and local Copic classes. Thank you so much for joining me on the Sunny Studios Stamps Blog today, I hope I will inspire you to create!

Today I'm sharing a card using this adorable Stamp Set called Plane Awesome and the cloud patterned paper from the Summer Splash 6x6 Paper Pack. I colored the stamps with my Copic Markers. Here's the colors I used:

Monkey - E50, E53, E55, E57, YR04, Y35, R30, R32
Plane & Flag - Y35, YR04, Y11, Y02, B24, B26, B29, C0, C2, C4, R32, R30

Sunny Studio Stamps: Plane Awesome Critter in Airplane Card with Copic No Line Coloring Video Tutorial by Mindy Baxter

Please Check out my video below so you can see how I colored the images on my card using the no-line technique, with my Copic Markers.


I absolutely LOVE the way this card turned out. I hope you feel inspired and ready to create!

Sunny Studio Stamps: Plane Awesome Critter in Airplane Card with Copic No Line Coloring Video Tutorial by Mindy Baxter

Thank you so much for stopping by. Have a great day!

Mindy

Let’s Connect on Social Media!

Sunny Studio Supplies Used:

Summer Splash 6x6 Paper
Shop at:
Sunny Studio
Plane Awesome Stamps
Shop at:
Sunny Studio
Plane Awesome Dies
Plane Awesome Dies
Shop at:
Sunny Studio

Saturday, August 17, 2019

Guest Designer Spotlight: Cards with Keeway Tsao

Hi there! It’s Keeway from Kiwi Koncepts and I’m excited to be here today to share with you some inspirations from the Fall 2019 Release! This release packed full of various fun themes.

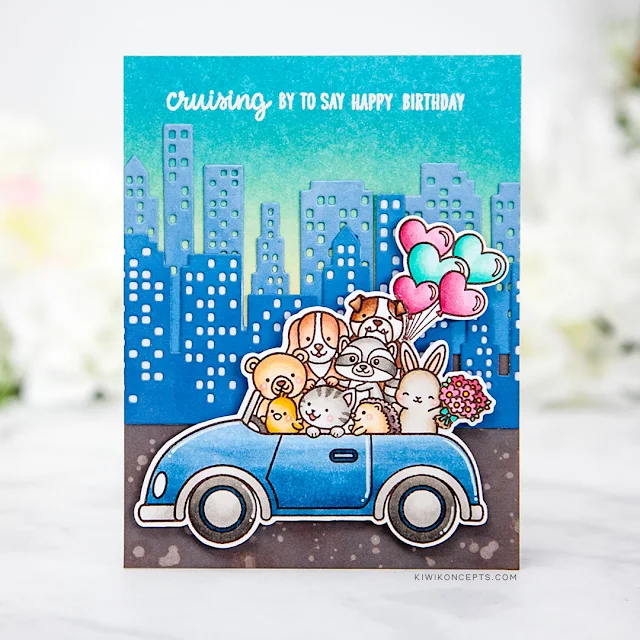
Sunny Studio Stamps: Cruising Critters Cityscape Border Dies Love Monkey Birthday Card by Keeway Tsao

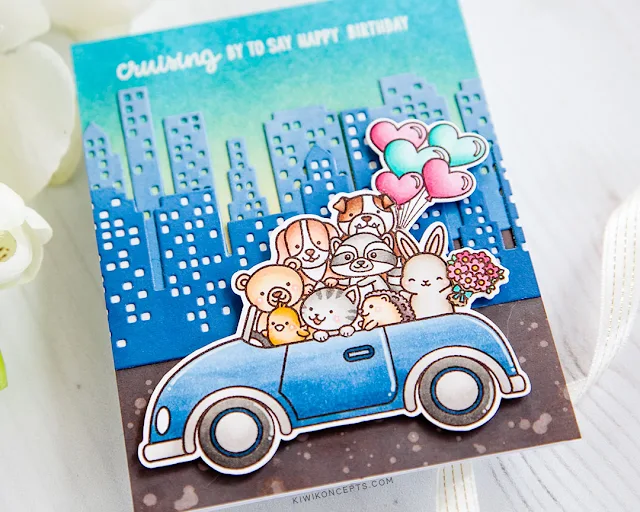
Let’s start with the mini stamp set called Cruising Critters. These car is packed full with the cutest critters! I stamped the image in a dark brown hybrid ink and colored them with Copic markers. I also borrowed some extra images from Love Monkey to add some balloons and a floral bouquet to the mix. The image was then fussy cut out, but coordinating Cruising Critter dies and Love Monkey dies are available.

Sunny Studio Stamps: Cruising Critters Cityscape Border Dies Love Monkey Birthday Card by Keeway Tsao

To create the city scene, I used the new Cityscape Border Die. I die cut the cityscape twice out of a blue card stock. On one of the die cuts, I gently blended white pigment ink from the top down. For the other die cut, I gently blended Faded Jeans distress oxide from the bottom up. This gave me the variations in color to get more contrast in layering them.

Sunny Studio Stamps: Cruising Critters Cityscape Border Dies Love Monkey Birthday Card by Keeway Tsao

My background was ink blended with Broken China and Antique Linen for the top half and Ground Espresso for the bottom half. The sentiment was heat embossed in white near the top center.

Sunny Studio Stamps: Plane Awesome Fluffy Clouds Border Dies Card by Keeway Tsao

Now let’s move up to the skies! For my next card I used the Plane Awesome stamps. I love how I have so many choices to on a pilot for the plane. I stamped the plane twice and picked out the dog and bear as my pilots. I also stamped two banners with my sentiment across them. These images were color with Copic markers and then die cut with their coordinating dies.


Sunny Studio Stamps: Plane Awesome Fluffy Clouds Border Dies Card by Keeway Tsao

I created a cloudy background with a stencil and Broken China distress oxide inks. If you don’t have a cloud stencil, you can also easily create your own with the Fluffy Clouds Border Dies and a piece of acetate (or paper if you plan to just throw it away afterwards).

Sunny Studio Stamps: Plane Awesome Fluffy Clouds Border Dies Card by Keeway Tsao

For extra dimension, I also die cut some stitched clouds using the Fluffy Clouds Die. I gently blended the bottom of each with Broken China distress oxide inks. The clouds and images were then added last with foam tape to complete the card.

Thanks for joining me today!

Sunny Studio Supplies Used:

Love Monkey Stamps
Love Monkey Stamps
Shop at:
Sunny Studio
Love Monkey Dies
Love Monkey Dies
Shop at:
Sunny Studio
Fluffy Clouds Dies
Fluffy Clouds Dies
Shop at:
Sunny Studio
Cruising Critters Stamps
Shop at:
Sunny Studio
Cruising Critters Dies
Shop at:
Sunny Studio
Plane Awesome Stamps
Shop at:
Sunny Studio
Plane Awesome Dies
Plane Awesome Dies
Shop at:
Sunny Studio
Cityscape Border Dies
Shop at:
Sunny Studio
Fluffy Clouds Border Dies
Shop at:
Sunny Studio