Friday, August 16, 2019

Comic Strip Speech Bubble Cards with Rachel and Lexa

Hello everyone! It's Rachel here and I have a group of Super Hero Tags to share with you today! Super Heroes are quite popular right now and I can't begin to tell you how many Super Hero Birthday parties that I have had for my kids over the past few years. I also know many adults that would love a Super Hero themed card or gift as well!

Sunny Studio Stamps: Super Duper Build-A-Tag Dies Comic Strip Speech Bubble Dies Super Hero Themed Gift Tags by Rachel Alvarado

For my tags today, I combined the Super Duper Stamps Set along with the new Comic Strip Speech Bubbles Die. You can't have Super Heroes without speech bubbles, right?! I adore both of these sets and they compliment each other so well! The nice thing about tags is that they are super easy to make and so versatile. You can make a quick tag to add to a gift for a favorite teacher, friend, parent, sibling, or create a bunch of Super Hero tags to add on to party favors or treat bags!

Sunny Studio Stamps: Super Duper Build-A-Tag Dies Comic Strip Speech Bubble Dies Super Hero Themed Gift Tags by Rachel Alvarado

I used the Build-A-Tag #1 Dies and the new Heroic Halftones Paper Pad to create a quick and easy comic-strip style themed base for my tags. I then stamped all of my images onto a sheet of Neenah Solar White 110lb Card Stock with Memento Tuxedo Black Ink and colored them with Copic Sketch Markers. I used the coordinating Super Duper Dies to cut them out.

Copic colors used: ** Please note: These colors are just a guide. You DO NOT need all of them to achieve nice blending. **
  • Skin: E0000, E000, E00, E11, E13
  • Light Blue: B000, B00, B02, B04, B06
  • Orange: YR12, YR04, YR09, E35
  • Tongues: R83
  • Inside of Mouth: R56, R89
  • Black: C3, C5, C7, 100
  • Purple: V01, V04, V06, V09
  • Pink: RV000, RV52, RV55, RV66, RV69
  • Red: R05, R27, R46, R89, RV99
  • Dark Blue: B21, B24, B28, B39
  • Yellow: Y02, Y08, Y15, E34
  • Green: YG01, YG07, YG17, YG67, G28
Sunny Studio Stamps: Super Duper Build-A-Tag Dies Comic Strip Speech Bubble Dies Super Hero Themed Gift Tags by Rachel Alvarado

Lastly, I stamped my sentiments onto six different speech bubbles and then added a Super Hero and a speech bubble to each tag using some 3D Foam Adhesive Tape for some added dimension.

I hope you enjoyed these tags today! Thank you all for dropping by! Have a wonderful weekend!

---------------------------------------------------

Hi everyone! Lexa here today with a super duper adorable birthday card using a versatile brand new dies called Comic Strip Speech Bubbles Dies. Along with the Super Duper Stamps. Let's get started.

Sunny Studio Stamps: Super Duper Cityscape Border Dies Comic Strip Speech Bubble Dies Super Hero Themed Card by Lexa Levana

First I die cut the Comic Strip Speech Bubbles Dies on a white cardstock then I colour each rectangles with Distress Inks (Salted Ocean, Mustard Seed, Twisted Citron, Festive Berries). It gives a vibrant and colorful touch to this superheroes' card. The images are stamped with Versafine black ink and watercolor them with Distress Markers.

Sunny Studio Stamps: Super Duper Cityscape Border Dies Comic Strip Speech Bubble Dies Super Hero Themed Card by Lexa Levana

On the blue panel I use Cityscape Border Dies on black cardstock with a superhero flying over the buildings. It's so vibrant and fun, perfect for any boys' birthday greetings. I also add some stars to add dimensions using Primary Star Confetti.

That's all for today, I hope you like today's card as much as I do. Have an amazing day!

Sunny Studio Supplies Used:

Build-A-Tag #1 Dies
Build-A-Tag #1 Dies
Shop at:
Sunny Studio
Heroic Halftones 6x6 Paper
Shop at:
Sunny Studio
Super Duper Stamps
Super Duper Stamps
Shop at:
Sunny Studio
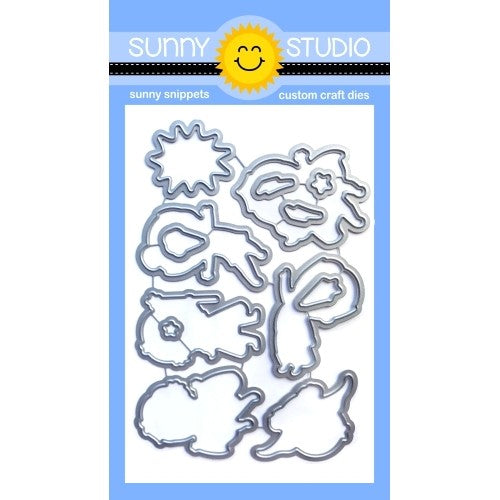
Super Duper Dies
Super Duper Dies
Shop at:
Sunny Studio
Cityscape Border Dies
Shop at:
Sunny Studio
Comic Strip Speech Bubble Dies
Shop at:
Sunny Studio

Thursday, August 15, 2019

Super Duper Cards with Anja and Vanessa

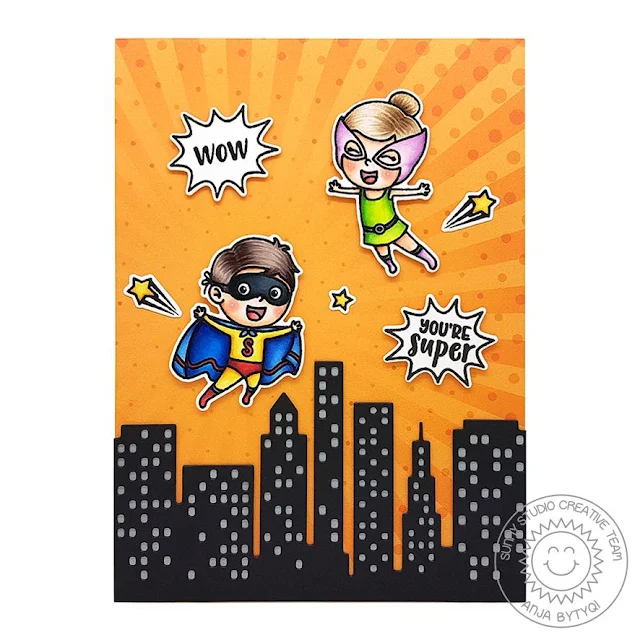
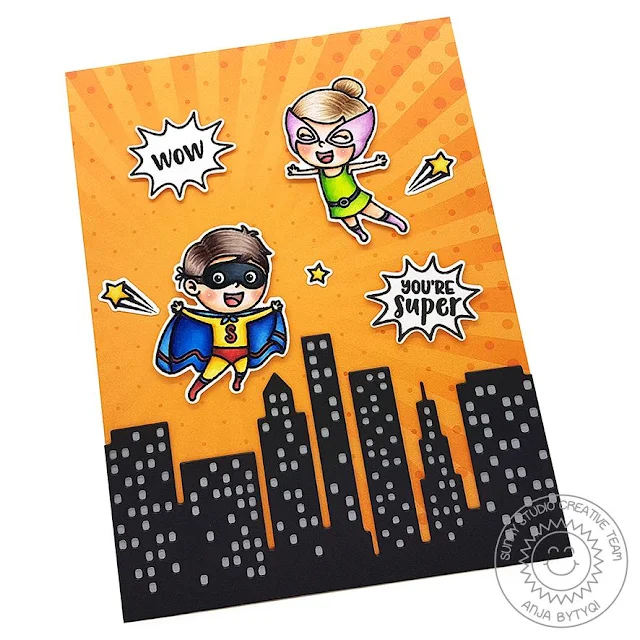
Hello everyone, Anja here and today I'm highlighting the fun Super Duper Stamps. I love these cute super hero images! They go perfectly with the Cityscape Border Die and Heroic Halftones 6x6 Papers. So I really enjoyed creating this comic style card.

Sunny Studio Stamps: Super Duper Cityscape Border Dies Super Hero Themed Card by Anja Bytyqi

I chose the orange dotty burst paper for my background and die cut the cityscape from black cardstock. To enhance the tiny windows, I backed the die-cut with grey cardstock.

Sunny Studio Stamps: Super Duper Cityscape Border Dies Super Hero Themed Card by Anja Bytyqi

Next, I stamped the images in Memento Tuxedo Black Ink and colored them with Copic Markers. The speech bubbles and sentiments were stamped in VersaFine Onyx Black Ink. I used the coordinating dies to cut everything out.

Thank you so much for stopping by! Have a wonderful day!

-----------------------------------------------------

Hello everybody! Vanessa here with a girly card using the Super Duper Stamps. I just love this wonderful stamp set!

Sunny Studio Stamps: Super Duper Cityscape Border Dies Super Hero Themed Card by Vanessa Menhorn

I started with a panel of white cardstock and inked it with pink/purple/blue Distress Oxide inks. With a white gel pen, I added stars. Now I die-cut the Cityscape Border die from black shimmer cardstock, trimmed it and adhered it. After I had adhered the panel to the card base, I stamped and heat-embossed the sentiment onto a strip of pink cardstock and added it to the card.

Sunny Studio Stamps: Super Duper Cityscape Border Dies Super Hero Themed Card by Vanessa Menhorn

I stamped the girl onto white cardstock, colored her with Copics, die-cut her with the matching die and adhered her with foam tape. Finally, I added the stars to the sky.

I am sure any little girl would love this super heroine! The wonderful set makes it easy to create cards for every little hero :) See you next week, thank you for stopping by!

Sunny Studio Supplies Used:

Heroic Halftones 6x6 Paper
Shop at:
Sunny Studio
Super Duper Stamps
Super Duper Stamps
Shop at:
Sunny Studio
Super Duper Dies
Super Duper Dies
Shop at:
Sunny Studio
Cityscape Border Dies
Shop at:
Sunny Studio

Wednesday, August 14, 2019

Cruising Critters Cards with Ana and Franci

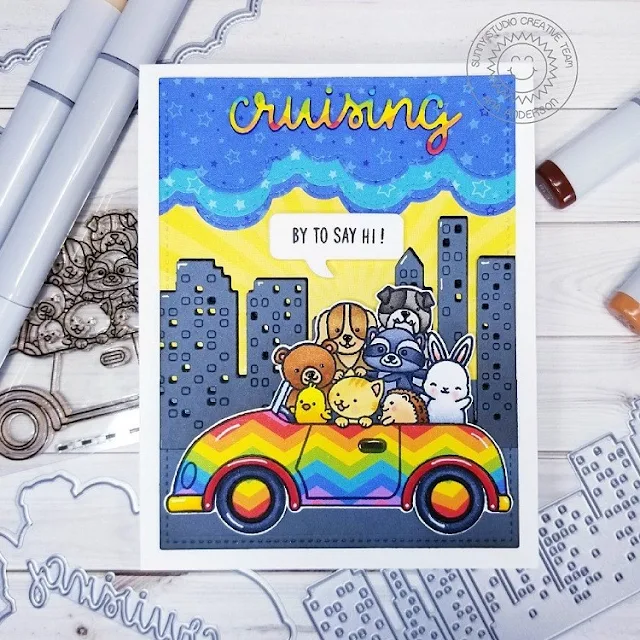
Hello everyone! It’s Ana here today with a fun card featuring new and so adorable Cruising Critters stamps and dies. These 7 cuties all piled up in a car just make me smile and I couldn’t wait to play with them. 

Sunny Studio Stamps: Cruising Critters Cityscape Border Dies Fluffy Clouds Border Dies Hello Friendship Card by Ana Anderson

I started with stamping, coloring and die cutting Cruising Critters image. I decided to do some paper piecing for the car, so I stamped the image on a piece of paper from the Surprise Party Paper Pack. I fussy cut the car image out, as well as the hub caps. I die cut the word CRUISING (Cruising Critters Dies) from the same Surprise Party paper.

To create the sunset I adhered a piece of yellow patterned paper from Spring Sunburst Paper Pack. Next, I used new Fluffy Clouds Border Dies and patterned papers from Surprise Party Paper Pack to create the clouds. I cut grey and black cardstock from Cityscape Border Die.

Sunny Studio Stamps: Cruising Critters Cityscape Border Dies Fluffy Clouds Border Dies Hello Friendship Card by Ana Anderson

To assemble the card, I adhered all the die cuts to the background, adhered the word cruising to the clouds and added the sentiment (stamped and die cut with speech bubble die from Comic Strip Speech Bubbles Dies) in the middle of the panel.

Thank you so much for stopping by and spending some time with us today! I really hope you like today’s card and got inspired. Have a wonderful day!

---------------------------------------------

Hello there and happy Wednesday! Franci here with you today with a pastel colors card featuring the new adorable Cruising Critters set.

Sunny Studio Stamps: Cruising Critters & Cityscape Border Dies Critters in Car Birthday Card by Franci Vignoli

First of all I created my card base out of white cardstock, I inked the front with Distress inks to create my pastel colors city sky/ background and I added some sparkly watercolors splatters. I die cut the Cityscape Border out of white cardstock and I glued it down, I stamped colored and die cut my image and adhered it down as well with some foam adhesive.

Sunny Studio Stamps: Cruising Critters & Cityscape Border Dies Critters in Car Birthday Card by Franci Vignoli

Then I die cut part of my sentiment out of gold glitter paper and I also die cut a speech bubble using a die from the Comic Strip Speech Bubbles set, colored it in pink and stamped another part of the sentiment. I glued down all the other elements and added some details with a white gel pen. All those critters are soo cute, aren't they?!

Sunny Studio Stamps: Cruising Critters & Cityscape Border Dies Critters in Car Birthday Card by Franci Vignoli

Finally I added some little gold glitter hearts and dots to complete my design. Hope you like my card and thank you so much for stopping by today!

Sunny Studio Supplies Used:

Spring Sunburst 6x6 Paper
Shop at:
Sunny Studio
Surprise Party 6x6 Paper
Shop at:
Sunny Studio
Cruising Critters Stamps
Shop at:
Sunny Studio
Cruising Critters Dies
Shop at:
Sunny Studio
Cityscape Border Dies
Shop at:
Sunny Studio
Fluffy Clouds Border Dies
Shop at:
Sunny Studio
Comic Strip Speech Bubble Dies
Shop at:
Sunny Studio

Tuesday, August 13, 2019

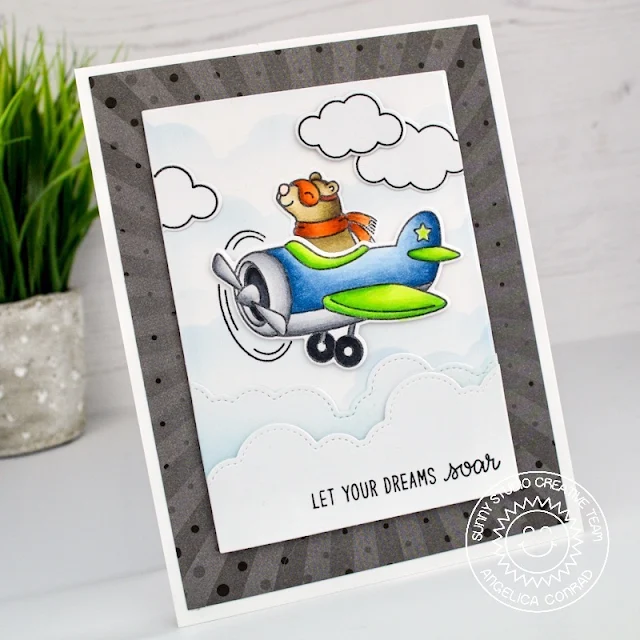
Plane Awesome Cards by Angelica and Juliana

Hello friends, Angelica here with a new card for this week showcasing the Plane Awesome Stamp Set.

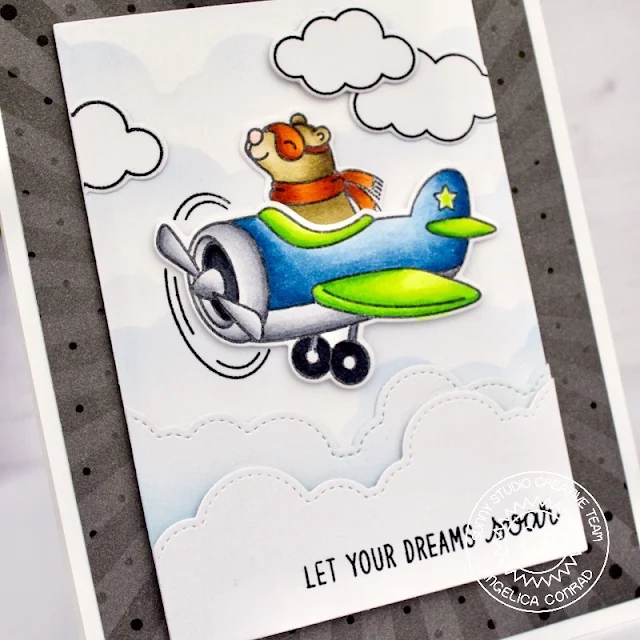
Sunny Studio Stamps: Plane Awesome Fluffy Clouds Border Dies Let Your Dreams Soar Card by Angelica Conrad

I started the card by stamping the images onto white card stock, and using Copic Markers to color them. I die-cut them with the coordinating dies, then moved on to the background.

Sunny Studio Stamps: Plane Awesome Fluffy Clouds Border Dies Let Your Dreams Soar Card by Angelica Conrad

I used the Fluffy Clouds Border Dies to die-cut white card stock. I also die-cut a cloud to use as a stencil for the cloud background, blending light blue ink over it. I trimmed the panel and clouds down, then put a sentiment together to stamp onto the bottom cloud.

Sunny Studio Stamps: Plane Awesome Fluffy Clouds Border Dies Let Your Dreams Soar Card by Angelica Conrad

I attached everything together with thin foam squares and glue, then added the panel to black sunburst paper from the Heroic Halftones Pattern Paper Pack. I used double-sided adhesive to adhere the card front to an A2 card base.

I hope I have helped with ideas on using the Plane Awesome stamp set. Thanks for stopping by!

-----------------------------------------------------------

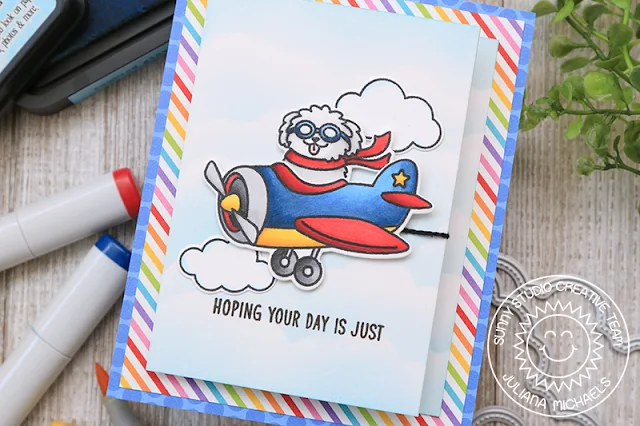
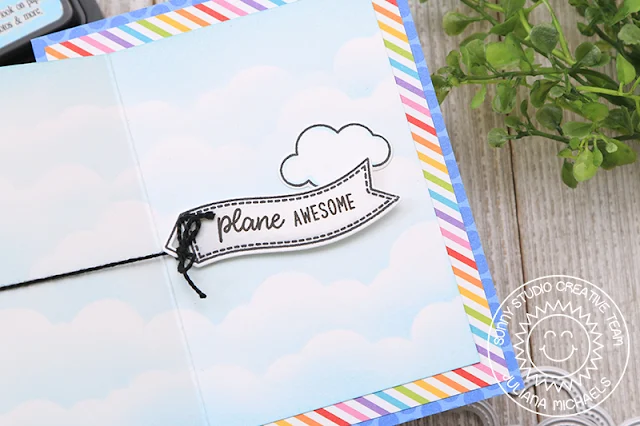
Hello friends! It's Juliana here today to share a Z Fold Card featuring the Plane Awesome Stamp Set along with a stenciled cloud background using the Fluffy Clouds Border Dies.

Sunny Studio Stamps: Plane Awesome Fluffy Clouds Border Dies Hope Your Day Is Awesome Card by Juliana Michaels

I began by stamping the various images from the Plane Awesome Stamp Set. I then colored them with Copic Markers and die cut them using the Plane Awesome Dies. I wanted to create a vertical card design, but I quickly realized that a standard card size (4.25 x 5.5 inches) wasn't going to allow me to include both the airplane and the banner. That's when I thought of creating a Z fold card. To do this, I cut a piece of Bristol Paper to 8.5 x 3.75 inches.

Sunny Studio Stamps: Plane Awesome Fluffy Clouds Border Dies Hope Your Day Is Awesome Card by Juliana Michaels

Before I scored the paper to make the Z fold, I created a cloudy sky using the Fluffy Clouds Border Dies. I cut each one from scrap cardstock to use as a mask. I alternated laying each one down on the Bristol paper and inked the mask with Tumbled Glass Distress Ink. Make sure to tap off excess ink and then apply the ink heavier along the edge of the mask and lighter as you move away from it so that you leave a bit of white or at least less inked paper for contrast.

Sunny Studio Stamps: Plane Awesome Fluffy Clouds Border Dies Hope Your Day Is Awesome Card by Juliana Michaels

Once the cloudy sky was complete, I then scored the card at 3 inches and at 5 5/8 inches to create the Z fold. This allowed the airplane to show nicely on the front of the card and to keep the banner hidden on the inside until you opened the card.

Sunny Studio Stamps: Plane Awesome Fluffy Clouds Border Dies Hope Your Day Is Awesome Card by Juliana Michaels

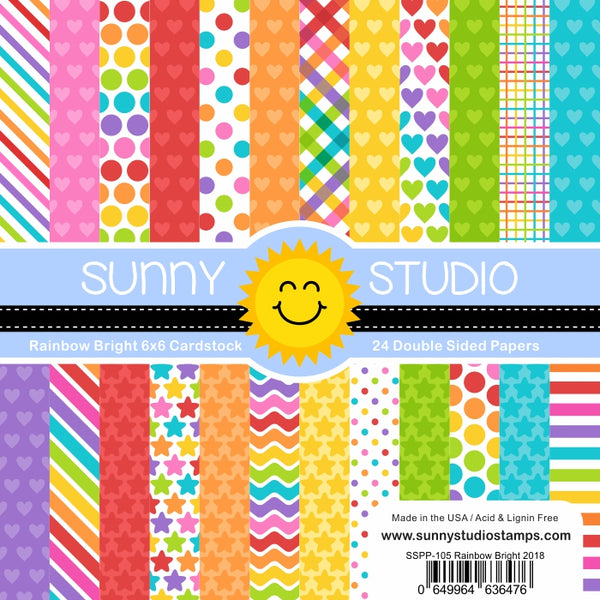
After adhering the images, I added a bit of black craft floss to tie the banner to the plane. I then matted the entire piece onto patterned paper from the Rainbow Bright 6x6 Paper and Polka Dot Parade 6x6 Paper to create a finished card size of 4.25 x 5.5 inches.

Sunny Studio Stamps: Plane Awesome Fluffy Clouds Border Dies Hope Your Day Is Awesome Card by Juliana Michaels

I hope you enjoyed learning how to create this Z Fold Card using the Plane Awesome Stamp Set. Thanks so much for stopping by today!

Sunny Studio Supplies Used:

Polka-dot Parade 6x6 Paper
Shop at:
Sunny Studio
Rainbow Bright 6x6 Paper
Shop at:
Sunny Studio
Heroic Halftones 6x6 Paper
Shop at:
Sunny Studio
Plane Awesome Stamps
Shop at:
Sunny Studio
Plane Awesome Dies
Plane Awesome Dies
Shop at:
Sunny Studio
Fluffy Clouds Border Dies
Shop at:
Sunny Studio

Monday, August 12, 2019

Elegant Leaves Cards by Leanne and Eloise

Hello everyone, Leanne here! Today we are showcasing a fall set that's packed with beautiful leaf images. I decided to try something other than my usual stamping in black ink and Copic coloring the images. I picked out few different colors of card stock from my stash and white heat embossed the leaf images instead. I kept the design simple to allow the leaves and fall colors to stand out.

Sunny Studio Stamps: Elegant Leaves Stitched Scallop Dies Autumn Themed Grateful Card by Leanne West

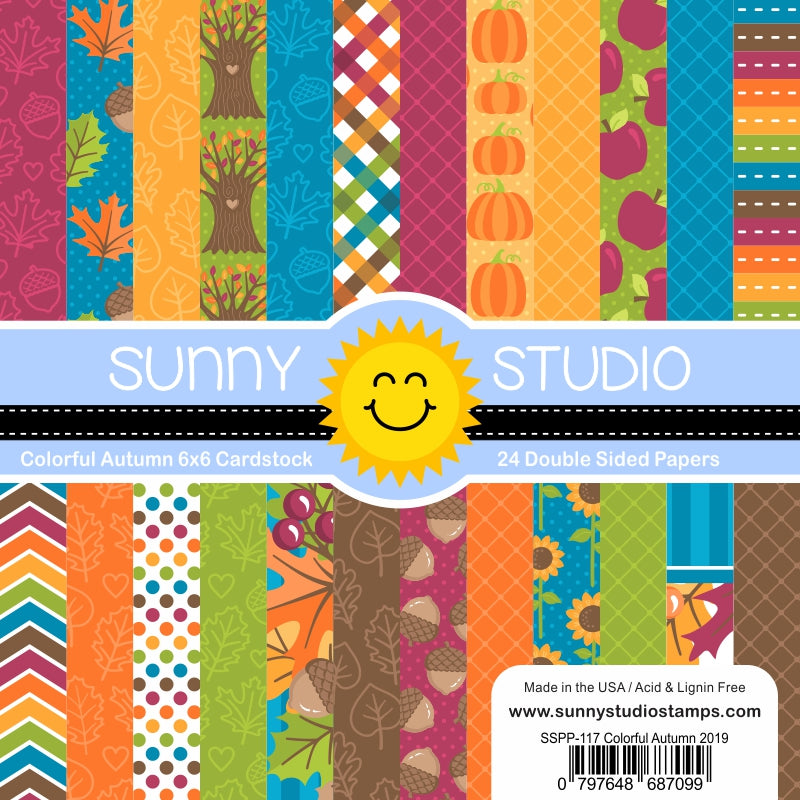
I chose card stock colors that coordinated with a rainbow stripe pattern from the Colorful Autumn Paper Pad. I stamped and white heat embossed several leaves from the Elegant Leaves set and then used the coordinating Elegant Leaves dies to cut them out. I took a white A2 size panel of card stock and die cut the bottom edge with a Stitched Scallop die. I arranged the leaves randomly across the panel. I stamped the greeting, also from the Elegant Leaves stamp set, right under the leaves with dark brown ink. Before adhering the panel to my card base, I tied some baker's twine around the bottom. 

Sunny Studio Stamps: Elegant Leaves Stitched Scallop Dies Autumn Themed Grateful Card by Leanne West

I adhered the strip of pattern paper to the bottom edge of the card front and layered the scalloped edge white panel overtop. I used foam tape to pop up the panel from the card base. Lastly I added some Nuvo Drops around the leaves. I used two different colors of Nuvo Crystal Drops - Copper Penny & Soft Mint.

--------------------------------------------------

Hello friends, Eloise here and today I have a card to share with you all using the Elegant Leaves Stamp Set.

Sunny Studio Stamps: Elegant Leaves Stitched Scallop Dies Autumn Themed Thankful Card by Eloise Blue

I started off with stamping out my leaf images from Elegant Leaves and coloured them in with Copic Markers. I then cut them out.

(Copic Markers Used: YR30, Y21, Y23, Y26 / YR21, YR23, YR24, YR27 / R14, R24, R27, R89 / YR00, YR02, YR12, YR18 / YG91, YG93, YG95, YG97 / YG61, YG63, YG67, G29 / 0)

Sunny Studio Stamps: Elegant Leaves Stitched Scallop Dies Autumn Themed Thankful Card by Eloise Blue

Next, I cut down a natural coloured card base and used the Colorful Autumn Patterned Paper and Stitched Scallop Dies to cut out a couple borders for the top and bottom of my card base. I adhered them down into place and then arranged my leaves onto the left side. That allowed me to stamp down my sentiment into place on the right. I then adhered down my cluster of leaves onto the left after my sentiment had been stamped.

Sunny Studio Stamps: Elegant Leaves Stitched Scallop Dies Autumn Themed Thankful Card by Eloise Blue

For an additional sentiment I white heat embossed ‘For All That You Do’ onto a strip of black cardstock and adhered it under the large ‘Thankful’ sentiment. I also adhered a few extra leaves underneath as well. Lastly, I tied a piece of hemp cord around my original leaves cluster and that finished off my card for today.

Thanks so much for stopping by today and I’ll see you next week. 

Sunny Studio Supplies Used:

Stitched Scallop Dies
Shop at:
Sunny Studio
Colorful Autumn 6x6 Paper
Shop at:
Sunny Studio
Elegant Leaves Stamps
Shop at:
Sunny Studio
Elegant Leaves Dies
Elegant Leaves Dies
Shop at:
Sunny Studio