Friday, May 10, 2019

Frilly Frames Dies Cards with Lexa and Rachel

Hello everyone! Lexa here today with a card that highlighting the Frilly Frame Chevron Dies and Frilly Frame Stripes Dies. Instead of using just one, I mix up the stripes and chevron dies together in this card. They look so good together, right? Along with the flamingos from Fabulous Flamingos Stamp and the coordinating dies. Let's get started!

Sunny Studio Stamps: Frilly Frames Dies Fabulous Flamingos Home Sweet Gnome Backyard Bugs Fluffy Clouds Stitched Ovals Cards by Lexa Levana and Rachel Alvarado

I started with cut the pretty pink patterned paper from Summer Splash Paper with Frilly Frame Chevron Dies for the inside and Frilly Frame Stripe Dies for the outside part. I layered it on a 4.25"x5.5" dark purple card base. The contrast between two create a beautiful background.

Sunny Studio Stamps: Frilly Frames Dies Fabulous Flamingos Home Sweet Gnome Backyard Bugs Fluffy Clouds Stitched Ovals Cards by Lexa Levana and Rachel Alvarado

I use white oval behind the flamingos use Stitched Oval Dies, it lets the flamingos pop out more as center images. I stamped the images with Versafine black ink and watercolor them with Distress Markers. I use almost every elements from Fabulous Flamingos Stamp just because they are too pretty. I add yellow jewels on center of the flowers to add dimensions, then arrange them as a curve below two flamingos.

That's all for today, I hope you like today's card as much as I do. Thank you so much for stopping by. Have an amazing day everyone!

------------------------------------------------

Hello and happy Friday! It's Rachel here and I have a fun little card today featuring the new Frilly Frames Stripes Dies combined with both the Home Sweet Gnome and Backyard Bugs Stamp Sets.

Sunny Studio Stamps: Frilly Frames Dies Fabulous Flamingos Home Sweet Gnome Backyard Bugs Fluffy Clouds Stitched Ovals Cards by Lexa Levana and Rachel Alvarado

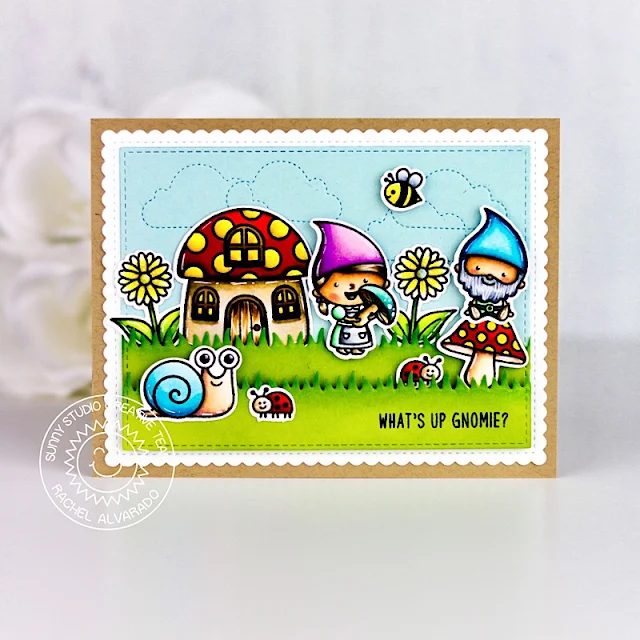
I love how this particular Frilly Frame just adds so much to the card and makes the images inside of it just pop as the focal point. To start, I first made the base of my card by trimming some Kraft Card Stock and then layering it with a Frilly Frame die cut from white card stock and then a smaller piece of light blue card stock.

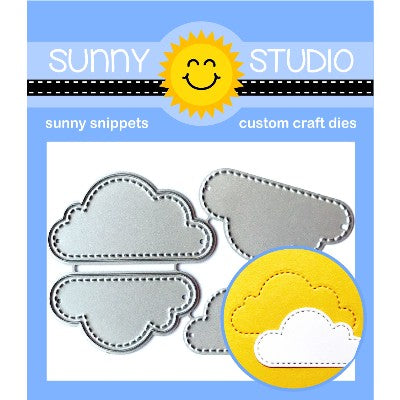
I added some beautiful stitched clouds in the background by using the new Fluffy Clouds Dies and then die cut two strips of grass using the Sunny Sentiments Die. Once cut to size, I then lightly blended these two grass strips with various shades of green ink.

Sunny Studio Stamps: Frilly Frames Dies Fabulous Flamingos Home Sweet Gnome Backyard Bugs Fluffy Clouds Stitched Ovals Cards by Lexa Levana and Rachel Alvarado

I stamped images from both the Backyard Bugs Stamps as well as the Home Sweet Gnome Set with some Memento Tuxedo Black Ink. I colored all of my images with Copics and then cut them out. Lastly, I stamped my sentiment onto the bottom of the card and then adhered my images with both liquid adhesive and 3D Foam Adhesive Squares.

Thank you for stopping by! If you liked this card and want some more crafty inspiration, don't forget to check out my INSTAGRAM feedHappy stamping!

Sunny Studio Supplies Used:
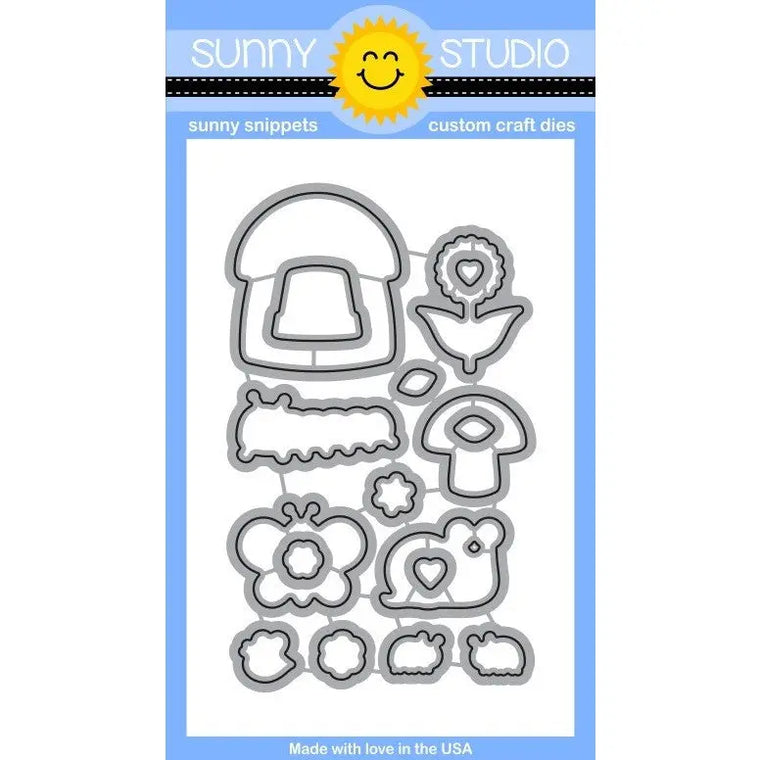
Backyard Bugs Dies
Backyard Bugs Dies
Shop at:
Sunny Studio
Backyard Bugs Stamps
Shop at:
Sunny Studio
Sunny Sentiments Dies
Shop at:
Sunny Studio
Home Sweet Gnome Stamps
Shop at:
Sunny Studio
Home Sweet Gnome Dies
Shop at:
Sunny Studio
Stitched Oval Dies
Stitched Oval Dies
Shop at:
Sunny Studio
Frilly Frames Chevron Die
Shop at:
Sunny Studio
Frilly Frames Stripes Die
Shop at:
Sunny Studio
Fluffy Clouds Dies
Fluffy Clouds Dies
Shop at:
Sunny Studio
Fabulous Flamingos Stamps
Shop at:
Sunny Studio
Fabulous Flamingos Dies
Shop at:
Sunny Studio
Summer Splash 6x6 Paper
Shop at:
Sunny Studio

Thursday, May 9, 2019

Hawaiian Hibiscus Cards with Vanessa and Anja

Hi everybody! Vanessa here with a flower card using the wonderful Hawaiian Hibiscus set.

Sunny Studio Stamps: Hawaiian Hibiscus Botanical Backdrop Everyday Greetings Floral Cards by Vanessa Menhorn and Anja Bytyqi

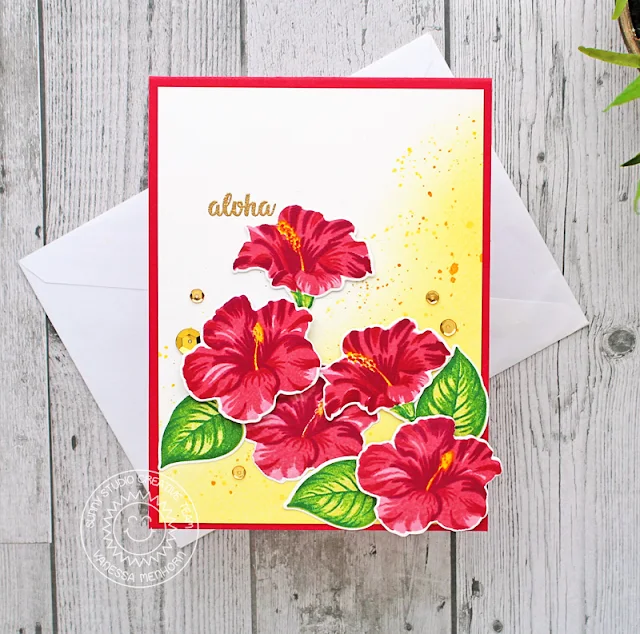
It is not easy to decide what colors to use for the gorgeous hibiscus blossoms, there's such a wide range of biodiversity available! I ended up with the best known red version - because I had multiple red inks in my stash :)

I started with a panel of white cardstock and inked the bottom part with yellow Distress Ink. Then I added ink droplets, stamped and heat-embossed the "aloha" with gold embossing powder and adhered the panel to the red card base.

Sunny Studio Stamps: Hawaiian Hibiscus Botanical Backdrop Everyday Greetings Floral Cards by Vanessa Menhorn and Anja Bytyqi

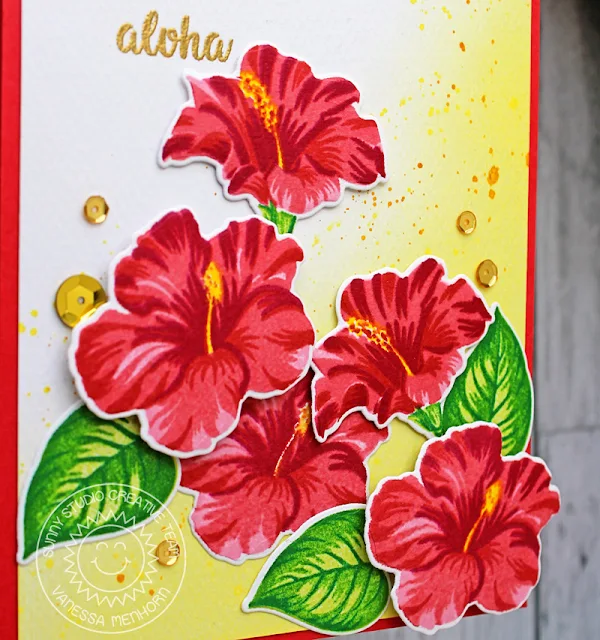
Now I stamped the flowers and leaves using the following colors - Blossoms, from lightest to darkest color: MFT Cotton Candy, Hero Arts Pale Tomato, MFT Cherry Crisp, Hero Arts Raspberry Jam, MFT Sunshine (Center). Leaves, from lightest to darkest color: MFT Sour Apple, Distress Ink Mowed Lawn, MFT Green Eyed Monster

After I had die-cut the elements with the matching dies, I adhered everything to the card, using foam tape for more dimension. Finally, I added gold sequins.

Don't you love how these layered stamps work? Mendi did such a great job with these! Thank you for visiting, see you next week!

---------------------------------------------------------

Hi everyone, Anja here and today I have a new summer card for you using the beautiful Hawaiian Hibiscus Stamps. Do you know how many working hours and effort went into designing these kind of layering stamps? I'm always amazed by the detailed images and it is so much fun to stamp the layers in different colors.

Sunny Studio Stamps: Hawaiian Hibiscus Botanical Backdrop Everyday Greetings Floral Cards by Vanessa Menhorn and Anja Bytyqi

So here is my floral birthday card where I combined the pretty hibiscus flowers with a foiled Botanical Backdrop frame. I put a piece of Deco Foil Turquoise Transfer Sheet by Therm o Web on cardstock using Ken Oliver's Stick it adhesive. Then I ran it through my die cutting machine with the floral frame die.

Next, I stamped the layered flowers and leaves (find ink colors below) and cut them out with the coordinating dies. Originally, I wanted the darkest layer to be a bright pink. First, I tried pigment ink which sits on top of the paper, but it wasn't bright enough. Then I remembered the vibrant pink embossing powder that I had in my stash for years. But as it isn't opaque, it turned out red ;-) I thought it gave a nice contrast to the first three stamped layers though and kept going.

Sunny Studio Stamps: Hawaiian Hibiscus Botanical Backdrop Everyday Greetings Floral Cards by Vanessa Menhorn and Anja Bytyqi

I stamped the birthday sentiment from the Everyday Greetings set in VersaMark Ink and heat embossed it with turquoise embossing powder. Finally, I adhered the images and also added some matching crystals and enamel dots.

Dye Inks used - Hibiscus Flowers: MFT Insulation Pink, Altenew Sunkissed and Orange Cream; Leaves: Altenew Bamboo, Parrot and Olive

Thank you so much for stopping by! Have a nice day!

Sunny Studio Supplies Used:

Botanical Backdrop Die
Shop at:
Sunny Studio
Everyday Greetings Stamps
Shop at:
Sunny Studio
Hawaiian Hibiscus Stamps
Shop at:
Sunny Studio
Hawaiian Hibiscus  Dies
Hawaiian Hibiscus Dies
Shop at:
Sunny Studio

Wednesday, May 8, 2019

Seasonal Trees Cards with Franci and Mona

Hi everyone! Franci here with you today with a spring themed card featuring the new, lovely Seasonal Trees set.

Sunny Studio Stamps: Seasonal Trees Frilly Frames A Bird's Life Spring Greetings Fancy Frames Spring Themed Cards by Franci Vignoli and Mona Toth

First of all I die cut my panel out of some white cardstock using the die included in the new Frilly Frame Chevron die set. Then I masked the top and inked my grass with Distress ink, I added some splatters of green watercolor and as it was completely dry, I masked it and created my sky using a custom made cloudy stencil and Distress inks again.

Sunny Studio Stamps: Seasonal Trees Frilly Frames A Bird's Life Spring Greetings Fancy Frames Spring Themed Cards by Franci Vignoli and Mona Toth

I stamped all my images, I colored them with Copics and die cut them with the coordinated dies. I love love, love all the trees include in the set cause they are perfect for every season and this tree, decorated with lots of little birds may be one of my favorites!

I glued all the elements down with liquid glue and foam adhesive and I added some details with a white gel pen. Finally I stamped my sentiment form the A Bird's Life set and added some little clouds that I die cut from white cardstock using the dies included in the Comic Strip Everyday set.

Sunny Studio Stamps: Seasonal Trees Frilly Frames A Bird's Life Spring Greetings Fancy Frames Spring Themed Cards by Franci Vignoli and Mona Toth

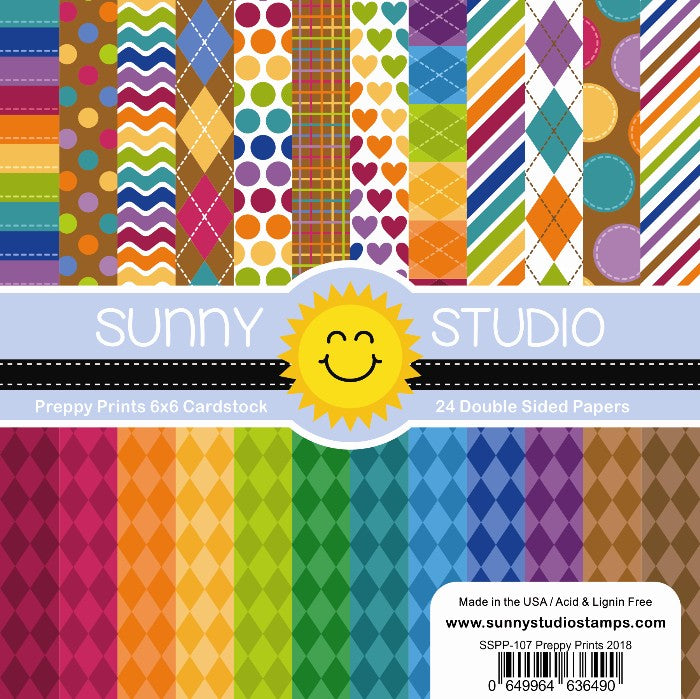
I also added some sparkling clear sequins and a little heart die cut with the mini die included in the Basic Mini Shaped Dies II set and out of some patterned paper form the Preppy Prints set, to finish up my simple card design.

Hope you like it and thank you so much for stopping by today!

--------------------------------------------------

Hi crafty friends! It's Mona here, today I am showing you two mini cards with the new Seasonal Trees stamp set.

Sunny Studio Stamps: Seasonal Trees Frilly Frames A Bird's Life Spring Greetings Fancy Frames Spring Themed Cards by Franci Vignoli and Mona Toth

I started the card making with stamping and coloring. I stamped the images with the Seasonal Trees stamp set and added a cute bunny from the Spring Greetings stamp set. After the coloring I run them through the die-cut machine with the coordinating dies.

Sunny Studio Stamps: Seasonal Trees Frilly Frames A Bird's Life Spring Greetings Fancy Frames Spring Themed Cards by Franci Vignoli and Mona Toth

Next I adhered a pink cardstock to the background from the Flirty Flowers paper pack, then added a frame die-cut made with Fancy Frames Rectangle dies. 

Sunny Studio Stamps: Seasonal Trees Frilly Frames A Bird's Life Spring Greetings Fancy Frames Spring Themed Cards by Franci Vignoli and Mona Toth

Next I added colored images to the card and placed them in different ways. In the end I heat embossed the sentiment to a blue cardstock and my card was ready.

Sunny Studio Stamps: Seasonal Trees Frilly Frames A Bird's Life Spring Greetings Fancy Frames Spring Themed Cards by Franci Vignoli and Mona Toth

Thank you very much for reading through my post, I hope that you have enjoyed it and I have inspired you! If you like my creations let's be friends on Instagram. :)

Sunny Studio Supplies Used:

A Bird's Life Stamps
Shop at:
Sunny Studio
A Bird's Life Dies
A Bird's Life Dies
Shop at:
Sunny Studio
Fancy Frames- Rectangles
Shop at:
Sunny Studio
Preppy Prints 6x6 Paper
Shop at:
Sunny Studio
Comic Strip Everyday Dies
Shop at:
Sunny Studio
Flirty Flowers 6x6 Paper
Shop at:
Sunny Studio
Spring Greetings Stamps
Shop at:
Sunny Studio
Spring Greetings Dies
Shop at:
Sunny Studio
Mini Basic Shape Dies II
Shop at:
Sunny Studio
Frilly Frames Chevron Die
Shop at:
Sunny Studio
Seasonal Trees Stamps
Shop at:
Sunny Studio
Seaonal Trees Dies
Seaonal Trees Dies
Shop at:
Sunny Studio

Tuesday, May 7, 2019

Summer Cards with Angelica and Mendi

Hi friends, Angelica here sharing a birthday shaker card using the Best Fishes stamp set. Here’s how I put it together.

Sunny Studio Stamps: Summer Cards using Best Fishes & Fabulous Flamingos Stamps by Angelica Conrad and Mendi Yoshikawa

The first step is making the card front. On a sheet of Yupo paper, I moved Tim Holtz Turquoise and Sailboat Blue alcohol inks around to resemble water. I worked from one corner to the other, the path I knew my windows were going to be. 

Sunny Studio Stamps: Summer Cards using Best Fishes & Fabulous Flamingos Stamps by Angelica Conrad and Mendi Yoshikawa

While the panel was drying, I made the inside panel that would be seen through the window. I smooshed watercolor paper into Distress Oxide inks that I had swiped onto my craft mat and sprayed with water. I did this three times, using my heat tool to dry the paper after each layer. Once my Yupo paper was dry, I die-cut the windows using the Staggered Circles Die.

Sunny Studio Stamps: Summer Cards using Best Fishes & Fabulous Flamingos Stamps by Angelica Conrad and Mendi Yoshikawa

I stamped several images from the Best Fishes stamp set, and pulled out a rainbow of Copic colors to color them with. I used the coordinating dies to die-cut them out, then planned out my card front. After moving the images around, I finally found the arrangement I wanted to use. I always do this, then take a picture of it so I know how to assemble the images when it’s time to complete the card.

Sunny Studio Stamps: Summer Cards using Best Fishes & Fabulous Flamingos Stamps by Angelica Conrad and Mendi Yoshikawa

To assemble the shaker element, I turned the Yupo paper over and used 1/8 Scor tape and a sheet of acetate to close the windows. Next I took thin strips of foam adhesive and wrapped them around each window, then on the rest of paper for support. I added clear and pink confetti into the windows, then carefully closed the back up with the watercolor background. I attached the card front to a card base, then added the images with thin foam squares. I stamped and white heat-embossed the sentiments using words from the stamp set. My last step was trimming the sentiments into thin strips, and attaching them to the card.

That's all that I have for today. Thanks for stopping by!

-------------------------------------------------

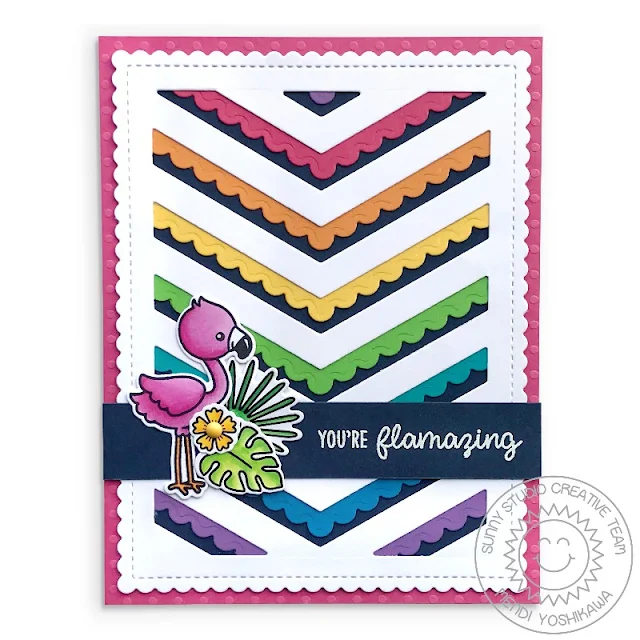
Hello there!  Mendi here today filling in for Juliana with a card featuring our newest Frilly Frames Dies.  I ran out of time during the sneak peek week to show how awesome the new Frilly Frames Chevron dies work together with both our Fishtail Banner die sets.  For my card here I paired them with the scallop from our Fishtail Banner 2 and the straight edge banner on our original Fishtail Banner dies to create "strips" which I cut from a rainbow of cardstock colors.

Sunny Studio Stamps: Fabulous Flamingos Rainbow Chevron Scalloped Card (using Fishtail Banner & Frilly Frames Dies)

I just adore how all our Frilly Frames can mix and match with each other.  The chevron dies come with a ric rac edge, but I wanted to continue the scalloped theme so I paired the inside portion of the die with the outside portion of our Frilly Frames Stripes Die.  I then backed them with a piece of navy cardstock.

I wanted to keep the rest of my card fairly simple to keep the attention on my rainbow chevron stripes so I colored a small grouping from our Fabulous Flamingo Stamps and dies, using Copic Markers and heat embossed a sentiment on some more of that same navy cardstock to ground my images.

Sunny Studio Stamps: Fabulous Flamingos Rainbow Chevron Scalloped Card (using Fishtail Banner & Frilly Frames Dies)

I hope we've inspired you in your cardmaking. Thanks so much for stopping by and hanging with us today.  :)

Sunny Studio Supplies Used:

Fishtail Banner II Dies
Shop at:
Sunny Studio
Staggered Circles Die
Shop at:
Sunny Studio
Frilly Frames Chevron Die
Shop at:
Sunny Studio
Frilly Frames Stripes Die
Shop at:
Sunny Studio
Best Fishes Stamps
Best Fishes Stamps
Shop at:
Sunny Studio
Best Fishes Dies
Best Fishes Dies
Shop at:
Sunny Studio
Fabulous Flamingos Stamps
Shop at:
Sunny Studio
Fabulous Flamingos Dies
Shop at:
Sunny Studio