Guys,
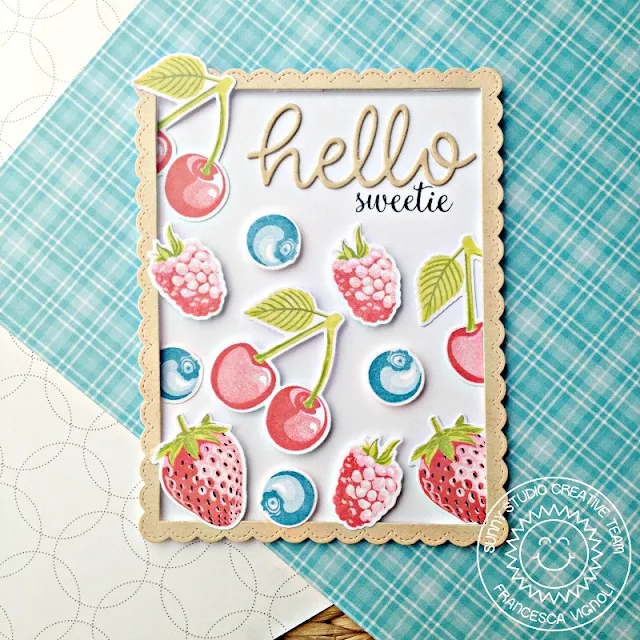
it's amazing! The fruits are so realistic and awesome!! So for today's
card I added a little challenge, as I created every single fruit with just one ink
pad! I do not have lots of colors of dye inks
and haven’t had the chance to buy more yet. So for today’s card, I played a
little bit with the second generation stamp technique and with my stamp
positioner!
First, I created my card base from white
cardstock and die cut this beautiful fancy frame out of some kraft cardstock
using the new Fancy Frames Rectangle dies. Then I started stamping all of my fruits. I
tested the images and my ink out and I finally followed this ultimate scheme (please
note: a stamp positioner is not strictly necessary but I highly recommend it if
you'd like to use the second generation stamp technique!).
I stamped my lightest images first: 1 +1
second generation stamp (I basically inked up my stamp, stamped onto some copy
paper, and then stamped it again onto my cardstock. I did this twice.
Then I stamped the second layer,
repeating what I have done previously and for the third layer I inked it and
stamped it directly onto the image twice. So my images are basically built by 6
layers of the same color ink.
For the leaves I had two different
greens and for the raspberry I stamped four layers with the same ink - twice on
top of the image. I also did the same with my blueberry, but I used a blue ink.
To complete my card I die cut all of my stamped images with the coordinating dies and
adhered all of the fruits and the frame with a combo of liquid glue and foam
adhesive. Finally, I die cut the “Hello” with the new Hello Word die, and glued it
down as well, stamping my sentiment with a black ink.
This card was so much fun to make and I
hope it inspired you to create with this new cool set! Have a lovely day!
Sunny Studio Supplies Used:
https://sunnystudiostamps.com/collections/new-arrivals/products/berry-bliss-dies


I love the berry bliss stamp. I can’t wait to get mine.
ReplyDelete