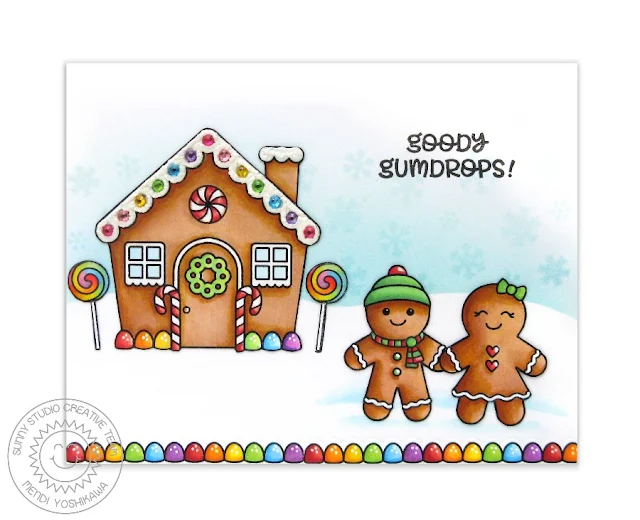
Card No. 1: I wanted to go bright and happy for this first Christmas card, turning to some non-traditional holiday colors. I added glossy accents to the the windows and little candies on my Gingerbread House roof and some Stickles glitter glue to the gumdrops. To tie my Stitched Scalloped borders together with the house, I took a circle snowflake from our Snow Kissed stamps and stamped it in the middle of each scallop. I then colored them with Copics to match and topped them with more glossy accents.
Card No. 2: I made a cute tag (by Papertrey Ink) even cuter, using the gumdrop border from the stamp set to frame my little cookie girl and boy. Of course no gumdrops are complete without sugar sprinkles so I used a little Stardust Stickles glitter to make them look realistic. A rainbow ribbon by Offray was the perfect finishing touch for this rainbow inspired gift tag.
Card No. 3: I turned to a kraft background to help my images pop on this traditional colored Christmas card. I paired the cookie tree from this set with the coordinating smaller cookie from the previously released Christmas Icons set to create my little scene. To pull everything together, I curved my sentiment stamps on my MISTI tool to hug the circle. I then heat embossed it with white embossing powder to pop against the background.
Card No. 4: For this rainbow inspired card, I started by adhering a hand cut mask to look like a snowdrift. I then inked on some Tumbled Glass distress ink to my background before stamps some faint snowflakes using our new Snow Flurries set. After coloring my little house, I added some liquid applique to look like snow icing and added some little jewels to match where the candies had been stamped. For my sugar on the gumdrops I added three little dots using my white extra fine point sharpie paint pen (there's also a little stamp image with three dots in the set, but I found it so much quicker to just do it by hand).
Card No. 5: For this fun shaker style card I started by inking up my card background with a blend of Evergreen Bough and Lucky Clover distress inks. I then stamped the Frosty Flurries stamp in the background in a similar tone of ink to give the look of splatters. For my top layer I used our Stitched Heart Dies to cut a window from the center of a scalloped panel and filled it with some stamped and colored peppermint candies from the set.
I hope you've enjoyed today's look at the Jolly Gingerbread Stamps and coordinating dies. Here's a full look at the new sets that will start shipping tomorrow! Also, as part of our second birthday festivities this week, you can reserve yours today in our store HERE. Plus use the promo code CELEBRATE to save 15% through October 1st at Midnight PST.
Other Sunny Studio Supplies Used:
 Blissful Baking Stamps Shop at: Sunny Studio |
Christmas Icons Dies Shop at: Sunny Studio |
Christmas Icons Stamps Shop at: Sunny Studio |
 Snow Kissed Stamps Shop at: Sunny Studio |
 Stitched Heart Dies Shop at: Sunny Studio |
 Stitched Scallop Dies Shop at: Sunny Studio |
 Frosty Flurries Stamps Shop at: Sunny Studio |
 Snow Flurries Stamps Shop at: Sunny Studio |


These are all so adorable as are the stamps! The little gumdrop border is a perfect detail :)
ReplyDeleteSeriously cute!
ReplyDeleteOh my goodness so adorable! I love the candy shaker bits!
ReplyDeleteSO cute! Love the scenes you've created, and the glossy accents to make things pop are the perfect finishing touches.
ReplyDeleteOH my gosh these are so cute!!!! LOVE those adorable gingerbread people!!! The little boy and girl are what really make this stamp set! The gingerbread house is perfect and you made sure to add lots of goodies to this set to make the best gingerbread Christmas projects! Way to go my friend! This is probably going to be your biggest release yet!!! LOVE it all, WANT it all, NEED it all and yea.. LOVE it!!! Your cards and your tag are fantastic!
ReplyDeleteHugs,
Jo
That's just so adorable !! I love the gumdrops border, irresistible!!
ReplyDelete