Hello and welcome to the first day of our Summer Peek Week! All this week I am showcasing cards using our newest collection which will be available for purchase on Friday, April 16th.
Today I am sharing a new layering stamp set perfect for all you art and rainbow lovers called Color My World together with a companion sentiment stamp set called Teacher Appreciation. As you will see, this sentiment set can work for so many occasions beyond celebrating the teacher's in our lives. We also have a new Gift Card Pocket die with will work nicely with both of these stamp sets.
Card No. 1 & 2: For my first project I created a pair of cards using the same layered pencils at different ends to make maximum use of all the stamping involved with this design. I'm not going to lie. These pencils have a ton of layers! 11 to be exact when you factor in the metal rims, eraser, pencil lead and wood portion, but they can be simplified and made in as few as 5 layers when omitting the shadows. 
My sentiment comes from the new Teacher Appreciation Stamps which were stamped using VersaFine Onyx Black Ink and my mini MISTI. In hindsight I might even recommend starting with the sentiment first just so you don't have to risk losing all these precious pencils you stamped or having to come up with a plan B to cover up any mistakes if your ink pad accidentally drops. As a last step I added a little heart from our Basic Mini Shape II Dies which I covered with glossy accents and set aside to dry.

My daughter who's a Junior in college this year has a professor that has poured a huge amount of time and energy into helping her really soar in her entrepreneur class and I think one of these two cards will be the perfect card for him before she graduates next year.
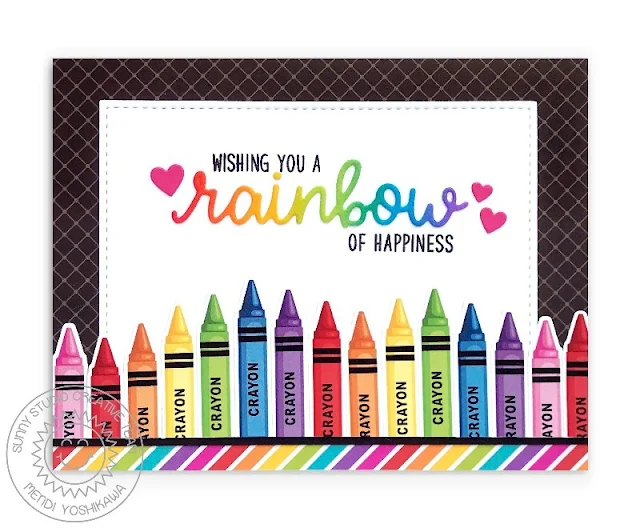
For my greeting, I inked up a small piece of white cardstock using finger daubers and then die-cut it using the Rainbow Word die, pairing it with a coordinating sentiment from our Over The Rainbow Stamps. Once again I pulled out some of those same mini hearts from our Basic Mini Shape II Dies which had been inked up using Picked Raspberry distress ink. For my card background, I cut a 5.5" x 4.25" black card panel from our Classic Sunburst Paper pack, adding a rainbow stripe to the bottom of my card from our Rainbow Bright Paper pack. We have a new set of basic Stitched Rectangle dies (being shared tomorrow) that I used to frame my sentiment using white cardstock.
For my card background I used the heart print from our Subtle Grey Tones Paper pack and the rainbow striped paper from our Rainbow Bright Paper pack to add a little interest to this simple design.
Card No. 6: My next card uses the paint brush and palette again so I thought it would be fun to create a hand-painted background to reinforce the painting theme using some Daniel Smith Watercolors. I wanted my colors to be really intense to match the feel of my stamped pallet of colors so I used less water in my paintbrush when mixing my colors to create more of a gouache. To start my process I started by brushing on a layer of water onto my watercolor paper and then used broad strokes to repeat the colors of the rainbow with a #8 round brush, cleaning my brush between colors. When it had dried completely, I ironed my panel sandwiched between printer paper on a low heat setting and then die-cut it using our new Stitched Rectangle dies (being shared more tomorrow). I then mounted my stitched rectangle onto an A2 panel cut from kraft paper and die-cut a white circle to frame my stamped images using our Stitched Circle Small Dies.
For my sentiment I used another greeting from our Teacher Appreciation Stamps which I heat embossed with white embossing powder onto black cardstock. I then cut it out using the double ended pennant die that comes with our new Stitched Rectangle dies. The issue was my greeting was a bit longer than the dies allowed for so I hung the end of the die off my cutting platform so it wouldn't cut on one end when passing it through my die-cutting machine. I then flipped it over, locking it in place with the previous cut's stitching lines and then repeated the process by hanging the opposite end off my cutting platform when running it through a second time.
and HERE). The beauty of this design is you can forgo stamping the handle of the paintbrush so you are able to speed things up by eliminating those three layers.
For my ink colors I alternated Gina K. Bubblegum Pink, Hero Arts Ultra Pink, Gina K. Passionate Pink & PinkFresh Studio Raspberry Bliss. When I was done stamping my brushstrokes they didn't end up being centered on my A2 panel so I trimmed them down using our Frilly Frames Retro Petals Dies and then mounted them onto a pink print paper from our Classic Gingham Paper pack.I then die-cut the word tickled" using our Loopy Letters Dies and the word "pink" using our new Chloe Alphabet dies (to be shared more on Wednesday) and coated them in more Glossy Accents. The word tickled though was getting lost on that particular pink that landed there though so I tucked a pennant cut from our Gingham Pastels Paper pack below it to help it stand out from our Stitched Rectangle dies (being shared tomorrow).

Card No. 8: For this card I used the notebook paper image from our School Time Stamps, repeatedly stamping them in PinkFresh Studio Sky Blue ink. I then trimmed them down with my paper trimmer and rounded the corners with my scissors before arranging them on the diagonal on my card front and cutting off the parts that hung off the edge. I think I was able to fill my entire card front using only 6 stamped notebook papers because I was able to use the parts that I trimmed off and piece them together to cover the other open spots.
I then used the lines of the notebook paper to line up my greeting from our Teacher Appreciation stamps and used those same lines to line up my crayons on the diagonal. For this particular card I chose to leave off the word "crayon" so you can see how they look both with and without. My card was feeling like it need a little extra something so I added a scalloped border to the bottom of my card using our Slimline Basic Border dies and some Classic Sunburst Paper scraps. I also cut a scalloped border without the holes from white cardstock using that same die set so I could layer it below my other scallop for a nice solid look on both sides of my card.
Card No. 9: The background for my last card of the day was also created using our School Time Stamps. This time I repeatedly stamped the ruler from the set on kraft paper using Gina K. Kraft Ink, slightly shifting the ruler each time so that the numbers wouldn't be lined up exactly the same way each time.
For this card I actually combined two different greetings together from our Teacher Appreciation Stamps. This is yet another set of sentiments that wouldn't need to be limited to just teachers. You could easily substitute the word friends, doctors, people, etc. in place of the word teacher using alphabet stamps and dies or even borrowing those words from other sets. My greetings were stamped onto circles cut using our Stitched Circle Small dies and Stitched Circle Large dies. For the second portion of my greeting I added interest by heat embossing part of it onto a piece of black cardstock that was die-cut using the pennant from the Stitched Rectangle dies. Maybe I should have just shared those today since as you can see I have used them a ton. ;) I had some leftover mini hearts from our Basic Mini Shape II Dies sitting on my desk from my very first set of cards and they felt like the perfect finishing touch to this card.
Paintbrush (card no. 4 & 6)
Pinkfresh Studio Warm Buff (3a)
Pinkfresh Studio Doe (3b)
Gina K. Warm Cocoa (3c)
Hero Arts Soft Granite (3d)
Hero Arts Charcoal (3e)
Hero Arts Soft Sand (3f)
Gina K. Sandy Beach (3g)
Paintbrush (card no.7)
Hero Arts Soft Granite (3d)
Hero Arts Charcoal (3e)
Concord & 9th Wheat (3g)
Hero Arts Cup O'Joe (3h)
Paint Palette (card no. 4)
+ 3-color groupings to match crayons below
Yellow No.2 Pencil
Pinkfresh Studio Apricot (1a)
Concord & 9th Buttercup (1b)
Pinkfresh Studio Marigold (1c)
Hero Arts Soft Granite (1d)
Hero Arts Charcoal (1e)
Gina K. Sandy Beach (1f)
Hero Arts Charcoal (1i)
Pinkfresh Studio Coral Reef (1j)
Pinkfresh Studio Passion Fruit (1k)
Pink Crayon
Pinkfresh Studio Ballet Slipper (2d)
Hero Arts Soft Pink (2c)
Hero Arts Bubblegum (2b)
Hero Arts Ultra Pink (2a)
Versafine Onyx Black Ink (2e)
Red Crayon (& Pencil)
Pinkfresh Studio Coral Reef (2d)
Hero Arts Pale Tomato (2c)
Gina K. Red Hot (2b)
PinkFresh Studio Berrylicious (2a)
Versafine Onyx Black Ink (2e)
Orange Crayon (& Pencil)
Pinkfresh Studio Apricot (2d)
Pinkfresh Studio Clementine (2c)
Concord & 9th Marmalade (2b)
Pinkfresh Studio Persimmon (2a)
Versafine Onyx Black Ink (2e)
Yellow Crayon (& Pencil)
Pinkfresh Studio Lemon Whip (2d)
Pinkfresh Studio Sunshine (2c)
Pinkfresh Studio Sweet Mustard (2b)
Pinkfresh Studio Marigold (2a)
Versafine Onyx Black Ink (2e)
Green Crayon (& Pencil)
Hero Arts Green Hills (2d)
Pinkfresh Studio Key Lime (2c)
Gina K. Lucky Clover (2b)
Pinkfresh Studio Olive (2a)
Versafine Onyx Black Ink (2e)
Teal Crayon
Gina K. Ocean Mist (2d)
Gina K. Turquoise Sea (2c)
Gina K. Blue Lagoon (2b)
Gina K. Tranquil Teal (2a)
Versafine Onyx Black Ink (2e)
Blue Crayon (& Pencil)
Hero Arts Dusty Blue (2d)
Pinkfresh Studio Slumber (2c)
Pinkfresh Studio Blue Jay (2b)
Pinkfresh Studio Sapphire (2a)
Versafine Onyx Black Ink (2e)
Purple Crayon (& Pencil)
Pinkfresh Studio Soft Lilac (2d)
Pinkfresh Studio Candy Violet (2c)
Versafine Clair Purple Delight (2b)
Hero Arts Grape Juice (2a)
Versafine Onyx Black Ink (2e)
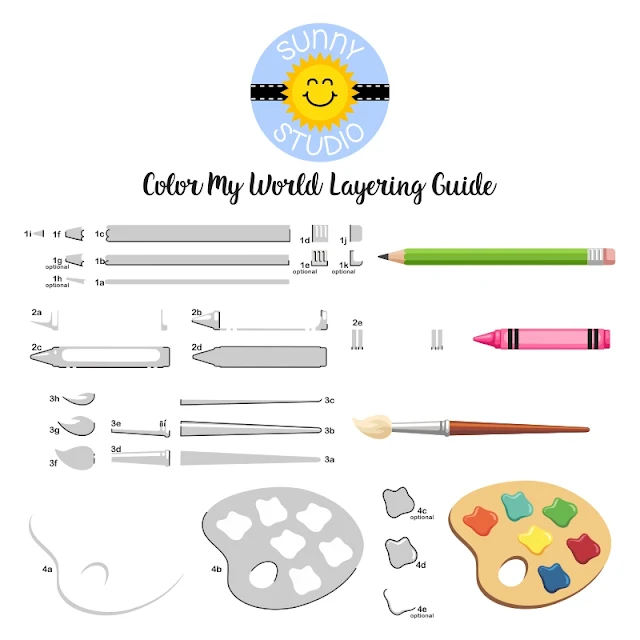
I have also created a special PDF alignment printable for you to print out and help you layer the stamps over for the Pencil and Paintbrush so they will line up perfectly with the dies that you can print HERE. The pencil and paintbrush in particular have three or four separate sections so this really helps keep things lined up so they will still match with the dies when you're done. This guide is designed so that you can trim it down and layer it with your paper strips that are 3.75" x 1" in size. You are then able to flip them and use both size to maximize your paper. I usually start by lining up and stamping some test impressions on thin printer paper while I work on get things set up perfectly and these guides really helped with that.
That wraps up today's sneak peeks. I'm so happy you spent a part of your day with me today. I read all your comments and they mean so much! I'd love to give a $50 gift code to one lucky winner using the rafflecopter below. Make sure to keep checking back all this week for more peeks & prizes. The contests run through Saturday, April 17th at Midnight PST with winners announced here on Sunday, April 18th. :)
a Rafflecopter giveawayHere's a closer look at the our new Color My World Stamps & Dies, Teacher Appreciation Stampseacher Appreciation Stamps and Gift Card Pocket Dies used today (available for purchase on April 16th):
 School Time Dies Shop at: Sunny Studio |
 School Time Stamps Shop at: Sunny Studio |
 Classic Gingham 6x6 Paper Shop at: Sunny Studio |
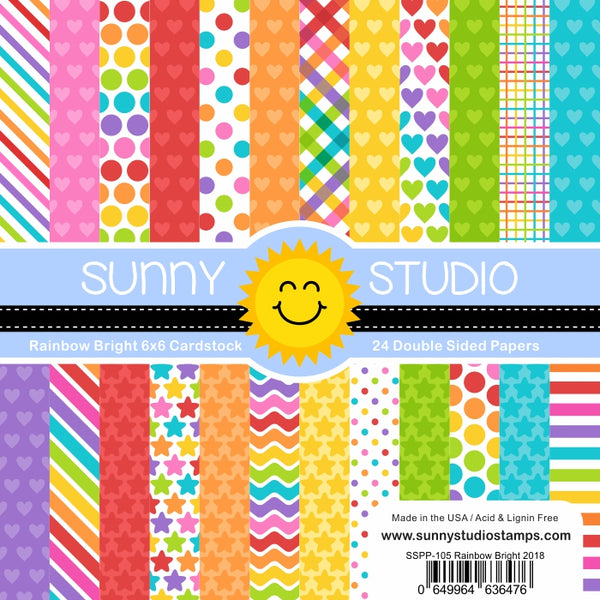 Rainbow Bright 6x6 Paper Shop at: Sunny Studio |
|
 Gingham Pastels 6x6 Paper Shop at: Sunny Studio |
 Over The Rainbow Stamps Shop at: Sunny Studio |
 Rainbow Word Die Shop at: Sunny Studio |
 Mini Basic Shape Dies II Shop at: Sunny Studio | |
 Frilly Frames Retro Petals Dies Shop at: Sunny Studio |
 Subtle Grey Tones Paper Shop at: Sunny Studio |
 Slimline Basic Borders Shop at: Sunny Studio |
 Classic Sunburst Paper Shop at: Sunny Studio | |
 Versafine Onyx Black Ink Shop at: Sunny Studio |
 Loopy Letters Dies Shop at: Sunny Studio |
 Stitched Circle Small Dies Shop at: Sunny Studio |
 Stitched Circle Large Dies Shop at: Sunny Studio |
|
 Fishtail Banner Dies Shop at: Sunny Studio |
 Stitched Rectangle Dies Shop at: Sunny Studio |
 Hero Arts White Detail Shop at: Sunny Studio |
 VersaMark Watermark Ink Shop at: Sunny Studio |


