Up first is a card featuring a fun new 4x6 stamp set called Critter Campout, along with the new Hello Word die and a stitched pennant from our newest website exclusive Fancy Frames Rectangle Dies.
To create my background, I started by inking up the bottom of my card panel near the horizon with Fossilized Amber distress ink. I then lightly faded it into Mermaid Lagoon, Salty Ocean, Blueprint Sketch and Chipped Sapphire inks. I started by tracing a faint pencil line just below where my ground would before stamping my tree silhouettes with VersaFine Black Onyx Ink.
When I was certain my inky background had dried I stamped my starry sky using our newest 3x4 background stamp called Cascading Stars, which was first heat embossed with gold powder and then again with translucent Wow! glow-in-the-dark powder. To continue the fun effect I colored over my campfire with a clear VersaMarker pen before heat embossing over it with more glow-in-the dark powder. I love that it is a hidden surprise, making this card look great both day or night.
Up next is a card featuring a scene contained within a circular window. I heat embossed the cascading star background using Ranger's buttercup embossing powder to match my banner stamped with our Sunny Borders set. When I was done the card felt like it was missing something so I used my new favorite Sharpie white extra fine paint pen with a clear ruler to add a dashed line around the border of my card. I love how it pops against the black cardstock and frames my card!
For this card I thought it would be fun to cut a section out of my card front and fill the opening with a panel inked up with mermaid lagoon distress ink and heat embossed the cascading stars using Hero Arts brass embossing powder (which to my eye is a beautiful gold). ;) I had so much fun coloring the little critters to gather around the campfire!
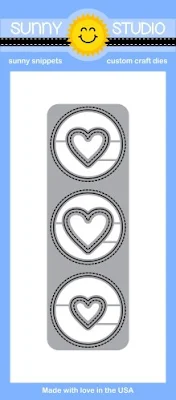
My sentiment was heat embossed with white powder, but when I was done, I was regretting that I didn't move it further to the right. To solve this problem I used our mini heart trio freebie die from our spring release to fill in some of the space and I love the results! Just goes to prove that there is no such thing as mistakes in crafting--just opportunities to embellish. ;)
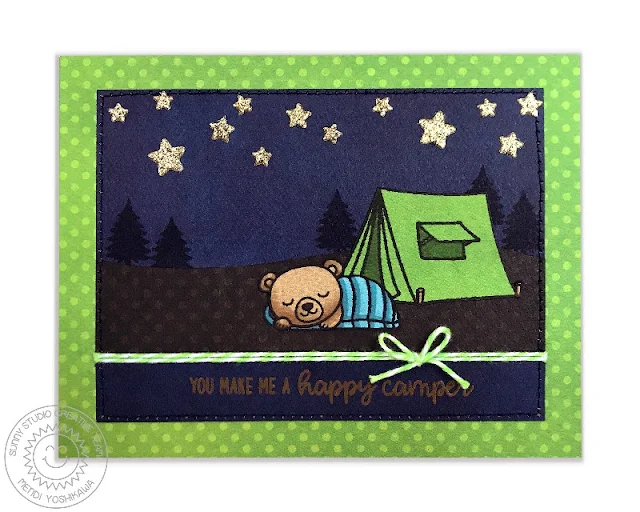
This particular card was created for a local store challenge I participate in where they provide a piece of paper and a couple small embellishments and we must use a little bit of everything we are given to create a card that they then share the following month. For this challenge in honor of St. Patrick's Day, we received a small strip of gold glitter cardstock, a 6x6 piece of BoBunny green polka-dot paper and the green baker's twine.
The green paper was double-sided so I thought it would be fun to use the solid side to paper-piece my tent to match the polka-dot border around my card. Luckily I had other BoBunny paper in my stash so I was able to paper piece my little bear to match. The paper-pieced images were feeling a little flat to me so I did some super quick shading with a copic marker. I love how easy it was and the dimension it adds! To complete my card, I die-cut the gold glitter cardstock into stars using the mini star freebie die from our Fall release last year and heat embossed my sentiment in gold to tie them together.
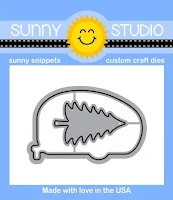
Up next we have another new stamp set to introduce called Happy Camper. It's a sweet mini 2x3 set with the retro trailer and two coordinating sentiments. It nicely compliments our Critter Campout set or can be used all on it's own. For this card I paired it with the car from our City Streets set and a red & black checkered print created using our new Background Basics set we'll be sharing more peeks of later this week. The trees die-cut from black cardstock are a bonus die that makes use of the open space for the Happy Camper die. I love the way the colors work with each other!
While the previous card was more masculine, I thought it would be fun to go soft & pretty for my next card with a "glamping" feel. To create my backdrop, I masked off my ground with masking material and inked it up with a very light application of black soot distress ink. I then use our Wavy Border dies to cut another mask for my hills, using one side for the cracked pistachio hills, and the other side for spun sugar sky. I didn't want to add an additional color to my color palette so I stamped my trees using Colorbox Seattle Sky ink.
For my stitched scallop frame I used our newest sunny studio website exclusive Fancy Frames Rectangle dies and my polka-dot background was stamped using our new Background Basics set (both will be shared more later this week).
Before I go, I thought it would be fun to share a completely different way to use our new Cascading Star stamps. Sadly it was very hard to get a good photo of this card with the way the glitter caught the light, but I promise it's really cool in person. ;) I started by inking up my card panel by fading candy apple distress ink from the top towards the center and Salty Ocean and Blueprint Sketch distress inks from the bottom. I then used my Misti to stamp the stars in coordinating colors. A stamp positioning tool is especially handy when stamping in two separate colors.
When my panel was dry, I then inked the entire surface using clear Versamark Ink and sprinkled the surface with clear iridescent embossing powder. It created a stunning glittery finish perfect for a star spangled card! For my stars, I repeated the process on some scratch cardstock and die-cut stars using our new Window Trio Square Dies and the bonus star from our Fancy Frames Square Dies. The sentiment was stamped using a phrase from our Stars & Stripes Stamps, colored with Copics and then die-cut using the oval label from our new Sunny Studio website exclusive Fancy Frames Oval Dies.
I hope you've enjoyed today's sneak peeks! I'd love to give a $25 gift code to one lucky winner.
a Rafflecopter giveaway
Make sure to keep checking back all this week for more peeks & prizes for up to five chances to win. The contests run through Saturday at Midnight PST with winners announced here on Sunday, April 8th. :)
Here's a full look at the new Critter Campout 4x6 stamps & coordinating dies, Happy Camper 2x3 stamps & coordinating dies and Cascading Stars 3x4 stamps showcased today (which will be available for purchase on Friday, April 6th).
Other Sunny Studio Supplies Used:
 Sunny Borders Dies Shop at: Sunny Studio |
 Sunny Borders Stamps Shop at: Sunny Studio |
 Wavy Border Dies Shop at: Sunny Studio |
 Memento Tuxedo Black Ink Pad Shop at: Sunny Studio |
 Memento Tuxedo Black Marker Shop at: Sunny Studio |
 Tsukineko Jumbo Dauber Shop at: Sunny Studio |
 Versafine Onyx Black Ink Shop at: Sunny Studio |
 Fancy Frames-Square Dies Shop at: Sunny Studio |
 Fancy Frames- Ovals Shop at: Sunny Studio | |
 Fancy Frames- Rectangles Shop at: Sunny Studio |
 Window Trio- Square Die Shop at: Sunny Studio |
 Background Basics Stamps Shop at: Sunny Studio |
 Hello Word Die Shop at: Sunny Studio | |


