Thursday, May 8, 2025

Frilly Frame Polka Dot Die Focused Card with Marine

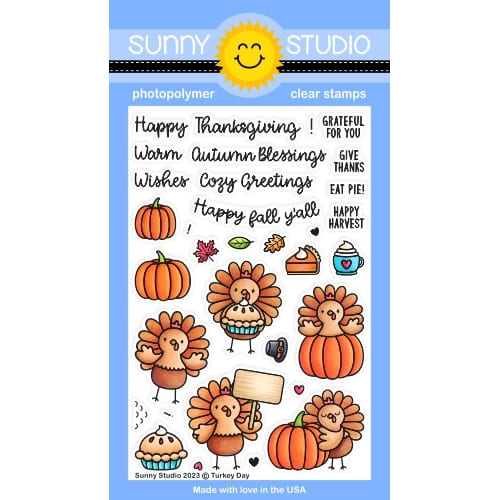
Hello crafty friends, Marine here, I'm thrilled to be back with this magical birthday card featuring cute fairies and chicky peacocks. I've had this idea of turning the turkeys from Turkey Day into peacocks since the set was released, so I'm very happy to finally be sharing this bright and colorful card with you.

Sunny Studio Stamps: Frilly Frame Polka Dot Die Focused Birthday Card by Marine Simon (featuring Turkey Day, Garden Fairy, Stitched Rectangle Dies, Brilliant Banner Dies)

I started off by stamping all the images using an alcohol marker friendly black ink, I cut them all using the coordinating dies, and colored everything using my Ohuhu markers in yellow, green and aqua, which is my favorite color combination at the moment.

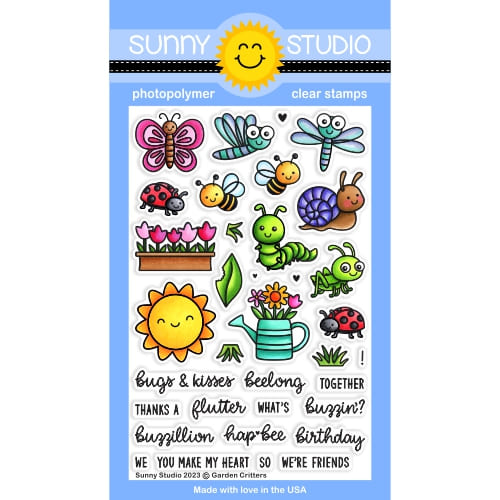
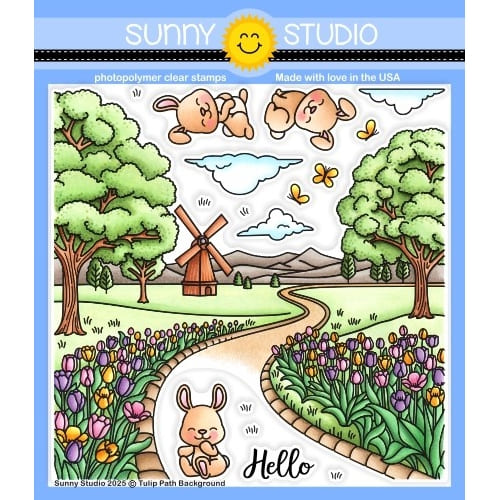
Here is a detailed list of the stamp sets I used: • Turkey Day - peacocks • Tulip Path Background - butterflies • Garden Fairy - fairies, flowers • Garden Critters - grass.

Next I worked on the background and started by cutting two 4,5 x 3,25 inches panels out of aqua cardstock using the second largest Stitched Rectangle die. On the first aqua panel, I used the polka dot die from the Frilly Frame Polka Dot die set to cut a million circles out of it, and then I attached that panel to the second aqua panel using liquid glue. Next I cut more tiny circles out of green, yellow and aqua cardstock using the same die, and then filled each circle spot on the aqua panel with my colorful tiny circles. It was quite a tedious task but I think it's totally worth it, I really love the result.

Sunny Studio Stamps: Frilly Frame Polka Dot Die Focused Birthday Card by Marine Simon (featuring Turkey Day, Garden Fairy, Stitched Rectangle Dies, Brilliant Banner Dies)

I added some texture to my polka dot panel: I mixed copic opaque white ink with water and used a slim brush to splatters all over it, I did the same with fossilized amber distress spritz for a touch of gold, and then the same again with peacock feathers distress spritz to match with the peacocks.

I cut a 5,25 x 4 inches scalloped panel out of shiny turquoise cardstock using the other die from the Frilly Frame Polka Dot die set, and attached my polka dot panel to it using 1mm foam tape. Next I stuck my scalloped panel to a 5,5 x 4,25 inches aqua panel using 1mm foam tape again, and then the whole thing to a white card base using liquid glue.

Sunny Studio Stamps: Frilly Frame Polka Dot Die Focused Birthday Card by Marine Simon (featuring Turkey Day, Garden Fairy, Stitched Rectangle Dies, Brilliant Banner Dies)

For my greeting, I used the Brilliant Banner 1 die set, and cut the different pieces out of cardstock that match with the images. I white heat embossed "Hoping you day is magical" from Garden Fairy on the main piece, assembled the banner using 1mm foam squares, attached it right at the top of my panel, and then stuck all the images using 1mm and 2mm foam squares. I added white blizzard nuvo drops to the fairies and butterflies wings to finish my card. 

And that's it! I hope that those cute peacocks have inspired you to create your own colorful birdies. Thanks so much for stopping by, and see you next week!

Sunny Studio Supplies Used:

Garden Fairy Stamps
Garden Fairy Stamps
Shop at:
Sunny Studio
Garden Fairy Dies
Garden Fairy Dies
Shop at:
Sunny Studio
Garden Critters Stamps
Shop at:
Sunny Studio
Garden Critters Dies
Shop at:
Sunny Studio
Frilly Frames Polka-Dot
Shop at:
Sunny Studio
Brilliant Banner 1 Dies
Shop at:
Sunny Studio
Turkey Day Stamps
Turkey Day Stamps
Shop at:
Sunny Studio
Turkey Day Dies
Turkey Day Dies
Shop at:
Sunny Studio
Tulip Path Background Stamps
Shop at:
Sunny Studio
Tulip Path Background Dies
Shop at:
Sunny Studio
Stitched Rectangle Dies
Shop at:
Sunny Studio

Wednesday, May 7, 2025

Woo Hoo Card with Tina

Hi crafty friends, Tina here with an adorable graduation-themed card! I have several family members graduating, and I just love this sweet owl from the Woo Hoo stamp and die set!

Sunny Studio Stamps: Woo Hoo Graduation Card by Tina Henkens (featuring Comic Strip Speech Bubble Dies, Happy Thoughts, Grad Cat)

As usual, I started with a white card base and went on to create a cloudy scene panel. On a white piece of card stock slightly smaller than the outside of the frame die we will be using later on, I ink blended a soft pastel sky with a stencil from my stash and Distress Oxides Squeezed Lemonade, Spiced Marmalade and Kitsch Flamingo.

Then I cut a white frame with the Comic Strip Speech Bubbles die. Since I wanted the clouds to continue across the little boxes, I just glued the frame on top of the inked background with liquid glue.

After selecting my images from the Woo Hoo and Grad Cat sets, I colored them in fun tones with my copics and added white highlights with a gel pen. To fill in the smaller boxes I also die cut two cloud shapes from the Comic Strip Speech Bubbles die.

Sunny Studio Stamps: Woo Hoo Graduation Card by Tina Henkens (featuring Comic Strip Speech Bubble Dies, Happy Thoughts, Grad Cat)

I browsed through my sentiment stamps and found the perfect saying in the Happy Thoughts set. It took a bit of masking to get the "wishing you a" sentiment spread over two lines. But I love how it turned out (Versafine Onyx Black ink).

Now it was time to build all the mini scenes, starting with the branches, and adding the owl, books, diploma, clouds, and little leaves. This card has already a lot of details so I kept the embellishments simple, just some White Diamonds Jewels.

Are you making grad cards this year? I am curious to see them! Thank you for visiting the blog and happy crafting!

Sunny Studio Supplies Used:

Woo Hoo Dies
Woo Hoo Dies
Shop at:
Sunny Studio
Woo Hoo Stamps
Woo Hoo Stamps
Shop at:
Sunny Studio
Happy Thoughts Stamps
Shop at:
Sunny Studio
Comic Strip Speech Bubble Dies
Shop at:
Sunny Studio
Grad Cat Stamps
Grad Cat Stamps
Shop at:
Sunny Studio
Grad Cat Dies
Grad Cat Dies
Shop at:
Sunny Studio

Tuesday, May 6, 2025

Kiddie Pool Card with Amanda

Happy Tuesday, crafty friends, Amanda here! I hope you had a great weekend and your week is off to a great start! Over the weekend, we celebrated my nephew’s 9th birthday and today, I’m sharing the card I made for him with YOU!  

Sunny Studio Stamps: Kiddie Pool Birthday Card by Amanda Fitterer (featuring Picket Fence Border Dies, Beach Buddies, Party Pets)

This card looks so dimensional, but it really only has a few layers! My background layer is a piece of white cardstock that I blended Catherine Pooler’s Oh Boy ink with a blending brush. I spritzed it with water and added a few dots of white acrylic paint.

The fence was cut from the Picket Fence Dies. I didn’t do anything to this fence, I just glued it straight to the background! So simple!

The grass layer was also cut using the Picket Fence Dies. I ink blended Altenew’s Olive and Bamboo inks with a blending brush to create that gorgeous green! Again, I spritzed it with a water bottle and added some white acrylic paint dots. I used 3D foam tape behind the grass and adhered it to the front of my card.

Sunny Studio Stamps: Kiddie Pool Birthday Card by Amanda Fitterer (featuring Picket Fence Border Dies, Beach Buddies, Party Pets)

I used a combination of a few stamp sets to get my images. I used the Party Pets Stamps, the Beach Buddies Stamps and the Kiddie Pool Stamps. I colored all of the images with Copic markers and then added highlights with a dot tool and the white acrylic paint. Then, I die cut them out with their coordinating dies.

I applied 3D foam squares behind the images and then adhered them to the card. The balloons in the background were adhered using glue, though, so they look farther away!

I had so much fun making card for my nephew and he loved it! Thanks so much for coming by the Sunny Studio Stamps blog today! I hope you have a great rest of your week!

Sunny Studio Supplies Used:

Beach Buddies Stamps
Shop at:
Sunny Studio
Beach Buddies Dies
Beach Buddies Dies
Shop at:
Sunny Studio
Picket Fence Border Dies
Shop at:
Sunny Studio
Kiddie Pool Stamps
Kiddie Pool Stamps
Shop at:
Sunny Studio
Kiddie Pool Dies
Kiddie Pool Dies
Shop at:
Sunny Studio
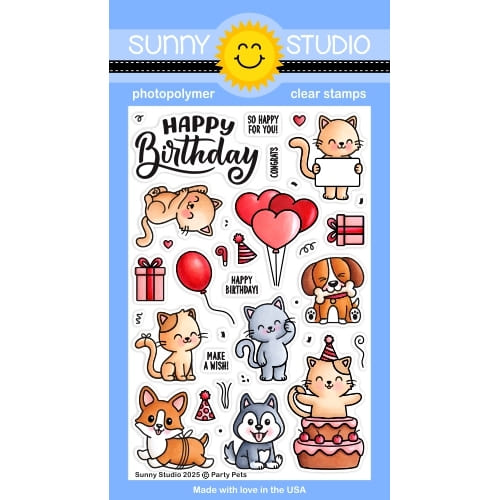
Party Pets Stamps
Party Pets Stamps
Shop at:
Sunny Studio
Party Pets Dies
Party Pets Dies
Shop at:
Sunny Studio

Monday, May 5, 2025

Color My World Teacher Appreciation Cards with Mendi

Hello and welcome! This is Mendi here today, popping in to share some cards for Teacher's showcasing our Color My World Stamps and Teacher Appreciation Stamps.

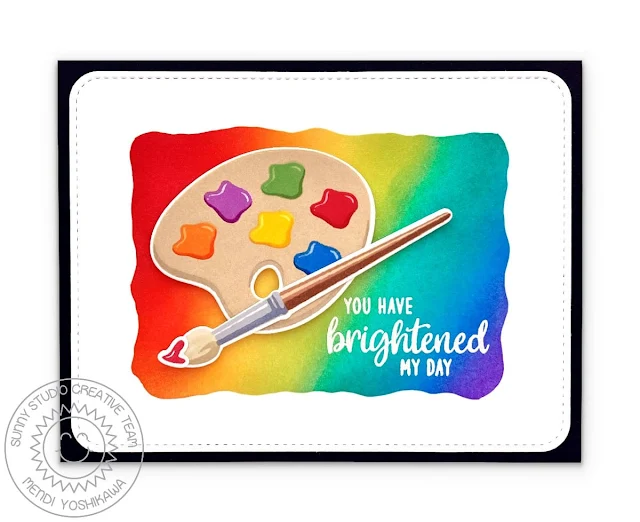
Sunny Studio Rainbow Crayons & Paint Palette School Cards using Teacher Appreciation & Color My World Clear Layering Stamps

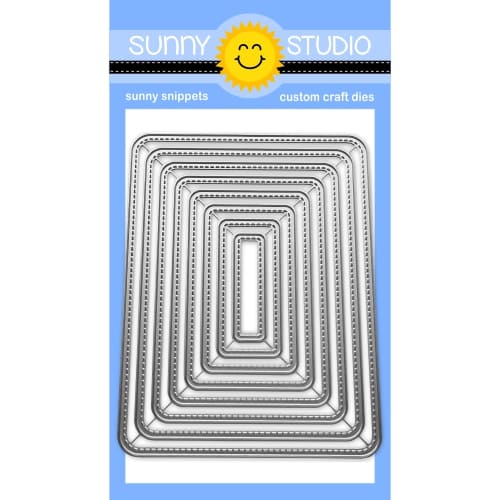
For my first card of the day, I have a card using the paint palette and paintbrush from our Color My World Stamps. I started by inking a white cardstock panel with a rainbow frame (detailed below) and then die-cut it using our stitched Rounded Rectangle Mat Dies. I was feeling there was a bit too much white space so having the thin border of black cardstock show through helped ground everything and not make it feel like it was floating quite so much. I heat-embossed the greeting "You have brightened my day" in the bottom right corner using our Teacher Appreciation Stamps. I then adhered my paintbrush to the palette and added foam tape to the back of both pieces to pop them up and make them stand out against my colorful background.

Sunny Studio Rainbow Paint Palette & Paintbrush School Card using Teacher Appreciation & Color My World Clear Layering Stamps

To create my handmade stencil from printer paper, I cut my scratch paper in half and traced around my A2 card panel on the back so as I was cutting out my loose frame, I would have a general sense of where to center it and also keep it dimensional with roughly the same margins on all four sides. I then randomly snipped a wavy-edged window in the center with my scissors. More than once, I felt it was lopsided, so I cut a bit off to make it more balanced with the other sides until I was satisfied.

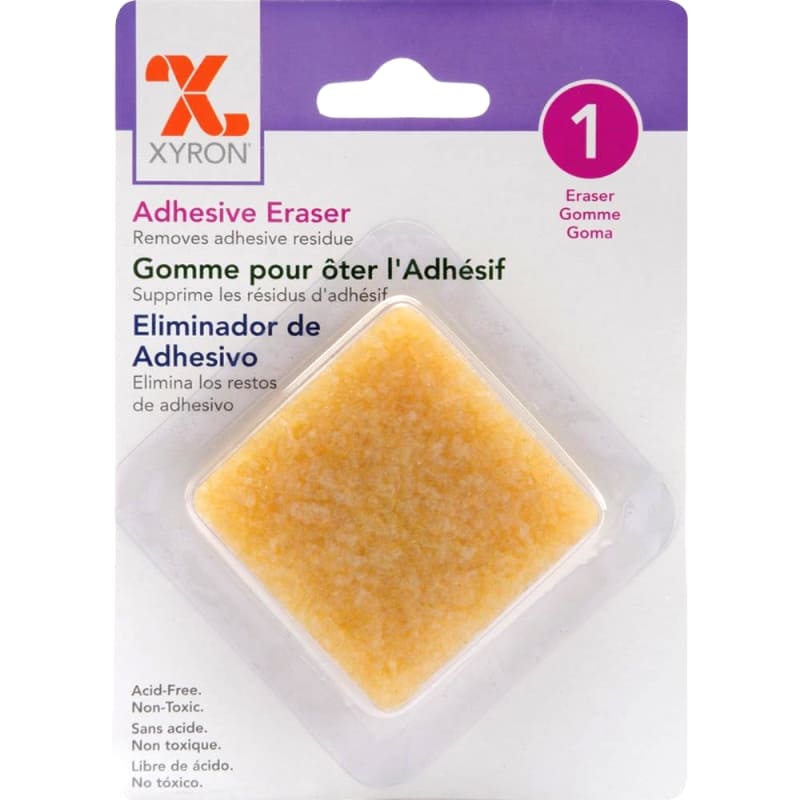
I then added some sticky adhesive with my ATG tape runner to the four corners and the center of each edge. This helped me keep it tacked down while I worked at inking it on my cardstock panel and kept it from shifting. I also made sure to not to rub it into my cardstock when laying it down so I could carefully pick it back up without damaging my cardstock afterward. I then blended Candied Apple, Carved Pumpkin, Mustard Seed, Twisted Citron, Peacock Feathers, Salty Ocean, and Wilted Violet Distress inks on the diagonal before gently removing my handmade stencil and rubbing off any left behind adhesive with the Xyron Adhesive Eraser. Surprisingly, my little stencil appears strong enough to make several more cards with the same piece!

Sunny Studio Rainbow School-Themed Card using Handmade Stencil with Teacher Appreciation & Color My World Clear Craft Stamps

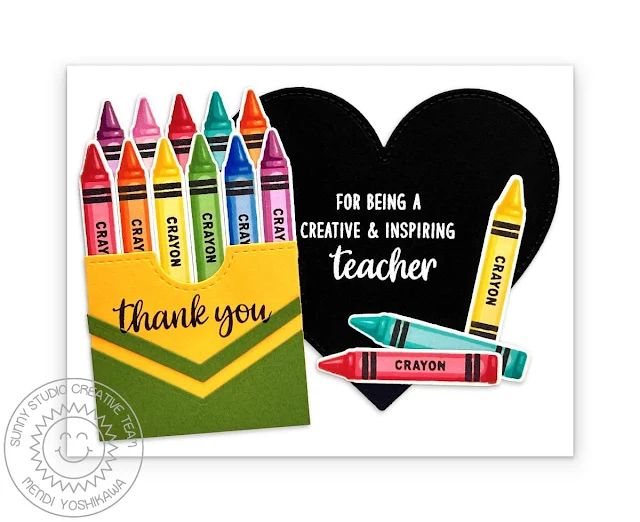
For my second card, I focused on the adorable layered crayon image from our Color My World Stamps, stacking them into a handmade crayon boxy using our Gift Card Pocket Dies, layered with the chevron "v" using our Fishtail Banner Dies. To the right of my crayon box, I layered Stitched Heart Die, die-cut from black cardstock (I was imagining to look a bit like a chalkboard). I then heat-embossed the second half of my sentiment using a greeting from our Teacher Appreciation Stamps. The "thank you" phrase stamped on the crayon box also comes from that same stamp set.

Sunny Studio Rainbow Crayons School Thank You Card using Teacher Appreciation, Color My World Stamps & Gift Card Pocket Die

I am frequently asked which ink colors I used for my layered images.  While I think there are so many great options out there, these are the colors I used today for my stamped images from light to dark:

Paint Palette (card no. 4)
Gina K. Kraft (4a)
+ 3-color groupings to match the crayons below

Pink Crayon
Pinkfresh Studio Ballet Slipper (2d)
Hero Arts Soft Pink (2c)
Hero Arts Bubblegum (2b)
Hero Arts Ultra Pink (2a)
Versafine Onyx Black Ink (2e)

Red Crayon
Pinkfresh Studio Coral Reef (2d)
Hero Arts Pale Tomato (2c)
Gina K. Red Hot (2b)
PinkFresh Studio Berrylicious (2a)
Versafine Onyx Black Ink (2e)

Orange Crayon
Pinkfresh Studio Apricot (2d)
Pinkfresh Studio Clementine (2c)
Concord & 9th Marmalade (2b)
Pinkfresh Studio Persimmon (2a)
Versafine Onyx Black Ink (2e)

Yellow Crayon
Pinkfresh Studio Lemon Whip (2d)
Pinkfresh Studio Sunshine (2c)
Pinkfresh Studio Sweet Mustard (2b)
Pinkfresh Studio Marigold (2a)
Versafine Onyx Black Ink (2e)

Green Crayon
Hero Arts Green Hills (2d)
Pinkfresh Studio Key Lime (2c)
Gina K. Lucky Clover (2b)
Pinkfresh Studio Olive (2a)
Versafine Onyx Black Ink (2e)

Teal Crayon
Gina K. Ocean Mist (2d)
Gina K. Turquoise Sea (2c)
Gina K. Blue Lagoon (2b)
Gina K. Tranquil Teal (2a)
Versafine Onyx Black Ink
 (2e)

Blue Crayon
Hero Arts Dusty Blue (2d)
Pinkfresh Studio Slumber (2c)
Pinkfresh Studio Blue Jay (2b)
Pinkfresh Studio Sapphire (2a)
Versafine Onyx Black Ink (2e)

Purple Crayon
Pinkfresh Studio Soft Lilac (2d)
Pinkfresh Studio Candy Violet (2c)
Versafine Clair Purple Delight (2b)
Hero Arts Grape Juice
 (2a)
Versafine Onyx Black Ink (2e)

As always we have layering guides as the second image on each of these stamp product pages that are also available to download with links in the product descriptions.

That wraps up my projects for today. Thanks so much for hanging out with me. I hope I've inspired you to spread a little happiness by sending out a card to someone you love. 💛

Supplies Used:

Fishtail Banner Dies
Shop at:
Sunny Studio
Color My World Stamps
Shop at:
Sunny Studio
Color My World Dies
Color My World Dies
Shop at:
Sunny Studio
Teacher Appreciation Stamps
Shop at:
Sunny Studio

Tsukineko Jumbo Dauber
Shop at:
Sunny Studio
Versafine Onyx Black Ink
Shop at:
Sunny Studio
Stitched Heart 2 Dies
Shop at:
Sunny Studio
Rounded Rectangle Mat Dies
Shop at:
Sunny Studio
Gift Card Pocket
Gift Card Pocket
Shop at:
Sunny Studio
Hero Arts White Detail
Shop at:
Sunny Studio
VersaMark Watermark Ink
Shop at:
Sunny Studio
Xyron Adhesive Eraser
Shop at:
Sunny Studio

Sunday, May 4, 2025

Fabulous Flamingos Card with Hanh

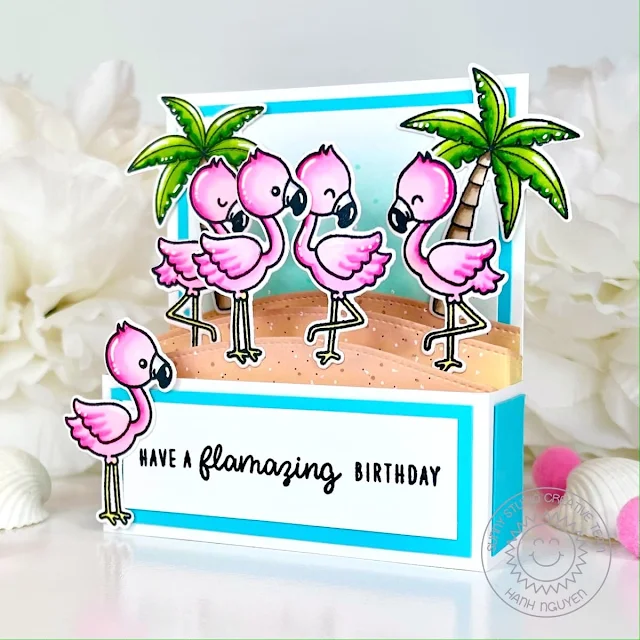
Hello Crafty Friends! This is Hanh on the Sunny Studio Stamps blog with a fun birthday boxcard to share with you featuring the adorable images from the Fabulous Flamingos and Sending Sunshine sets. Aren't these flamingos just the cutest?! Today I'm going to share a quick and easy way to make a homemade boxcard to add just a little pizzazz to your birthday cards. So let's get started. 

Sunny Studio Stamps: Fabulous Flamingos Birthday Boxcard by Hanh Nguyen (featuring Sending Sunshine, Slimline Nature Border Dies)

I stamped the flamingos and palm trees from the Fabulous Flamingos and Sending Sunshine Stamps sets onto a piece of Neenah Solar White 110 lb cardstock with Memento Tuxedo Black ink and used the coordinating Fabulous Flamingos Dies and Sending Sunshine Dies to die cut them out. I colored them with Copic markers and highlighted them with a white gel pen.

COPIC COLORS:
Flamingos: RV000/00/02/06, Y13, C1
Palm Trees: YG01/03/17/67, E41/42/43/44

For the boxcard, I used a few pieces of sturdy white cardstock: base (1.5" x 10.5"), back panel (3.75" x 4.25"), background panel (3.25" x 3.75"), sentiment strip (3.25" x 1") and 3 shelves (4.75" x 2"). I also trimmed a few pieces of a contrasting teal cardstock for decorations: back mat (3.5" x 4"), sentiment strip mat (3.5" x 1.25") and 2 side panels (1" x 1.25").

Sunny Studio Stamps: Fabulous Flamingos Birthday Boxcard by Hanh Nguyen (featuring Sending Sunshine, Slimline Nature Border Dies)

To assemble the boxcard, I used a score board to score the base strip at the 0.5", 1.75", 5.5" and 6.75" marks. I folded the strips at the score lines and used a strong double sided tape on the 0.5" end tab to enclose the boxcard base.

Next, I lightly blended some Salvaged Patina Distress Oxide ink onto the background panel. Once it was dry, I added a few dots with a BG11 Copic marker and a white gel pen for a bit of interest. I adhered this background panel to the teal back mat, then to the white back panel with liquid adhesive. I adhered these panels as well as the teal sentiment strip mat and teal side panels to the boxcard base with liquid adhesive. 

For the shelves, I used one of the stitched slope dies from the Slimline Nature Borders Dies to die cut a slope with a nicely finished edge onto the 3 white shelves. I lightly blended some Scattered Straw and Tea Dye Distress Oxide inks onto the top finished edge of the shelves. I added a few dots with a E33 Copic marker, a black Pigma Micron pen (or you can use a Copic Multiliner pent) and a white gel pen to give the mounds a more realistic sand appearance. Once the inks were dried, I trimmed off 0.5" from each end of one of the shelves and adhered it to the inked background panel of the boxcard. Next, I used a score board to score at the 0.5" mark on each end of the remaining two shelves. I folded at the score line, added some double sided tape to the end tabs and adhered them into the boxcard.

Sunny Studio Stamps: Fabulous Flamingos Birthday Boxcard by Hanh Nguyen (featuring Sending Sunshine, Slimline Nature Border Dies)

For the sentiment, I stamped the "Have a" and "birthday" from the Harvest Mice Stamp set and the "flamazing" from the Fabulous Flamingos Stamp set onto the white sentiment strip with Memento Tuxedo Black ink. I adhered the strip to the front of the boxcard with liquid adhesive.

Finally, I decorated the boxcard with my colored images using liquid adhesive. HINT: for extra sturdiness, I sometimes use a thin strip of clear acetate to adhere behind my colored image (especially for thin images like these flamingos and their thin legs) before adhering the other end of the clear acetate strip to the boxcard shelf. These clear acetate strips are also super handy for adhering images that appear to be floating in midair like balloons, birds or clouds.

Sunny Studio Stamps: Fabulous Flamingos Birthday Boxcard by Hanh Nguyen (featuring Sending Sunshine, Slimline Nature Border Dies)

I love boxcards. I think they take a regular card to a whole new level of fun for the recipient. I also love that they can be flattened and fit into a regular envelope for mailing. My card today fit nicely into a standard A2 sized envelope

I appreciate you taking the time to stop by and visit today. I hope you liked my boxcard. For more info and ideas, be sure to visit the Sunny Studio Stamps Shop. Please also visit my INSTAGRAM feed for more inspirations.

Have a wonderful and crafty day!

Sunny Studio Supplies Used:

Fabulous Flamingos Stamps
Shop at:
Sunny Studio
Fabulous Flamingos Dies
Shop at:
Sunny Studio
Sending Sunshine Stamps
Shop at:
Sunny Studio
Sending Sunshine Dies
Shop at:
Sunny Studio
Slimline Nature Borders
Shop at:
Sunny Studio
Harvest Mice Stamps
Harvest Mice Stamps
Shop at:
Sunny Studio