Friday, May 2, 2025

Cheerful Daisies Layered Daisy Cards with Mendi

Hello and welcome! This is Mendi here today, popping in to share some floral cards for Spring using our Cheerful Daisies Stamps and Dies. These have always been a favorite set of mine, so I had so much fun revisiting them for these two clean and simple cards.

Sunny Studio Daisy Birthday & Mother's Day Card using Cheerful Daisies & Layered Basket Clear Stamps & Botanical Backdrop Die

For my first card today featuring the Cheerful Daisies Stamps, I started by stamping a classic white daisy using only the top petal layer of the daisy image, which I stamped with a very pale ink called Barely Beige by Simon Says Stamp. I kept my color scheme yellow and green to match my daisies, filling the background with a yellow polka-dot patterned paper from our Polka-dot Parade Paper pack. I then layered our Botanical Backdrop Die over the top, which I cut from olive green cardstock. 

I cut three extra groupings of leaves by positioning some of my leftover cardstock to run through my machine again with the same die so I could fill in more of my edges with the leafy vines since my two daisies grouped on the bottom were pretty large and obstructed the view of many of the leaves. To add interest, I added some vein details to each leaf with my G07 Copic sketch marker. For my sentiment, I stamped the oversized "Happy Birthday" phrase from our Big Bold Greetings Stamps in Versafine Onyx Black ink. Lastly, I adhered some yellow Citrine Jewels to add a little sparkle and help fill in some visually empty spots.

Sunny Studio Daisy Birthday Card using Cheerful Daisies & Big Bold Greetings Clear Craft Stamps & Botanical Backdrop Die

Ink Color used for White Daisy: 

Ink colors used for Green Leaves:

For my second card today, I inked up all my gerber daisies from our Cheerful Daisies Stamps in various pink hues, pairing them with the woven basket from our Layered Basket Stamps. To embrace my country feel, I paired the flowers with a scalloped mat cut using our Frilly Frames Hexagon Dies from a lilac gingham print. However, the lilac gingham from our Gingham Pastels Paper pack is a bit more vibrant and it felt like it was competing for attention with the flowers in the foreground. I considered covering it with a piece of vellum, but decided I didn't want to mess with finding a way to hide the adhesive. Instead I applied a layer of white Hero Arts Unicorn Pigment Ink over the top of my patterned paper with a Jumbo Dauber to tone it down and make it appear more muted. This was my first time attempting something like this and while the background is still a bit busier than I wanted, it helped give me the look I was after. I finished my Mother's Day card with a small sentiment from our Puppy Parents Stamps.

Sunny Studio Daisy Mother's Day Card using Cheerful Daisies & Layered Basket Clear Layering Craft Stamps & Metal Cutting Dies

Ink colors for pale pink daisy:

Ink colors for medium pink daisy:

Ink colors for hot pink daisy:

Ink colors for lilac daisy:

Ink colors for centers of each daisy:

Ink colors for leaves:

Ink colors for layered basket: 
  • Skipped Lightest Layer
  • Hero Arts Soft Sand
  • Memories Soft Sand or Gina K. Sandy Beach
  • Memories Sand

That wraps up my projects for this morning. I hope I've inspired you in your own cardmaking and that you spread a little happiness by sending out a card to a loved one today.💗

Don't forget to check out our Cheerful Daisies Stamps, Layered Basket Stamps, Botanical Backdrop Die, and 6x6 Patterned Paper Pads in our online shop, which are all currently on sale!

I also encourage you to check out all the card ideas with these sets on each of their product pages. I always make sure to upload tons of ideas for each set following the product image so there are lots of ideas to scroll through there organized by set.

Supplies Used:

Versafine Onyx Black Ink
Shop at:
Sunny Studio
Polka-dot Parade 6x6 Paper
Shop at:
Sunny Studio
Gingham Pastels 6x6 Paper
Shop at:
Sunny Studio
Puppy Parents Stamps
Shop at:
Sunny Studio
Botanical Backdrop Die
Shop at:
Sunny Studio
Frilly Frames Hexagon Dies
Shop at:
Sunny Studio
Cheerful Daisies Stamps
Shop at:
Sunny Studio
Cheerful Daisies Dies
Shop at:
Sunny Studio
Layered Basket Stamps
Shop at:
Sunny Studio
Layered Basket Dies
Layered Basket Dies
Shop at:
Sunny Studio
Big Bold Greetings Stamps
Shop at:
Sunny Studio
Citrine Jewels
Citrine Jewels
Shop at:
Sunny Studio
Tsukineko Jumbo Dauber
Shop at:
Sunny Studio
PinkFresh Studio Blending Brushes
Shop at:
Sunny Studio
Hero Arts Unicorn Pigment Ink
Shop at:
Sunny Studio

Thursday, May 1, 2025

Plane Awesome Card with Marine

Hello crafty friends, Marine here with you today! I'm so glad to be back with this super colorful and extra cute card showcasing the adorable Plane Awesome stamp set. I love those adorable planes so much I decided to feature three of them on my card, so I went for a slimline design to make them fit well, and used a color palette I've used before on this Party Pets card and enjoyed it very much.

Sunny Studio Stamps: Plane Awesome Card by Marine Simon (featuring Slimline Scalloped Frame Dies)

All the images are from Plane Awesome. I know: shocking, right? I'm more of a "let's use all my stamp sets on one card" kind of a card maker, but for this one, everything I needed to create my scene was already in the set. So, I started off by stamping the images on 110lb Neenah solar white cardstock using an alcohol marker friendly black ink, I cut them all using the matching dies, and then colored everything using my Ohuhu markers and my Graph'it brush, with neutrals on the critters and brights on the planes. And once the coloring was finished, I added highlights and details to the images using a white gel pen.

Sunny Studio Stamps: Plane Awesome Card by Marine Simon (featuring Slimline Scalloped Frame Dies)

Next I cut a slimline panel out of Strathmore bristol smooth cardstock using a die from the Slimline Scalloped Frame die set, covered that panel with tumbled glass oxide ink first, and then used a slimline cloud stencil from my stash along with broken china oxide ink to add a cloudy pattern to my background. I splattered water all over the panel and dried it with a paper towel, mixed a bit of copic opaque white ink with water and used a slim brush to add white splatters to the panel, and then did the same with broken china, faded jeans and black soot oxide inks to add more contrast and interest to the clouds.

I cut an 8 x 3 inches white panel and attached my cloudy background to it using liquid glue. Next I cut a scalloped blue panel using another die from the Slimline Scalloped Frame die set and stuck my white panel to it using 1mm foam tape, and then I attached my scalloped blue panel to a khaki green card base using 1mm foam tape again.

Sunny Studio Stamps: Plane Awesome Card by Marine Simon (featuring Slimline Scalloped Frame Dies)

I stamped "Hoping your day is just plane awesome" from Plane Awesome at the bottom of the cloudy panel using black versafine ink, attached all the images using 1mm and 2mm foam squares, and finished my card by adding glossy accents to the hearts to make them super shiny. 

And that's it! How fun it was to color those planes in this super fun color palette, what a great coloring session I had! I hope that you like this super colorful card, too! Thanks so much for stopping by, and see you next time.

Sunny Studio Supplies Used:

Plane Awesome Stamps
Shop at:
Sunny Studio
Plane Awesome Dies
Plane Awesome Dies
Shop at:
Sunny Studio
Slimline Scalloped Frame
Shop at:
Sunny Studio

Wednesday, April 30, 2025

Pink Peonies Card with Tina

Hello crafters, it’s Tina and today’s card layout is very versatile, it can be used for so many occasions. But since I am always in need of birthday cards, that is what I made! 

Sunny Studio Stamps: Pink Peonies Birthday Card by Tina Henkens (featuring Scalloped Square Dies, Buffalo Plaid Embossing Folder, Fancy Frame Dies)

When I started my card making journey, I was a bit afraid of ‘flower arrangements’ and how to style them. I found that using the flowers as a center point with any kind of frame is always a winning combination. The beautiful Pink Peonies stamp and die set is great for these type of cards because it contains several shapes and sizes of peonies, making it easier for us to compose stunning bouquets.

After creating a square card base, I cut a panel with the biggest of the Scalloped Square 1 Large dies from white card stock. To add texture, I embossed it with the Buffalo Plaid Embossing folder and splattered the piece with Wilted Violet and Villainous Potion Distress Oxides.

While that was drying, I worked on my ‘frame’ element of the card. The Fancy Frames Circle dies are a perfect match for this square card. I cut them from a sheet of lilac Gingham Pastels and glued them directly to the card panel with liquid glue.

Sunny Studio Stamps: Pink Peonies Birthday Card by Tina Henkens (featuring Scalloped Square Dies, Buffalo Plaid Embossing Folder, Fancy Frame Dies)

Next, it was time to create the flower centerpiece. I decided to stamp all the flowers and the leaves in this set and colored them in green, pink, and lilac shades with my Copics. Adding shadows with a darker maker and highlights with a white gel pen.

My sentiment was chosen from the Party Pets set and I love that it comes with a matching die! I stamped the ‘Happy Birthday’ with Versafine Onyx Black ink and cut two extra layers to make it very sturdy. After placing this sentiment on the top right of the circle, I could start to arrange my peonies and leaves. I opted for the three largest flowers, and they fill the circle perfectly. Finally, I sprinkled a few Silver Jewels to finish this card.

I can’t wait to see your creations with this beautiful flower stamp! Thank you for joining me and happy crafting!

Sunny Studio Supplies Used:

Fancy Frames-Circle Dies
Shop at:
Sunny Studio
Gingham Pastels 6x6 Paper
Shop at:
Sunny Studio
Buffalo Plaid Embossing
Shop at:
Sunny Studio
Pink Peonies Stamps
Pink Peonies Stamps
Shop at:
Sunny Studio
Pink Peonies Dies
Pink Peonies Dies
Shop at:
Sunny Studio
Scalloped Square 1 Large Die
Shop at:
Sunny Studio
Party Pets Stamps
Party Pets Stamps
Shop at:
Sunny Studio
Party Pets Dies
Party Pets Dies
Shop at:
Sunny Studio

Tuesday, April 29, 2025

Happy Hamster Card with Amanda

Hey crafty friends! It’s Amanda here with you on the Sunny Studio Stamps blog today sharing the cutest little hamster card! I had to get a little creative when creating this cage for my little Happy Hamsters! I actually used the Tropical Trees Backdrop Dies to create their little home.  

Sunny Studio Stamps: Happy Hamsters Card by Amanda Fitterer (featuring Comic Strip Speech Bubble Dies, Tropical Trees Backdrop Dies)

First, I die cut the frame piece.  I used the stitched border piece as my frame and the sand piece for the “bedding". I also used the “sky” piece  for “bedding” by flipping it over and trimming it down with my paper trimmer. I blended Catherine Pooler Shea Butter ink on these two pieces.  

On a piece of A2 cardstock, I blended Catherine Pooler Cotton Candy ink all around the panel. From the Happy Hamster Stamps, I placed all the little heart images onto an acrylic block. Using the Cotton Candy ink pad, I stamped them all around the background. I glued this panel to an A2 card base.  Next, I glued my “bedding” and frame pieces to the card base.

I stamped all the hamsters, the wheel, and some sunflower seeds with black ink. Using Copic markers, I colored the images. 

Here are the markers I used:
N1, N3, N5
W6, W9
R00, R20, R22, R37
E30, E31, E33, E35, E50
White Gelly Roll pen

Sunny Studio Stamps: Happy Hamsters Card by Amanda Fitterer (featuring Comic Strip Speech Bubble Dies, Tropical Trees Backdrop Dies)

Once colored, I die cut them out with the coordinating dies. For the hamsters behind the bedding, I adhered them to my card front with liquid glue. For the other 2, I used 3D foam squares.

And, finally, for the sentiment! I die cut one of the word bubbles from the Copic Strip Speech Bubbles Dies out of black cardstock. I stamped the sentiment with my Wow! Embossing pad and then applied white embossing powder. I melted the powder with my heat tool and then put 3D foam tape behind it and stuck it to the front of the card.

Thanks so much for coming by the blog today! I hope you find some time to get crafty! Come back tomorrow for more inspiration from the Design Team!

Sunny Studio Supplies Used:

Happy Hamsters Stamps
Shop at:
Sunny Studio
Happy Hamsters Dies
Happy Hamsters Dies
Shop at:
Sunny Studio
Comic Strip Speech Bubble Dies
Shop at:
Sunny Studio
Tropical Trees Backdrop
Shop at:
Sunny Studio

Monday, April 28, 2025

Captivating Camellias Spring Cards with Mendi

Hello and welcome! This is Mendi here today, popping in to share some floral cards for Spring using our gorgeous Captivating Camellias Stamps and Dies. These have always been a favorite set of mine, so I had so much fun revisiting them for these two clean and simple cards.

Sunny Studio Floral Mother's Day & Thank You Cards using Captivating Camellias Stamps and Diagonal Stripes Stencils

For my first card, I chose a hot pink and grey color scheme and personalized the card for Mother's Day. After I had my floral arrangement laid out the way I wanted, I stamped a banner from our Banner Basics Stamps in Sparkling Rose ink onto a polka-dot print paper from our Polka-Dot Parade Paper pack. I then fussy cut the banner out with my scissors and masked off the top portion with a post-it note so I could ink around the pennant ends with that same ink with an ink dauber to create the look of extra dimension. 

When I was done, I stamped my "Happy Mother's Day" greeting using the sentiment from the Captivating Camellias set. To get the sentiment to match the curve of the banner, I used my Misti tool with a piece of acetate layered over my banner. This gave me a sticky surface for my stamps to cling to in a curved position before picking up the words with the Misti Lid to stamp them with ink.

Ink used for diagonal stripes: Gina K. Soft Stone

Sunny Studio Pink & Grey Floral Mother's Day Card using Captivating Camellias Stamps and Diagonal Stripes Stencils

I used many of the same elements for my second card but experimented with a different color scheme and floral arrangement for my flowers. This time, I made a thank you card using the oversized "thanks" sentiment from our Big Bold Greetings Stamps and Dies.

The ink used for diagonal stripes: PinkFresh Studio Misty Coast

Sunny Studio Red & Grey Spring Floral Thank You Card using Captivating Camellias Stamps and Diagonal Stripes Stencils

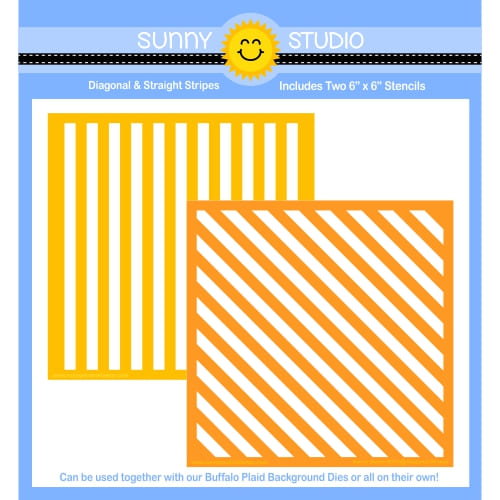
To achieve the checked backgrounds for each card today, I masked off every other stripe for our Diagonal & Straight Stripes Stencil using a 1/2" wide low tack masking tape from my craft stash. This had the benefit of masking off every other stripe while also holding my stencil in place as I inked up the background. Then, when I was done adding stripes in one direction, I rotated my stencil 90 degrees and inked them up in the opposite direction to form the oversized plaid look I was going for.


That wraps up my projects for this morning. I hope I've inspired you in your own cardmaking and that you spread a little happiness by sending out a card to a loved one today.

Don't forget to check out our 
Captivating Camellias Stamps and Dies which are both on sale in our online shop right now! Also, please check out all the card ideas using these sets on each of their product pages. I always make sure to upload tons of card ideas following the product image so there are lots of ideas to scroll through there organized by set.💗

Supplies Used:

Versafine Onyx Black Ink
Shop at:
Sunny Studio
Polka-dot Parade 6x6 Paper
Shop at:
Sunny Studio
Captivating Camellias Stamps
Shop at:
Sunny Studio
Captivating Camellias Dies
Shop at:
Sunny Studio
Tsukineko Jumbo Dauber
Shop at:
Sunny Studio
PinkFresh Fairy Dust Ink
Shop at:
Sunny Studio
PinkFresh Heartbeat Ink
Shop at:
Sunny Studio
PinkFresh Over The Hills Ink
Shop at:
Sunny Studio
Banner Basics Stamps
Shop at:
Sunny Studio
Banner Basics Dies
Banner Basics Dies
Shop at:
Sunny Studio
Big Bold Greetings Stamps
Shop at:
Sunny Studio
Big Bold Greetings Dies
Shop at:
Sunny Studio
Diagonal & Straight Stripes Stencils
Shop at:
Sunny Studio