Hello and welcome! This is Mendi here today, popping in to share some floral cards for Spring using our gorgeous Captivating Camellias Stamps and Dies. These have always been a favorite set of mine, so I had so much fun revisiting them for these two clean and simple cards.
For my first card, I chose a hot pink and grey color scheme and personalized the card for Mother's Day. After I had my floral arrangement laid out the way I wanted, I stamped a banner from our Banner Basics Stamps in Sparkling Rose ink onto a polka-dot print paper from our Polka-Dot Parade Paper pack. I then fussy cut the banner out with my scissors and masked off the top portion with a post-it note so I could ink around the pennant ends with that same ink with an ink dauber to create the look of extra dimension.
When I was done, I stamped my "Happy Mother's Day" greeting using the sentiment from the Captivating Camellias set. To get the sentiment to match the curve of the banner, I used my Misti tool with a piece of acetate layered over my banner. This gave me a sticky surface for my stamps to cling to in a curved position before picking up the words with the Misti Lid to stamp them with ink.
Ink colors used for blossoms:
Ink colors used for leaves:
Ink colors used for leaves:
Ink used for diagonal stripes: Gina K. Soft Stone
I used many of the same elements for my second card but experimented with a different color scheme and floral arrangement for my flowers. This time, I made a thank you card using the oversized "thanks" sentiment from our Big Bold Greetings Stamps and Dies.Ink colors used for blossoms:
Ink colors used for leaves:
Ink colors used for leaves:
The ink used for diagonal stripes: PinkFresh Studio Misty Coast
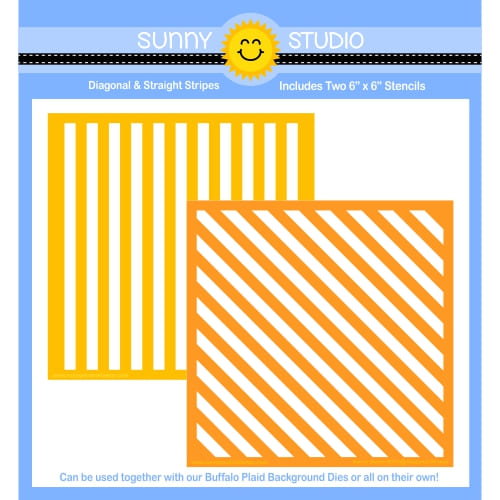
To achieve the checked backgrounds for each card today, I masked off every other stripe for our Diagonal & Straight Stripes Stencil using a 1/2" wide low tack masking tape from my craft stash. This had the benefit of masking off every other stripe while also holding my stencil in place as I inked up the background. Then, when I was done adding stripes in one direction, I rotated my stencil 90 degrees and inked them up in the opposite direction to form the oversized plaid look I was going for.

That wraps up my projects for this morning. I hope I've inspired you in your own cardmaking and that you spread a little happiness by sending out a card to a loved one today.
Don't forget to check out our Captivating Camellias Stamps and Dies which are both on sale in our online shop right now! Also, please check out all the card ideas using these sets on each of their product pages. I always make sure to upload tons of card ideas following the product image so there are lots of ideas to scroll through there organized by set.💗
Supplies Used:
 Versafine Onyx Black Ink Shop at: Sunny Studio |
 Polka-dot Parade 6x6 Paper Shop at: Sunny Studio |
 Captivating Camellias Stamps Shop at: Sunny Studio |
 Captivating Camellias Dies Shop at: Sunny Studio |
 Tsukineko Jumbo Dauber Shop at: Sunny Studio |
 PinkFresh Fairy Dust Ink Shop at: Sunny Studio |
 PinkFresh Heartbeat Ink Shop at: Sunny Studio |
 PinkFresh Over The Hills Ink Shop at: Sunny Studio |
 Banner Basics Stamps Shop at: Sunny Studio |
 Banner Basics Dies Shop at: Sunny Studio |
 Big Bold Greetings Stamps Shop at: Sunny Studio |
 Big Bold Greetings Dies Shop at: Sunny Studio |
 Diagonal & Straight Stripes Stencils Shop at: Sunny Studio |


No comments:
Post a Comment