Thursday, October 19, 2023

Pretty Poinsettia Tags with Marine

Hey crafty friends, Marine here with you today, I'm back with this set of three Christmas shaker tags showcasing Pretty Poinsettia, a gorgeous and very easy to use layering stamp set. Every year, I like to create tags, you can put them on presents, hang them in the Christmas tree or in the house, etc. I personally send them to my crafty friends abroad along with a holiday card.

Sunny Studio Stamps: Pretty Poinsettia Holiday Tags by Marine Simon (featuring Scalloped Square Tag Dies, Holiday Greetings)

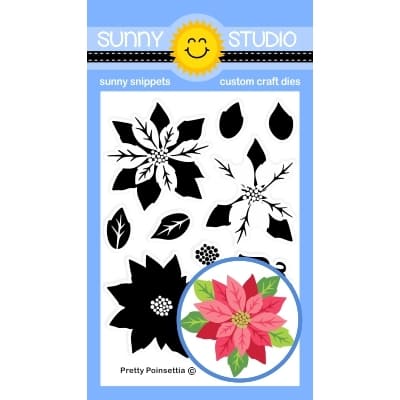
I knew I wanted to have three poinsettias on each tag, so, with the help of the layering guide on the Pretty Poinsettia product page, I started off by stamping nine poinsettias on 80lb Neenah solar white cardstock using the different layering stamps from the set along with Lawn Fawn dye inks: for the first layer (1a) I used peachy keen, for the second layer (1b) I used guava, and for the third layer (1c) I used lobster. Next I used my heat gun to dry the inks and prevent them from mixing into each other, I gold heat embossed the center of each poinsettia, and then cut my nine poinsettias using the matching die.

I gold heat embossed several leaves using the stamps 2a and 3a. And next I used Altenew dye inks to create green leaves. For the first layers (2a and 3a) I used frayed leaf, and for the second layers (2b alternate and 3b alternate) I used forest shades. And I used the matching dies to cut all the leaves.

While I was into the stamping process, I took the advantage of the opportunity to white heat emboss three Holiday Greetings on vellum that I cut using the coordinating dies.

Sunny Studio Stamps: Pretty Poinsettia Holiday Tags by Marine Simon (featuring Scalloped Square Tag Dies, Holiday Greetings)

Next I worked on the shaker tags, and started off by cutting all the different elements in three using the Scalloped Tag Square die set: the front panel out of red cardstock (and I used a smaller square die from my stash to cut an opening inside of each of those panels), acetate panels, vellum panels and All Is Bright panels. And here is how I built each shaker tag:

1. Attach the acetate panel at the back of the red panel using liquid glue along the four edges

2. Still at the back of that red panel, add foam strips on the four edges, use a powder tool along the inside edges of the foam to make it non sticky, clean the acetate using a cloth, and pour some shaker accessories on the acetate (here I used gold sequins from my stash)

3. Attach the vellum panel on top of the pattern paper panel using liquid glue along the four edges (this step is optional, I did this to mute the colors on the pattern papers a little bit)

4. Attach your vellum + pattern paper panel at the back of the red panel, directly on the foam strips to close the shaker tag

Sunny Studio Stamps: Pretty Poinsettia Holiday Tags by Marine Simon (featuring Scalloped Square Tag Dies, Holiday Greetings)

Next I created a handle at the top of each tag using gold thread, and added bows for more cuteness. And then I attached all the elements (poinsettias, leaves and greetings) on the tags using 3mm glue dots mostly to stick really well on the acetate, and also 1mm foam squares. And to add more shine to those tags, I added clear droplets here and there directly on the poinsettias.

And that's it! Those shaker tags were so fun to make, and stamping the poinsettias and seeing them taking shape was quite satisfying. I hope you will find inspiration in today's projects. Thanks so much for stopping by, and see you next week with more poinsettias, but in a different way!

Sunny Studio Supplies Used:

Scalloped Tags-Square
Shop at:
Sunny Studio
All Is Bright Paper
All Is Bright Paper
Shop at:
Sunny Studio
Holiday Greetings Stamps
Shop at:
Sunny Studio
Holiday Greetings Dies
Shop at:
Sunny Studio
Pretty Poinsettia Stamps
Shop at:
Sunny Studio
Pretty Poinsettia Dies
Shop at:
Sunny Studio

Wednesday, October 18, 2023

Feliz Navidad Card with Gladys

Hello crafty friends, Gladys here! I'm excited to be back on the blog to share a Christmas card featuring the beautiful stamp sentiment called Feliz Navidad.

Sunny Studio Stamps: Feliz Navidad Holiday Card by Gladys Marcelino (featuring Holiday Hugs, Fancy Frame Dies)

First, I stamped the adorable bear and present image from the Holiday Hugs stamp set with alcohol friendly ink. Then I colored them with Copic markers and used the coordinating dies to cut them out.

For my background, I used an A2 rectangle die to cut the red pattern paper from All Is Bright 6x6 paper pad. I knew I wanted to put a frame around my image so I used the Fancy Frames Rectangle dies to cut from white cardstock. I adhered the frames on the pattern paper with double sided foam tape to add dimension.

Sunny Studio Stamps: Feliz Navidad Holiday Card by Gladys Marcelino (featuring Holiday Hugs, Fancy Frame Dies)

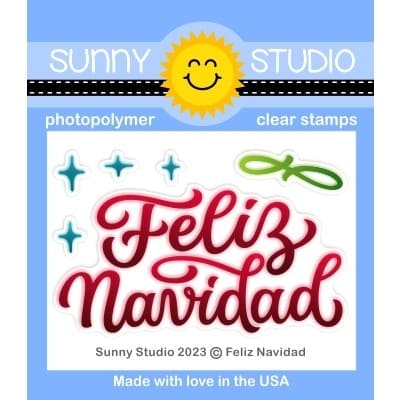
Next I popped up the bear with foam tape and mounted it on the bottom center of the background panel. I stamped the Feliz Navidad sentiment and used the coordinating die to cut it out. I love a bold sentiment with matching dies! I used the sentiment die to cut twice from white cardstock and stacked them together. I used this technique often to add dimension if I don't want to use foam tape for intricate images. To complete my card I added diamond stickles on the present for some sparkle.

Thank you for joining me and have a wonderful day!

Sunny Studio Supplies Used:

Fancy Frames- Rectangles
Shop at:
Sunny Studio
All Is Bright Paper
All Is Bright Paper
Shop at:
Sunny Studio
Feliz Navidad Stamps
Shop at:
Sunny Studio
Feliz Navidad Die
Feliz Navidad Die
Shop at:
Sunny Studio
Holiday Hugs Stamps
Holiday Hugs Stamps
Shop at:
Sunny Studio
Holiday Hugs Dies
Holiday Hugs Dies
Shop at:
Sunny Studio

Tuesday, October 17, 2023

Love & Light Hanukkah Card with Isha

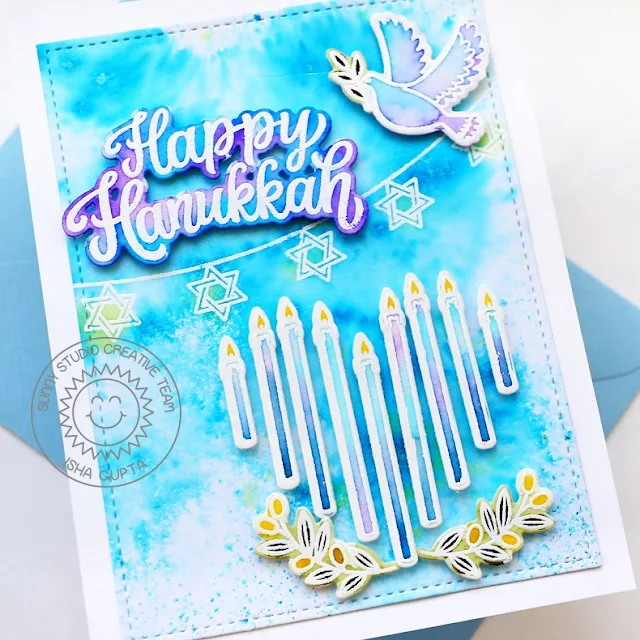
Hello everyone! Isha here today with a watercolor Hanukkah theme card featuring the Love & Light stamp stamps and coordinating dies. I normally don't make Hanukkah theme cards but really enjoyed creating this one.

Sunny Studio Stamps: Love & Light Hanukkah Card by Isha Gupta (featuring Stitched Rectangle Dies)

I started by creating the background using pigment powder, spritz with water to get desired effect. I used magicals by Lindys gang. Stamp the star banner with clear embossing ink, sprinkle WOW! opaque white power and heat set. add some yellow color. Die-cut this panel using Stitched Rectangle dies.

Sunny Studio Stamps: Love & Light Hanukkah Card by Isha Gupta (featuring Stitched Rectangle Dies)

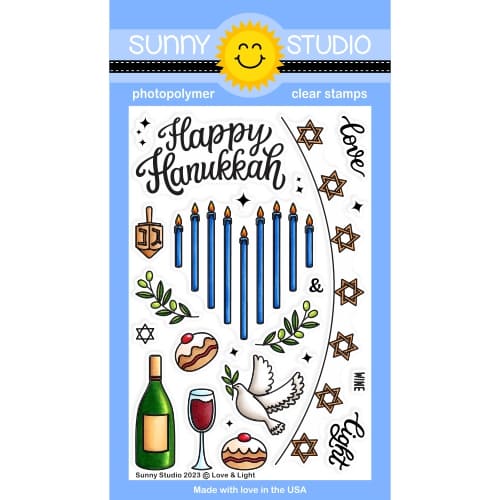
Stamp all the images from the Love & Light stamp set onto watercolor paper using clear embossing ink, use the embossing powder, heat set. Die-cut the images using the coordinating dies, add watercolor. Adhere the panel to a white card and then add images using 3d foam. 

Thank you for dropping by and have a nice day!

Sunny Studio Supplies Used:

Stitched Rectangle Dies
Shop at:
Sunny Studio
Love & Light Stamps
Love & Light Stamps
Shop at:
Sunny Studio
Love & Light Dies
Love & Light Dies
Shop at:
Sunny Studio

Monday, October 16, 2023

Holiday Hugs Card with Bobbi

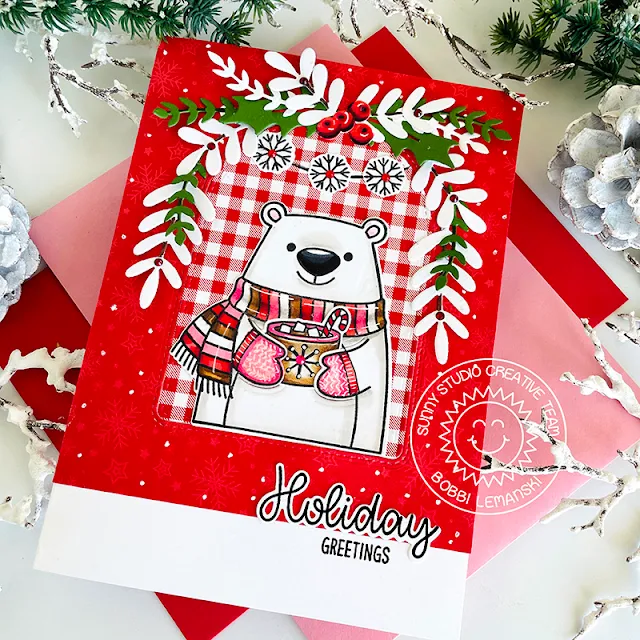
Hello friends! It’s Bobbi here with one big “Holiday Hug” for you! This 5″ X 7″ card includes the adorable bear from this new multi seasonal / holiday stamp set by Sunny Studio Stamps.

Sunny Studio Stamps: Holiday Hugs Christmas Card by Bobbi Lemanski (featuring Winter Greenery, Stitched Arch Dies)

The card base is made from 80lb Classic Crest Solar White cardstock. To create the front panel, I cut a piece of snowflake pattern paper from the Joyful Holiday Paper pack, to the size of 5″ wide X 6″ long. I cut an arch from the paper using the largest die from the Stitched Arch Die set. I also cut the same size arch from a red and white check pattern paper, too. Both frame and arch were secured to a white card base, leaving 1″ white space at the bottom. I added a few white dots to the snowflake paper using my white Gelly Roll pen.

Sunny Studio Stamps: Holiday Hugs Christmas Card by Bobbi Lemanski (featuring Winter Greenery, Stitched Arch Dies)

I stamped, colored and cut out the bear and the cup of hot cocoa. The bear die includes a separate die for the front paws, allowing smaller images from the set to be placed in the bear’s hands. How cute is that?! I added mittens to the bear with a couple of simple curved lines at both wrists. To color the bear and cup of hot cocoa, I used the following Copic Marker colors: E59, E57, E55, R89, R46, R17, R14, R20, RV13, RV14, W3, W0, 100, C7, C5. I used the same reds to color the berries, too. I stamped a snowflake on the cocoa cup and accented it with my white Gelly Roll Pen.

I attached the bear inside the arch window. I added three snowflakes inside the arch and hand drew a string to hang them from. I added sparkly rhinestones to the centers of the hanging snowflakes and the snowflake on the cup.  I added greenery around the top of the arch window using the Winter Greenery Dies. I cut greens from green and white cardstock and mixed the two to create the swag. Berries were added at the top.

Sunny Studio Stamps: Holiday Hugs Christmas Card by Bobbi Lemanski (featuring Winter Greenery, Stitched Arch Dies)


I stamped and die cut the "holiday"
sentiment and attached it at the bottom of the card front. I stamped "greetings" in the 1″ white space, right below "holiday" to finish the card.

Thanks for stopping by today. If you want to see more ideas and inspiration from me, subscribe to my blog, 
BobbiHartDesign.com. I’ll send you updates on new posts! You can also find me on Instagram as @BobbiHartDesign and on Facebook as BobbiHartDesign.

Sunny Studio Supplies Used:

Stitched Arch Dies
Stitched Arch Dies
Shop at:
Sunny Studio
Winter Greenery DIes
Shop at:
Sunny Studio
Joyful Holiday Paper
Shop at:
Sunny Studio
Holiday Hugs Stamps
Holiday Hugs Stamps
Shop at:
Sunny Studio
Holiday Hugs Dies
Holiday Hugs Dies
Shop at:
Sunny Studio

Sunday, October 15, 2023

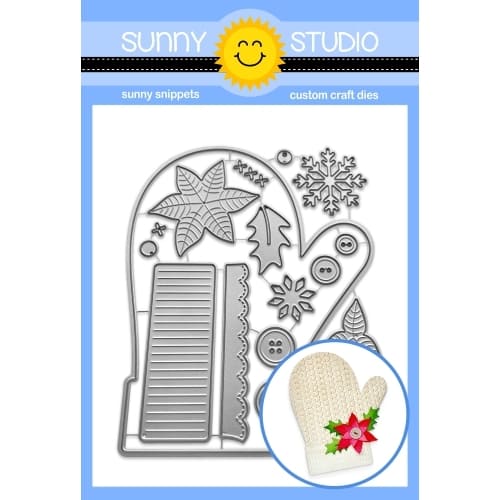
Woolen Mitten Die Focused Gift Card Holders with Tammy

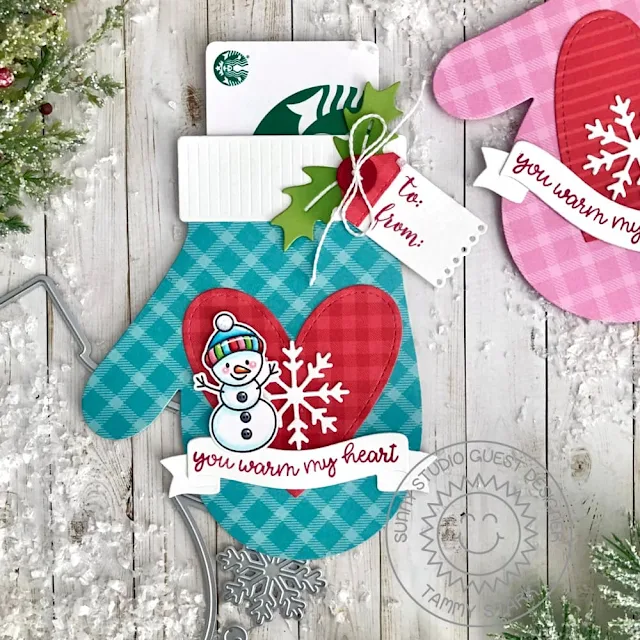
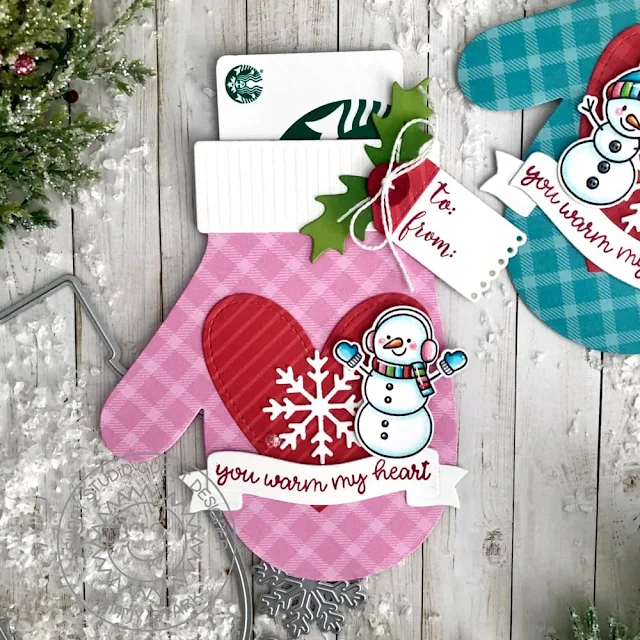
Hello friends! Tammy here with a fun project featuring the adorable Woolen Mitten Dies. Since the holidays are quickly approaching, I made a couple of gift card holders with a homespun feel!

Sunny Studio Stamps: Woolen Mitten Holiday Gift Card Holders by Tammy Stark (featuring Season's Greetings, Feeling Frosty, Brilliant Banners Dies)

To begin, I stamped the cute snowman images from Feeling Frostycolored with Copic markers, and die cut with the Feeling Frosty Dies. Next, I die cut the mittens from the All Is Bright 6X6 Paper Pad using the Woolen Mitten Die. I also cut 2 mittens from heavy white cardstock, attaching them together to create a pocket. I lined the edges of the mitten with thin sticky tape, making sure to leave the opening at the top to insert a gift card.

Sunny Studio Stamps: Woolen Mitten Holiday Gift Card Holders by Tammy Stark (featuring Season's Greetings, Feeling Frosty, Brilliant Banners Dies)

Next, I die cut the hearts from red patterned paper (Joyful Holiday Paper and Very Merry 6X6 Paper) using the Stitched Heart 2 DiesI die cut the cuff and snowflake from white cardstock using the Woolen Mitten Dies, then attached them to the front of each mitten, using foam tape to adhere the snowmen. I cut white banners using the Brilliant Banner 1 Die and stamped the sentiment from Feeling Frosty in red ink and attached them to the mitten, tucking underneath the snowmen.

Sunny Studio Stamps: Woolen Mitten Holiday Gift Card Holders by Tammy Stark (featuring Season's Greetings, Feeling Frosty, Brilliant Banners Dies)

Next, using the Woolen Mitten Dies, I cut the holly leaves from green cardstock and the cute button from red cardstock. I cut mini white tags from the Window Quad Square Diesadding red patterned paper (leftover from hearts) on the top of the tags. I stamped the 'to' and 'from' in red ink from the Season's Greeting Stampthen threaded the buttons with white string, adding the tags and tying them up. I attached the holly leaves to the cuff of the mitten, then adhered the tags, using foam tape for dimension to complete my mitten gift card holders!

Thanks so much for stopping by! See you soon!

Sunny Studio Supplies Used:

Very Merry 6x6 Paper
Shop at:
Sunny Studio
Season's Greetings Stamps
Shop at:
Sunny Studio
Feeling Frosty Stamps
Shop at:
Sunny Studio
Feeling Frosty Dies
Feeling Frosty Dies
Shop at:
Sunny Studio
Window Quad Square Die
Shop at:
Sunny Studio
All Is Bright Paper
All Is Bright Paper
Shop at:
Sunny Studio
Stitched Heart 2 Dies
Shop at:
Sunny Studio
Joyful Holiday Paper
Shop at:
Sunny Studio
Brilliant Banner 2 Dies
Shop at:
Sunny Studio
Woolen Mitten Dies
Woolen Mitten Dies
Shop at:
Sunny Studio