Friday, April 7, 2023

Wonderful Windows Cards with Vanessa and Tina

Hello to you! Vanessa here with a card using the Wonderful Windows Dies.


I trimmed a panel of cream cardstock slightly smaller than my card base and adhered it. Now I die-cut all the elements from various colors of cardstock, assembled the window and the flowers, added little accents to the grass (Picket Fence Border dies) with a marker, and adhered the pieces to the card.


Then I stamped the bike (Paris Afternoon), colored it with Copics, die-cut it with the matching die and adhered it.

I hope you are all having a lovely weekend! See you next week!

---------------------------------------

Hello crafty friends, it’s Tina with a sweet Easter card featuring the Wonderful Windows dies. These dies are so versatile as you will see in this project. Today, I am also mixing and matching several stamps, even one from a previous Christmas release. Always fun when you can stretch the use of your stash!


Let’s start by cutting the windows and curtains from a sheet of white cardstock. I used the large more solid window and adjusted the size to fit my design by removing the bottom part of the glass. I repeated this step and colored the window frames and curtains in shades of purple with Copics. I also cut two small white strips as windowsills. Two small panels were inked with a cloud stencil and Distress Oxide Picked Raspberry, they will go behind the window frames to create the ‘outside look’.

To decorate the windowsills, I cut two flower boxes using the die and adjusted them to the size I needed. You just cut the box once as is and pop the paper shape back into the die, shifting it to the correct measurement and die cut again.

Next, I selected several images to create the Easter scene, the cute little chicks and eggs (Chickie Baby), the sofa and cushions (Cozy Christmas) and finally the small flowers (Chubby Bunny). All the images were colored with Copics using Spring tones.

The combined sentiment comes from the Clucky Chickens set and was stamped onto a small white strip with Versafine Onyx Black ink. Can’t say enough good things about this ink! Love the dark crisp results you get each time!


To assemble the card, I started by creating the windows, gluing all the elements in place (curtains on the inside of the frame, then the cloud panel and lastly the windowsill with flower box).

For my background, I selected a beautiful flower design from the Spring Fever pack which looks like a gorgeous wallpaper. A dark purple strip was added as a baseboard, combined with a pink floor!

Now, I could adhere all the other elements in my scene, creating dimension where needed with foam tape. Finally, I glued the sentiment strip directly to the floor portion of the card. There was already so much color and cute images that I didn’t add any embellishments.

Wishing you lots of crafty fun making your own scene with these beautiful window dies! Thank you for joining me and happy crafting!

Sunny Studio Supplies Used:

Picket Fence Border Dies
Shop at:
Sunny Studio
Chubby Bunny Stamps
Chubby Bunny Stamps
Shop at:
Sunny Studio
Chubby Bunny Dies
Chubby Bunny Dies
Shop at:
Sunny Studio
Chickie Baby Stamps
Chickie Baby Stamps
Shop at:
Sunny Studio
Chickie Baby Dies
Chickie Baby Dies
Shop at:
Sunny Studio
Paris Afternoon Stamps
Shop at:
Sunny Studio
Paris Afternoon Dies
Shop at:
Sunny Studio
Cozy Christmas Stamps
Shop at:
Sunny Studio
Cozy Christmas Dies
Cozy Christmas Dies
Shop at:
Sunny Studio
Clucky Chickens Stamps
Shop at:
Sunny Studio
Wonderful Windows Dies
Shop at:
Sunny Studio
Spring Fever Paper
Spring Fever Paper
Shop at:
Sunny Studio

Thursday, April 6, 2023

Panda Party Cards with Marine and Waleska

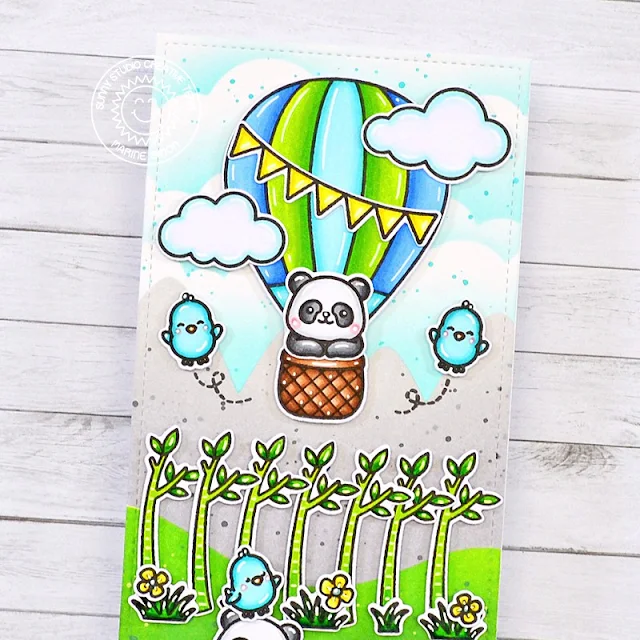
Hey crafty friends, Marine here, so glad to be back on the blog with the loveliest and sweetest pandas from Panda Party. I created a mountain scene for those cute little guys, and to help me complete my scene, I shopped my entire Sunny Studio collection to find the stamps that could fit the theme.

Sunny Studio Stamps: Panda Party Birthday Card by Marine Simon (featuring Balloon Rides)

And just like the Garden Critters card that I shared last week, I first stamped all my images on Transotype perfect coloring paper using an alcohol marker-friendly black ink, and die cut them all using the coordinating dies, in order to place them on an 8,5 x 3,5 inches Strathmore bristol smooth panel and help me visualize the scene I wanted to build. I used a pencil to mark on my panel the different parts I wanted to create in my scene, from the bottom to the top: two hills, mountains, and the sky, and I used stencils from my stash along with oxide inks to color the entire panel.

Sunny Studio Stamps: Panda Party Birthday Card by Marine Simon (featuring Balloon Rides)

Once my mountain landscape was done, I colored all my images using my Spectrum Noir Illustrator markers and Graph'it brush markers. And to create a lovely habitat for my lovely pandas from Panda Party, I picked some extra stamps from different sets:

- the grass from Garden Critters
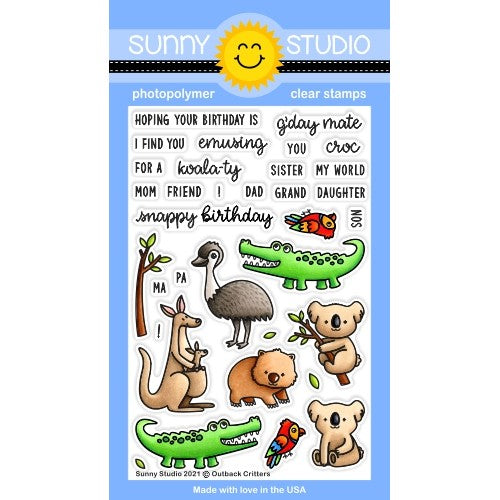
- the branch from Outback Critters
- the hot air balloon & clouds from Balloon Rides
- two leaves from Fabulous Flamingos
- the tree trunk from Seasonal Trees
- the flowers from Chickie Baby + from Chubby Bunny
- the swirling detail from Country Scenes

Sunny Studio Stamps: Panda Party Birthday Card by Marine Simon (featuring Balloon Rides)

I white heat embossed my "Wishing you a pandastic day" from Panda Party at the bottom of the panel, I attached all the images using 1mm foam squares mostly and 3mm glue dots, and as always I finished my card by adding highlights and details to the images using a white gel pen.

Sunny Studio Stamps: Panda Party Birthday Card by Marine Simon (featuring Balloon Rides)

And that's it! Love those cute pandas and how they pop on the green landscape, and the one in the balloon is one more proof that Sunny Studio stamp sets are totally mixable, just perfect if, just like me, you love to create stories on cards. Don't hesitate to watch the process video for more details (click on the image above)! Thank you so much for stopping by, and see you next time!

-------------------------------------------

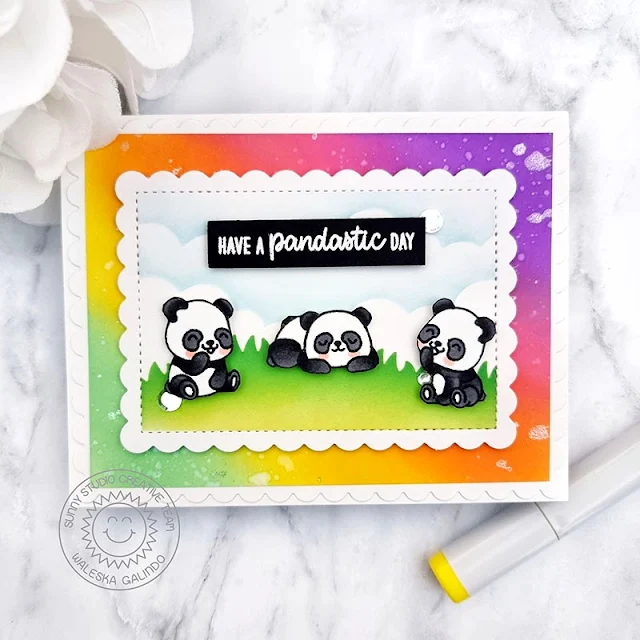
Hello there, Waleska here! I am happy to be back on the blog to share a happy card featuring the Panda Party Stamps. I also used the Frilly Frames Hexagon and the Mini Mat & Tag #1 Dies.

Sunny Studio Stamps: Panda Party Birthday Card by Waleska Galindo (featuring Frilly Frame Dies)

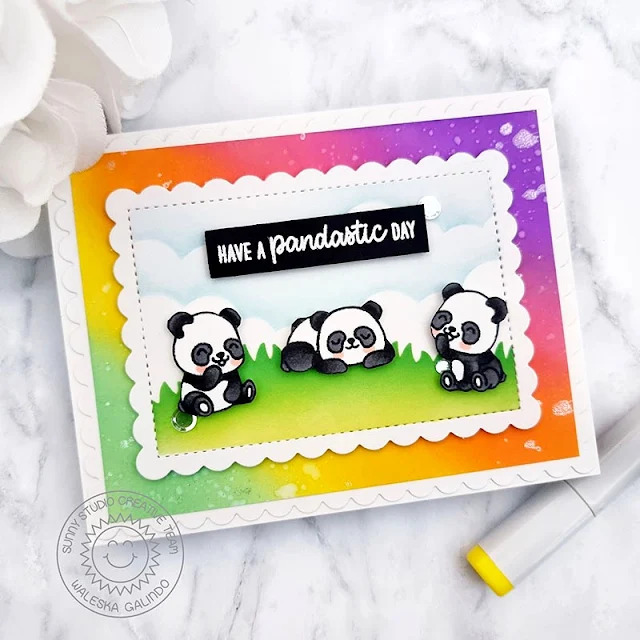
I started by cutting the biggest of the Frilly Frames with white cardstock and inking another piece to adhere on top of this frame with Oxide Inks in colors Wilted Violet, Picked Raspberry, Carved Pumpkin, Mustard Seed and Cracked Pistachio, I did some watercolor splatters for more interest too. I then cut the small scalloped rectangle from the Mini Mat Tag #1 Dies and created a little scene with stencils and oxide inks.

Sunny Studio Stamps: Panda Party Birthday Card by Waleska Galindo (featuring Frilly Frame Dies)

I then stamped and cut the cutest three pandas from the set and adhere them in the scene, I stamped one of the sentiments with white embossing powder on black cardstock, such an adorable card to wish someone you love a pandastic day! Thank you so much for stopping by today have a great rest of your week!

Sunny Studio Supplies Used:

Outback Critters Stamps
Shop at:
Sunny Studio
Outback Critters Dies
Shop at:
Sunny Studio
Chubby Bunny Stamps
Chubby Bunny Stamps
Shop at:
Sunny Studio
Chubby Bunny Dies
Chubby Bunny Dies
Shop at:
Sunny Studio
Fabulous Flamingos Stamps
Shop at:
Sunny Studio
Fabulous Flamingos Dies
Shop at:
Sunny Studio
Seasonal Trees Stamps
Shop at:
Sunny Studio
Seaonal Trees Dies
Seaonal Trees Dies
Shop at:
Sunny Studio
Frilly Frames Hexagon Dies
Shop at:
Sunny Studio
Chickie Baby Stamps
Chickie Baby Stamps
Shop at:
Sunny Studio
Chickie Baby Dies
Chickie Baby Dies
Shop at:
Sunny Studio
Balloon Rides Stamps
Shop at:
Sunny Studio
Balloon Rides Dies
Balloon Rides Dies
Shop at:
Sunny Studio
Country Scenes Stamps
Shop at:
Sunny Studio
Country Scenes Dies
Country Scenes Dies
Shop at:
Sunny Studio
Mini Mat & Tag 1 Dies
Shop at:
Sunny Studio
Garden Critters Stamps
Shop at:
Sunny Studio
Garden Critters Dies
Shop at:
Sunny Studio
Panda Party Stamps
Panda Party Stamps
Shop at:
Sunny Studio
Panda Party Dies
Panda Party Dies
Shop at:
Sunny Studio

Wednesday, April 5, 2023

Tranquil Tulips Cards with Marie and Catherine

Hello Everyone, Marie here! Spring is one of my most favorite times of the year because everything is beautiful and flowers are blooming left and right. If I could think of a flower that is the quintessential Spring flower, tulips definitely come to mind first! That being said, I am excited to share my latest inspiration card that features Sunny Studio Stamps' Tranquil Tulips Stamps. This layering stamp set allows you to quickly create gorgeous tulips during their different stages of bloom. This set is perfect for mass producing cards! 

Sunny Studio Stamps: Tranquil Tulips Card by Marie Marco (featuring Loopy Letters Dies, Frilly Frame Dies)

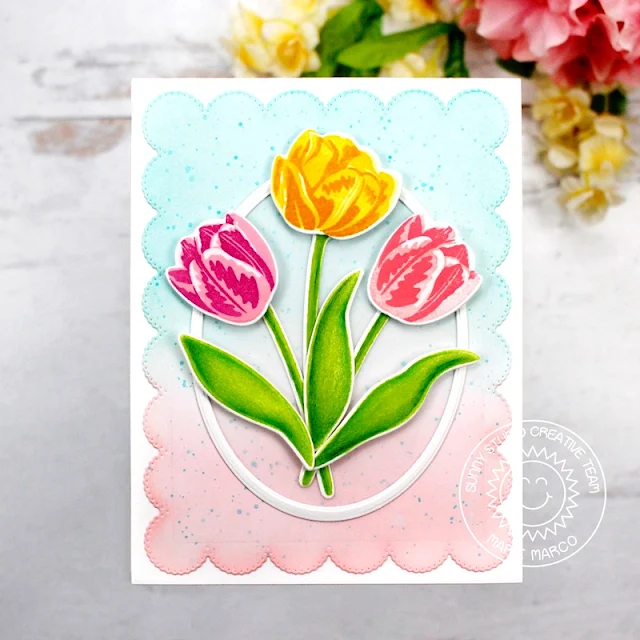
My card today has a very simple design. To start,  I die cut an A2 sized base panel from 110 lb. Neenah Solar White Cardstock. For my background panel I used the Frilly Frames Eyelet Lace Die. I love the scalloped border this die creates! Then taking some Salvaged Patina Distress Oxide Ink, I lightly inked a little more than half the panel, and finished distress inking the rest with Saltwater Taffy Distress Oxide Ink. I also splattered some Salvaged Patina throughout the panel for a little texture. I then  adhered the background panel to the base panel using double sided tape adhesive. 

Next step was to stamp out all my lovely tulips onto Neenah Solar White Cardstock. Each layering flower stamp is individually labeled so it's easy to follow which order they go in. For each tulip bloom, I used three different colors with 3 different ink tones. For the purple tulip, I used a very light Princess Pink Dye Ink for the base, and then a slightly darker Pink in the shade Cotton Candy Dye ink  for the mid tone.These two inks are from MFTstamps. The darkest shade I used is Seedless Preserves Distress Oxide which is a purple that compliments the pink layers very well. For my full bloom yellow tulip, I used Lemon Chiffon Dye Ink, followed by a darker Lemon Drop Dye ink from MftStamps, and the darkest Ink is Fossilized Amber Distress Oxide Ink. 

Sunny Studio Stamps: Tranquil Tulips Card by Marie Marco (featuring Loopy Letters Dies, Frilly Frame Dies)

To make the base of the flower a little darker giving it a more defined gradient, I added a touch of Wild Honey Distress Oxide Ink only to the base. For the pink tulip, I used Spun Sugar Distress Ink, Saltwater Taffy Distress Ink, and finally Worn Lipstick Distress Oxide as the darkest shade. For all the stems and leaves, I used a bright green Twisted Citron Distress Ink, and then Polychromos Color pencils to add some shading. I cut out all the images using the corresponding Tranquil Tulips Dies.

To highlight their beauty, I kept my design very simple by placing all three tulips inside a white oval frame that I created using two oval nesting dies. I gave the flowers dimension by adhering each one with foam tape. I also used foam tape on all the leaves. For the inside of my card, I lightly inked the center of an oval with Salvaged Patina and added a single stemmed tulip, placed off to the side, to create room for my "You're the Best" sentiment. My sentiment was created using the Loopy Letter Dies which I cut from a gold metallic cardstock. 

That concludes this week's card inspiration using the awesome Tranquil Tulips Layering stamps! I had a lot of fun experimenting with various different inks to create the perfect tulip colors! I hope this inspires you to create more Spring projects especially for the upcoming Easter holiday! Thanks so much for joining me today and until next time, Happy Cardmaking! 

-----------------------------------------

Hello Crafty Friends! Catherine here, and today I am sharing some floral gift tags created with Tranquil Tulips Stamps and Vintage Jar Stamps.

Sunny Studio Stamps: Tranquil Tulips Gift Tags by Catherine Cohen (featuring Vintage Jar)

To start, I die-cut the tulips, leaves, and stems, with white cardstock using the coordinating Tranquil Tulips Dies. I placed the die cut images back into the negative spaces. I stamped the images layer by layer with the following Altenew inks:

Yellows: Citrus Burst, Fresh Lemon, Maple Yellow
Pinks: Frosty Pink, Cotton Candy, Coral Berry
Purples: Soft Lilac, Wisteria, Lavendar Fields
Greens: Firefly, Grass Field

I added some highlights onto the tulips and leaves with a white gel pen.

Sunny Studio Stamps: Tranquil Tulips Gift Tags by Catherine Cohen (featuring Vintage Jar)

For the jar, I die cut 6 jars (3 for the front and 3 for the back) out of white cardstock using Vintage Jar Dies. I placed 3 of the jars back into the negative space and stamped the jar using Vintage Jar Stamps with Lawn Fawn Kiddie Pool Ink. I set the 3 jars aside for the back of the tags.  For the front of the jars, I placed the remaining 3 white cardstock jars back into the negative space and stamped the stem images. Next, I stamped the jar on top of the stems using Vintage Jar Stamps and Lawn Fawn Kiddie Pool Ink.

I adhered the tulips, stems, and leaves onto the back of the jar fronts and then glued on the back of the jars. I tied some brown string around the top of the jars. I added tags from Window Quad Square Dies using paper from Gingham Pastels Paper. I added a “thanks” sentiment in the Tranquil Tulips Stamps set using the pennant from Fancy Frames Rectangle Dies.

Thank you so much for joining me today! I would love for you to visit me at Crafti-Cat! Have a lovely day!

Sunny Studio Supplies Used:

Vintage Jar Dies
Vintage Jar Dies
Shop at:
Sunny Studio
Vintage Jar Stamps
Vintage Jar Stamps
Shop at:
Sunny Studio
Fancy Frames- Rectangles
Shop at:
Sunny Studio
Loopy Letters Dies
Loopy Letters Dies
Shop at:
Sunny Studio
Gingham Pastels 6x6 Paper
Shop at:
Sunny Studio
Frilly Frames-Eyelet Lace
Shop at:
Sunny Studio
Window Quad Square Die
Shop at:
Sunny Studio
Tranquil Tulips Stamps
Shop at:
Sunny Studio
Tranquil Tulips Dies
Shop at:
Sunny Studio