Tuesday, October 4, 2022

Pumpkin Patch Die Focused Cards with Kavya and Isha

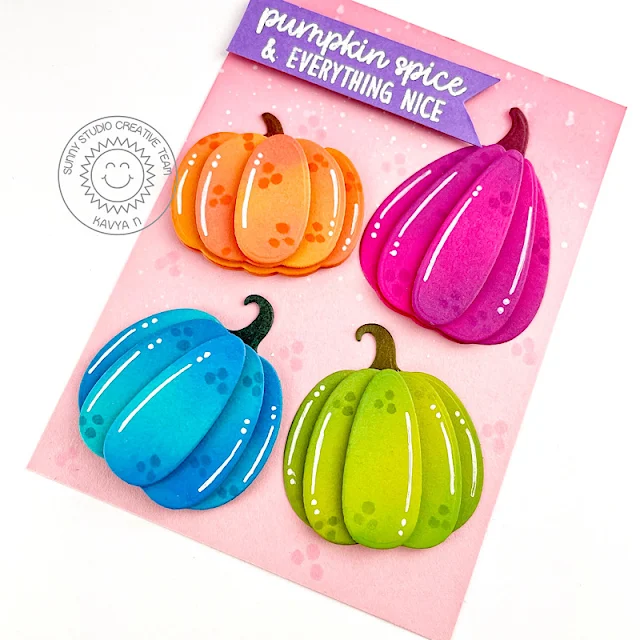
Hi folks, Kavya here. I am back on the blog with another fun project using some amazing dies from the latest release! Today’s project was inspired by some amazing pattern paper that I saw at a stationary store. I knew it would be perfect to recreate using the new Pumpkin Patch dies. 

Sunny Studio Stamps: Pumpkin Patch Die Focused Card by Kavya

I first started off by die cutting different parts of the pumpkin using colored paper. Then, I ink blended the edges using darker distress oxide inks. I also added some details using white gel pen and alcohol markers. 

Sunny Studio Stamps: Pumpkin Patch Die Focused Card by Kavya

Added all the pumpkins on pale pink cardstock and added a sentiment from Happy Harvest to finish off my card!

That’s it! I hope you liked this card :) Happy Crafting! 

-------------------------------------------------

Hello everyone! Isha here today with a mixed media card featuring our new Pumpkin Patch dies. These are GORGEOUS layering dies along with some leaves to create nice scenes/collage.

Sunny Studio Stamps: Pumpkin Patch Die Focused Card by Isha Gupta (featuring Crisp Autumn, Frilly Frame Herringbone Dies)

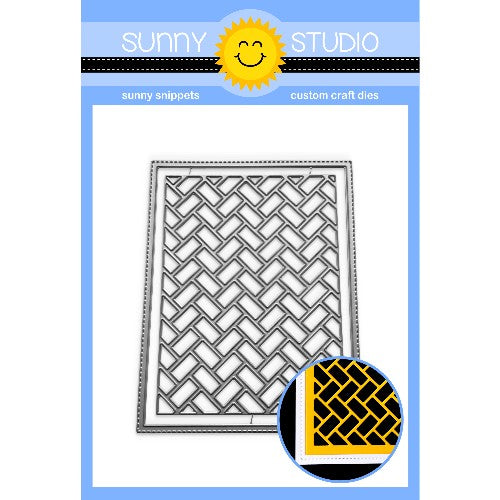
I started by creating the background, for which I used evergreen bough distress ink to create the watercolor feel. Next, I die-cut a white cardstock using the Frilly Frames Herringbone die. Apply crackle embossing paste through this die-cut to the background. Flick gold watercolor and let this dry.

Sunny Studio Stamps: Pumpkin Patch Die Focused Card by Isha Gupta (featuring Crisp Autumn, Frilly Frame Herringbone Dies)

Die-cut the pumpkins, leaves from the Pumpkin Patch dies. Use dried marigold, ripe persimmon, evergreen bough, forest moss distress inks to add color. Stamp the sentiment from the Crisp Autumn stamp set, die-cut using the coordinating dies. Add color to this die-cut sentiment. Adhere everything to the mat layer and then adhere to a kraft card base.

Thank you for dropping by and have a nice day!

Sunny Studio Supplies Used:

Crisp Autumn Stamps
Crisp Autumn Stamps
Shop at:
Sunny Studio
Crisp Autumn Dies
Crisp Autumn Dies
Shop at:
Sunny Studio
Happy Harvest Stamps
Shop at:
Sunny Studio
Frilly Frames Herringbone
Shop at:
Sunny Studio
Pumpkin Patch Dies
Pumpkin Patch Dies
Shop at:
Sunny Studio

Monday, October 3, 2022

Too Cute To Spook Cards with Cathy and Bobbi

Hey friends! Cathy here today with the cutest little trick-or-treaters all set for Halloween!

Sunny Studio Stamps: Too Cute To Spook Halloween Card by Cathy Chapdelaine (featuring Autumn Tree Dies, Fall Scenes, Slimline Dies, Frilly Frame Dies)

To make this card, I started by die-cutting a piece of black cardstock using the frame portion of the Frilly Frames Chevron Dies and adhered it to a lavender A2 card base. For the background of my scene, I cut a piece of Neenah 80lb Classic Crest solar white cardstock 3 1/2“ x 4 3/4". Before inking the sky, I masked a large moon by die-cutting a piece of eclipse masking tape using a Stitched Circle Small Die. Starting with gentle pressure from the masked moon working outwards, I inked with Milled Lavender followed by Dusty Concord, Seedless Preserves, Picked Raspberry and a touch of Hickory Smoke Distress inks on the top half of the cardstock. On the bottom half I inked with Milled Lavender into Saltwater Taffy. I added craters to the moon using a B60 Copic marker. Once the inks were dry, I heat embossed the sentiment using citron embossing powder.

For the ground, I cut a piece of white cardstock 2” x 4 3/4" and die-cut the top edge using a Slimline Nature Borders Die. I inked the piece with Hickory Smoke Distress ink and adhered it to the bottom of my background piece. I stamped a small tree from the Fall Scenes Stamps on the right side of the panel in gray ink to make it appear off in the distance and inked the ground under it with an N4 Copic marker. To add a little more pop of green, I cut a strip of paper from the Critter Country Paper Pack 1/2" x 4 3/4" and adhered it to the bottom of the scene.

Sunny Studio Stamps: Too Cute To Spook Halloween Card by Cathy Chapdelaine (featuring Autumn Tree Dies, Fall Scenes, Slimline Dies, Frilly Frame Dies)

The Autumn Tree Dies make such a great spooky tree cut from black cardstock, so I added that to the left side and used precision tip scissors to carefully cut the excess around the edges of the cardstock panel. I then adhered the panel to the card front. To finish, I stamped all the images from the Too Cute to Spook Stamps on Neenah 80lb Classic Crest solar white cardstock, colored them with Copics and die-cut them using the coordinating dies.

I hope you enjoyed and thanks for stopping by today! For more inspiration, please visit my blog www.inkredibleadventures.com and you can also find me on Instagram as @cathy.chapdelaine.

---------------------------------------------------

Hello friends! It’s Bobbi sharing a fun style card referred to as a zigzag card or stretch card. While this card requires a number of score lines and a few slits, it is really easy to make. I am using the Too Cute to Spook stamp and dies as well as the Autumn Tree dies and the Fall Scene Stamps.


Sunny Studio Stamps: Too Cute To Spook Halloween Card by Bobbi Lemanski (featuring Fall Scenes, Autumn Tree Dies)
 

This card folds flat for mailing (see below), but when removed from the envelope, it can be stretched out to be a free-standing card to enjoy through the holiday. I used one piece of 8-1/2″ X 11″ black cardstock to create the card base. That’s it! I have complete instructions on making the card base below so check it out if you would like to give this card idea a try.


Sunny Studio Stamps: Too Cute To Spook Halloween Card by Bobbi Lemanski (featuring Fall Scenes, Autumn Tree Dies)


Once my black zigzag card base was ready (see the card base instructions below), I stamped, colored and die cut the characters and pumpkins from the Too Cute to Spook stamp and dies as well as two black trees using the Autumn Tree dies and the fencing and smaller pumpkins from the Fall Scene Stamps. I arranged the fencing on the layered edges of the base, gluing each section. Since the fencing images stick up above the card base top edges, I added black cardstock to the backs of each fence strip to cover any color bleeding for a clean finish. 


Sunny Studio Stamps: Too Cute To Spook Halloween Card by Bobbi Lemanski (featuring Fall Scenes, Autumn Tree Dies)

I also added a 1/2″ strip of black cardstock inside the two diamond openings of the card base to center the house and the characters in those areas. This is easy to do. You can either attach the strips to the inside of the base (folding 1/4″ on each end to create glue flaps) or run them through the card base slits and secure them from behind. The images can also be attached directly to the card base avoiding the need to use any strips.


Sunny Studio Stamps: Too Cute To Spook Halloween Card by Bobbi Lemanski (featuring Fall Scenes, Autumn Tree Dies)
 

I added one tree in the back at the top of the hill, behind the house, and felt it needed more branches so I added one more to make the backdrop. Extra large pumpkins and the small tree from the Fall Scene Stamps set were added to the ground area. Next, came fencing from the Fall Scene Stamps and the the haunted house and characters from the Too Cute to Spook stamp and die sets.


Sunny Studio Stamps: Too Cute To Spook Halloween Card by Bobbi Lemanski (featuring Fall Scenes, Autumn Tree Dies)

I finished the front with some larger pumpkins and the “Trick or Treat” stamp from 
Too Cute to Spook stamp and die sets. I hand cut the phrase out and attached it to the front panel. I added some black leaves around it that I had die cut by accident when I cut out the autumn tree.  I added the cute bat in the tree, too.


Sunny Studio Stamps: Too Cute To Spook Halloween Card by Bobbi Lemanski (featuring Fall Scenes, Autumn Tree Dies)


This card folds flat to mail. I may have to trim my trees a bit for this one to fit inside my A7 envelope. 
 I could also fit this inside a longer business-size envelope or create a custom size envelope to fit my tall trees. I hope you give this idea a try.  Directions and measurements for the base are right below.


How to Make the Zig Zag Card Base:

Here’s some measurements and steps I followed to make my card base above. Note: I’m using white cardstock to show how to make the base. For my featured card above, I used a piece of black cardstock.


Sunny Studio Stamps: Too Cute To Spook Halloween Card by Bobbi Lemanski (featuring Fall Scenes, Autumn Tree Dies)

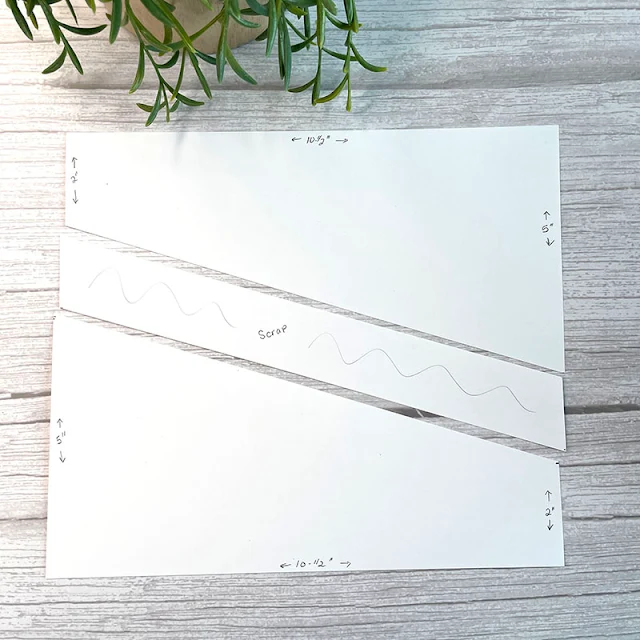
I cut  1/2″ off the 11″ length of a letter-size piece of cardstock, making it 10-1/2″ X 8-1/2″. I marked 5″ and 2″ on opposite sides and cut diagonally. I rotated to the other side of the remaining cardstock and did the same, thereby creating two matching panels. I threw away the odd-shaped scrap piece from the middle.


Sunny Studio Stamps: Too Cute To Spook Halloween Card by Bobbi Lemanski (featuring Fall Scenes, Autumn Tree Dies)


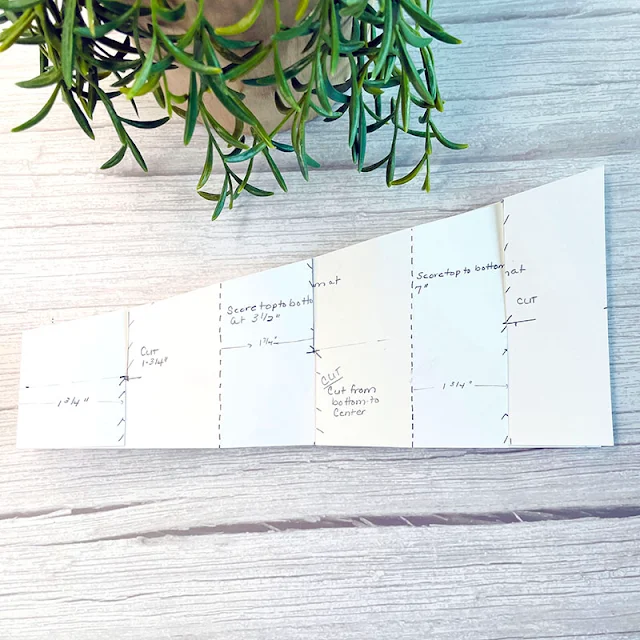
On both pieces, I scored at 3-1/2″ and 7″ from the left side creating three equal sized 3-1/2″ sections on each panel. I scored from the top to the bottom. I also measured and cut slits at 1-3/4″ in from each section (which is the middle of each section). One one panel, I cut from the top to the middle and on the other piece, from the bottom to middle. To determined the middle point, by placing my ruler at 1″ from the 2″ side and 2-1/2′ on the 5″ side (i.e., the center points on each side edge) and made a mark at the middle of each section so I knew where to stop cutting.


Sunny Studio Stamps: Too Cute To Spook Halloween Card by Bobbi Lemanski (featuring Fall Scenes, Autumn Tree Dies)

I placed one panel on top of the other panel and slid it down. When the pieces are intertwined, they should fit perfectly, assuming all the slits line up!


Sunny Studio Stamps: Too Cute To Spook Halloween Card by Bobbi Lemanski (featuring Fall Scenes, Autumn Tree Dies)

After connecting the two pieces at each slit point, this is how the card base looks from the top down. I ended up with two open diamonds in the middle. Now it’s ready to add the fun stuff!

Thanks for stopping by today. If you want to see more ideas and inspiration from me, subscribe to my blog, BobbiHartDesign.com. I’ll send you updates on new posts! You can also find me on Instagram as @BobbiHartDesign and on Facebook as BobbiHartDesign.

Sunny Studio Supplies Used: 

Frilly Frames Chevron Die
Shop at:
Sunny Studio
Slimline Nature Borders
Shop at:
Sunny Studio
Stitched Circle Large Dies
Shop at:
Sunny Studio
Fall Scenes Stamps
Fall Scenes Stamps
Shop at:
Sunny Studio
Fall Scenes Dies
Fall Scenes Dies
Shop at:
Sunny Studio
Too Cute To Spook Stamps
Shop at:
Sunny Studio
Too Cute To Spook Dies
Shop at:
Sunny Studio
Autumn Tree Die
Autumn Tree Die
Shop at:
Sunny Studio
Critter Country Paper
Shop at:
Sunny Studio

Saturday, October 1, 2022

Guest Designer Spotlight: Too Cute To Spook Card & Tags with Rachel Alvarado

Hello crafty friends! It's Rachel Alvarado here and I have some inspiration to share with you today featuring the new Too Cute To Spook Stamp Set.

Sunny Studio Stamps: Too Cute To Spook Card by Rachel Alvarado

For my first project, I made an interactive 3D shadow box card. When you move the card, the spider swings back and forth. When folded, this card fits perfectly into a 5.25" square envelope.

Shadowbox Card Measurements:

  • Cut 2 pieces of card stock to 5" x 6.25" and score along the long side at 1.25" x 5"
  • Cut your window into one of your pieces (I used a standard stitched rectangle die)
  • Cut the inside strips to 4 3/8" long and however high they need to be (I varied mine so that you could see each grassy hill layer). Score these pieces at 3/8" and 4”
Sunny Studio Stamps: Too Cute To Spook Card by Rachel Alvarado

I stamped all of my images onto a piece of Neenah Solar White 110lb Card Stock and colored them with Copic Markers. I used the coordinating 
Too Cute To Spook Die Set to cut them out. For my background, I blended a mix of Squeezed Lemonade, Carved Pumpkin, and Candied Apple Distress Inks for my background.

Sunny Studio Stamps: Too Cute To Spook Tags by Rachel Alvarado (featuring Mini Mat & Tag Dies)

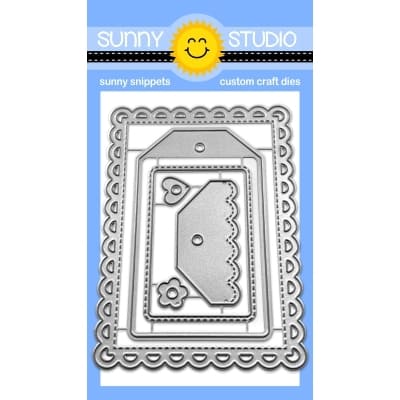
For my second project, I made a trio of tags also featuring the Too Cute To Spook Stamp Set. I used the Mini Mat & Tag 3 Die Set to create the base of my tags. I die cut each tag base from a piece of purple card stock and then die cut my inside layering piece from some white card stock. On each of these pieces, I blended some Milled Lavender, Dusty Concord, and Black Soot Distress Inks. I stamped my "Trick or Treat!" sentiment as well the tree and spider directly onto these pieces with black ink after the ink blending had dried.

Sunny Studio Stamps: Too Cute To Spook Tags by Rachel Alvarado (featuring Mini Mat & Tag Dies)

Here's a look at one way to use these tags. I placed some Halloween-themed pencils inside of a pretzel gift bag and added my tags to create some fun trick-or-treat favors. For candy lovers, you could also put candy bars or Halloween candy inside the treat bags instead. These tags are super easy and lots of fun!

I hope you enjoyed my card today! Thanks so much for taking the time to stop by! If you liked this card and want some more crafty inspiration, please feel free to check out my INSTAGRAM feed!

Sunny Studio Supplies Used:

Too Cute To Spook Stamps
Shop at:
Sunny Studio
Too Cute To Spook Dies
Shop at:
Sunny Studio
Mini Mat & Tag 3 Dies
Shop at:
Sunny Studio

Friday, September 30, 2022

Autumn Greenery Die Focused Cards with Tina and Vanessa

Hello crafty friends, Tina here with a card that features the amazing new Autumn Greenery Dies! Such a versatile die set to have in your stash. It’s fun to combine a pile of leaves with some cute critters. I usually go for bright deep colors but today I wanted to achieve a more pastel look.

Sunny Studio Stamps: Autumn Greenery Card by Tina (featuring Fall Friends, Chloe Alphabet Dies, Scalloped Oval Mat Dies)

First, I die cut a bunch of different shaped leaves from the set and started ink blending them with Distress Oxides, I used Salvaged Patina, Saltwater Taffy, Spiced Marmelade, Squeezed Lemonade and Vintage Photo.

Next, I stamped and die cut my adorable critters from the sets Fall Friends and Beach Buddies. The little acorns are also from that first set. All the coloring was done with Copic markers, and I used my trusty white gel pen for some highlights on the images. For my background panel, I selected a beautiful blue gingham paper from the new Joyful Holiday paper pad.

Next, I die cut an oval from Neenah Solar White card stock with the Scalloped Oval Mat 1 set. This will be the base for my little Autumn scene. I wanted to create a huge pile of leaves for the critters to play hide and seek in. After adhering the leaves to the oval, I added the critters and the little acorns.

Sunny Studio Stamps: Autumn Greenery Card by Tina (featuring Fall Friends, Chloe Alphabet Dies, Scalloped Oval Mat Dies)

The Chloe Alphabet Dies are perfect to customize your sentiments. To give the letters some dimension I die cut them 3 times from Neenah White card stock and once from the gingham paper. I stacked the letters using liquid glue and added them to the card.

Finally, I stamped the word ‘Happy’ from the Fall Friends set and mounted it with foam tape onto the oval frame. As embellishment I put in two extra acorns left and right of the sentiment. I added foam tape to the blue background panel and mounted it to an orangey brown card base.

That finishes my pastel Autumn card, thank you so much for stopping by and happy crafting!

---------------------------------------

Hello to you! Vanessa here with a slimline fall card using the Autumn Greenery Dies.

Sunny Studio Stamps: Autumn Greenery Card by Vanessa Menhorn (featuring Slimline Dies, Everyday Greetings, Pumpkin Patch Dies)

I first created my leaves, starting with a panel of watercolor paper. I smeared the Distress Oxide inks Carved Pumpkin, Wilted Violet, Squeezed Lemonade, Preserved Seeds and Kitsch Flamingo onto an acrylic block, spritzed this with water and applied the ink to the paper with a freeze bag. You can find a little video about that process here.

Sunny Studio Stamps: Autumn Greenery Card by Vanessa Menhorn (featuring Slimline Dies, Everyday Greetings, Pumpkin Patch Dies)

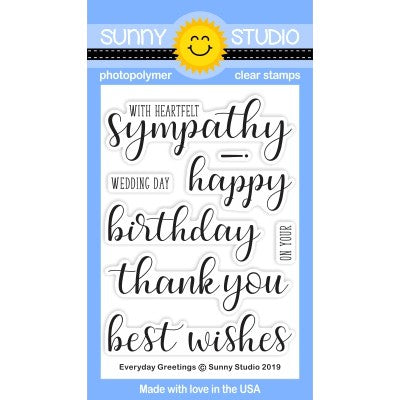
After I had dried the colors, I die-cut the leaves from the panel. Next, I die-cut the rectangle from white cardstock, using the Slimline Scalloped Frame Dies and inked the panel with Wilted Violet and Kitsch Flamingo Distress Oxide inks. Then I adhered the leaves and trimmed off the edges. Now I applied violet and gold ink droplets all over the front and stamped the sentiment from Everyday Greetings. After adhering the panel to the card, I die-cut the small swirls from the Pumpkin Patch dies from gold cardstock and added them to the card.

Enjoy your weekend and thank you for visiting today!

Sunny Studio Supplies Used:

Beach Buddies Stamps
Shop at:
Sunny Studio
Beach Buddies Dies
Beach Buddies Dies
Shop at:
Sunny Studio
Chloe Alphabet Dies
Chloe Alphabet Dies
Shop at:
Sunny Studio
Fall Friends Stamps
Fall Friends Stamps
Shop at:
Sunny Studio
Fall Friends Dies
Fall Friends Dies
Shop at:
Sunny Studio
Everyday Greetings Stamps
Shop at:
Sunny Studio
Slimline Scalloped Frame
Shop at:
Sunny Studio
Scalloped Oval Mat 1 Dies
Shop at:
Sunny Studio
Autumn Greenery Dies
Shop at:
Sunny Studio
Pumpkin Patch Dies
Pumpkin Patch Dies
Shop at:
Sunny Studio
Joyful Holiday Paper
Shop at:
Sunny Studio