Saturday, February 26, 2022

Guest Designer Spotlight: Passionate Penguins Cards with Sara Zoppi

Hi crafty friends, Sara Zoppi here! Today I am totally thrilled because today I am guesting again for Sunny Studio Stamps. I really love cute critters and if you are here, I’m sure you will too! I made three cards, using two of the recently released stamps and a background die too. So, let’s dive into the first one!

Sunny Studio Stamps: Passionate Penguins Card by Sara Zoppi (featuring Heart Bouquet, Bursting Hearts Die)

As soon as I saw the Bursting Hearts Die I loved it!! Look how gorgeous it is! And I have seen a lot of inspirations from the Design Team that I couldn’t wait to play more. I firstly took a piece of 4.25”x 5.5” white cardstock and I ink blended the Distress Inks in Spun Sugar and Worn Lipstick. When I liked the blending, I splattered some Festive Berries ink and some Gansai Tambi Starry Watercolor (pearl) to create some texture and I let aside to dry.

I now moved to the two protagonists from Passionate Penguins Stamps, which I stamped on a piece of Neenah Solar White and I colored with Copics. I went for a totally new combo for me: blue, white, red and pink. It works really great! I also die cut everything with coordinating dies

Sunny Studio Stamps: Passionate Penguins Card by Sara Zoppi (featuring Heart Bouquet, Bursting Hearts Die)

Here’s my first trick: since I didn’t like the white between all the balloon strings from the Heart Bouquet Stamps so I fussy cut them all and I stamped them directly on the background panel before adhering the balloons. I then took the background panel and I die-cut it using the Bursting Hearts Die. I didn’t throw away all the smaller hearts, I took a little plastic bag and I put them there. My idea was to layer a white sheet of paper behind, but I didn’t like the look so much…and while looking in my stash I found some holographic paper and I couldn’t resist! I cut a 4” x 5.25” piece of that (I also cut the heart panel, since I wanted to mat everything with some white) and I layered behind…it is really difficult to catch in the photos all the shine and light that it gives. I completed the card adding the sentiment strips and an A2 white panel behind. 

Sunny Studio Stamps: Passionate Penguins Card by Sara Zoppi (featuring Lovey Dovey)

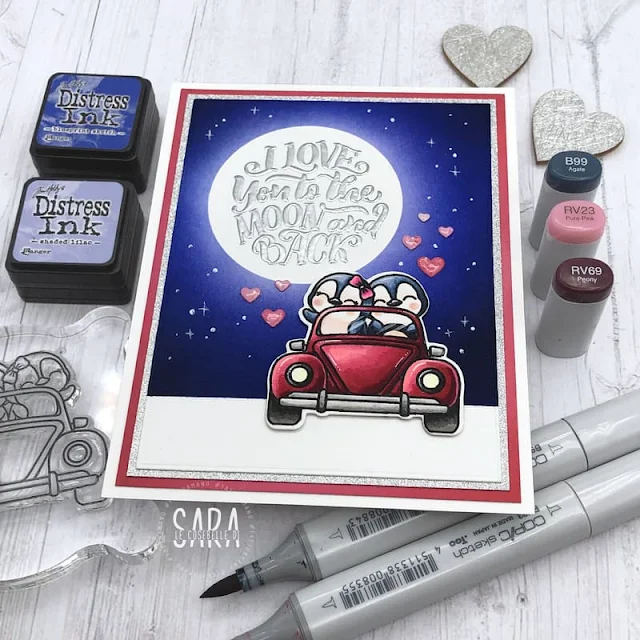
My second inspiration uses the same Passionate Penguins Stamps but in a night-time scene. The idea came from the sentiment found in the Lovey Dovey Stamp Set. The sentiment is in a circular shape and it was perfect to fit into a moon! I firstly started from the background: I masked a circular shape with a Post-it note and I ink blended the sky using Distress Inks in Shaded Lilac, Blueprint Sketch and Black Soot. I then removed the post it and silver heat embossed the sentiment. And here’s another trick: if you use a stamping tool, you can heat emboss twice, to get a smoother look (after my first layer, the sentiment didn’t look so bold). I also added some white stars in the sky.

Sunny Studio Stamps: Passionate Penguins Card by Sara Zoppi (featuring Lovey Dovey)

I then stamped the penguins on the card and I colored with Copics too. Look how lovely they are! To complete the scene, I added some hearts (the ones that I saved from the previous background LOL) and I matted three times, using in order silver glitter, pink and white paper. 

Sunny Studio Stamps: Passionate Penguins Card by Sara Zoppi (featuring Chloe Alphabet Dies)

And here’s my third and last inspiration, using the same Passionate Penguins stamp set. 

I must say I was inspired by another super talented crafty friend for the background, Amy Young. When I saw her card, I knew I wanted to case (copy and selectively edit) her, using this couple under the umbrella. I stamped the penguins on a piece of Neenah Solar White paper and I colored my one-layer scene using Copics. I masked the bottom part in order to get a horizontal white stripe. To create the rain effect, I created some blue lines over my scene, and I used a white gel pen to add some shining details.

Sunny Studio Stamps: Passionate Penguins Card by Sara Zoppi (featuring Chloe Alphabet Dies)

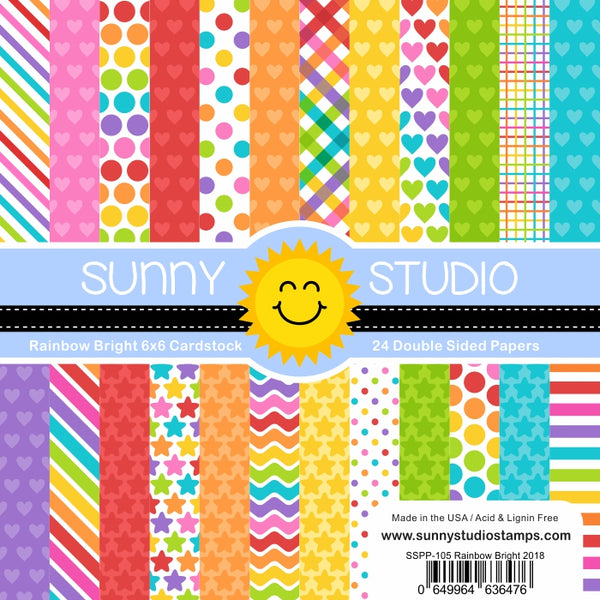
I also wanted to complete the scene with a giant SUNSHINE word, made of a rainbow colors. I used the Chloe Alphabet Dies, I really love this bold font and it is perfect to customize sentiments. I die cut them from some colored cardstock but when I layered them the word was “too heavy” for my card and I didn’t like the final look. So, I came up with another idea (I never give up!). I cut white letters and I used the colored pieces behind, with a small offset, in order to create a colored shadow. And I loved the look! I then matted the scene with a slightly larder black panel and a rainbow patterned paper. The one I used comes from another brand, but Sunny Studio has in stock the Rainbow Bright 6x6 Paper with a really similar pattern. 

And here’s my third and last trick: when you are choosing a color palette or – like here – the colors for the letters, choose your patterned paper and take inspiration from it! The project will seem more organic. Thanks for stopping by! I hope you have found my project inspiring! 

Sunny Studio Supplies Used:

Chloe Alphabet Dies
Chloe Alphabet Dies
Shop at:
Sunny Studio
Rainbow Bright 6x6 Paper
Shop at:
Sunny Studio
Bursting Heart Die
Bursting Heart Die
Shop at:
Sunny Studio
Heart Bouquet Stamps
Shop at:
Sunny Studio
Lovey Dovey Stamps
Lovey Dovey Stamps
Shop at:
Sunny Studio
Passionate Penguins Stamps
Shop at:
Sunny Studio
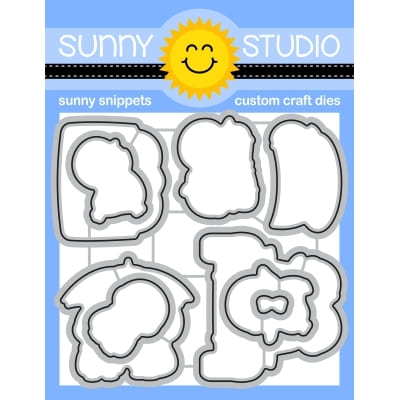
Passionate Penguins Dies
Shop at:
Sunny Studio

Friday, February 25, 2022

Spring Greenery Cards with Vanessa and Audrey

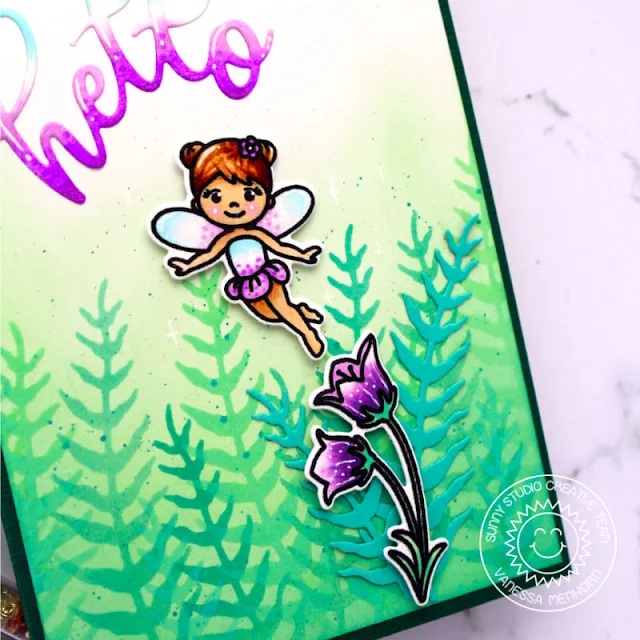
Hello to you! Vanessa here with a little fairy-themed card using the Spring Greenery dies.

Sunny Studio Stamps: Spring Greenery Card by Vanessa Menhorn (featuring Fairy Garden, Slimline Dies)

I started with a panel of white cardstock and softly inked the bottom part with Cracked Pistachio Distress Oxide Ink. Now I die-cut the fern leaves from masking paper and used this "stencil" to ink the leaves with Cracked Pistachio and Pine Needles Distress Oxide ink. After removing the stencils, I added tiny ink droplets and adhered the panel to the card base. 

Sunny Studio Stamps: Spring Greenery Card by Vanessa Menhorn (featuring Fairy Garden, Slimline Dies)

Then I die-cut the leaves from green cardstock and adhered them to the card. I stamped the images from Garden Fairy, colored them with Copics, die-cut the pieces with the matching dies and adhered the elements with foam tape. Finally, I die-cut the "hello" from the Slimline Scalloped Frame Dies from white paper, colored the word with Copics and adhered it to the card.

It's such fun to make more of your dies with this technique! I hope you'll give it a try. Happy weekend everybody and thanks for visiting!

-----------------------------------------

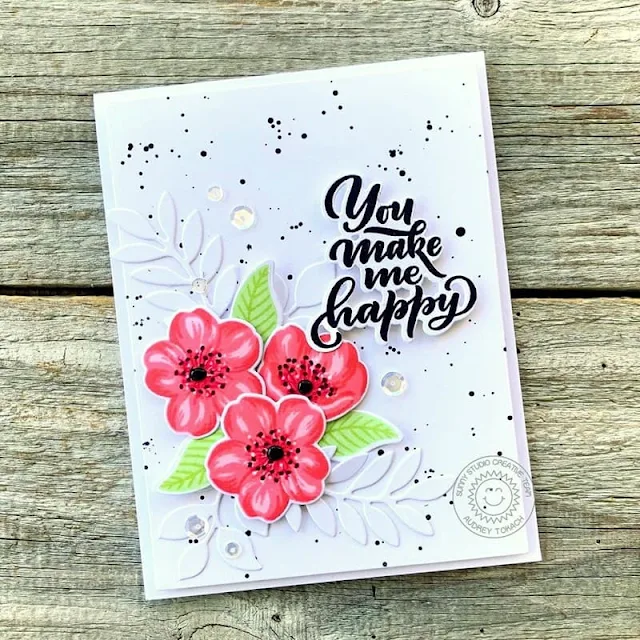
Hello friends, Audrey here! Today, I have a fun card to share with you using the Spring Greenery dies. They pair so well with many other Sunny Studio products! I used them today with the Cherry Blossoms stamp set and Lovey Dovey sentiments! 

Sunny Studio Stamps: Spring Greenery Card by Audrey Tokach (featuring Lovey Dovey, Cherry Blossoms)

To create my card, I started off with a piece of white cardstock cut to 4" x 5.25". I splattered the panel with black watercolor. Then, I stamped some of the Cherry Blossoms and leaves in bright colors, and diecut them with the coordinating Cherry Blossoms dies. I die cut some of the Spring Greenery from white cardstock and arranged my bouquet before gluing some pieces flat and popping others up for some dimension. 

Sunny Studio Stamps: Spring Greenery Card by Audrey Tokach (featuring Lovey Dovey, Cherry Blossoms)

The sentiment from the Lovey Dovey stamp set is stamped in black in and diecut with the coordinating Lovey Dovey Dies. I popped that up on foam tape, and added so black centers to the flowers using black Nuvo Drops before popping the panel up on an A2 card base.

Sunny Studio Supplies Used:

Slimline Scalloped Frame
Shop at:
Sunny Studio
Garden Fairy Stamps
Garden Fairy Stamps
Shop at:
Sunny Studio
Garden Fairy Dies
Garden Fairy Dies
Shop at:
Sunny Studio
Cherry Blossoms Stamps
Shop at:
Sunny Studio
Cherry Blossoms Dies
Shop at:
Sunny Studio
Lovey Dovey Stamps
Lovey Dovey Stamps
Shop at:
Sunny Studio
Lovey Dovey Dies
Lovey Dovey Dies
Shop at:
Sunny Studio
Spring Greenery Dies
Shop at:
Sunny Studio

Thursday, February 24, 2022

Paris Afternoon Cards with Anja and Marine

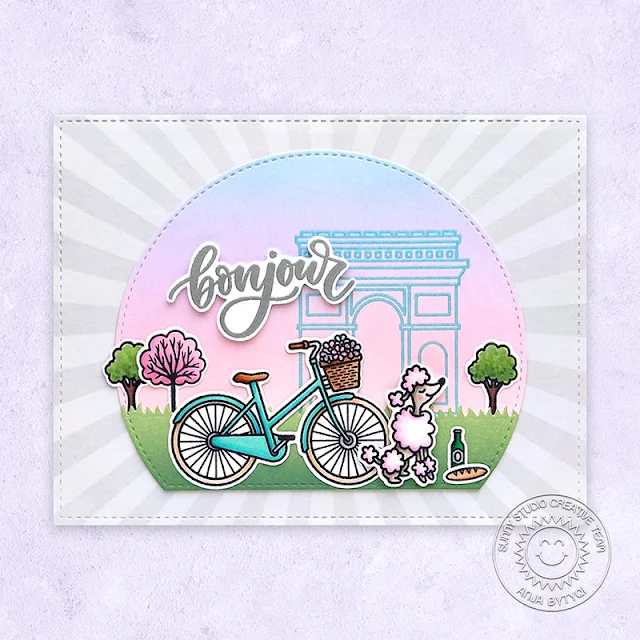
Hi everyone, Anja here with you today. I'm already looking forward to spring! So I created a scene with the Paris Afternoon Stamps. Sweet "Madame Poodle" is dreaming of a picnic at the park.

Sunny Studio Stamps: Paris Afternoon Card by Anja Bytyqi (featuring Charming City, Stitched Semi-Circle Dies)

First, I used the Frilly Frames Quatrefoil stitched rectangle die to cut out a full-size A2 mat from the Subtle Grey Tones sunburst paper. I adhered it to a top folding landscape card base.

For my pastel background, I did some ink blending with Distress Oxides (Tumbled Glass, Shaded Lilac, Milled Lavender and Spun Sugar) onto a piece of Bristol cardstock. I stamped the arch image from the Charming City set in VersaMark Ink and heat embossed it with Salvaged Patina Distress Embossing Glaze.

On another Bristol cardstock strip, I blended together Bundled Sage and Rustic Wilderness Distress Oxide Ink for the grass. At the top I used the the grass border die included in the Comic Strip Everyday Dies set. I die cut both ink blended pieces with the largest of the Stitched Semi-Circle Dies and layered the grass border over the background.

Sunny Studio Stamps: Paris Afternoon Card by Anja Bytyqi (featuring Charming City, Stitched Semi-Circle Dies)

Next, I stamped the images (the trees are from Charming City and Critters on the Go) in Memento Tuxedo Black Ink and colored them with Copic Markers. I used the coordinating dies to cut everything out. The word 'bonjour' was stamped in VersaMark Ink and heat embossed with silver embossing powder. Since there isn't a matching die, I carefully fussy cut it with scissors.

Finally, I assembled my scene by adhering the images and popping up the sentiment and poodle with foam tape.

Thank you so much for stopping by! Hope you're having a beautiful day!

----------------------------------------------

Hi crafty friends, Marine here, I'm back with this cute and sweet bakery storefront showcasing Paris Afternoon

Sunny Studio Stamps: Paris Afternoon Card by Marine Simon (featuring Critters On The Go, Farm Fresh, Chloe Alphabet Dies)

I started off by making the storefront panel. I cut a 5,5 x 4,25" light blue panel, masked 1cm along the bottom edge using washi tape, and created a brick texture on the paper using tumbled glass distress ink and a brick stencil. Next I carefully removed the washi tape, and applied a little bit of hickory smoke distress ink on the bottom edge to bring some texture and contrast.

I picked a rectangle die from my stash, taped it in the middle of the brick panel, right above the pavement section, and sent everything to my die cutting machine to cut a window out of this brick panel. And to finish this window nicely, I created a frame. I used the same rectangle die as before and a second one slightly bigger, I taped both dies on a piece of white cardstock and cut a frame that I glued on the brick panel.

Sunny Studio Stamps: Paris Afternoon Card by Marine Simon (featuring Critters On The Go, Farm Fresh, Chloe Alphabet Dies)

Next I cut a 5,5 x 4,25" vellum panel, and on the left side I white heat embossed the croissant and the word "Bonjour" from Paris AfternoonI added double sided tape at the back of the brick panel and attached it on the vellum panel. I also created a simple pink awning using a paper from the Dots & Stripes Pastels paper pack and the roof die from the Sweet Treat House Add-On.

I cut a light blue card base, and stuck a piece of rainbow polka dot paper from the Spring Sunburst paper pack on top. I added foam tape at the back of the brick panel, all around the rectangle window, next I poured some colorful confetti inside the vellum window and then I attached my card base to the foam to finally close and complete my shaker background. I attached the pink awning above the window using double side tape at the top and foam tape along the scalloped edges to bring dimension, and then I stamped, die cut and colored all my images using my alcohol markers.

Sunny Studio Stamps: Paris Afternoon Card by Marine Simon (featuring Critters On The Go, Farm Fresh, Chloe Alphabet Dies)

In addition to Paris Afternoon, here are the stamp sets I used:
Charming City for the word "Bonjour"
Critters on the Go for the sitting bear and fox
Farm Fresh for the pile of hay and the crows that I turned into pigeons

Once the coloring was done, I cut the word "Friends" twice using the Chloe Alphabet die set: out of yellow cardstock and out of white cardstock. I attached the white letters behind the yellow letters to create an outline, and I stuck those letters on the pink awning. I also white heat embossed the words "So happy we're" from Fall Friends on black cardstock, and trimmed it into a slim banner that I attached below the word "Friends".

Sunny Studio Stamps: Paris Afternoon Card by Marine Simon (featuring Critters On The Go, Farm Fresh, Chloe Alphabet Dies)

I finished my card by adding highlights and details to the images using a white gel pen, and that's it! I hope that you like this cute Parisian scene! We have coffee, croissant and baguette and of course some pigeons ready to steal a few crumbs! As always, you are more than welcome to check the process video (click on the image above)! Thanks for stopping by, and see you next Thursday! Have an amazing day!

Sunny Studio Supplies Used:

Chloe Alphabet Dies
Chloe Alphabet Dies
Shop at:
Sunny Studio
Fall Friends Stamps
Fall Friends Stamps
Shop at:
Sunny Studio
Comic Strip Everyday Dies
Shop at:
Sunny Studio
Spring Sunburst 6x6 Paper
Shop at:
Sunny Studio
Dots & Stripes Pastels 6x6 Paper
Shop at:
Sunny Studio
Subtle Grey Tones Paper
Shop at:
Sunny Studio
Sweet Treats House Add-on
Shop at:
Sunny Studio
Stitched Semi-Circle Dies
Shop at:
Sunny Studio
Frilly Frames Quatrefoil
Shop at:
Sunny Studio
Farm Fresh Stamps
Farm Fresh Stamps
Shop at:
Sunny Studio
Farm Fresh Dies
Farm Fresh Dies
Shop at:
Sunny Studio
Charming City Stamps
Shop at:
Sunny Studio
Charming City Dies
Charming City Dies
Shop at:
Sunny Studio
Critters on the Go Stamps
Shop at:
Sunny Studio
Critters on the Go Dies
Shop at:
Sunny Studio
Paris Afternoon Stamps
Shop at:
Sunny Studio
Paris Afternoon Dies
Shop at:
Sunny Studio

Wednesday, February 23, 2022

Little Birdie Cards with Franci and Gladys

Hello there! It's Franci here with you today, with a cute card showcasing the Little Birdie set. Aww these little birds are sooo cute! 

Sunny Studio Stamps: Little Birdie Card by Franci Vignoli

I created a card base out of white cardstock and inked the front by sponging some Distress ink onto a custom made cloud stencil. Then I stamped all the images, colored them with copics and die cut them out with their coordinated dies.

Sunny Studio Stamps: Little Birdie Card by Franci Vignoli

I chose rainbow colors for all the little birds and they're so happy and cute! I glued them all down with foam adhesive, then stamped my sentiment and added some sequins.

Thanks a lot for stopping by today and have a lovely day!

---------------------------------------------

Hello crafty friends!! Gladys here and I am back with this sweet card featuring the Little Birdie stamp set. I was definitely thinking of Spring when I created this card because I was imagining the birds chirping on the branches. That was my inspiration and I know I’m not the only who is ready for warmer weather!!

Sunny Studio Stamps: Little Birdie Card by Gladys Marcelino (featuring Lovey Dovey)

First I cut an A2 size panel out of Bristol Smooth cardstock and did some ink blending. For the top half of the panel I used tumbled glass distress oxide ink and purposely didn't blend evenly so it's more organic looking. For the bottom half I used shaded lilac with a cloud stencil. I used a small paint brush with diluted broken china to add splatter onto the background for more interest.

Next I stamped and colored the birds and branch using Copic markers. I used the coordinating dies to cut them out. Once I was happy with the placement of the images I adhered them down with double sided foam tape for dimension.

Sunny Studio Stamps: Little Birdie Card by Gladys Marcelino (featuring Lovey Dovey)

Finally I stamped the sentiment from Lovey Dovey and used the coordinating die to cut it out. I cut it multiple times to stack them together and glued it on the top center of the panel to complete this card. Thanks so much for joining me. Have a wonderful day!

Sunny Studio Supplies Used:

Little Birdie Stamps
Shop at:
Sunny Studio
Little Birdie Dies
Little Birdie Dies
Shop at:
Sunny Studio
Lovey Dovey Stamps
Lovey Dovey Stamps
Shop at:
Sunny Studio
Lovey Dovey Dies
Lovey Dovey Dies
Shop at:
Sunny Studio