Hey crafty friends, Marine here, I'm so happy to share with you this new holiday shaker card showcasing the lovely Lazy Christmas stamp set that features two super cute sloths. I stamped those cuties as well as two branches on white cardstock using an alcohol marker friendly black ink, cut them using the coordinating dies and then used my alcohol markers to color them.
After the coloring I moved on to the background and started by creating a turquoise panel. I cut a 5,5 x 4,25" Strathmore bristol panel and applied salvaged patina oxide ink all over the panel and then peacock feathers oxide ink on the edges to bring more contrast.
As
always I added lots of splatters on the panel to make it less flat and more
interesting: water, peacock feathers + water, liquid stardust + water and copic
opaque white ink + water.
To
frame the card, and give the sloths a habitat, I cut a Botanical Backdrop out of a dark green
cardstock, and added a little bit of white splatters on those leaves as
well. And to make this jungle card even more festive, I cut another
Botanical backdrop out of a silver glitter cardstock. I attached the dark green
botanical frame on top of the silver glitter frame, but turned the dark green
frame so that the leaves don't match.
I
cut a 5,5 x 4,25" heat resistant acetate panel that I placed in my misti
tool, placed some stamps right in the middle of the acetate to create my
sentiment and picked them up with the door of the misti tool. I applied powder
all over the acetate panel using my powder bag to make it antistatic, and
then I stamped my sentiment using clear embossing ink. I sprinkled white
embossing powder on the ink and used my heat gun to melt the powder.
I
attached the acetate panel at the back of the botanical frame using liquid glue
at the back of the frame on the four edges and foam squares at the back of some
leaves to bring some dimension.
Stuck two layers of foam strips at the back of the frame on the four edges, and used my powder brush tool to apply a generous amount of powder all along the foam strips. This will keep the sequins away from the foam strips. I cleaned the acetate using a microfiber cloth, and poured a mix of sequins directly on the acetate, I carefully peeled the backing papers off the foam strips, and then I stuck my oxide panel on the foam strips to totally close the my shaker panel.
Next
I attached the two little sloths and the branches. I used glue dots to stick
the branches and foam squares to stick the sloths. And finally I added
highlights and details on the images using a white gel pen.
And that's it, we have a super fun and festive shaker card that features the cutest little sloths, and I hope that you like it. Feel welcome to check the process video (click on the photo above), and I will see you next week with a new card!
----------------------------------------------------
Hi
everyone, Anja here and today
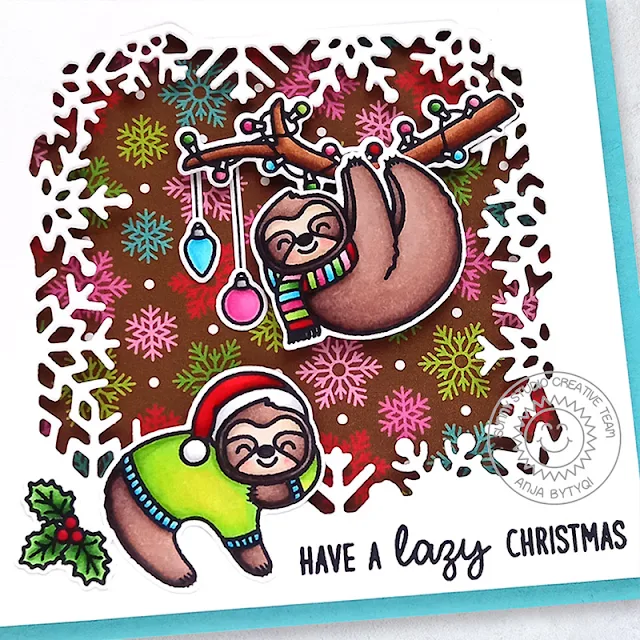
I'm back with another holiday card showcasing the Lazy Christmas Stamps.
These sloths are just the cutest!
First, I started off with a 4 3/8" x 4 3/8" card base and trimmed down a piece of white cardstock to 4" x 4". I ran it through my die cutting machine with one of the Layered Snowflake Frame Dies. The patterned paper that went behind the opening is from the All Is Bright 6x6 Paper pack. The sentiment was stamped in VersaFine Onyx Black Ink. To create a bit of dimension, I adhered the snowflake frame with foam tape.
Next, I stamped the images in Memento Tuxedo Black Ink and colored them with Copic Markers. I cut everything out with the coordinating dies. I used foam tape again to pop up my images. Only the Christmas baubles and the holly & berries were adhered flat with liquid glue.
Thank you so much for stopping by! Have a wonderful day!
Sunny Studio Supplies Used:
 Lazy Christmas Stamps Shop at: Sunny Studio |
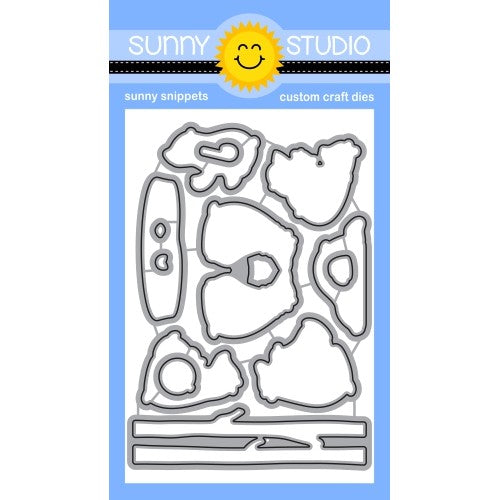
 Lazy Christmas Dies Shop at: Sunny Studio |
 Botanical Backdrop Die Shop at: Sunny Studio |
 Layered Snowflake Frame Shop at: Sunny Studio |
 All Is Bright Paper Shop at: Sunny Studio |


