Friday, January 15, 2021

Captivating Camellias Cards with Candice and Kay

Hello and Happy New Year! Candice back with you this Friday to kick off sharing with you the new amazing release from Sunny Studio stamps!

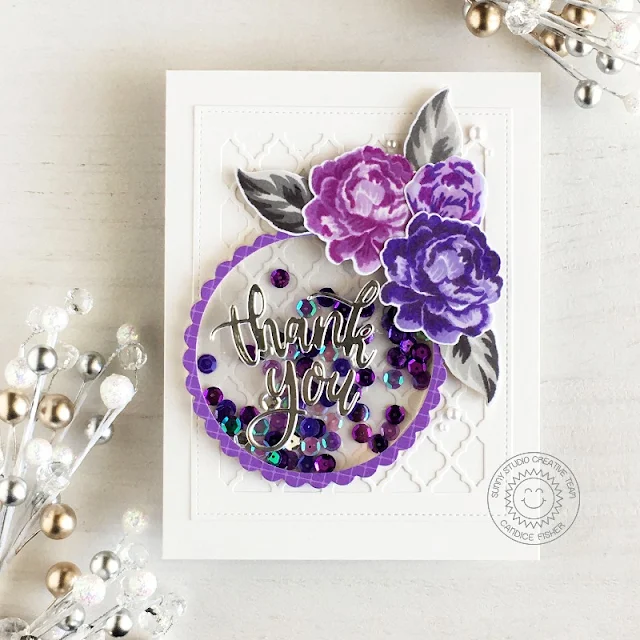
Sunny Studio Stamps: Captivating Camellias Scalloped Circle Mat Dies Stitched Circle Thank You Shaker Card by Candice Fisher

I used this mix of new and older sunny studio products:

For the background, I die cut the intricate panel using the Quatrefoil dies from thick white cardstock and glued to the center of my card front.

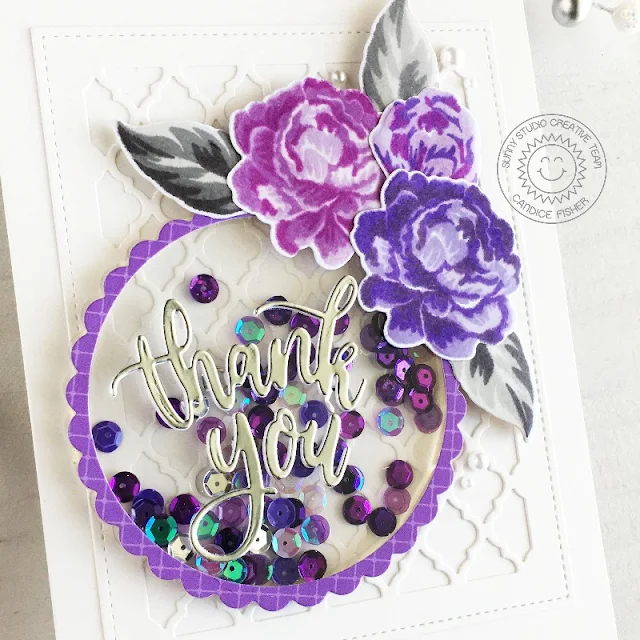
I then created the clear circle shaker by first die cutting the purple pattern paper from the scalloped circle and a smaller stitched circle to create my thin frame. I also cut two acetate pieces, one from the scalloped and one from the stitched circle dies. I adhered the stitched acetate piece behind my pattern paper frame and added a double layer of foam tape around the outside. To finish the shaker, I added lots of different colors of purple sequins and closed it onto the scalloped acetate making sure to line up to seal the shaker.

Sunny Studio Stamps: Captivating Camellias Scalloped Circle Mat Dies Stitched Circle Thank You Shaker Card by Candice Fisher

Next, I stamped the flowers and leaves using a variety of purple and grey inks, cut them out with the coordinating dies and arranged them with foam tape around the circle shaker. I finished my card by adding a layered thank you onto the circle shaker and a few white pearls to draw your eye in!

Thank you for visiting today!

--------------------------------------------

Hi friends! Kay here and I have a card to share with you today featuring one of the brand new stamp sets from the January release called Captivating Camellias. It's such a pretty set, and the layered stamping really makes these flowers pop! 

Sunny Studio Stamps: Captivating Camellias Mother's Day Card by Kay Miller

For my background, I diluted some Seedless Preserves and Wilted Violet Distress inks and brushed them across the paper lightly with a large watercolor brush. I then speckled with the same colors of ink. The pink flowers were stamped with for shades of ink from Pinkfresh, Ballet Slipper, Sparkling Rose, Bubble Gum and Raspberry Bliss. The purple flowers were stamped with Soft Lilac, Candy Violet, Lavender and Regal Kiss also from Pinkfresh.  The leaves were stamped with Fresh Pear and Evergreen from Pinkfresh, and Artichoke from Lawn Fawn. 

Sunny Studio Stamps: Captivating Camellias Mother's Day Card by Kay Miller

After all of the stamping was done I cut them out with the coordinating dies and added them to my card with foam tape. The Happy Mother's Day sentiment is included in the Captivating Camellias stamp set and it was stamped with black ink. 

I hope you have enjoyed my card today! Thank you for stopping by!

Sunny Studio Supplies Used:

Frilly Frames Quatrefoil
Shop at:
Sunny Studio
Slimline Scalloped Frame
Shop at:
Sunny Studio
Classic Sunburst Paper
Shop at:
Sunny Studio
Captivating Camellias Stamps
Shop at:
Sunny Studio
Captivating Camellias Dies
Shop at:
Sunny Studio
Scalloped Circle Mat 1 Dies
Shop at:
Sunny Studio
Stitched Circle Small Dies
Shop at:
Sunny Studio

Thursday, January 14, 2021

Garden Fairy Cards with Vanessa and Anja

Hello to you! Vanessa here with my first card using the wonderful new release, starting with Garden Fairy today. I love this set so much! Here is my take:

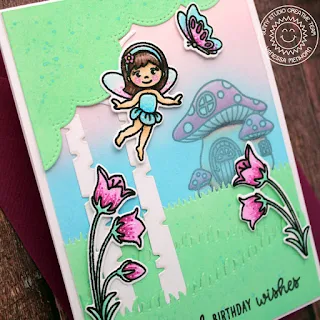
Sunny Studio Stamps: Garden Fairy Slimline Dies Rustic Winter Dies Fairy Themed Birthday Card by Vanessa Menhorn

I've been loving the look of layered vellum over backgrounds to create more depth. But I didn't like to fumble with vellum to adhere it without showing adhesive. So I thought about alternatives and came up with an easy solution creating my desired look! For this, I just stamped the mushroom house onto my white cardstock panel and colored it with Copic markers. Now I inked the background with Tumbled Glass and Spun Sugar Distress Oxide Inks, covering the image, too. This is all. I guess it won't work with all colors, but light ones will work well. Maybe creating a night landscape with a dark blue one will look good - I'll try various versions and we'll see how it turns out. Let me know if you use this technique!

Stamps and dies used today:
Garden Fairy stamps + dies (images, sentiment)
Slimline Nature Borders Dies (grassy edge, scalloped edge)
Rustic Winter Dies (tree trunks)

Sunny Studio Stamps: Garden Fairy Slimline Dies Rustic Winter Dies Fairy Themed Birthday Card by Vanessa Menhorn

I inked a panel of white cardstock with Cracked Pistachio, added ink droplets and die-cut the grassy edges and the scalloped edge. Then I die-cut the tree trunks and adhered the die-cut pieces to the panel. After I had stamped the sentiment, I adhered the panel to the card. Finally, I stamped the images, colored them with Copic markers, die-cut everything with the matching dies and adhered the elements to the card with foam tape.

This wonderful stamp set will for sure be one of my new favorites. Thank you so much for stopping by, see you next week!

-----------------------------------------------

Hello everyone, Anja here and today I'm excited to share my first project using some beautiful stamps from the new Spring release. Today I'm kicking it off with the sweet Garden Fairy Stamps.

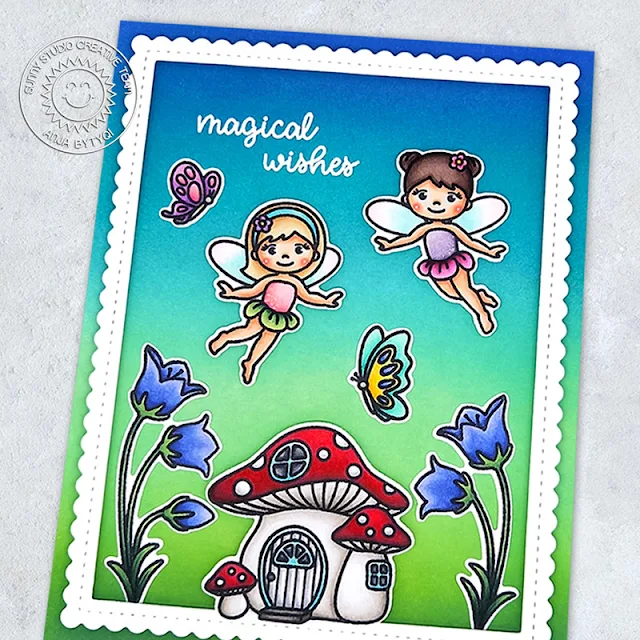
Sunny Studio Stamps: Garden Fairy Frilly Frame Dies Fairy Themed Card by Anja Bytyqi

I started off with an ink blended background in vibrant blue, teal and green tones. Therefore I used the Distress Oxides Blueprint Sketch, Peacock Feathers, Broken China, Cracked Pistachio, Mowed Lawn and Rustic Wilderness. I stamped the sentiment in VersaMark Ink and white heat embossed it.

Next, I stamped the images in Memento Tuxedo Black Ink and colored them with Copic Markers. I used the coordinating dies to cut everything out.

Sunny Studio Stamps: Garden Fairy Frilly Frame Dies Fairy Themed Card by Anja Bytyqi

To frame my little garden scene, I die cut the scalloped mat included in the Frilly Frames Stripes Dies set from white cardstock and also cut out a rectangle. I popped up the frame with foam tape strips and adhered the images.

Thank you so much for stopping by! Have a magical day!

Sunny Studio Supplies Used:

Rustic Winter Dies
Rustic Winter Dies
Shop at:
Sunny Studio
Frilly Frames Stripes Die
Shop at:
Sunny Studio
Slimline Nature Borders
Shop at:
Sunny Studio
Garden Fairy Stamps
Garden Fairy Stamps
Shop at:
Sunny Studio
Garden Fairy Dies
Garden Fairy Dies
Shop at:
Sunny Studio

Wednesday, January 13, 2021

Stitched Circle Die Focused Cards and Video Tutorial with Franci and Julia

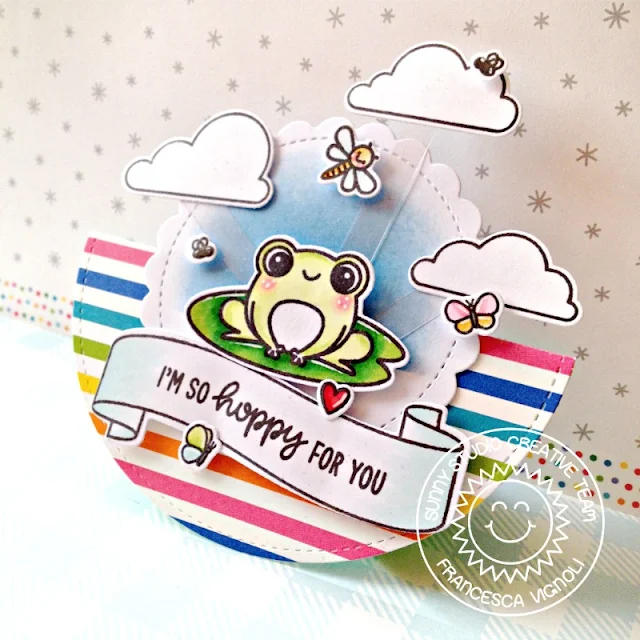
Hi there and happy Wednesday! It's Franci here with you today, with a super cute rocking mini rainbow card. Aww look how cute is this!! 

Sunny Studio Stamps: Stitched Circle Dies Scalloped Circle Mat Dies Feeling Froggy Everyday Card by Franci Vignoli

I combined lots of new products here: the Stitched Circle Large dies, the Scalloped Circle Mat 1 set and the Feeling Froggy mini set.

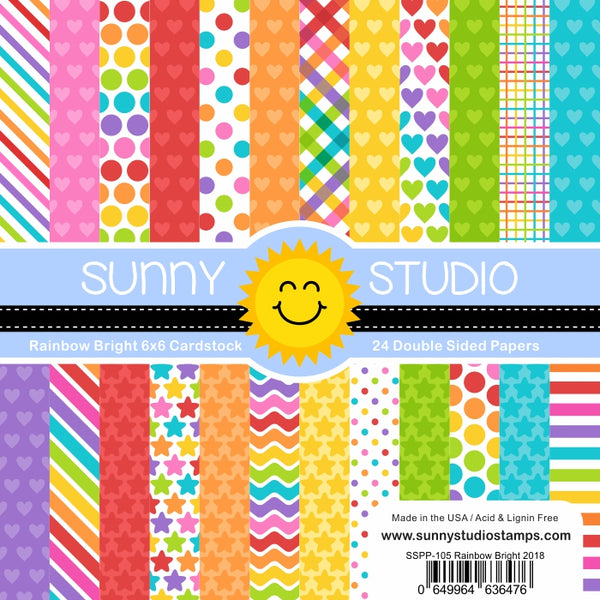
First of all I die cut a stitched circle out of some rainbow patterned paper from the Rainbow Bright 6x6 paper set and a scalloped one out of white cardstock. I inked the center of my scalloped circle with some blue distress ink and then I moved on to my images.

Sunny Studio Stamps: Stitched Circle Dies Scalloped Circle Mat Dies Feeling Froggy Everyday Card by Franci Vignoli

I added some older images to my little scene here, as some clouds from the Spring Showers set and the sentiment banner from the Banner Basics set. I stamped them all on white cardstock, then colored them with Copics and cut them out with their coordinated dies. 

Sunny Studio Stamps: Stitched Circle Dies Scalloped Circle Mat Dies Feeling Froggy Everyday Card by Franci Vignoli

I folded my rainbow circle in half and I assembled my scene/ card by securing everything down with a combo of liquid glue and foam tape. The secret here is to make sure to glue the scalloped circle just onto one of the half circle we created by folding the rainbow circle. That's why I attached some elements with acetate stripes, cause they were hanging off the scalloped circle, on the top.

This mini card is so cute and it's so much fun in real life by being interactive! As you can see it does fit completely flat on a standard size envelope so it's also easy to mail, a plus! Hope you are now inspired to create and thanks a lot for stopping by!

------------------------------------------------

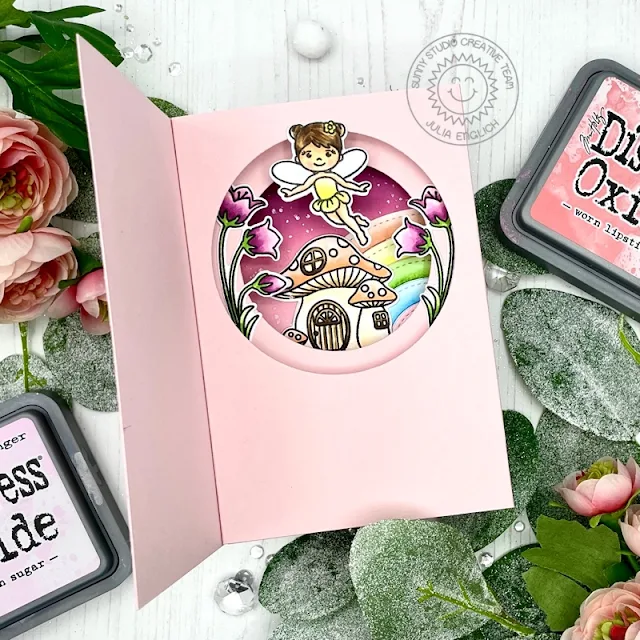
Hey crafty friends! I hope you are doing well! It's Julia here with a card featuring the new Stitched Circle Large dies and the Stitched Circle Small dies.

Sunny Studio Stamps: Stitched Circle Dies Scalloped Circle Mat Dies Garden Fairy Interactive Card by Julia Englich

I absolutely love the versatility of basic dies, so I decided to use the circles to create an interactive inside tunnel card - and a little rainbow, too!

Sunny Studio Stamps: Stitched Circle Dies Scalloped Circle Mat Dies Garden Fairy Interactive Card by Julia Englich

I paired the circles with the super adorable Garden Fairy stamp set, the Scalloped Circle Mats 3, Loopy Letters and Slimline Nature Borders dies to create two cute little scenes!

Sunny Studio Stamps: Stitched Circle Dies Scalloped Circle Mat Dies Garden Fairy Interactive Card by Julia Englich

If you would like to see how this card came together, you can watch the video below - or on my YouTube channel, Craft Room Adventures.


Inks used: Spun Sugar, Worn Lipstick, Seedless Preserves Distress Oxides

Copic Markers used: Green: YG 11, YG 13, YG 17; Red / Orange: R000, R00, R02; Yellow: Y000, Y00, Y11, Y13; Blue: B000, B00, B02; Purple: RV10, RV63, RV66; Skintone: E000, E00, E11, R20; Browns: E50, E51 E53, E55, E57, E59

Thank you so much for stopping by! Wishing you all a wonderful day!

Sunny Studio Supplies Used:

Rainbow Bright 6x6 Paper
Shop at:
Sunny Studio
Loopy Letters Dies
Loopy Letters Dies
Shop at:
Sunny Studio
Banner Basics Stamps
Shop at:
Sunny Studio
Banner Basics Dies
Banner Basics Dies
Shop at:
Sunny Studio
Spring Showers Stamps
Shop at:
Sunny Studio
Spring Showers Dies
Spring Showers Dies
Shop at:
Sunny Studio
Slimline Nature Borders
Shop at:
Sunny Studio
Feeling Froggy Stamps
Shop at:
Sunny Studio
Feeling Froggy Dies
Feeling Froggy Dies
Shop at:
Sunny Studio
Garden Fairy Stamps
Garden Fairy Stamps
Shop at:
Sunny Studio
Garden Fairy Dies
Garden Fairy Dies
Shop at:
Sunny Studio
Scalloped Circle Mat 1 Dies
Shop at:
Sunny Studio
Scalloped Circle Mat 3 Dies
Shop at:
Sunny Studio
Stitched Circle Small Dies
Shop at:
Sunny Studio
Stitched Circle Large Dies
Shop at:
Sunny Studio

Tuesday, January 12, 2021

Meow & Furever Cards with Isha and Kavya

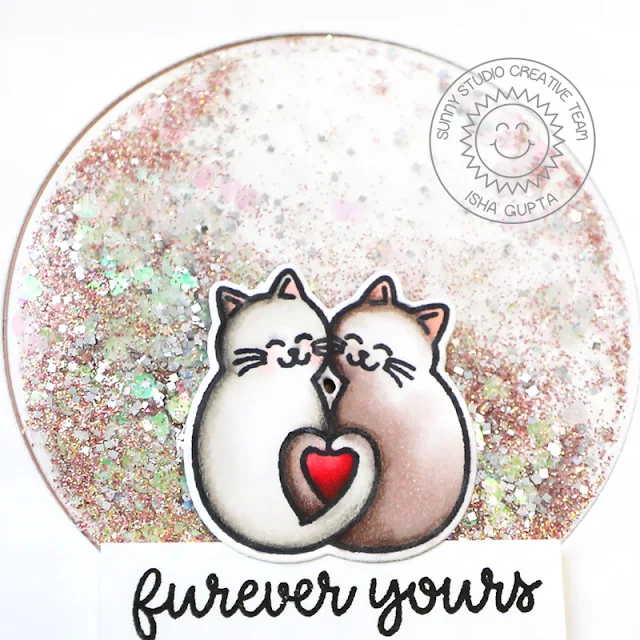
Hello everyone! Isha here with you with a fun CAS shaker card. I love making flat shaker cards a lot as they are easy to post too :)

Sunny Studio Stamps: Meow & Furever Slimline Dies Stitched Circle Dies Valentine's Day Cards by Isha Gupta

Hope you might be enjoying our new release. Today I am featuring the new Meow & Furever stamp set and the coordinating dies along with the Slimline Pennant dies and the Stitched Circles - large dies.

To start, I stamped the image from the Meow & Furever stamp set using memento black ink. Color them using Copic markers and die-cut using the coordinating diesDie-cut the biggest of the pennants using the Slimline Pennant die. Die-cut a circle towards the center of the pennant using the Stitched Circles - large dies

Sunny Studio Stamps: Meow & Furever Slimline Dies Stitched Circle Dies Valentine's Day Cards by Isha Gupta

Adhere acetate to the back of the circle opening. Adhere the white circle onto the pink card base. Add some WOW! Sparkles onto the circle to create the shaker. Adhere Scor-tape all around the circle opening onto the acetate to keep the shaker flat. Adhere the pennant to the card base. Now using a 3D foam, adhere the image and the sentiment stripe to the card.

Hope you enjoyed the shaker interactive element using the new release. Thank you for dropping by.

--------------------------------------------

Hi folks, Kavya here. Valentine’s Day is just a month away and the new Meow & Furever stamp set is perfect for creating a sweet card for the special someone or a friend for that matter!

Sunny Studio Stamps: Meow & Furever Slimline Dies Stitched Circle Dies Inside Greetings Valentine's Day Card by Kavya

I first started by matting my card-base on a linen colored card stock. I die cut the banners from the Slimline Pennant Dies set and ink blended using shades of blue and pink. I splattered some white paint to add some texture! Sunny Studio Stamps: Meow & Furever Slimline Dies Stitched Circle Dies Inside Greetings Valentine's Day Card by Kavya

I then stamped and colored various images from the Meow & Furever stamp set using Copic Markers and colored pencils. I added some highlights to the images using a white gel pen.

Sunny Studio Stamps: Meow & Furever Slimline Dies Stitched Circle Dies Inside Greetings Valentine's Day Card by Kavya


To finish my card, I stamped a sentiment from Inside Greeting Birthday stamp set using black ink and added some stamped hearts on each side!

I hope you enjoyed this card as much I did making it! 

Sunny Studio Supplies Used:

Inside Greetings Birthday
Shop at:
Sunny Studio
Meow & Furever Stamps
Shop at:
Sunny Studio
Meow & Furever Dies
Meow & Furever Dies
Shop at:
Sunny Studio
Slimline Pennant Dies
Shop at:
Sunny Studio
Stitched Circle Large Dies
Shop at:
Sunny Studio