Hello and welcome to day 4 of our Spring Peek Week! All this week I have been showcasing cards using our newest collection which will be available for purchase tomorrow, January 8th.
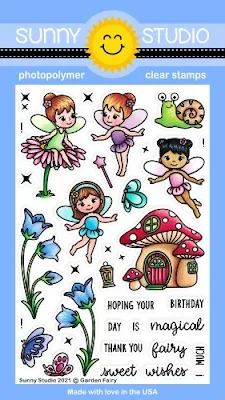
Card No. 1: My first card of the day I used our new Garden Fairy Stamps. This set features 4 unique fairies, 3 butterflies, a new toadstool house, 2 sets of bluebell flowers, a snail, a myriad of sparkly pixie dust and 3 coordinating punny greetings.
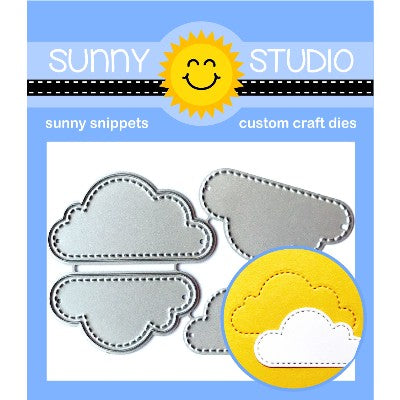
I found this background in my stash which I created awhile back and never got around to using. I can't remember for sure which products I specifically used, but you could recreate a similar look by cutting masks using our Fluffy Cloud Border Dies & Slimline Nature Border Dies. I ran the panel through my die-cutting machine using the stitching border along the bottom edge from our Slimline Basic Border dies, along with a ric-rac edge.
For my rainbow border I blended Picked Raspberry, Carved Pumpkin, Mustard Seed, Twisted Citron and Peacock Feathers distress inks. This is yet another strip I had left over from a previous card. I often will save any portions like this that I cut off, hoping I can use them for a future project to save myself a little time. LOVE challenging myself to use scraps on my desk. I then stamped sparkles to match around my faires and added some Ranger Stardust Stickles liquid glitter to their wings.
Card No. 2: I had envisioned this card when I designed this stamp set and I'm so happy the card turned out the way I had pictured (since it doesn't always work out that way). I combined the little lanterns from the Garden Fairy Stamps with the string of lights from our Scenic Route Stamps.
To create the glowing effect. I started by inking some Squeezed Lemonade distress ink onto my white cardstock panel using a small foam finger dauber roughly where I planned to put my lights, going back and forth with holding up the die-cuts as I worked for placement. I then inked in some Salty Ocean Distress ink around them, overlapping the colors a little bit but trying to be careful to not blend so much that the glow turned more green than yellow. As I worked towards the outside edges, I blended in some darker Blueprint Sketch and Chipped Sapphire Distress inks. I then die-cut my panel using the stitched mat from our Frilly Frames Retro Petals Dies.
I kept the rest of my card fairly simple to keep the focus on the lanterns, heat embossing my sentiments using VersaMark ink and Hero Arts White Detail Embossing Powder. For the pixie dust on this card I added some small dots using a Sharpie White Extra Fine Point Paint Pen.
Card No. 3: Up next is a card showcasing the two bluebell flowers in the Garden Fairy set. I found yet another panel with the stitched Fluffy Cloud Dies in my stash. I remember this background was actually created for THIS card a couple years ago, but I messed up on the the horizontal panel when I accidentally grabbed the cloud cutout that comes with the set and die-cut a big cloud shaped hole in my panel requiring me to start over. Rather than toss it though I decided to trim it down and save it for a future project when I could use it for a vertical card and hide the bottom. It took me awhile to find the perfect application, but it just goes to show once again that almost every crafty "mistake" can be rescued.
Card No. 4: For this card I wanted to highlight the new Slimline Pennant Dies in all their slimline glory. This is the largest of the pennants from the die set measuring 3-1/2" wide x 8.5" high, which I paired with a scalloped edge from our Fishtail Banner II Dies and mounted onto a piece of pink Bazzill swiss dot cardstock. I took inspiration of the ''sweet wishes" phase included with the Garden Fairy Stamps and decided to combine it with the "wishes" word die from our Layered Snowflake Frame Die set. I used the stitched trail from the Country Scenes Stamps for my butterflies and added a swirl of sparkles using the mini stamps from the Garden Fairy set.
I added a stitched hillside using our Slimline Nature Border dies and repeatedly stamped the little random tufts of grass that come with the Country Scenes set. My punny thank you sentiment from the Garden Fairy set was stamped onto two stacked oval mats using the dies from our Stitched Oval Dies and Fancy Frames Oval Dies.
Card No. 6: My last Garden Fairy card for the day uses many of the same components found on my previous card, but this card uses the trees and hilly border from Country Scenes for my background and features the cute fairy sitting on a daisy with the snail. Love them! I once again added a stitched hillside using our Slimline Nature Border Dies, but this time I added some flicks of grass using my Copic Marker.
Card No. 7: Up next is a little cutie called Feeling Froggy that I can't help but smile at when I see them looking back at me with their big eyes. It's a mini 2x3 stamp set that comes with the frog sitting on a lily pad, a cute dragonfly, two little house flies, and two punny greetings.
Card No. 8: Up next is a card combining our newest Feeling Froggy frog, fly and dragonfly with the trimmer Froggy Friends and stamped a punny greeting from that set onto the thinnest banner from our Slimline Pennant Dies.
Card No. 9: My last card of the day is a Valentine's Day take on the Feeling Froggy set, using the pond border and extra cattails from our Country Scenes Stamps and a big over-sized heart colored with Picked Raspberry Distress ink using our Stitched Heart dies.

That wraps up today's sneak peeks. I'm so happy you spent this time with me today. I read all your comments and they mean so much! I'd love to give a $50 gift code to one lucky winner using the rafflecopter below. Make sure to keep checking back all this week for more peeks & prizes. The contests run through Saturday, January 9th at Midnight PST with winners announced here on Sunday, January 10th. :)
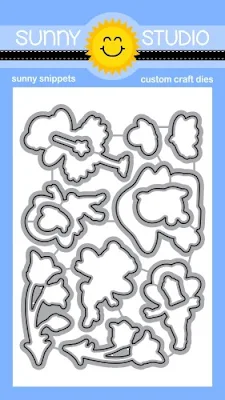
Here's a closer look at the our new Garden Fairy Stamps & Dies and Feeling Froggy Stamps & Dies used today (available for purchase on January 8th).
 Froggy Friends Dies Shop at: Sunny Studio |
 Froggy Friends Stamps Shop at: Sunny Studio |
 Stitched Heart Dies Shop at: Sunny Studio |
 Sunny Sentiments Dies Shop at: Sunny Studio |
|
 Versafine Onyx Black Ink Shop at: Sunny Studio |
 Ric Rac Border Dies Shop at: Sunny Studio |
 Fancy Frames- Ovals Shop at: Sunny Studio |
 Background Basics Stamps Shop at: Sunny Studio | |
 Classic Gingham 6x6 Paper Shop at: Sunny Studio |
 Comic Strip Everyday Dies Shop at: Sunny Studio |
 Stitched Oval Dies Shop at: Sunny Studio |
 Fluffy Clouds Dies Shop at: Sunny Studio | |
 Fluffy Clouds Border Dies Shop at: Sunny Studio |
 Frilly Frames Retro Petals Dies Shop at: Sunny Studio |
 Scenic Route Stamps Shop at: Sunny Studio |
 Scenic Route Dies Shop at: Sunny Studio | |
 Banner Basics Stamps Shop at: Sunny Studio |
 Banner Basics Dies Shop at: Sunny Studio |
 Slimline Nature Borders Shop at: Sunny Studio |
 Mini Basic Shape Dies 3 Shop at: Sunny Studio | |
 Country Scenes Stamps Shop at: Sunny Studio |
 Country Scenes Dies Shop at: Sunny Studio |
 Inside Greetings Birthday Shop at: Sunny Studio |
 Slimline Pennant Dies Shop at: Sunny Studio | |
 Tsukineko Jumbo Dauber Shop at: Sunny Studio |
 Hero Arts White Detail Shop at: Sunny Studio |
 VersaMark Watermark Ink Shop at: Sunny Studio |


