Tuesday, February 11, 2020

Cheerful Daisies Cards with Leanne and Mindy

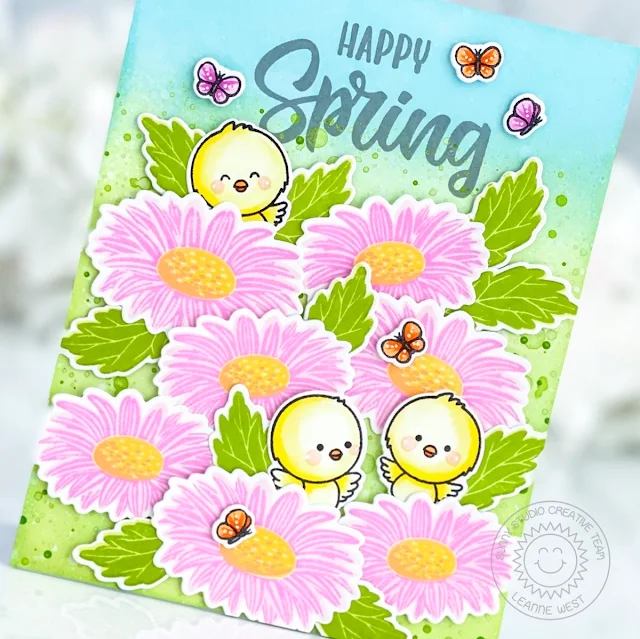
Hello crafty friends, Leanne here! I have a very springy card to share today. I think this combination of spring daisies and little chicks is sure to brighten anyone's day. 

Sunny Studio Stamps: Cheerful Daisies Chickie Baby Frilly Frame Dies Spring Showers Spring Themed Cards by Leanne West

This card is A2 size and I started with an ink blended background. I used some Distress Inks (Tumbled Glass, Twisted Citron, Bundled Sage) and blending brushes to create my two toned background. I then splatted the bottom 3/4's of the background with thinned green acrylic paint. I always use acrylic paint for splattering because I can control the opaqueness of the splatters by adding more or less water to the paint. 

Sunny Studio Stamps: Cheerful Daisies Chickie Baby Frilly Frame Dies Spring Showers Spring Themed Cards by Leanne West

I wanted to cover most of the card front with daisies. I stamped out seven daisies and ten leaves from the Cheerful Daisies set. (ink colors for petals, centers, and leaves listed below) I arranged the daisies and leaves closely together but left a little room to add the chicks which are from Chickie Baby. I Copic colored the chicks with Y0000, Y00, Y15 - my go to colors for yellow chicks. I stamped the greeting from Cheerful Daisies in dark grey ink towards the top of the card. I felt this design still needed a little something so I decided to add some butterflies. I used tiny butterfly images from Spring Showers.  

Altenew Ink colors used for daisies and leaves: Rose Quartz, Puffy Heart, Buttercream, Warm Sunshine, Caramel Toffee, Limeade, Fresh Leaf

---------------------------------------------------------

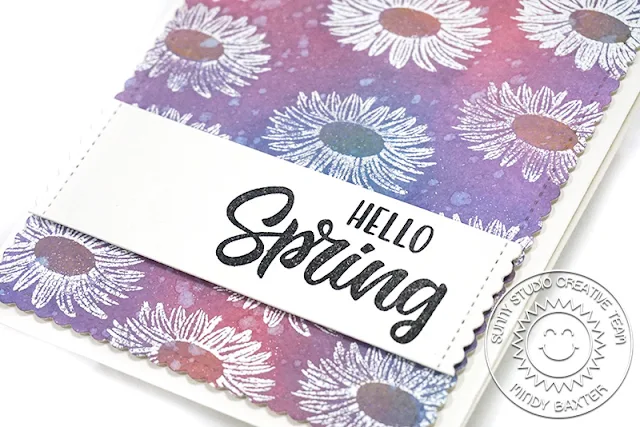
Hello! It’s Mindy from My Creative ScoopToday I’m sharing a 2 step stamping technique with the new Cheerful Daisies Stamp Set
Sunny Studio Stamps: Cheerful Daisies Frilly Frame Dies Spring Themed Card and Video Tutorial by Mindy Baxter

Instead of doing the traditional 2 step stamping with a lighter color and a darker color ink I’m using some water to stamp with my stamp and get the reaction from the Distress Oxide inks. I’m also using the Frilly Frames Striped die

Sunny Studio Stamps: Cheerful Daisies Frilly Frame Dies Spring Themed Card and Video Tutorial by Mindy Baxter

This is such a fun and simple card and a great way to practice blending backgrounds with your distress oxide inks. I wanted to use pinks and purples but wouldn’t this also look amazing in some orange and yellows?!

I’m using Shaded Lilac, Worn Lipstick, Peacock Feathers and a little Scattered Straw Distress Oxide inks in my video below!


Thank you so much stopping by. Have a great day!

Sunny Studio Supplies Used:

Frilly Frames Stripes Die
Shop at:
Sunny Studio
Cheerful Daisies Stamps
Shop at:
Sunny Studio
Cheerful Daisies Dies
Shop at:
Sunny Studio
Chickie Baby Stamps
Chickie Baby Stamps
Shop at:
Sunny Studio
Chickie Baby Dies
Chickie Baby Dies
Shop at:
Sunny Studio
Spring Showers Stamps
Shop at:
Sunny Studio
Spring Showers Dies
Spring Showers Dies
Shop at:
Sunny Studio

Monday, February 10, 2020

Floating By Cards with Lynn and Ashley

Hey everyone, it's Lynn here with a card featuring the Floating By stamp set and coordinating dies

Sunny Studio Stamps: Floating By Sunny Sentiments Frilly Frame Dies Spring Showers Birthday Card by Lynn Put

To create my card I used the fun new Floating By stamp set and coordinating Floating By dies. I started out with a white card base then die cut a piece of rainbow colored paper from the Spring Fling paper pack using the Frilly Frames Retro Petals dies. Next I stamped the balloon image from the Floating By stamp set and colored the balloons using Copic markers and die cut them out. 

The die cuts only the balloons and not the strings which is great because once you add foam tape to the balloons it really gives the illusion that they’re floating. After that, I stamped the little boy and clouds from the new Spring Showers stamp set, colored them and die cut them out using the Spring Showers dies

Sunny Studio Stamps: Floating By Sunny Sentiments Frilly Frame Dies Spring Showers Birthday Card by Lynn Put

Once that was done I die cut a stitched rectangle from white card stock and using the cloud die from the Sunny Sentiments dies as a stencil, I blended on some Tumbled glass Distress Oxide ink giving my rectangle panel a soft sky look. Next I stamped my sentiment and the balloon image then adhered a pink card stock mat to my rectangle panel and added the clouds, using foam tape I added the little boy and my popped up rainbow cluster of balloons.

--------------------------------------------------------

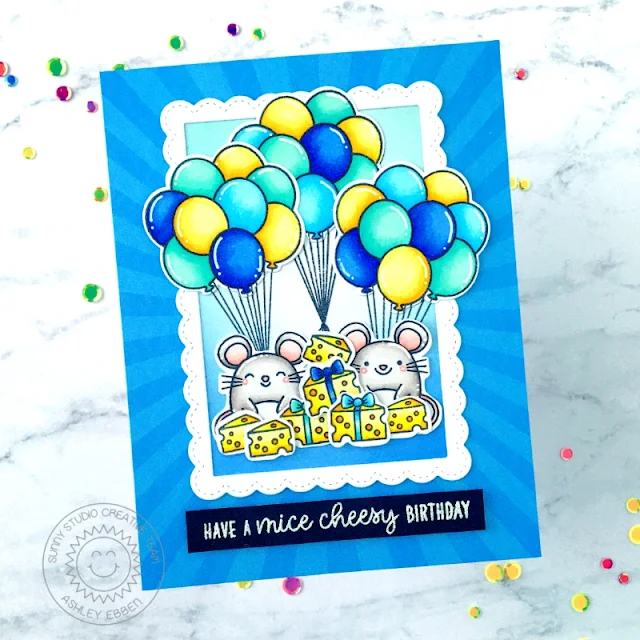
Hello friends! It's Ashley with a bright and happy birthday card! The new Floating By stamps are so perfect for birthday cards. And using the balloon bunch with other stamps is a great way to stretch your stash! I combined them with Christmas stamps for this card!

Sunny Studio Stamps: Floating By Fancy Frame Dies Merry Mice Birthday Card by Ashley Ebben

I started by blending a small piece of white cardstock with Hero Arts inks in Cornflower and Soft Pool. I used the Fancy Frames Rectangle Dies to make a small white frame and added it to a piece of blue ray paper from the Spring Sunburst paper pad cut to A2 size.

I stamped three sets of balloons from Floating By in Lawn Fawn Jet Black ink and colored with Copics before cutting them out with the matching die. I grabbed the Merry Mice set from the winter release and decided to give those mice some birthday fun! I stamped the mice and several pieces of cheese in Jet Black and colored with Copics. I arranged all my stamped images in the center of the framed piece.

Sunny Studio Stamps: Floating By Fancy Frame Dies Merry Mice Birthday Card by Ashley Ebben

To finish, I combined sentiments from Merry Mice and Floating By to make my own. I stamped this with VersaMark ink on black cardstock and embossed with white. I popped the sentiment strip up with a strip of foam tape for a bit of dimension.

Aren't these little mice so cute having their party? You would never know they came from a Christmas set! Thank you so much for stopping by! Have a mice day!

Sunny Studio Supplies Used:

Sunny Sentiments Dies
Shop at:
Sunny Studio
Fancy Frames- Rectangles
Shop at:
Sunny Studio
Spring Sunburst 6x6 Paper
Shop at:
Sunny Studio
Frilly Frames Retro Petals Dies
Shop at:
Sunny Studio
Merry Mice Stamps
Merry Mice Stamps
Shop at:
Sunny Studio
Merry Mice Dies
Merry Mice Dies
Shop at:
Sunny Studio
Floating By Stamps
Floating By Stamps
Shop at:
Sunny Studio
Floating By Dies
Floating By Dies
Shop at:
Sunny Studio
Spring Showers Stamps
Shop at:
Sunny Studio
Spring Showers Dies
Spring Showers Dies
Shop at:
Sunny Studio
Spring Fling Paper
Spring Fling Paper
Shop at:
Sunny Studio

Saturday, February 8, 2020

Guest Designer Spotlight: Chickie Baby Cards with Nicky Meek

Hello! I'm Nicky Meek and I'm delighted to be guest designing for Sunny Studio Stamps again today and have had so much fun creating with the unapologetic ally adorable Chickie Baby stamp set. I have two cards for you today that feature the stamp set in completely different ways!

Sunny Studio Stamps: Chickie Baby Eyelet Lace Border Dies Girlfriend Card by Nicky Meek

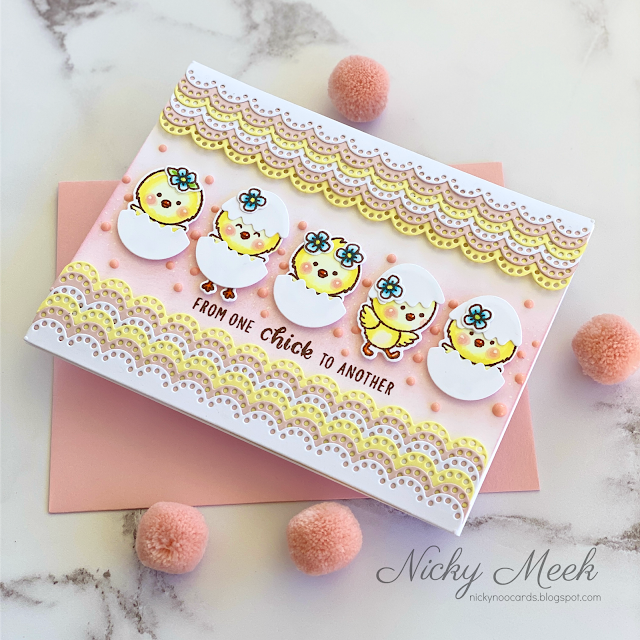
My first card also uses one of the dies from the Eyelet Lace Borders die setTo make this card I die cut one of the Eyelet Lace Border dies 12 times over from 3 different coloured card stocks. I adhered them to one another in layers then set them aside to dry. I took a panel of cardstock and ink blended the focal point using Distress Ink in Spun Sugar. I added in a few dots of white gel pen just to break it up a little.

I adhered the lace borders to the panel by backing them with foam tape, then popped it in my Misti and stamped the sentiment. This background was then applied to a 110lb white cardstock base.

Sunny Studio Stamps: Chickie Baby Eyelet Lace Border Dies Girlfriend Card by Nicky Meek

Now for my Chickie Baby images. I stamped them all with Memento Ink in Rich Cocoa and coloured them with Copic markers, highlighted some points with a white gel pen then die cut. Each was backed with foam tape and applied. To make it just a little more girly and playful I added some Nuvo Crystal Drops amongst the chickies. Card complete!

Sunny Studio Stamps: Chickie Baby Eyelet Lace Border Dies Easter Card by Nicky Meek

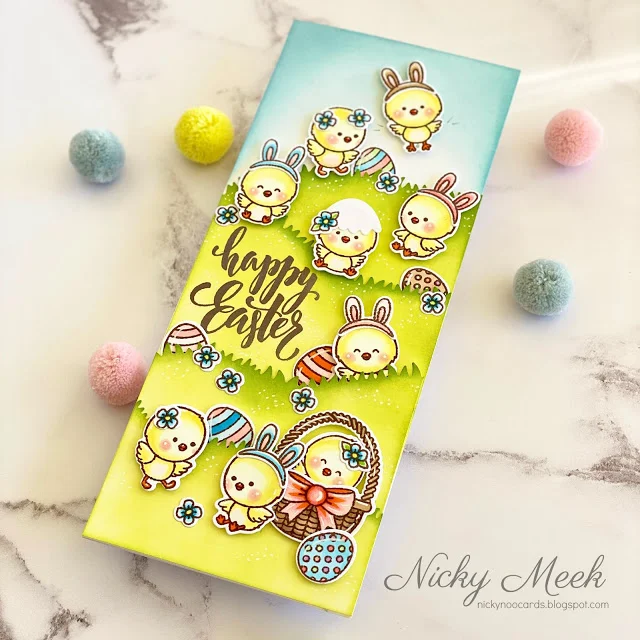
My second card using Chickie Baby is a slimline card with finished dimensions of 8 1/2in x 3 1/2in and this allowed me more space to create a big scene.

I grabbed a panel of smooth white cardstock and ink blended the sky using Distress Oxide in Tumbled Glass. I applied the panel to the prepared cardstock base. I took a couple of other slimline panels and used a grass edge die from my stash to create 4 undulating hills. They were ink blended with Distress Oxide in Twisted Citron and areas darkened using Mowed Lawn (seemed appropriate!). The sentiment was stamped. These sections were all adhered down to the background panel which in turn was adhered to the 110lb white cardstock base.

Sunny Studio Stamps: Chickie Baby Eyelet Lace Border Dies Easter Card by Nicky Meek

The Chickie Baby images were again stamped with the Memento Ink in Rich Cocoa and coloured with Copic markers, highlighted with a white gel pen, die cut and adhered either directly or with foam tape to build depth. I dotted in patches of daises with a white gel pen and with that this card was also complete.

I hope you have been enjoying your purchases from the most recent Sunny Studio release and that I've provided you with some fun inspiration.

Sunny Studio Supplies Used:

Chickie Baby Stamps
Chickie Baby Stamps
Shop at:
Sunny Studio
Chickie Baby Dies
Chickie Baby Dies
Shop at:
Sunny Studio
Eyelet Lace Borders
Eyelet Lace Borders
Shop at:
Sunny Studio

Friday, February 7, 2020

Frilly Frame Eyelet Lace Focused Cards with Juliana and Candice

Hello crafty friends! It's Juliana here and today I'll be sharing how the Frilly Fames Eyelet Lace Die can be used for both embossing and die cutting to create a beautiful background for a card.

Sunny Studio Stamps: Frilly Frame Eyelet Lace Dies Pink Peonies Birthday Card by Juliana Michaels

I began by stamping and coloring all the images from the Pink Peonies Stamp Set with Copic Markers. I then die cut them using the coordinating dies. Once this was finished I set them to the side to work on the background.

To create the embossed design, I took a piece of white cardstock and used the inside die from the Frilly Fames Eyelet Lace Die to emboss it. By using a silicone mat with your die cutting machine you can achieve this look. I recommend referring to the instruction manual for your manual die cutting machine on how to do this. Once the paper was embossed, I then die cut it using a simple stitched rectangle die. I then took the outside die from the Frilly Fames Eyelet Lace Die and used it to die cut a piece of white cardstock. Next, I layered these piece together and mounted them both to a piece of colored cardstock that coordinated with my colored images.

Sunny Studio Stamps: Frilly Frame Eyelet Lace Dies Pink Peonies Birthday Card by Juliana Michaels

With the background complete, I then began arranging the stamped images and adhered them with double sided foam tape for a bit of depth and dimension. I finished off the card by stamping Happy Birthday from the Floating By Stamp Set.

I hope you enjoyed learning that you can use your dies for embossing as well as die cutting. Don't you just love learning how to stretch your supplies? Thanks so much for stopping by today!

---------------------------------------------------------

Happy Friday friends! It's Candice back with you today using the new Frilly Frames Eyelet Lace die in a fun way! Because of the scalloped edge I can use it to create a slimline panel, a perfect way to extend my dies!

Sunny Studio Stamps: Frilly Frame Eyelet Lace Dies Chickie Baby Spring Scene Fluffy Clouds Dies Spring Showers Everyday Card by Candice Fisher

I used these Sunny Studio Stamps products for my card:
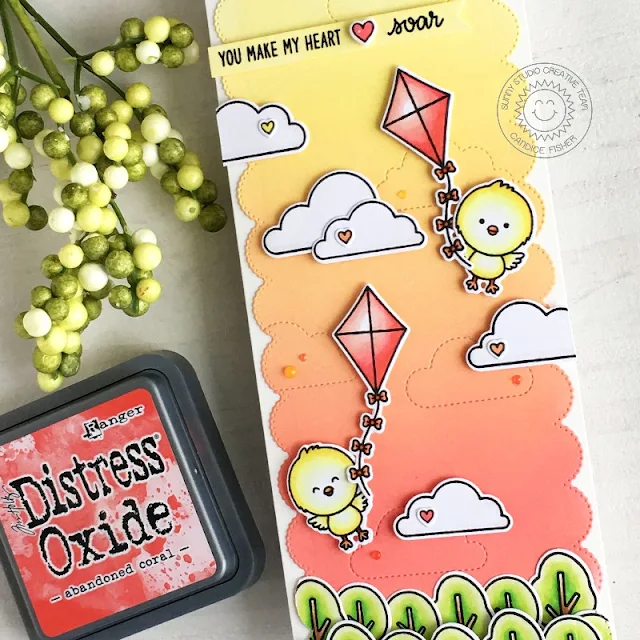
I began my slimline by creating an 8 1/2 x 3 1/2 card base which is a perfect size for your standard envelopes. To create the slimline panel using the new Frilly Frames Eyelet Lace die, I first run it through the die cutting machine, stopping just before you cut the bottom. Then you measure how high you want the frame to be and flip it and do the same to the other side, making sure you have lined it up fitting into the scalloped and stitched cuts. I then measured on the card front how wide I wanted it and repeat the steps above until you have the frame! It is easier done than explained!  

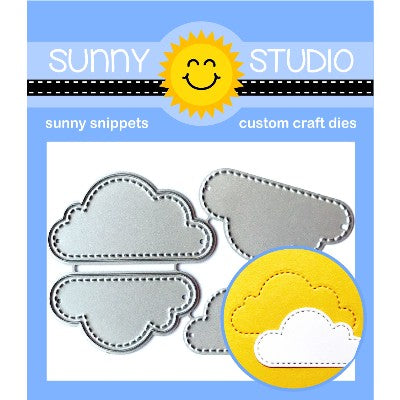
For the background, I first added the stitched clouds and then inked with abandoned coral, dried marigold & squeezed lemonade oxide inks. Next I stamped the chickskites, cloudstrees, & hearts, colored with copic markers and used the coordinating dies listed above to cut them out.

I layered one row of the trees on a scrap piece of white cardstock and cut out the bottom using the eyelet frame die adhering with foam tape over another layer of trees on the inked panel.

Sunny Studio Stamps: Frilly Frame Eyelet Lace Dies Chickie Baby Spring Scene Fluffy Clouds Dies Spring Showers Everyday Card by Candice Fisher

To put the card together, I added hearts to the clouds and adhered with foam tape trimming the edges with scissors. The chicks and kites were also put on the card with foam tape around the clouds.

For the sentiment, I first heat embossed in black on a banner, leaving space for the heart and inked over with squeezed lemonade to match the sky. I adhered with foam tape and added a few nuvo drops in red, orange and yellow.

I hope you are inspired to try creating slimline frames, I have done it with a few of Sunny Studio's frilly frames, and find the scalloped and straight edges line up perfectly! Thank you so much for stopping by!

Sunny Studio Supplies Used:

Fluffy Clouds Dies
Fluffy Clouds Dies
Shop at:
Sunny Studio
Plane Awesome Stamps
Shop at:
Sunny Studio
Hogs & Kisses Stamps
Shop at:
Sunny Studio
Hogs & Kisses Dies
Hogs & Kisses Dies
Shop at:
Sunny Studio
Chickie Baby Stamps
Chickie Baby Stamps
Shop at:
Sunny Studio
Chickie Baby Dies
Chickie Baby Dies
Shop at:
Sunny Studio
Floating By Stamps
Floating By Stamps
Shop at:
Sunny Studio
Pink Peonies Stamps
Pink Peonies Stamps
Shop at:
Sunny Studio
Pink Peonies Dies
Pink Peonies Dies
Shop at:
Sunny Studio
Spring Scenes Stamps
Shop at:
Sunny Studio
Spring Scenes Dies
Spring Scenes Dies
Shop at:
Sunny Studio
Spring Showers Stamps
Shop at:
Sunny Studio
Spring Showers Dies
Spring Showers Dies
Shop at:
Sunny Studio
Frilly Frames-Eyelet Lace
Shop at:
Sunny Studio