Thursday, February 6, 2020

Enchanted Cards with Vanessa and Anja

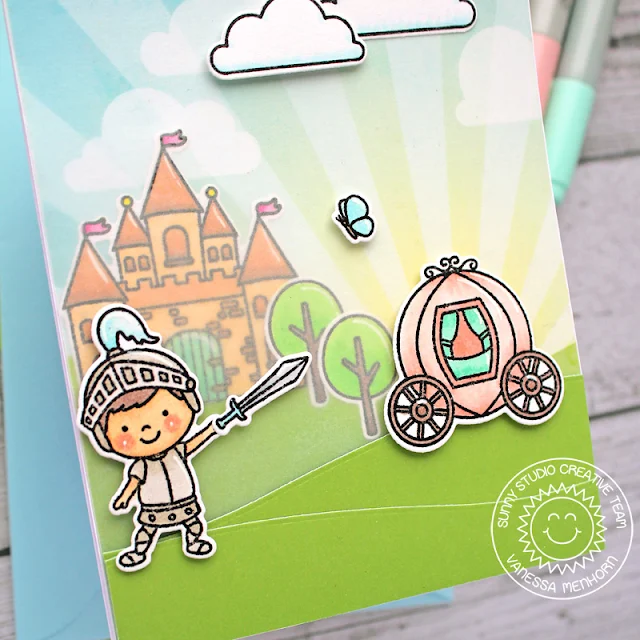
Hello to you! Vanessa here with a card using the adorable Enchanted set. With these stamps, you can create storybook projects in a snap.

Sunny Studio Stamps: Enchanted Spring Scenes Spring Showers Fairy Tale Themed Cards by Vanessa Menhorn

First, I covered a card base with the patterned paper from the Spring Fling Paper Pad. Now I stamped the images from Enchanted, Spring Scenes and Spring Showers onto white cardstock, colored everything with Copic markers and die-cut the images with the matching dies. I adhered the castle and the trees to the card and covered the front with a piece of vellum to create the impression of distance.

Sunny Studio Stamps: Enchanted Spring Scenes Spring Showers Fairy Tale Themed Cards by Vanessa Menhorn

Then I used the border from Oceans Of Joy Dies to die-cut the hills from green cardstock, adhered the pieces and adhered the remaining images with foam tape.

Prince Charming right from a fairy tale! My daughter is delighted with this set. Me, too :) Thanks for visiting! See you next week!

-------------------------------------------------------

Hi everyone, Anja here and today's card showcases the sweet Enchanted Stamps which I combined with a beautiful scene from the Spring Fling Paper pack. This makes creating so easy and convenient because the background is already done for you ;-)

Sunny Studio Stamps: Enchanted Spring Scenes Spring Showers Fairy Tale Themed Card by Anja Bytyqi

I stamped the images in Memento Tuxedo Black Ink, colored them with Copic Markers and used the coordinating dies to cut them out. The sentiment is from the same set and I stamped it in VersaMark Ink directly onto the grass at the bottom. I then heat embossed it with white embossing powder.

Sunny Studio Stamps: Enchanted Spring Scenes Spring Showers Fairy Tale Themed Card by Anja Bytyqi

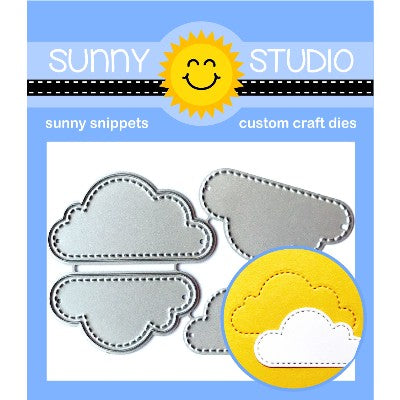
To complete my scene, I die cut two clouds (included in the Spring Showers Dies set) from white cardstock and added them to the sky.

Thank you so much for stopping by! Hope you're having a wonderful day!

Sunny Studio Supplies Used:

Oceans of Joy Dies
Oceans of Joy Dies
Shop at:
Sunny Studio
Enchanted Stamps
Enchanted Stamps
Shop at:
Sunny Studio
Enchanted Dies
Enchanted Dies
Shop at:
Sunny Studio
Spring Scenes Stamps
Shop at:
Sunny Studio
Spring Scenes Dies
Spring Scenes Dies
Shop at:
Sunny Studio
Spring Showers Stamps
Shop at:
Sunny Studio
Spring Showers Dies
Spring Showers Dies
Shop at:
Sunny Studio
Spring Fling Paper
Spring Fling Paper
Shop at:
Sunny Studio

Wednesday, February 5, 2020

Spring Scenes Cards with Franci and Ana

Hi there and happy Wednesday! It's Franci here with you today, with a fun card inspired by the upcoming season!

Sunny Studio Stamps: Spring Scenes Spring Showers Banner Basics A Good Egg Spring Themed Easter Card by Franci Vignoli

I created a colorful Spring/ Easter scene here combining different sets: Spring Scenes coordinated diesA Good Egg set + coordinated diesBanner Basics coordinated dies and Spring Showers and its coordinated dies

I started by stamping, coloring with Copics and die cutting all the images, then I arranged them on the front of my white card base, in the center, to create this happy scene. Then, as I was happy with the placement, I secured everything down with a combo of liquid glue and foam adhesive.

Sunny Studio Stamps: Spring Scenes Spring Showers Banner Basics A Good Egg Spring Themed Easter Card by Franci Vignoli

I stamped my sentiment at the top, added some Iridescent Pastel Confetti here and there and some details with a white gel pen to finish my card.

Aww I love it so much, hope you like it too! Thanks a lot for stopping by and have a lovely day!

----------------------------------------------------

Hello friends! Ana here today with a super cute card featuring new Spring Scenes stamps and coordinating dies!

Sunny Studio Stamps: Spring Scenes Spring Showers Fluffy Clouds Banner Basics Spring Themed Card by Ana Anderson

To start, I stamped a park bench with a tree and lamp post border, flowers (sprinkled through the grass), individual trees and butterflies - all from Spring Scenes stamp set. I stamped a girl, boy, tulips and the kite – from Spring Showers Stamps next, and colored all images with Copic markers.

Once the images were finished, I die cut them using Spring Scenes and Spring Showers coordinating dies. I used Fully Clouds Border dies to make a stencil, then using the stencil inked Salty Ocean Distress Ink to create the clouds. Using Fluffy Clouds dies, I added stitched clouds shapes to the background as well as few die cut clouds, which I inked with Salty Ocean distress ink as well.

Sunny Studio Stamps: Spring Scenes Spring Showers Fluffy Clouds Banner Basics Spring Themed Card by Ana Anderson

Sentiment (from Spring Showers) was stamped on a banner (from Banner Basics stamps) and die cut with coordinating Banner Basics dies. I added light shading to the edges of the banner with gray marker. I assembled the card by adhering the images with liquid glue, then added highlights with white gel pen.

I really hope you like this sweet spring scene card as much as I do – there are so many possibilities to design beautiful scenes with this amazing stamp set! Thank you so much for stopping by today, see you next week!

Sunny Studio Supplies Used:

A Good Egg Dies
A Good Egg Dies
Shop at:
Sunny Studio
A Good Egg Stamps
A Good Egg Stamps
Shop at:
Sunny Studio
Fluffy Clouds Dies
Fluffy Clouds Dies
Shop at:
Sunny Studio
Fluffy Clouds Border Dies
Shop at:
Sunny Studio
Banner Basics Stamps
Shop at:
Sunny Studio
Banner Basics Dies
Banner Basics Dies
Shop at:
Sunny Studio
Spring Scenes Stamps
Shop at:
Sunny Studio
Spring Scenes Dies
Spring Scenes Dies
Shop at:
Sunny Studio
Spring Showers Stamps
Shop at:
Sunny Studio
Spring Showers Dies
Spring Showers Dies
Shop at:
Sunny Studio

Tuesday, February 4, 2020

Chickie Baby Cards with Angelica and Mindy

Hi friends! Angelica here. I have a cute Easter project to share with you today, using a couple products from the newest release.

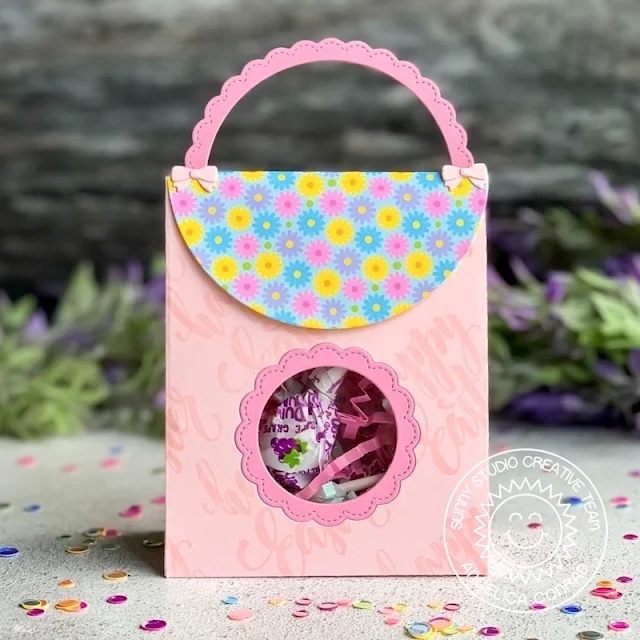
Sunny Studio Stamps: Chickie Baby Fancy Frame Dies Sweet Treat Bag Dies Treat Bag by Angelica Conrad

This bag was made with the Sweet Treat Bag Dies. I stamped pink card stock with Happy Easter, a sentiment from Chickie Baby stamp set, before die-cutting the bag. I die-cut a handle, and a window out of the bag with Fancy Frame Circle dies. I close the back of the window with acetate, and added a small circle frame to the front. 

Sunny Studio Stamps: Chickie Baby Fancy Frame Dies Sweet Treat Bag Dies Treat Bag by Angelica Conrad

Before I attached the Spring Fling pattern paper flap to the bag, I cut slits into the flap crease, allowing me to insert the handle. I made pink bows using the bow die from Sweet Treats Add On dies to cover the slits. My final step was adding a small set of Basic Grey magnetic snaps to the backside of the flap and bag, which keeps the flap closed.

I hope I have given you some fun Sunny Studio Stamps Easter inspiration. Thanks so much for stopping by!

--------------------------------------------------------

Hello! It’s Mindy from My Creative Scoop. Today I’m sharing 2 different stamp sets. The little chick is from a set just released called, Chickie Baby and I’ve used the coordinating dies to cut him out. I wanted the card to be colorful yet subtle so I used the rainbow hearts paper from the new Spring Fling Paper pack and covered my entire card front. Then used the Frilly Frames Stripes die – minus the stripes – over the patterned paper. 

Sunny Studio Stamps: Chickie Baby Frilly Frame Dies Floating By Birthday Card by Mindy Baxter

I used some Salty Ocean Distress Oxide ink right in the center of my frame. Then I took the Balloons from the Floating By Stamp set and stamped them where I wanted them on the card in Black memento ink.  I stamped the balloons again using Memento Desert Sand so I can have the no line look for my balloons. I fussy cut the balloons and placed them right over the balloons stamped on my sponged card front.

Copic Markers used: Chickie – Y21, Y26, E42, YR12R32, R30; Balloons – BV0000, BV000, BV00, RV04, RV02, RV00, G20, YG13, YG17, B00, B21, B24, Y11, Y13, Y000

Sunny Studio Stamps: Chickie Baby Frilly Frame Dies Floating By Birthday Card by Mindy Baxter

I combined the sentiment from the Floating By and Chickie Baby Stamp sets along with the Sweet Word Die which I cut out in some fun foam. I adore the way this card came out!

Thank you so much stopping by. Have a great day!

Sunny Studio Supplies Used:

Sweet Word Die
Sweet Word Die
Shop at:
Sunny Studio
Fancy Frames-Circle Dies
Shop at:
Sunny Studio
Frilly Frames Stripes Die
Shop at:
Sunny Studio
Sweet Treats Gift Bag
Shop at:
Sunny Studio
Sweet Treats House Add-on
Shop at:
Sunny Studio
Chickie Baby Stamps
Chickie Baby Stamps
Shop at:
Sunny Studio
Chickie Baby Dies
Chickie Baby Dies
Shop at:
Sunny Studio
Floating By Stamps
Floating By Stamps
Shop at:
Sunny Studio
Floating By Dies
Floating By Dies
Shop at:
Sunny Studio
Spring Fling Paper
Spring Fling Paper
Shop at:
Sunny Studio

Monday, February 3, 2020

Prancing Pegasus Cards with Lynn and Ashley

Hey everyone, it’s Lynn here. As soon as I saw the new Prancing Pegasus stamp set and coordinating Prancing Pegasus diesI knew I wanted to use them to create a shaker card.

Sunny Studio Stamps: Prancing Pegasus Frilly Frame Dies Sunny Sentiments Birthday Shaker Card by Lynn Putt

To create my card I started out by stamping the Pegasus image and two clouds from the Sunny Sentiments stamp set and colored them using Copic markers. I die cut the Pegasus using the coordinating die and the clouds using the Sunny Sentiments dies.

Next I created my shaker panel, I used the Frilly Frames Hexagon dies and die cut a piece of white card stock then I used two stitched rectangle dies, one to die cut an opening in my Frilly Frames Hexagon panel and another to die cut the white panel for my images which I matted in blue card stock. After that, I trim down a piece of acetate and adhered it to the backside of my frame piece and then added two layers of foam tape all around the edges. Then came the fun part of filling my shaker, I used some of the new Iridescent Pastel Confetti and I also die cut some pink card stock hearts from the Basic Mini Shapes II dies.

Sunny Studio Stamps: Prancing Pegasus Frilly Frame Dies Sunny Sentiments Birthday Shaker Card by Lynn Putt

Once my shaker was filled, I used a piece of the Spring Fling designer paper to seal off the back of my shaker and adhered it to a white card base. I then stamped my sentiment on to the small rectangle along with three stars from the Prancing Pegasus set, added my blue card stock mat and adhered it to the front of my card. I added the clouds and used foam tape to adhere my Pegasus. As a final touch I used some clear Wink of Stella glitter pen on the stars and the mane and tail of the Pegasus.

-------------------------------------------------

Hello everyone! It's Ashley with a super fun slider card featuring the new Prancing Pegasus and Enchanted sets! I've never made a slider card before, but the video and instructions on the Sliding Window page made it so easy! I think the result really is magical!

Sunny Studio Stamps: Prancing Pegasus Enchanted Sliding Window Dies Birthday Card by Ashley Ebben

I started by ink blending the three pieces of cardstock needed to make the slider. I did two identically, and then just the sky colors for the smaller pull piece. I grabbed 80# cardstock out of habit, but I think I'll use 110# in the future so the card is sturdier. I used Distress Oxides in Victorian Velvet, Wilted Violet, and Chipped Sapphire for the sky and Peeled Paint for the grass. I added silver and gold watercolor splatters for some pretty shine.

I stamped my pegasus from Prancing Pegasus and my princess and castle from Enchanted in Lawn Fawn Jet Black ink, colored with Copics, and cut out with the matching dies. I used the Sliding Window dies to cut out the window and notch on one of my blended panels and laid out my images to determine the placement of my sentiments. I stamped my sentiments in VersaMark and embossed with white before assembling the slider.

Sunny Studio Stamps: Prancing Pegasus Enchanted Sliding Window Dies Birthday Card by Ashley Ebben

Once the slider was assembled, I stamped "pull" from a set in my stash. I decided the card still needed something, so I stamped and colored several stars from Prancing Pegasus. I scattered the stars around the card and used a clear Wink of Stella shimmer pen on the pegasus's wings and the stars for a finishing touch.

I think this turned out so cute! I don't make a lot of interactive cards, but I will definitely be making another of these in the future! Thank you so much for stopping by! Have a magical day!

Sunny Studio Supplies Used:

Sunny Sentiments Dies
Shop at:
Sunny Studio
Sunny Sentiments Stamps
Shop at:
Sunny Studio
Sliding Window Dies
Sliding Window Dies
Shop at:
Sunny Studio
Mini Basic Shape Dies II
Shop at:
Sunny Studio
Fabulous Flamingos Stamps
Shop at:
Sunny Studio
Fabulous Flamingos Dies
Shop at:
Sunny Studio
Frilly Frames Hexagon Dies
Shop at:
Sunny Studio
Enchanted Stamps
Enchanted Stamps
Shop at:
Sunny Studio
Enchanted Dies
Enchanted Dies
Shop at:
Sunny Studio
Prancing Pegasus Stamps
Shop at:
Sunny Studio
Prancing Pegasus Dies
Shop at:
Sunny Studio
Spring Fling Paper
Spring Fling Paper
Shop at:
Sunny Studio