Friday, April 20, 2018

Fast Food Fun Stamped Background Friendship Card with Lexa

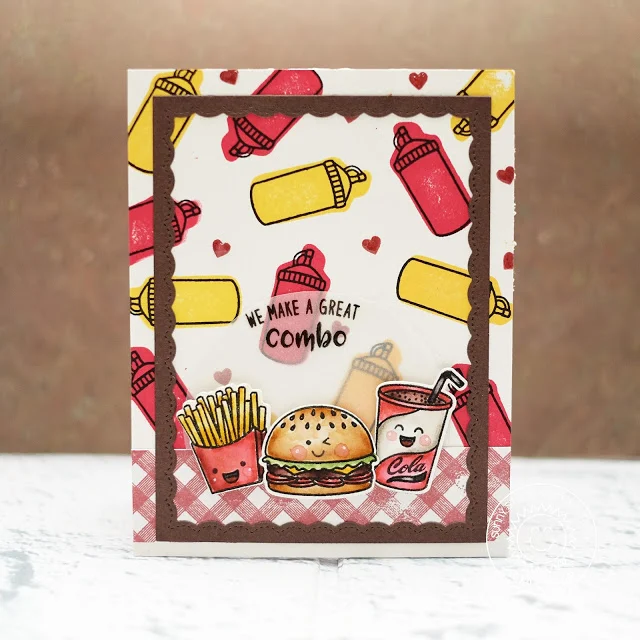
Hello everyone! Lexa here today with a card that highlighting the brand new Fast Food Fun Stamps and the coordinating dies. Be ready to feel your tummy rumble and craving for some fast food. I also paired them with some other new release products. Let's get started!

Sunny Studio Stamps: Fast Food Fun Stamped Background Friendship Card by Lexa Levana

First, I create the background for my card using the ketchup bottle from the set, I use the back side of it to stamp them in yellow and red before stamp the bottles then stamp some solid little hearts in between. That's how I create the patterned for my background. All the main images are stamped with Versafine black ink and watercolored with Distress Markers. After I finished and happy with the coloring result I use the coordinating dies to cut all of them. They are the cutest!

Sunny Studio Stamps: Fast Food Fun Stamped Background Friendship Card by Lexa Levana

I use the gingham border from Background Basic Stamps and stamp it in cherry red dye ink to use it as a table cloth for the fries, burger and cola. To keep the main images pop out, I use a piece of vellum behind them so they won't blend in with the vibrant background. I stamped the curved sentiment to follow the half-circle vellum. Last but not least, I use the inner part of Fancy Frames Rectangle Dies to give cute frame for my card.

That's all for today, thank you for visiting and I hope you like my card as much as I do. Have a wonderful day!

Sunny Studio Supplies Used:
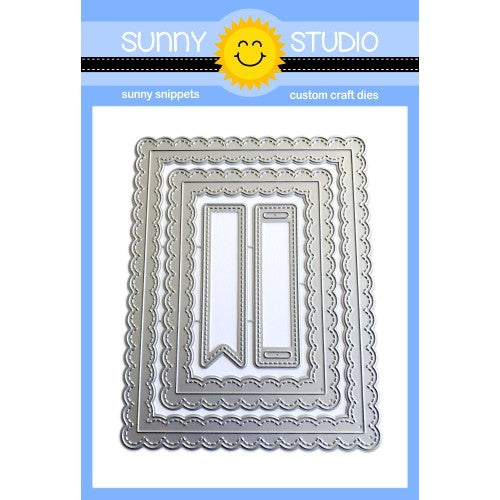
Fancy Frames- Rectangles
Shop at:
Sunny Studio
Fast Food Fun Stamps
Shop at:
Sunny Studio
Fast Food Fun Dies
Fast Food Fun Dies
Shop at:
Sunny Studio
Background Basics Stamps
Shop at:
Sunny Studio

Thursday, April 19, 2018

Beach Babies Window Trio Summer Shaker Card with Vanessa

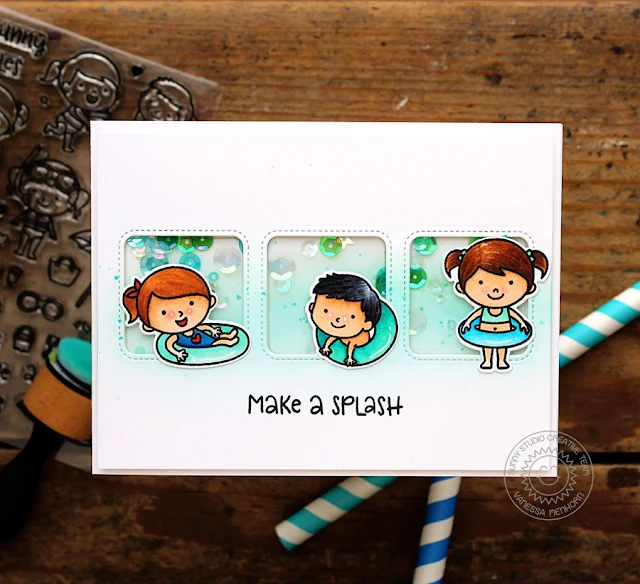
Hi there! Vanessa here today with a CAS shaker card using the adorable Beach Babies set! I love the new Window Trio Square dies and wanted to fill them with sequins for some action.

Sunny Studio Stamps: Beach Babies Window Trio Summer Shaker Card by Vanessa Menhorn

First, I softly inked the middle portion of a white cardstock panel with aqua ink and applied small ink droplets. Then I die-cut the windows and stamped the sentiment. I created the shaker part, using the die-cut rectangles behind the openings, and adhered the panel to the card base.

Sunny Studio Stamps: Beach Babies Window Trio Summer Shaker Card by Vanessa Menhorn

Now I stamped the cute images, colored them all with Copics, die-cut them with the matching dies and adhered them to their windows. (I actually colored all the images from the set, if you would like to see them all, please go here).

The new window dies make it so easy to create happy shaker cards! I hope you like today's inspiration! Thanks for stopping by :)

Sunny Studio Supplies Used:

Beach Babies Stamps
Beach Babies Stamps
Shop at:
Sunny Studio
Beach Babies Dies
Beach Babies Dies
Shop at:
Sunny Studio
Window Trio- Square Die
Shop at:
Sunny Studio

Wednesday, April 18, 2018

Berry Bliss Single Color Ink Technique Card with Franci

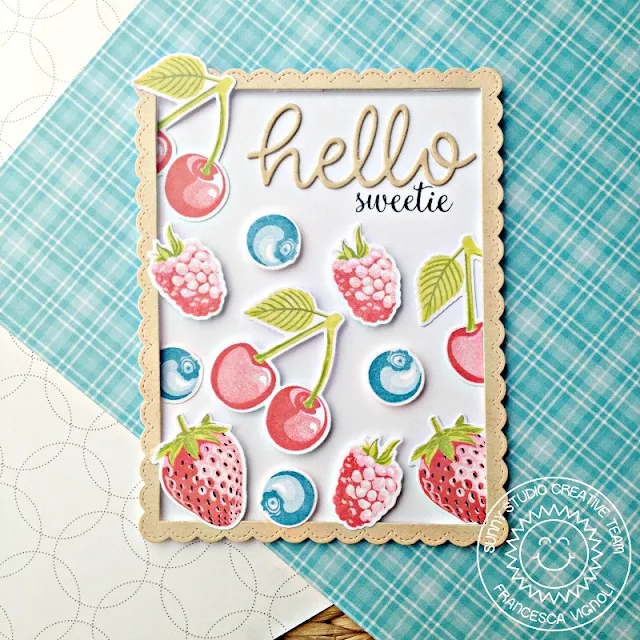
Hi there and happy Wednesday! It's Franci here with you today with a Tutti Frutti card featuring the new Berry Bliss set! The new layering stamp set for this release is all about red fruits - it includes a strawberry, some cherries, a raspberry ( that you can also dress as a blue raspberry!) and a blueberry. Plus some leaves and stems of course!

Sunny Studio Stamps: Berry Bliss Single Color Ink Technique Card by Franci Vignoli

Guys, it's amazing! The fruits are so realistic and awesome!! So for today's card I added a little challenge, as I created every single fruit with just one ink pad! I do not have lots of colors of dye inks and haven’t had the chance to buy more yet. So for today’s card, I played a little bit with the second generation stamp technique and with my stamp positioner!

First, I created my card base from white cardstock and die cut this beautiful fancy frame out of some kraft cardstock using the new Fancy Frames Rectangle dies. Then I started stamping all of my fruits. I tested the images and my ink out and I finally followed this ultimate scheme (please note: a stamp positioner is not strictly necessary but I highly recommend it if you'd like to use the second generation stamp technique!).

Sunny Studio Stamps: Berry Bliss Single Color Ink Technique Card by Franci Vignoli

I stamped my lightest images first: 1 +1 second generation stamp (I basically inked up my stamp, stamped onto some copy paper, and then stamped it again onto my cardstock. I did this twice.

Then I stamped the second layer, repeating what I have done previously and for the third layer I inked it and stamped it directly onto the image twice. So my images are basically built by 6 layers of the same color ink. 

For the leaves I had two different greens and for the raspberry I stamped four layers with the same ink - twice on top of the image. I also did the same with my blueberry, but I used a blue ink.

To complete my card I die cut all of my stamped images with the coordinating dies and adhered all of the fruits and the frame with a combo of liquid glue and foam adhesive. Finally, I die cut the “Hello” with the new Hello Word die, and glued it down as well, stamping my sentiment with a black ink.

This card was so much fun to make and I hope it inspired you to create with this new cool set! Have a lovely day!

Sunny Studio Supplies Used:

https://sunnystudiostamps.com/collections/new-arrivals/products/berry-bliss-dies

Tuesday, April 17, 2018

Party Pups Woofing Happy Birthday Card with Juliana

Hello friends! It's Juliana Michaels here with you to share a woofingly happy birthday card using the brand new Party Pups stamp set. As the momma to 2 Golden Retrievers, I kind of love dogs and I couldn't wait to play with this new set.

Sunny Studio Stamps: Party Pups Woofing Happy Birthday Card by Juliana Michaels

I began by stamping all of the dogs and other images with Memento Ink in Black. I then colored them using Chameleon Pens and die cut them using the coordinating dies. With all the sweet pups helping to celebrate, they each had to have a party hat!

To create the background for the card, I die cut a 4.25 x 5.5 inch piece of white cardstock using the largest frame from the Fancy Frames Rectangle die set. I took the inside piece and splattered it with ink. To create the ink splatters, I used Distress ink and stamped the ink pad onto a craft mat. I added a little bit of water and then used a paint brush to flick the ink onto the paper.

Sunny Studio Stamps: Party Pups Woofing Happy Birthday Card by Juliana Michaels

Once the ink was dry, I adhered each of the pups, the cake and other images to the card front. I used double sided foam tape on some of the pieces to give the scene a bit of dimension. For the final step, I added the sentiment with black ink.

These pups are perfect for celebrating that special day for those dog lovers in our lives. Thanks so much for stopping by and I hope you enjoyed this bit of inspiration using the new Party Pups stamp set. 

Sunny Studio Supplies Used:

Fancy Frames- Rectangles
Shop at:
Sunny Studio
Party Pups Stamps
Party Pups Stamps
Shop at:
Sunny Studio
Party Pups Dies
Party Pups Dies
Shop at:
Sunny Studio

Monday, April 16, 2018

Critter Campout Framed Appreciation Card with Eloise

Hi everyone, Eloise here and today I'll be using the Critter Campout Stamp Set along with the new Fancy Frames Rectangles Dies to create my appreciation card. This Critter Campout set from the release is probably one of my favourites. It's super adorable and has a ton of image stamps to help set the scene along with loads of sentiments for many different occasions.

Sunny Studio Stamps: Critter Campout Framed Appreciation Card by Eloise Blue

To begin my card today, I first started off with cutting out three frames from the Fancy Frames Rectangles Dies out of some white cardstock. Once my frames were cut, I measured them and then cut three additional rectangles from some watercolour paper for the backgrounds of each of them. Once those were cut, I used some Chipped Sapphire and Salty Ocean Distress Inks for the sky and Twisted Citron and Mowed Lawn Distress Inks for the ground. I ink blended on all three pieces and once they were done, I added foam tape on the backs of the frames and adhered them to the backgrounds. 

Sunny Studio Stamps: Critter Campout Framed Appreciation Card by Eloise Blue

Next up, was to colour up my images. I stamped them all out on some white cardstock with some black ink and coloured them up using Copic Markers. I used lots of different shades of browns so all my critters would look different, as that's something I do find hard with woodland critters. Once they were coloured, I cut them out using the coordinating dies. Now, I added foam tape all along the backs of the critters and adhered them down onto each of my rectangle pieces, creating a mini scene in each of them. To adhere all these pieces onto my cardbase, I took a piece of grey cardstock and layered up all my frames. I did this by tucking each of the pieces under each other and then cutting off the excess of the frame going under any of the other pieces. Now that everything was adhered, I white heat embossed the 'Life With You Is An Adventure' sentiment onto a thin black strip. I then popped that up on foam tape and adhered it down onto my card as well. 

Thanks so much for stopping by today, I hope you feel inspired and you enjoyed my project today. I'll catch you all next time!

Sunny Studio Products Used:

Critter Campout Stamps
Shop at:
Sunny Studio
Critter Campout Dies
Shop at:
Sunny Studio
Fancy Frames- Rectangles
Shop at:
Sunny Studio