Monday, December 18, 2017

Polar Playmates Christmas Themed Tags with Eloise

Hi everyone, Eloise here and today I have some quick tags to share with you all using the Polar Playmates and Tag Topper Crescent Dies.

Sunny Studio Stamps: Polar Playmates Christmas Themed Tags by Eloise Blue

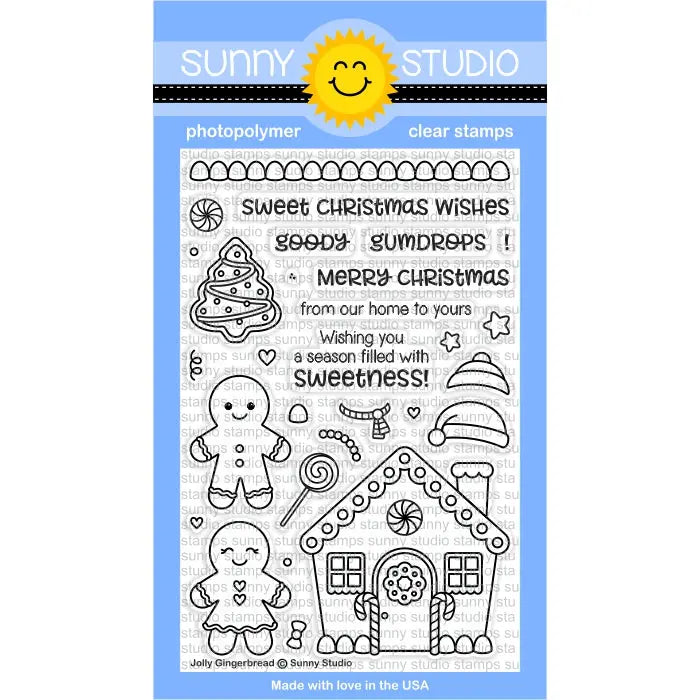
To begin I cut down three pieces of watercolor paper to 3" wide by 4 1/2" tall. I then used the largest Crescent Topper Die and cut down each of the pieces to have a tag-like edge. Then I ink blended some Tumbled Glass and Salty Ocean Distress Ink on top of each of the tags and sprinkled them with water to appear like snow. Next, I cut down some Neenah Solar White cardstock to 3" wide and used my scissors to cut a snowy hill on each of the pieces. I then stamped 'Merry Christmas' from the Jolly Gingerbread stamp set with some black ink onto each of the snow pieces. I then added some foam tape along the back and adhered it down onto the bottom of each of my tags.

Sunny Studio Stamps: Polar Playmates Christmas Themed Tags by Eloise Blue

Next, I stamped, colored, and cut my images out from the Polar Playmates stamp set. I used Copic Markers for my coloring and the coordinating dies to cut them out. Once they were cut out I adhered them onto my tags with more foam tape. To finish up my tags, I punched holes at the top of my tags and threaded through some twine, and that finished up my tags.

Thanks so much for stopping by today and I'll catch you next time!

Sunny Studio Supplies Used:


Tag Topper Dies-Crescent
Shop at:
Sunny Studio
Jolly Gingerbread Stamps
Shop at:
Sunny Studio
Polar Playmates Stamps
Shop at:
Sunny Studio
Polar Playmates Dies
Shop at:
Sunny Studio

Saturday, December 16, 2017

Guest Designer Spotlight: Winter Themed Card with Melissa Bowden

Hi everyone! Melissa Bowden here, I am so excited to be back on the Sunny Studio blog as a guest designer! I love the newest winter collection and I really enjoyed making these two cards focusing on the Festive Greetings and Playful Polar Bears stamp sets. I hope you enjoy them as well!

Sunny Studio Stamps: Playful Polar Bears Festive Greetings Winter Card by Melissa Yates

To make the first card I first cut a rectangle of white card stock for the stamped area. I then die cut the bottom using the Fishtail Banner dies. After that was done I lined up the bear and the present from the Playful Polar Bears set where I wanted them to go. Because I wanted the present in front I stamped that first. I then masked it off and stamped the bear over top. 

Sunny Studio Stamps: Playful Polar Bears Festive Greetings Winter Card by Melissa Yates

To finish the little scene I added the stars from the set scattered around the sky and the sentiment from Festive Greetings to the bottom. I coloured the images with Copic markers. To finish the card off I adhered the panel I had just coloured to a navy blue card base. 

Sunny Studio Stamps: Playful Polar Bears Festive Greetings Winter Card by Melissa Yates

For the next card I used the same two stamp sets as before. I started with the background for this card. This consisted of me blending together a few different blue inks on white card stock to create a gradient effect. I used a white gel pen on the background to create a snow like effect. I then cut out some hills with a hill border die and layered those over top of the background. I also cut out the circle opening with another die and laid that over top. When I got those all where I wanted them I adhered them down. 

Sunny Studio Stamps: Playful Polar Bears Festive Greetings Winter Card by Melissa Yates

I then blended some ink around the outside to give it a little more dimension and a bit of an antiqued look. It was then on to the star of the show the little polar bear. I coloured him with Copic markers and cut him out with a white border around the edge. I stamped him again onto patterned Christmas paper but this time I only cut out his scarf. I layered that over top to make it look like he was wearing a cute Christmasy scarf. To finish off the card I stamped the sentiment onto a little banner of patterned paper and mounted everything onto a navy blue card base.

Have a wonderful day! 


Sunny Studio Supplies Used:

Fishtail Banner Dies
Shop at:
Sunny Studio
Festive Greetings Stamps
Shop at:
Sunny Studio
Playful Polar Bears Stamps
Shop at:
Sunny Studio
Playful Polar Bears Dies
Shop at:
Sunny Studio

Friday, December 15, 2017

Woodsy Creatures and Backyard Bugs Sunshine Card with Lexa

Hi there! It's Lexa here with a card that full of sunshine today. It's always sunny (or rainy some other times) where I live, so I decided to create a bright card for you all.

Sunny Studio Stamps: Woodsy Creatures and Backyard Bugs Sunshine Card by Lexa Levana

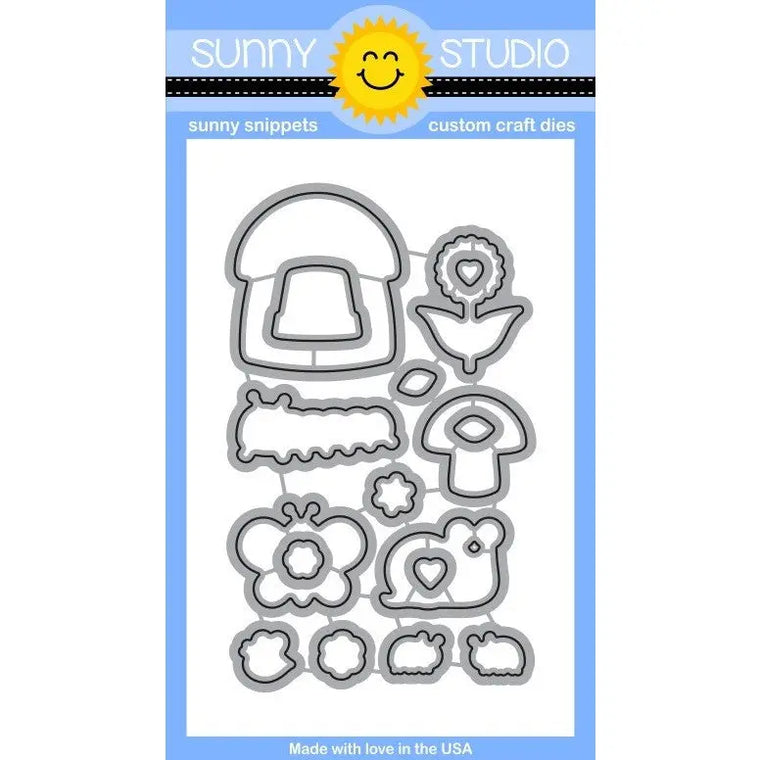
I used an older stamp sets for today's card by combining Sunny SentimentsWoodsy Creatures and Backyard Bugs together to create a little scene. I stamp all the images with Versafine black ink then watercolor them with Distress Markers. When you go through your Sunny Studio stamps collection, you will realize that you can combine most of all the stamp sets together. That's how versatile the designs are. After I finished with the coloring, I die cut all the images with the coordinating dies.

Sunny Studio Stamps: Woodsy Creatures and Backyard Bugs Sunshine Card by Lexa Levana

As for the background I want it to be solid this time. So I die cut green and blue cardstock with a basic stitched rectangular dies, then adhere it to the 4.25"x5.5" card base. That create thin white borders around it and look like a frame. I stamped "hello" on the cloud, it's a simple and warming greeting for everyday cards. Here's a closer look of my card.

I really hope you enjoy the post and my card for today. Thank you so much for stopping by. I hope you all have a wonderful day!

Sunny Studio Supplies Used:

Backyard Bugs Dies
Backyard Bugs Dies
Shop at:
Sunny Studio
Backyard Bugs Stamps
Shop at:
Sunny Studio
Sunny Sentiments Stamps
Shop at:
Sunny Studio
Woodsy Creatures Dies
Shop at:
Sunny Studio
Woodsy Creatures Stamps
Shop at:
Sunny Studio

Thursday, December 14, 2017

Polar Playmates Fluffy Husky Christmas Card with Vanessa

Hi everybody! Vanessa here today with a card using the cute Polar Playmates set. 

Sunny Studio Stamps: Polar Playmates Fluffy Husky Christmas Card by Vanessa Menhorn

I wanted to make the little husky look really fluffy and hairy, so I used colored pencils on dark cardstock to achieve this. I first stamped the image onto the blue panel and colored the little fur ball, applying the color with flicks to create the hair. Then I masked off a snowy hill and applied white pigment ink with an ink blending tool. Using the pencils again, I created the shadow on the snow.

Sunny Studio Stamps: Polar Playmates Fluffy Husky Christmas Card by Vanessa Menhorn

Now I covered the image with a mask and flicked on white paint droplets. I stamped and heat-embossed the sentiment from Christmas Home and adhered the panel to the card base. Finally, I die-cut little stars from white glitter cardstock and adhered them to the sky.

I hope you like my fluffy fur ball :) Thanks for stopping by today!

Sunny Studio Supplies Used:

Christmas Home Stamps
Shop at:
Sunny Studio
Polar Playmates Stamps
Shop at:
Sunny Studio

Wednesday, December 13, 2017

Gleeful Reindeer Christmas Ornaments and Treat Bags with Franci

Hi there, happy Wednesday! It's Franci here with you today with a little Christmas party! 


Sunny Studio Stamps: Gleeful Reindeer Christmas Ornaments and Treat Bags by Franci Vignoli

"Rudolph the red-nosed reindeer had a very shine nose". And that's where my inspiration came from! I love the Gleeful Reindeer stamp set so much that I thought it would have been perfect for my little party! So first of all - the little Christmas tree.


Sunny Studio Stamps: Gleeful Reindeer Christmas Ornaments and Treat Bags by Franci Vignoli

I found this little Christmas tree at one of my local stores and loved how tiny and festive it is. I wrapped it in some gold starry twine and then I created my ornaments. I stamped all of my reindeer in memento black ink, colored them with Copics, and drew some details with a white gel pen. I then added some Wink of Stella sparkle and die cut them with the coordinating dies

Then I die cut some circles out of white cardstock and embossed the Frosty Flurries in white on the top of them. I let them cool and then sponged some Peacock Feathers distress ink to create the sky and make them pop.


Sunny Studio Stamps: Gleeful Reindeer Christmas Ornaments and Treat Bags by Franci Vignoli

This mini background is amazing, and I love the beautiful snowy effect! To complete my ornaments, I glued down all my reindeer with foam tape to give extra dimension and I also added a little clear twine. 


Sunny Studio Stamps: Gleeful Reindeer Christmas Ornaments and Treat Bags by Franci Vignoli

Then of course I had to make treat bags! For these I took some clear plastic bags and I cut 2 rectangles out of some white cardstock to match in size. I decorated them as I did for my ornament with the embossed Frosty Flurries and Distress ink. Then I created a mini tag out of white cardstock with the Tag Topper dies, stamping my little reindeer on them and coloring them with Copics. 

Then I filled my bags with treats and closed them with my decorated rectangles, gluing down the little tags on top with foam tape and adding a little red bow. So festive, right! For the treats, I took some salted dried pretzels, coated them with chocolate and let them cool. I sprinkled them with powdered sugar to finish them off. Super easy. Nothing fancy, but oh they are so yummy!


Sunny Studio Stamps: Gleeful Reindeer Christmas Ornaments and Treat Bags by Franci Vignoli

And speaking about yummy Christmas treats, here they come. Last, but not least, my reindeer cupcakes! How cute are these? And they perfectly match my reindeer! YAY! If you would like to create these too, here's how I made them. I just decorated some vanilla cupcakes with some chocolate. Then I cut some salted dried pretzels in a half to create the horns, and added some eye candies and a little mini red chocolate peanut for my Rudolph nose!

This party was so, so, sooo much fun to make. I hope you enjoyed it and host a little reindeer themed party too! Thank you so much for stopping by and have a lovely day! 

Sunny Studio Supplies Used:

Gleeful Reindeer Dies
Shop at:
Sunny Studio
Gleeful Reindeer Stamps
Shop at:
Sunny Studio
Tag Topper Dies-Traditional
Shop at:
Sunny Studio
Frosty Flurries Stamps
Shop at:
Sunny Studio