Hello there friends! I'm sad to say I've made the decision to push back our inspiration week and holiday release by one week due to receiving a late shipment of some of the new products. I'm super bummed, but in the end I decided I would feel better having everything in hand before kicking the week off. ;)
However I promised you some peeks this week so I've put together a little collage of some of the projects I've been working on that I will now be sharing starting next Monday with a release date of October 7th.
I hope you will join us for all the fun & festivities. In the meantime, the team is sharing some amazing ideas for fall using our Harvest Happiness set this week. Please scroll down to see Eloise's gorgeous card for the day. :)
Big Hugs!
Monday, September 26, 2016
Harvest Happiness Layered Pumpkins Card with Eloise
Hello everyone, Eloise here and I'm back with a card featuring the Harvest Happiness set. I knew when I got this set I knew I wanted to stack the pumpkins up so that's what I'm doing for the card today.
To begin my card today I needed to make a ton of masks. So I took some masking paper and stamped down 4 of each pumpkin and a few leaves from the Harvest Happiness set I fussy cut them out to the line and then I could start stamping. I used some Versafine Onyx black ink to stamp down my leaves first, using the masks in between as needed. Once I had the layer of those at the bottom of the cardstock, I could stamp out my pumpkins - doing the same thing as I did for the leaves. Once I had finished stamping I used clear embossing powder so when I watercolour it can be faster and easier.
For the watercolouring today I'm using the Kuretake Gansai Watercolours. I used autumn-y colours and I also coloured the background too, to make it look complete.
To finish up my card I used a stitched rectangle die to die cut the panel down and to flatten it out, I then stamped down the 'autumn blessings' sentiment with some black ink also. I then popped it up on fun foam and mounted it onto a green card base and that finished up my card.
Thanks for stopping by today, I hope you enjoyed and make sure you check by the blog this week to see more inspiration using this stamp set.
- Eloise
Sunny Studio Products Used:
Saturday, September 24, 2016
Sunny Saturday Share: Customer Cards For Fall & Everyday Occasions
Hello there! How are you? I'm so excited to finally share some amazing cards spotted online using our stamps & dies over the past few weeks!
Baby Bear Boy Card by Eloise Blue (with video tutorial)
Baby Bear Girl Card by Eloise Blue (with video tutorial)
Autumn Splendor Card by Coni Longley (with tutorial at her blog)
Fishtail Banner & Fishtail Banner II Thank You Card by Amanda
Harvest Happiness Turkey Card by Nicole Bergeson
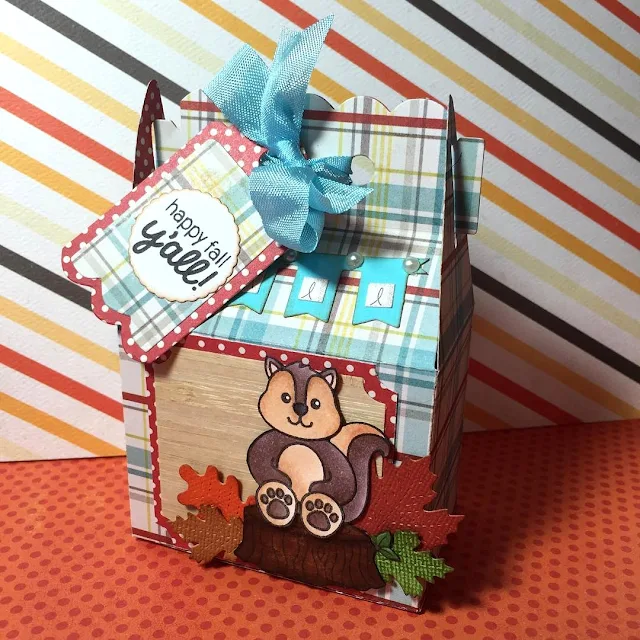
Woodsy Creatures Chipmunk Gift Box by Sarah Corkrey-Elliott
City Streets Card by Laurie C (as seen here at Butterfly Reflections Ink)
City Streets Christmas Card by Sherry Bahlman
Backyard Bugs New Home Ladybug & Toadstool Card by Nora Noll
Thank you for sharing your gorgeous cards. Please keep them coming. My heart always skips a beat when I stumble upon your fabulous projects!
Want to be featured in a future Sunny Saturday Share post? Tag us with the hashtag #sunnystudiostamps and share your projects with us on Instagram, our facebook page or in our flickr group. :)
Friday, September 23, 2016
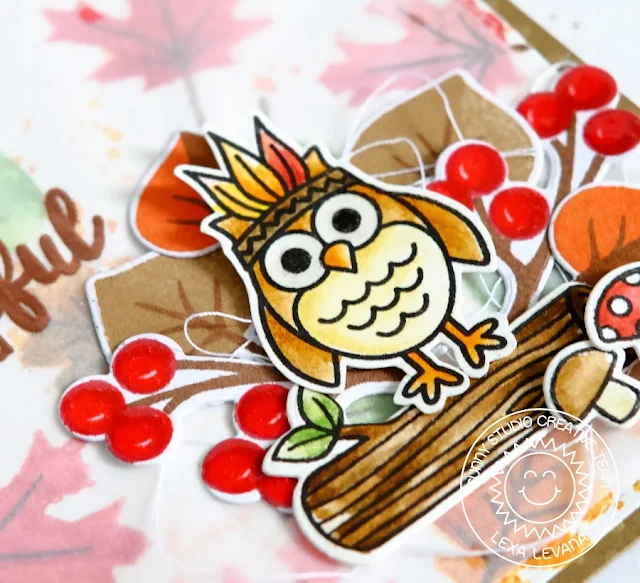
Autumn Splendor Grateful For You Card By Lexa
Hello crafty friends!
It's Lexa here, today I'm going to share a card featuring Autumn Splendor stamp and coordinating dies. This set is so pretty with all the leaves, berries, and acorns which are perfect for all your fall projects. I love fall colors!
I start my card with a piece of 4.25" x 5.5" watercolor paper, stamping all the leaves with Distress Inks (Candied Apple, Wild Honey, Spiced Marmalade, Mowed Lawn, Vintage Photo) and then I applied some water to all of them. As a last touch, I splattered the same ink colors, which I think looks really cool. :)
After I finished my background, I layer a piece of vellum in 4" x 5.25" to soften the tone. The trick I learned for this stamp set is I prefer to die cut first and then stamp all the images. I think it's easier that way, as I did with the berries and leaves. I use the cute owl from Harvest Happiness to stand on the wood log from Woodsy Creatures as the main piece of my card.
I stamped them with Versafine black ink and watercolored them with Distress Markers. After I finished all my elements, I arranged them all together and they look so pretty. Mixing your stamp sets always can give you a fresh look, and yes I know when it's easier to match all the pieces that come from the same set, but it's worth a try. I heat-embossed the sentiment with copper embossing powder to match all the color tones together.
Thursday, September 22, 2016
Autumn Splendor & Woodsy Creatures Fall Card with Vanessa
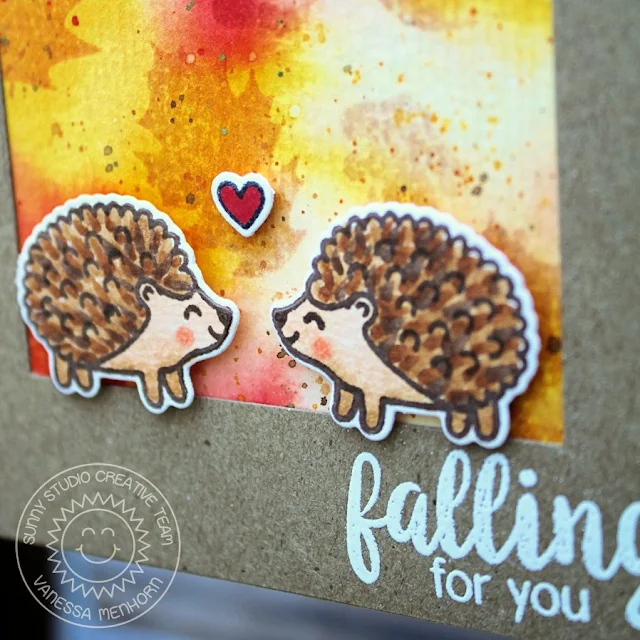
Hey everybody!! Vanessa here with a card combining the cute hedgehogs from Woodsy Creatures with the gorgeous Autumn Splendor set.
First, I stamped the leaves from Autumn Splendor with Distress Inks onto a panel of watercolor paper. Then I applied water over the stamped images until I was satisfied with the result. I added spritzes of gold, brown and red ink, let the panel dry and adhered it to my card base. Now I trimmed a panel of Kraft cardstock to fit the card, die-cut a rectangle from it and stamped/heat-embossed the sentiment. After I had adhered the frame, I stamped the images, colored them with Copics, die-cut them with the matching dies and adhered them with foam tape.
I love that the Autumn Splendor set is so versatile! You can easily create clean and graphic designs, as well as a bit messier ones with Distress Inks! I hope you liked today's card! Thanks for stopping by!
Vanessa
Sunny Studio Supplies Used:
Subscribe to:
Comments (Atom)


