Friday, June 24, 2016

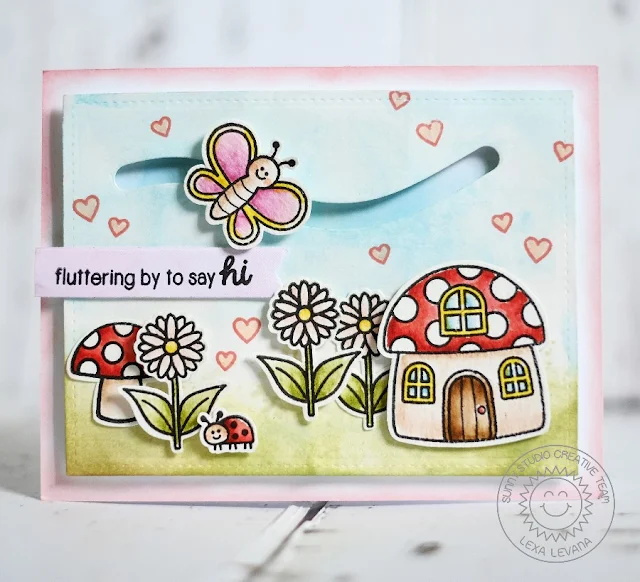
Backyard Bugs Slider Butterfly Card with Lexa

Hi there crafty friends! I hope you are doing well. Lexa here today with a fun interactive slider card starring Backyard Bugs stamps and dies. I had so much fun creating this one.


Sunny Studio Stamps: Backyard Bugs Fluttering By To Say Hi Butterfly slider card by Lexa Levana.

I start this card with die-cut a piece of watercolor paper die-cut with a basic stitched rectangle die.  I then scribble some Tumbled Glass and Shabby Shutters Distress Ink on my acrylic block then spray some water to blend it. After the Distress Ink reacted well, I place my watercolor paper on top of it. I love how uneven and imperfect it looks. That's the beauty of watercolor, I think. :)

All the images and sentiment were stamped with Versafine Onyx Black ink and then I used Distress Markers to color the images. For extra sweetness, I stamp pink hearts on the sky and color them with a soft pink alcohol ink. I finished my card by blending some Spun Sugar Distress Ink on the edges of the card base to match my butterfly's wings color.

Sunny Studio Stamps: Backyard Bugs Fluttering By To Say Hi Butterfly slider card by Lexa Levana.

The fluttering butterfly is so adorable, even my 4 year old daughter loves to play with it.  I hope you enjoy today's card.

Before I go today we have one last peek for the week to share of a follow-up to the popular Fishtail Banner dies.  This new item will be available for sale on July 1st.  We hope you will come back all next week for more peeks, prizes and inspiration using the new sets!  :)

Sunny Studio Stamps: Fishtail Banners II Dies Sneak Peek

Thanks for stopping by! :)


Thursday, June 23, 2016

School Time Rainbow Crayon Birthday Card with Vanessa

Hello everyone! Vanessa here with a colorful birthday card. The colors of the rainbow make me happy and I love to use them on birthday cards:


Sunny Studio Stamps: School Time Rainbow Crayon Birthday Card by Vanessa Menhorn.

I used the fun crayon image from the School Time Stamp set, stamped it multiple times onto white cardstock, colored it with Copics and fussy-cut the crayons. Then I adhered them to the bottom of a white card base and trimmed off the edges. Now I stamped the tiny heart from Tropical Paradise with matching inks above the crayons. I stamped the sentiment from Comfy Creatures and finished the card off with matching sequins. 


Sunny Studio Stamps: School Time Rainbow Crayon Birthday Card by Vanessa Menhorn.

Once again, I enjoyed playing with my cute Sunny Studio stamps!  I hope you liked today's inspiration.  

Today we are sharing a sneak peek of the last of four new stamp sets coming out on July 1st.

Sunny Studio Stamps: Sock Hop Stamp Set Sneak Peek

I'll see you back again soon! Thanks for stopping by!

Vanessa

Wednesday, June 22, 2016

Backyard Bugs & Woo Hoo Owl Birthday Card with Lindsey

Hi, Lindsey here. Today I combined Backyard Bugs with Woo Hoo and a sentiment from Comfy Creatures to create a sweet little birthday card. I just love how all the Sunny Studio stamp sets work so well together. There are so many possibilities when you can mix and match images and sentiments from different sets. Let's get started!


Sunny Studio: Owl & Snail Birthday Card by Lindsey Sams (using Backyard Bugs & Woo Hoo stamps)

I started with a 4 bar size card base made from some brown woodgrain paper. I thought this would go nicely with the little nature friends I planned to use on my card. Next, I cut a slightly smaller stitched rectangle from white cardstock to do my stamping on. I had to do a bit of masking to create my scene but nothing too involved. I decided to use the mushroom house, snail, ladybugs, and bee from the Backyard Bugs stamp set and the owl from Woo Hoo to create my scene. I colored all my images with Copic Markers. I slightly curved the Happy Birthday sentiment from the Comfy Creatures stamp set over the top of the owl's head. 

To finish my scene, I hand drew some grass and outlined my images with a blue Copic marker. I backed the stamped panel with a red scalloped rectangle to make the red in the scene really pop. Finally, I attached the scalloped rectangle to my woodgrain card base with some foam tape. I just love how all these cute little critters worked together. So sweet!


Sunny Studio: Owl & Snail Birthday Card by Lindsey Sams (using Backyard Bugs & Woo Hoo stamps)

For today's sneak peek we have a "sweet" new set that will be available for purchase on July 1st.
Sunny Studio Stamps: Sweet Shoppe Stamp Set Sneak Peek

Thanks for reading and be sure to check back to the blog for more fun inspiration! Have a great day!

Tuesday, June 21, 2016

Happy Summer Tropical Card with Anni

Hey stampers, Anni here!

For today' card I used  A LOT of stamp sets: Island Getaway, Fresh & Fruity and Tropical Paradise. All these fun summer sets...


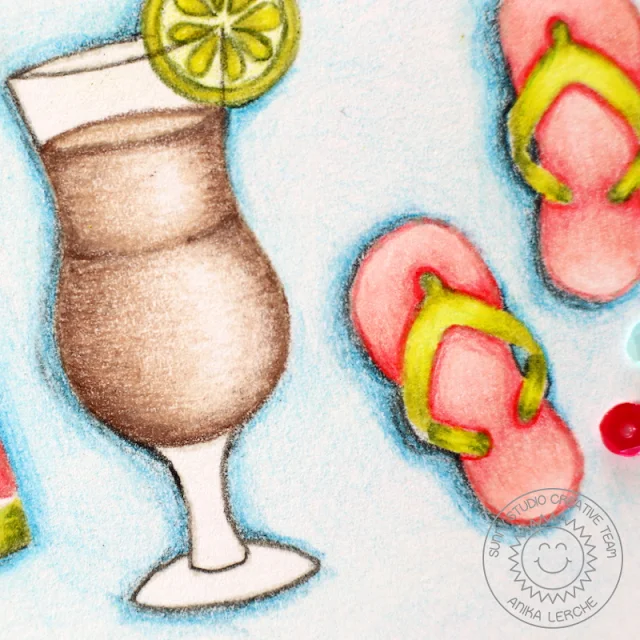
Sunny Studio Stamps: Tropical Paradise, Island Getaway & Fresh & Fruity Summer Card by Anni Lerche.

I went throught my stamp sets and choose all the stamps that screamed summer to me. I put my cardstock in my MISTI, arranged all the stamps as I liked it and stamped all the images at once. For the ink I decided to go with a light tone because I wanted to do some no-line coloring. 

Whenever I have a little bit of time on my hands I love to color with colored pencils. It is my favorite coloring medium because of all these opportunities it provides. But it is a little bit time consuming.  No-line-coloring is still a little bit challenging for me but I love the effect and the totally different look you get.


Sunny Studio Stamps: Tropical Paradise, Island Getaway & Fresh & Fruity Summer Card by Anni Lerche.

I stamped the sentiment with black Versafine ink and adhered the piece of cardstock to my card base with dimensional adhesive. For the finishing touches I used some sequins.

Before I go I have a sneak peek to share of a second new stamp set coming out on July 1st.  


Sunny Studio Stamps: Baby Bear Stamp Set Sneak Peek

Thanks for stopping by and have a sunny week!

Monday, June 20, 2016

Comfy Creatures Island Window Card with Eloise

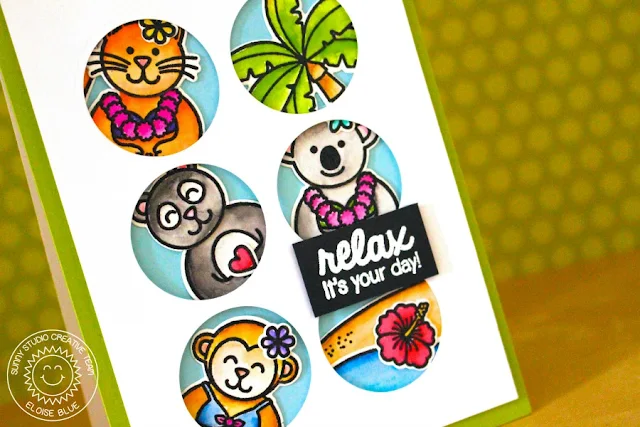
Hey everyone! Eloise here today and I’m here to create a super fun window type card for today’s project. I really enjoyed all the stamp sets from this release, but honestly my personal favourite set from this release was the Island Getaway set. I loved that palm tree image so so much! Plus all the other elements in the set to make scenes, which is my thing, just make the set so amazing. So for todays card I’m going to be using the Island Getaway set along with the Comfy Creatures, Summer Picnic and Sending my Love stamp sets to create my card today. I’m also going to be pulling in the Fresh and Fruity Dies to create my windows in my card today also.

Sunny Studio Stamps: Island Window Card by Eloise Blue (using Comfy Creatures Summer Picnic, Sending My Love & Island Getaway)

So to begin my card today I knew I wanted some images to peak out through some sort of windows. So I was digging through my stash to see if there was some simple shape die that I could use to make a repeating pattern to create some windows and I came across the die that cuts the orange slice in the Fresh and Fruity Die set and it was just a simple circle die – so I used this to create my windows today. I ruled up some guides just using a light hand and a pencil and make spots so the circle die could line up well and create the 6 circles I wanted. Once it was ruled up I ran my die through 6 times to create the pattern. 

I now needed to pick out my images I wanted to use. So I used the tree, island, waves border, hibiscus flower and the monkey in the bathing suit from Island Getaway, the panda / koala head, tail and bodies in bathers from the Comfy Creatures set and the cat head from Sending my Love. I coloured all my images in using my Zig Clean Colour Markers once again and then die cut them all using the coordinating dies.

Sunny Studio Stamps: Island Window Card by Eloise Blue (using Comfy Creatures Summer Picnic, Sending My Love & Island Getaway)


Now it was time to arrange my card together. I first placed a blue cardstock panel behind the window panel and drew around the circles to know where to put my images. I worked through one circle at a time positioning and cutting down the images to fit inside the circle so it doesn’t hang over into the above and below circles. I used all flat runner adhesive for this, as it was easier to keep it all flat.

To finish up my card, I first adhered a piece of green cardstock to my card base and then adhered the blue panel with all the images adhered to the green card base too. I then used some foam adhesive to adhere the window piece over the blue piece with the images and then I needed to figure out the sentiment. I pulled out my Summer Picnic stamp set and stamped ‘relax, it’s your day!’ in some Versamark ink on some black cardstock and heat embossed it in white. I lastly adhered the sentiment with some foam tape also to the window piece and that finished up my card.

I hope you enjoyed my window card today, I had a lot of fun making it and being able to use so many of those cute little animals that you can sort of dress up. 

- Eloise 

Sunny Studio Products Used:
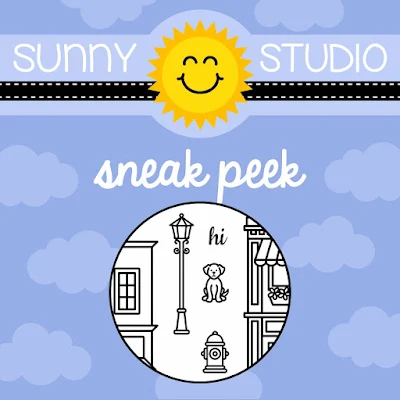
Before I go I have a quick sneak peek to share of one of four new stamp set being released on July 1st.
Sunny Studio Stamps: City Streets Stamp Set Sneak Peek

Make sure you stop by the blog this week to check out some more inspiration & sneak peeks!