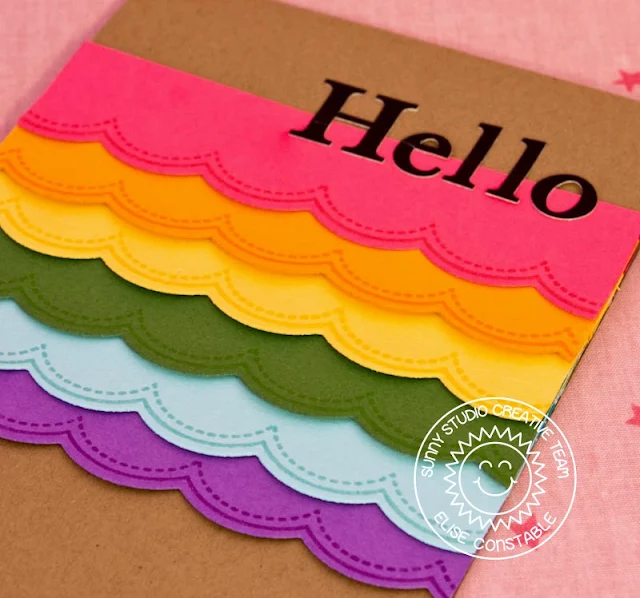
I used a bunch of colorful cardstock to make this bright and cheery card! I started by stamping the border onto the cardstock, and then using the die to cut out the scalloped edge. I arranged the card stock on the kraft card base, trimmed the extra paper off the edge, and added the sentiment with some black stickers. Here is a close up on the scalloped edges:
This card was so fun to make and I can't wait to sent it to a friend and brighten their day! :)
Thanks for stopping by! I'm sad to say that this is my last post on the Sunny Studio design team! I have had a blast being a part of this team, and I am going to miss it! I hope you all have a great day! :)
Hi there. It's Marion here with two cards for you which feature the Sunny Borders and the Sending My Love stamp sets.
I started by stamping the stitched zig-zag border repeatedly in three different colours at the bottom of my white focal panel. I then stamped and coloured the critters onto another piece of card stock and coloured them with Copics. After fussy cutting around them, I popped them up on some mounting foam to add dimension.
I did the same for the second card, but just changed up the colours and the critter and mounted them on different coloured card bases.
Sunny Studio Products used:
Thanks for stopping by today,
Marion
Hello there! It's Heidi here today with one last Easter card mixing together three different stamp sets: The bunny from Sending My Love, the banner from Sunny Borders and the sentiment from A Good Egg.
To create my background peeking through the the circle window I sponged on distress ink using Cracked Pistachio, Mowed Lawn, Mustard Seed and Spun Sugar. My bunny was colored with Copic markers and I heat embossed the banner and sentiment using white embossing powder.
Thanks so much for stopping by for a closer look. I hope you all have a happy Easter! :)
Supplies Used:
Hi everyone, Melissa here! Today I have a card to share using two awesome stamp sets. Sunny Borders and A Good Egg. I love this banner from Sunny Borders!
To create this card I first cut a small square out of white paper. I stamped all the images where I wanted them, masking off the basket and the chick to add the larger basket behind. After they were all stamped I colored the whole scene with Copic markers.
I then added the banner from Sunny Borders and the “Happy Easter” sentiment from A Good Egg to the top of the card - then colored it in with Copic markers. To finish the card off I adhered it to a card base with striped patterned paper.
I hope you enjoyed the card for today! Thanks for stopping by! :)
I'm so excited to finally share what I have been busy working on! Without further ado here is our full new release for Summer 2016 available for purchase on April 1, 2016. :)
Sneak Peek #1 Tropical Paradise Stamps & Dies
Sneak Peek #2 Island Getaway Stamps & Dies
Sneak Peek #3 Fresh & Fruity Stamps & Dies
Sneak Peek #4 Stars & Stripes Stamps & Dies
Sneak Peek #5 Summer Picnic Stamps & Dies
Sneak Peek #6 Comfy Creatures Stamps & Dies
Sneak Peek #7 Woo Hoo 3x4 Stamps & Dies
Sneak Peek #8 Wavy Borders Dies & Star Border Die
Sneak Peek #9 Birthday Smiles Dies & School Time Dies
I'd love to hear what you think and what you're most excited about! I can't wait to show you all the ideas I've been working on with these new stamps & dies! Make sure to check back starting on March 28th. I will be sharing lots of fun ideas the entire week leading up to release day! :)
So how did you fare in your guesses for the sneak peek contest? I had so much fun reading your guesses. So many creative names. I think I should enlist your help when it comes to naming our sets! ;)
The first person to guess the closest and the winner of the $25 gift certificate is: Dara Hoffman. Congratulations! Email me at info@sunnystudiostamps to receive your special discount code.


