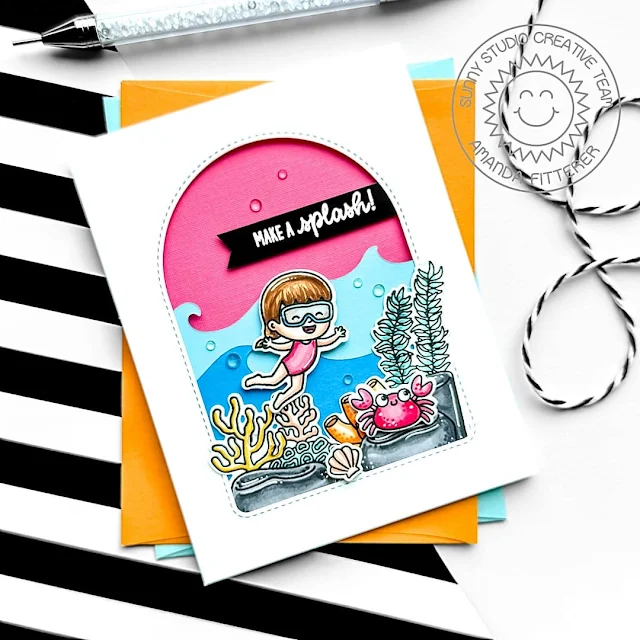
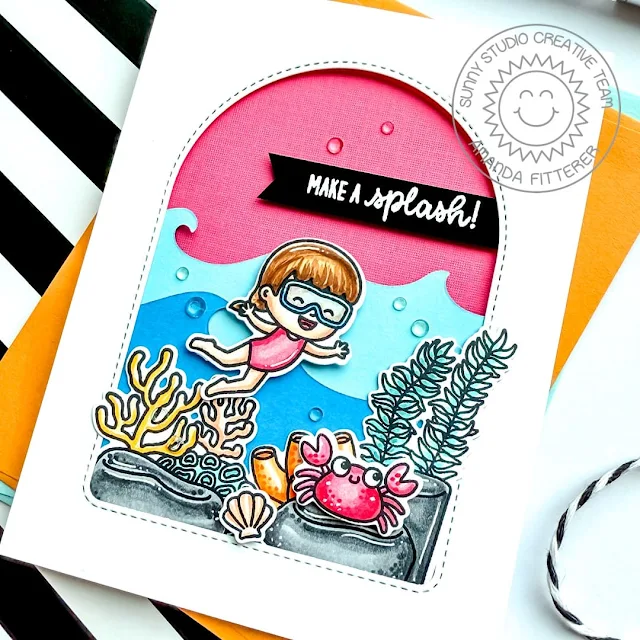
Hey crafters! It’s Amanda here! Today, I’m sharing this fun summer card and how I made it! Keep reading to see all the products I used, Copic markers, and how I put it all together!
The first step to creating this card is to trim a piece of white cardstock to 4.25”x5.5”. Next, using some low tack tape, secure the largest of the Stitched Arch Dies in the center of the panel. Set this panel aside for later.
Next, grab 2 pieces of blue or teal cardstock for the waves. Using the Catch a Wave Dies, create 2 waves that are approximately 4” wide. Glue the waves together and then place foam tape behind them.
On an A2 card base, glue a piece of red cardstock directly to the front of it. Then, attach your waves with the foam tape. Place foam tape only on the upper portion of the arch panel. Put glue on the bottom portion where it touches the waves. This will keep the arch panel level.
Grab your Ocean View and Kiddie Pool Stamp Sets, a MISTI or stamping platform, and alcohol marker-friendly black ink. Stamp the images with the black ink and then get your Copic markers ready!
Here are the Copic marker colors I used to color this scene:
Girl:
Hair: E53, E55, E57, E59
Skin: E00, E11, E13
Mouth: R37, R59
Suit: RV23, RV25, RV29
Goggles: B02, B06 (B21 for the lenses)
Crab: RV23, RV25, Rv29, R46
Rocks: N4, N5, N6, N8
Plants & Shell:
YR000, YR12, YR15, YR16, YR18
Y32, Y35, Y38
E00, E13
BG11, BG13, BG15
Once coloring is complete, trim the images out with the coordinating dies or fussy cut them with scissors. Add some white highlights and dots with a white Gelly Roll pen.
On a small piece of black cardstock, stamp the sentiment with a WOW embossing pad, apply white embossing powder, and then melt the powder with a heat tool. Trim the sentiment into a strip and then create a flag/banner edge with scissors.
Glue the rocks and plants directly to the waves, having the edges poke out in front of the arch. Then, put 3D foam squares behind the girl, crab, shell, and sentiment strip and add them to the scene. Finally, glue a few of the Clear Jewels around the card to complete the card!
What a fun layout for a card using that Stitched Arch Die! I hope you enjoyed reading about this card! Come back tomorrow for more crafty inspo!
Sunny Studio Supplies Used:
 Catch A Wave Dies Shop at: Sunny Studio |
 Stitched Arch Dies Shop at: Sunny Studio |
 Ocean View Stamps Shop at: Sunny Studio |
 Ocean View Dies Shop at: Sunny Studio |
 Kiddie Pool Stamps Shop at: Sunny Studio |
 Kiddie Pool Dies Shop at: Sunny Studio |


No comments:
Post a Comment