Hello there! Today is all about ideas featuring our Comfy Creatures and Summer Picnic sets! I hope you will take a look at all the fun ideas and sign up for today's giveaway.
I found myself turning to Comfy Creatures over and over again while working on my cards for this release. It has so many versatile images that compliment our other sets for fun scene building options. While I sadly forgot to use them together for my cards this week, the new Comfy Creatures set was designed to mix and match with our previously released Sending My Love stamp set for endless combinations. I also added two tails to the new set which can be added to either side of the body which work great for the cat and monkey faces.
Up first is a fun scene using the Summer Picnic stamps and the grassy border stamp from Sunny Sentiments. I might have gone a little overboard with all the images I layered on this card, but it was hard to stop with all the cute choices available in this set!
My second card features the boy body in swim trunks and the hula girl body from Comfy Creatures. I decided to turn them into monkeys using the two different faces provided in the set and stamping their tails so that they could intertwine with each other.
I cut my card base using the Stitched Heart Dies and masked off my beach and waves using Post-it Tape and our new Wavy Border dies featured on Monday (inked up from top to bottom in Tumbled Glass, Tea Dye and Salty Ocean distress inks). After the ink was dry I heat embossed my greeting using the "aloha" sentiment from the new Island Getaway stamps.
Up next is another card featuring the different critters from Comfy Creatures. I inked up each rectangle in my grid design using Twisted Citron, Mermaid Lagoon, Mustard Seed and Peacock Feathers distress ink. I then stamped a subtle print in the background of each using some of the smaller images from the set (borrowing the leaf from Island Getaway). When the distress ink was completely dry I heat embossed my sentiment in white.
These critters were designed to be able to stamp together in a single layer, but I accidentally made a coloring mistake on my little monkey's head so I ended up stamping a second head and layering over the top with foam tap. I love the dimension it gives him. To bad he didn't fall in the center to make things look a little more balanced. ;)
My next card uses the tree from Summer Picnic (LOVE the versatility of that tree), the monkey and sentiment from Comfy Creatures, the grass from our Sunny Sentiment dies and our Fishtail Banner dies.
I was inspired to color my grass using a technique similar to the one shared by Nina Trapani in her tutorial HERE. I included two different bananas in the comfy creatures set: one by itself and one for the creature to hold. I used the extra banana in the set to stamp a random pattern in my background to reinforce the sentiment.
My next card is a simple take on the Summer Picnic set. I paired the fun little ant images with the trail from the Backyard Bugs stamps. I then cut a simple frame from patterned paper on my paper trimmer and stitched it to the perimeter of my card.
My last card uses the squirrel and tree (cut in half) from Summer Picnic, the birthday sentiment from Comfy Creatures, the banner and "let's celebrate" sentiment from Stars and Stripes and the grass border from Sunny Sentiments for a fun birthday card. I think this would be super fun done up with a Fourth of July take too! ;)
And here's another look at the new products featured on today's cards...
Would you like to win some of these fun new products? Today we are giving away the Summer Picnic and Comfy Creatures stamps to one lucky winner using the Rafflecopter below. If you're just joining us, make sure to check out our giveaways earlier in the week. We will also be back tomorrow with one last prize featuring our graduation set.
Winners will be announced here on the blog on Sunday, April 3rd. :)
a Rafflecopter giveaway
I hope I've helped jump start your creative juices. I can't wait to see what fun projects you create with all these set. Just a reminder that all our new products will be available for sale first thing tomorrow morning in our online store. ;)
Hello there! How are you doing today? I'm really excited to share ideas using our new Stars & Stripes stamps and the new standalone 5.5" star border die coming out on Friday! While you're here be sure to sign up for our drawing of the day for your chance to win them! ;)
My first card uses the featured Stars & Stripes Stamps, along with the panda and koala bear from the Comfy Creatures set being featured tomorrow, the shadow image from the Sunny Borders stamps and the new Star Border die. I cut the star border from two different colors of blue cardstock and then added the stars back into the border using a Zig glue pen.
The little hat from the Stars & Stripes stamp set was designed to fit all our various creatures. Using that as my jumping off point I went fully patriotic on this set. I love how depending on the way you color the little clothes from Comfy Creatures and what you have them hold, you can create a completely different look!
Up next is a card using the stars from the set, along with the star border stamp from our Sunny Borders stamp set which I used to create a tone-on-tone background with VersaMark ink. After I arranged the stars, I adhered them with a glue pen and popped some up with foam tape for extra dimension. I also added some clear Wink of Stella glitter to all the smaller stars and a little glossy accent to a few random ones.
For my next card I used that same star border stamp from the Sunny Borders stamp set, alternating between red and blue ink. I then sponged on festive berries and mermaid lagoon distress ink over the top using mini sponge daubers. I colored my rocket pops in coordinating colors with Copic Markers, stamped little faces on them using the faces from the set and then covered them in glossy accents to make them shiny. I think you could get a little extra life from this image by coloring it in fun happy colors for summer too.
For my next card I wanted to create a special card perfect for giving to a loved on Veteran's day or for putting in the mail telling our military men and women how much they mean to us. I used the bunting image to create a little banner and paired it with the flag from the set.
Before I go, I wanted to share a couple of everyday ideas using this set just to show how versatile it can be. I love blue, black and yellow together and I couldn't wait to create a fun scene using this little rocket and matching sentiment. The set comes with 4 different curly trails that are perfect for pairing with the rocket. I think with a little creativity you might be able to use them to create your own firework image too. ;)
To color my images I used Copic Markers in Y15, Y17, Y19, Y38 and YR04. For my background I sponged on Mermaid Lagoon and Blueprint Sketch distress inks trying to create an ombre effect where my die-cut window was. To add a little variation, I heat embossed three of my tiny stars in white, along with my sentiment and rocket trails.
For my last card I used the pinwheel image along with a pocket die-cut on my Silhouette. The bunting image from the set can be colored in patriotic colors, but it also looks great colored in fun rainbow colors! On a side note, I needed the lengthen the stick on my pink pinwheel so I stamped an extra stick and tried to hide the seam behind the yellow pinwheel. ;)
To create the fun shape of my card I used our Fishtail Banner dies in front (leaving it flat in back to make it easier to stand. I then filled the bottom inside of the card with some fun coordinating patterned paper (not shown).
And here's another look at the new products featured on today's cards...
Would you like to win some of these fun products? Today we are giving away the Stars & Stripes stamps & Star Border die to one lucky winner using the Rafflecopter below. Come back everyday this week for another chance to win the products featured that day.
Winners will be announced here on the blog on Sunday, April 3rd. :)
a Rafflecopter giveaway
I hope I was able to inspire you today. We're more than half way through our inspiration week. Check back tomorrow for ideas using our Summer Picnic and Comfy Creatures sets. Until then...
Hello there! We're back today with lots of ideas using our new Fresh & Fruity stamps and dies coming out this Friday along with another GIVEAWAY!
Up first I have a card using a number of the different fruit images from the set, along with the pineapple from the Tropical Paradise stamp set shared yesterday. All of my images were colored with copic markers and then I stamped the texture on my lime and lemon using the extra image in the set with inks a bit darker than my copic coloring. I also used a white gel pen to add shiny marks to my orange and watermelon slices.
I finished off my white cardstock panel by die-cutting the bottom edge using a border die from the Sunny Border dies (the patterned paper is from an older Doodlebug collection called Fruit Stand).
Up next I have a card using the strawberry image from the set. I started by coloring my strawberries with Copic Markers. This image has a fun companion image with the seeds that can layer over the top of the main image. I created these as a separate stamp to increase flexibility with your designs. It can either be heat embossed in white or left off so that a cute little face from the set can be stamped instead. I love both versions, but I am especially smitten at how the seeds pop when heat embossed!
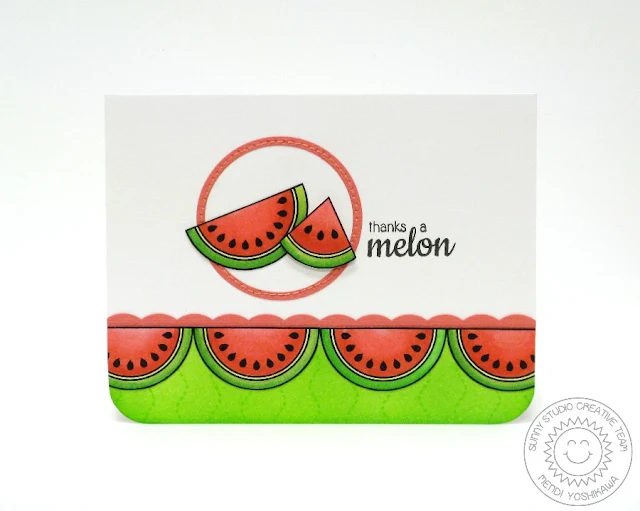
Up next is a card focusing on the watermelon images. I thought it would be fun to use the watermelon slices to create a scalloped border. I cut another little scallop from coral cardstock using our Sunny Borders dies and then stamped a subtle tone-on-tone background using Twisted Citron and Mowed Lawn distress inks along with the wavy stitched stamp from Backyard Bugs.
My next card uses the citrus slice from the set. I stamped several citrus slices onto masking material, fussy cut them out and then used them to mask of the areas where the images overlapped. I stamped my citrus slices with clear VersaMark ink onto white cardstock, heat embossed the images with white embossing powder and then colored them in with my Zig Clean Color Real Brush Markers, a little water and a spare paint brush.
I really struggle with watercolors, but I love how the heat embossing gives you a raised line to color within. I am also in love with using the Strathmore Bristol paper with these Zig markers. I love the smooth surface and the way the pens blend on the paper.
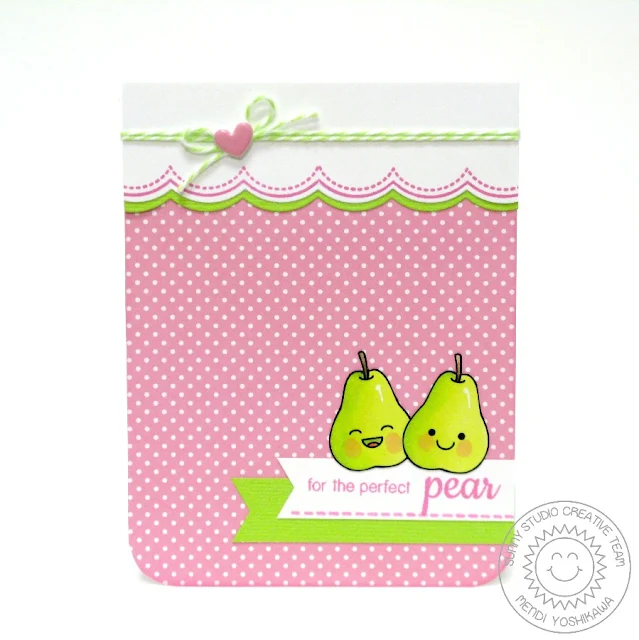
My next card focused on the pears and coordinating sentiment. One of my favorite color schemes is pink and green so I thought it would work well for this card. I paired Doodlebug's new swiss dots petite prints paper with the scalloped border stamps from Sunny Borders and the Sunny Borders dies. I used the two faces from the set to add a little personality to my two pears and cut out the strips of paper for my sentiment using the Fishtail Banner dies.
For my last card I used the cherries and sentiment from the set and the sprinkles image from the Birthday Smiles stamp set which I heat embossed in white to create my tri-dot pattern. I actually cut and colored two of the cherry images and then popped the second image up over the first with foam tape, offsetting the leaves to create dimension. I also added some shine to my cherries using glossy accents. :)
And here's another look at the new stamps & dies featured on today's cards...
Would you like to win some of these fun products? Today we are giving away the Fresh & Fruity stamps & Wavy Border dies featured yesterday to one lucky winner using the Rafflecopter below.
Winners will be announced here on the blog on Sunday, April 3rd. :)
a Rafflecopter giveaway
I hope you enjoyed all the ideas today. Come back everyday this week for more ideas and for another chance to win the products featured that day. ;)
Hello there! I'm so thrilled to be kicking off the countdown to our new release on Friday with some fun projects using the newest sets along with a GIVEAWAY each day! Today I am showcasing just a few of the fun ways you can use Tropical Paradise, Island Getaway and our fun new Wavy Borders dies!
Up first is a card using Island Getaway and borrowing a monkey from the new Comfy Creatures set to be showcased on Thursday. ;) For this card I die-cut clouds from a sticky masking material using the dies from Rain or Shine and Sunny Sentiments. I added them to my background before sponging on Tumbled Glass distress ink. I then layered on some Peacock feathers distress ink along the bottom of my card front feathering out the color to blend with the tumbled glass. I then stamped the waves over the top in Tumbled Glass using the waves stamps from the set.
To create the hammock, I die-cut a circle from some extra white cardstock and then cut another circle in same size from the edge of the original circle to create the moon shape. I then inked it up with a heavy layer of that same Peacock Feathers distress ink and traced the edge with a sharpie (using a piece of scratch paper beneath it) to give it the appearance that it had been stamped like the rest of the scene.
For my next card with Island Getaway, I used the same cloud masks from the Rain or Shine and Sunny Sentiments dies. Then for my waves, I sponged on Peacock Feathers, then Mermaid Lagoon and Salty Ocean distress inks with masks cut with the Wavy Borders dies. I used Post-it tape and was able to cut and use them over and over again on a number of cards before they lost their stickiness. I love the finished results of the waves with the layered colors!
I finished my card by coloring in the flip flops and the little clothespins from the set with Copic Markers and stamping a sentiment onto a strip of paper, cutting the end with our Fishtail Banner dies.
For my third card using Island Getaway I wanted to create a card with the monkey playing in the waves. I used my island stamp in the set to form my sandy beach, hiding the edge behind some die-cut waves. This time for my waves using the Wavy Borders dies I cut them all from white cardstock. I then sponged on ink starting at the bottom using Salty Ocean, trying to make the blend gradual and keeping the top edges fairly light. I love how it gives a frothy appearance to my waves and makes them stand out against each other. I finished my card with a flower in the corner from the Tropical Paradise set.
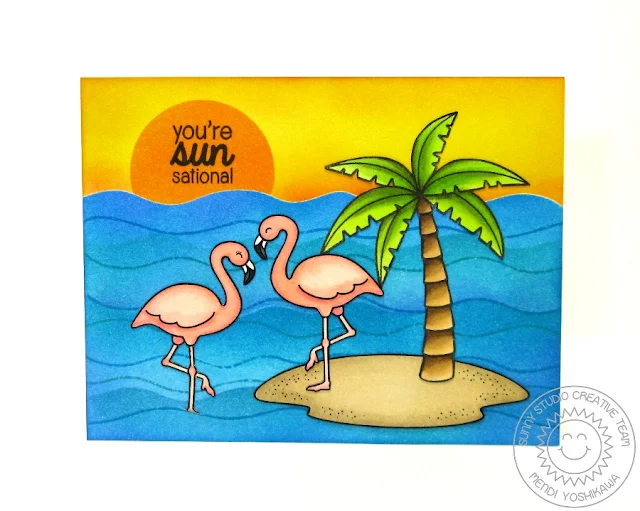
Up next I have a card combining the palm tree, island, waves & sentiment from Island Getaway with the flamingos from Tropical Paradise. For this card I used my mask to sponge on Peacock Feathers, Salty Ocean and Mermaid Lagoon ink on the bottom two-thirds of my card, moving the mask down as I worked to add some different layers of color. I then used the waves stamp from Island Getaway to add some more waves. For the top half, I cut a second mask using the other side of the die and sponged on Mustard Seed and Spiced Marmalade distress inks. Keeping my wave mask in place, I layered the negative portion of a circle mask over the top and inked the sun in more Spiced Marmalade before stamping my sentiment over the top in black ink.
My stamped images were colored with Copic markers and I cut a little sliver from my wave using a craft knife to slip one of the flamingos feet into the water so it didn't look like it was walking on water. ;)
My next card uses the florals from Tropical Paradise, the smaller hibiscus flower (in my background piece) from Island Getaway and a sentiment from the Sunny Sentiments stamp set.
For this card I sponged my background with Peacock Feathers distress ink and then stamped the subtle flower print in the background using Tumbled Glass distress ink. My flowers were colored in Copics and my sentiment was stamped using SSS Doll Pink ink
For my last card today I wanted to focus on all the fun fruity drinks and pineapples from the Tropical Paradise set. I started by die-cutting a circle from white cardstock and lightly sponging on some Tumbled Glass distress ink in the center. I then layered my stamped images colored with Copics, grounding them with a banner from our Sunny Borders stamp set. For my sentiment I borrowed one from the Island Getaway set, curving it on my clear acrylic block to match the curve of my banner. The outer frame of my card was inked using Mustard Seed and Spiced Marmalade distress inks and then I used a small heart stamp from the Tropical Paradise set with the Mustard Seed ink to stamp a repeated pattern.
That's all I have for you today. Here's another look at all the new products featured on today's cards...
Would you like to win some of these fun products? Today we are giving away the Tropical Paradise and Island Getaway stamps to one lucky winner using the Rafflecopter below. Come back everyday this week for another chance to win the products featured that day.
Winners will be announced here on the blog on Sunday, April 3rd. :)
a Rafflecopter giveaway
I hope you enjoyed all the ideas shared today. I had so much fun playing with these sets!
Happy Easter! I hope you're all having a wonderful day without too much rain (sadly after a beautiful Saturday, it's raining here in the Pacific Northwest). :(
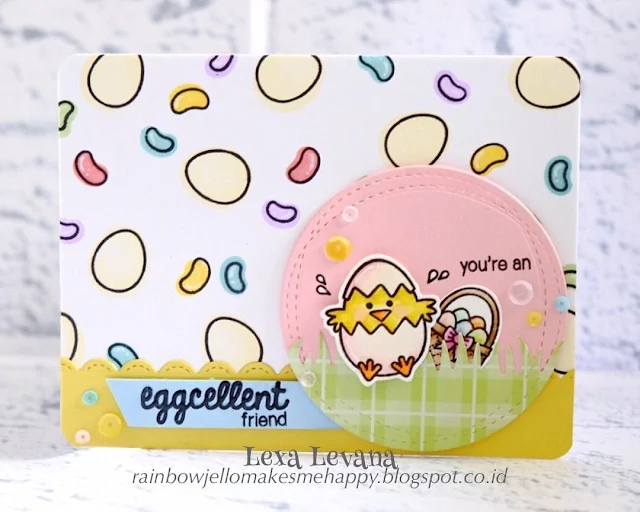
Well, I couldn't resist putting together a last minute post giving a shout out to all our wonderful customers who created beautiful projects over the last week using our A Good Egg stamps and coordinating dies.
Easter Chick & Jellybeans card by Lexa Levana (@lexalevana on instagram)
I'll be back tomorrow to kick off our inspiration week with loads of ideas using our new stamps. I seriously can't wait to finally share what I have been madly working on over the past few weeks. I hope you all enjoy your day! Big Hugs! :)


