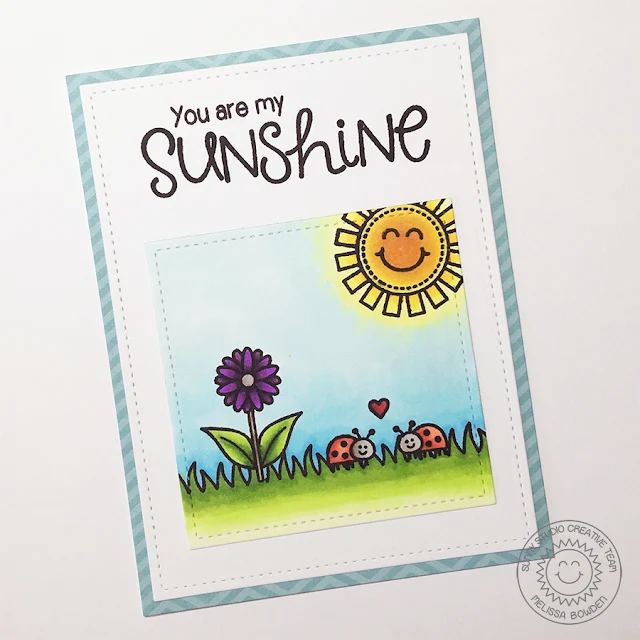
Hello everyone, Melissa here! Today I have a card to share using the stamp set Backyard Bugs (and the letter from Sending My Love). This set is my favorite from the spring release, it is so good for making scenes and the little bugs are too cute!
To make this card I first stamped the sentiment on the top of a small rectangle of white card. I wanted to do this first so I knew exactly how much room I had to fit my scene. I then stamped and masked all of the images, starting in the foreground and working my way back. I then removed all of the masks and colored the images with Copic markers. To finish up the card I attached it to a piece of yellow patterned paper.
I hope you enjoyed the card for today and that you love this stamp set as much as I do! Don’t forget to check back for more inspiration!
Monday, February 29, 2016
Saturday, February 27, 2016
Sunny Saturday Share: Spring & Easter Themed Cards
Happy Saturday! Today I'm popping in with some awesome Easter cards spotted on instagram this past week.
Up first we have a couple cards by the talented Lindsey Sams (@baileyl5) using our A Good Egg Stamps and coordinating dies.
When I saw this darling card I literally squealed. How clever is it to stack all the eggs together with the chick on top?! I love her beautiful coloring and the fun glittery accents she added to the eggs with a wink-of-stella pen (you might have to visit her feed to see the beautiful close-up shots to fully appreciate all her beautiful details). ;)
Her second card is equally adorable. I am loving the fun die-cut scalloped borders in her background and how it ties together all the colors in her images!
I also adore these sweet cards by Sarah Elliott (sarahelliott76 on Instagram) using the same A Good Egg Stamps. :)
She shares a fun video on how she created these on her YouTube channel HERE. I found her so soothing to listen to her creating and explaining her process while I worked. She's a wonderful teacher! :)
Last, but certainly not least I spotted this darling card by Tanya Adams (studio5380 on Instagram) using our Backyard Bugs stamps. I am so smitten with her color scheme. Pink and green is one of my favorite combinations and with pink mushrooms it's even better! Loving her sweet die-cut lace border and her beautifully colored grass too! :)
Aren't these all so cute?! We'd love to see what you've been creating with our stamps & dies too! As always you share your creations with us on our Facebook page, in our Flickr group or by tagging us with the hashtag #SunnyStudioStamps on instagram.
I hope the rest of your weekend is happy! :)

Friday, February 26, 2016
Rain or Shine Puppy Dog Get Well Card with Francine
This set is FANTASTIC! There are so many ways to use it. You can mix the images together to make a scene or create a clean and simple design. I decided to focus on the dog with his yellow rain coat (even if the stamped image was black and white, I saw it "yellow" *ha ha* but of course, you can choose another color for the coat lol). I colored the cute doggie with Copic markers and fussy cut him with scissors. There are also coordinating dies for this stamp set in case you don’t like fussy cutting!
Next, I created a circle shaped card using blue gingham design paper and yellow cardstock for the base. I love the yellow-white-blue color combination! It’s so fresh, isn’t it? The sentiment, also from the Rain or Shine set, was stamped with black ink and I framed it with twine. To finish off my card, adhered the images with foam pop dots to the card base for more dimension.
I hope you enjoyed this post! Thanks for stopping by and happy crafting!
Thursday, February 25, 2016
Rain or Shine Weather It Together Card with Elise
Hi there! It's Elise to share an encouraging card that features the "Rain or Shine" stamp set and dies from Sunny Studio Stamps!
The images are all stamped in black ink and colored with Prismacolor pencils. I really wanted it to look like the puppy had its arm around the other puppy! The images are all attached with foam tape for some extra dimension, and I also added some details with a white gel pen. Here is a close up on the puppies:
I used a grey colored pencil to add some shading below the puppies, and I also used some blue ink to stamp the raindrops in the sky.
I hope you like this card! Thanks for stopping by and come back again tomorrow for some more inspiration! :)
Wednesday, February 24, 2016
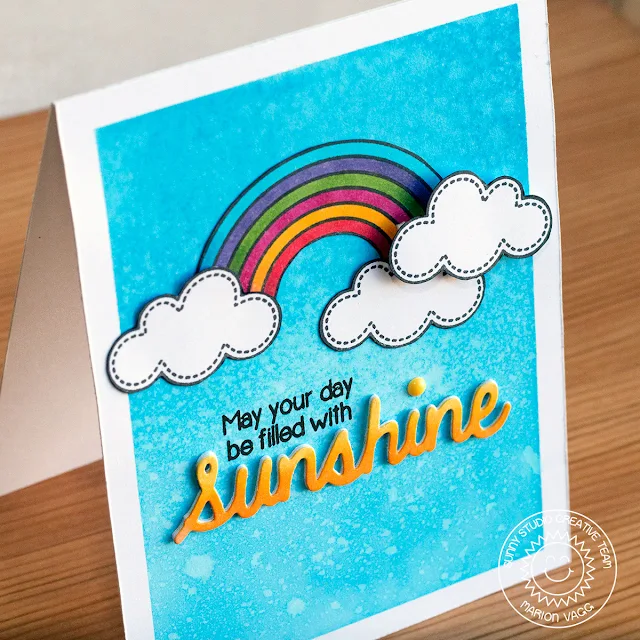
May Your Day be Filled with Sunshine Card by Marion
Hello. It's Marion here with another card using the Rain or Shine stamp set. I've also used the Sunny Sentiments stamp set for the greeting as well as the Sunshine word die.
I stamped and fussy cut the rainbow and the clouds (there are matching dies for the Rain or Shine set but today I felt like fussy cutting). All images were coloured with Copic markers.
To create the background, I masked off the edges of a white piece of card stock with some masking tape. I then used an ink blending tool and some Salty Ocean distress ink to create the sky. It lacked some texture, so I spritzed the panel with a mister filled with water and then dabbed up the excess water with paper towel. The water reacts with the Distress ink, to create the fun water splattered effect.
I die cut the Sunshine word die about 4 times and adhered them together. The top layer was coloured with Copic markers to create the ombre effect. It's hard to tell, but the Sunshine word die is also covered in a layer of Clear Wink of Stella Glitter brush pen.
Sunny Studio products used:
Thanks for stopping by. I hope you are having a great day.
Marion
I stamped and fussy cut the rainbow and the clouds (there are matching dies for the Rain or Shine set but today I felt like fussy cutting). All images were coloured with Copic markers.
To create the background, I masked off the edges of a white piece of card stock with some masking tape. I then used an ink blending tool and some Salty Ocean distress ink to create the sky. It lacked some texture, so I spritzed the panel with a mister filled with water and then dabbed up the excess water with paper towel. The water reacts with the Distress ink, to create the fun water splattered effect.
I die cut the Sunshine word die about 4 times and adhered them together. The top layer was coloured with Copic markers to create the ombre effect. It's hard to tell, but the Sunshine word die is also covered in a layer of Clear Wink of Stella Glitter brush pen.
Sunny Studio products used:
- Rain or Shine stamp set
- Sunny Sentiments stamp set
- Sunshine word die
Thanks for stopping by. I hope you are having a great day.
Marion
Tuesday, February 23, 2016
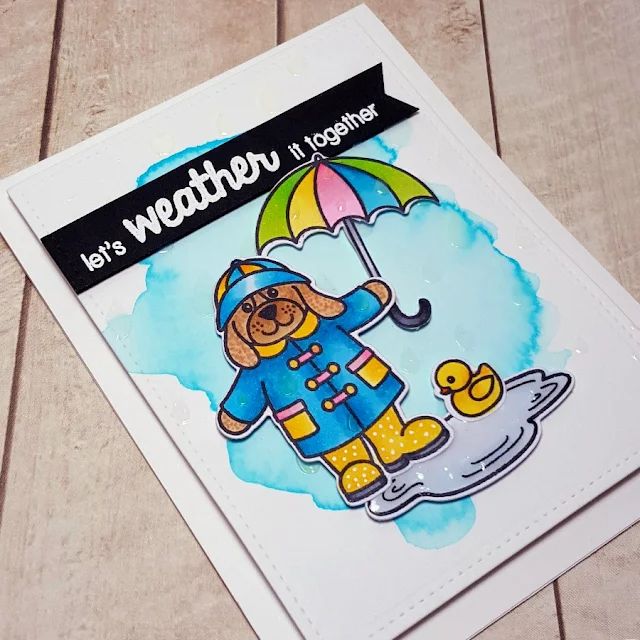
Rain or Shine Watercolor Encouragement Umbrella Card with Heidi
Hello there! It's Heidi here today with another card using the Rain or Shine stamps & coordinating dies.
To go with my rainy theme I created a watercolored panel for my backdrop. I started by applying water to my cardstock and then dropped in color using my Tumbled Glass re-inker (which had been lightly watered down on an acrylic block on the side beforehand).
My images were colored with Copic Markers and afterwards I embellished with a gel pen adding dots to the rain boots and giving the puppy dog some freckles. As a finishing touch I added drips of glossy accents to the umbrella and some drops of glossy accents to the background the reinforce the rainy day theme.
Thanks so much for stopping by. The team will be back again tomorrow with more ideas using this fun set! :)
Monday, February 22, 2016
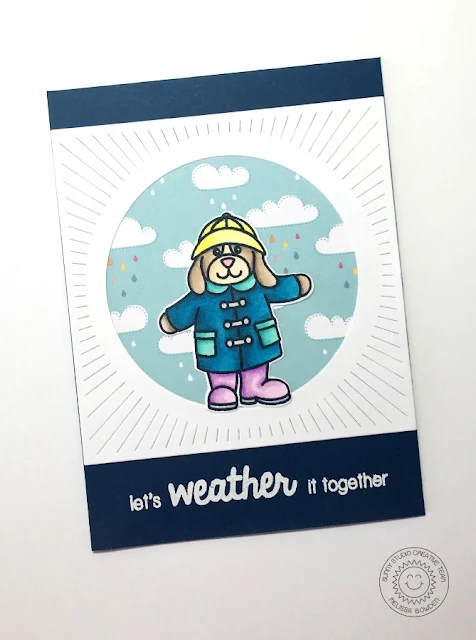
Rain or Shine Let's Weather It Together Card with Melissa
Hello everyone, Melissa here! I am sharing a card with you today featuring the Rain or Shine stamp set and coordinating dies!
To create the card for today I first built the background of the card. I die cut this fun sunburst die out of white paper and put some patterned paper underneath it. The clouds and rain drops fit the scene perfectly. I then stuck those onto a navy card base. I stamped the “lets weather it together” sentiment on the bottom in Versamark ink and heat embossed it with white embossing powder. I then stamped the little dog from the set off to the side on some white paper. I colored him in with Copic markers and used the coordinating die to cut him out. I then stuck him to the card with his feet just resting on the bottom of the circle.
That finishes up the card for today. I hope you liked it! Thanks for stopping by! :)
Saturday, February 20, 2016
Sunny Saturday Share: Customer Cards & Tags for Spring
Happy Saturday! I'm popping in with some great projects spotted on the web in the past week or two from our wonderful customers.
Up first is a super cute set of Easter tags by Ashley @sparklycanadiancraftygirl using our A Good Egg stamps and matching dies. I'm so in love with her bright happy colors and the idea of monochromatic tags! :)
Ashley shared another project using the eggs, easter basket & sentiment from that same A Good Egg stamp set (with some other stamps from her stash) to create this darling Easter card. So cute! :)
For our third project, Anastasiya Sokolova at @stasynic shared this darling card on instagram using our Happy Home stamp set (which is currently sold out, but expected back in stock in early March). Love her cute use of the fence die in the foreground. Such a fun little scene! :)
We'd love to see what you've been creating with our stamps & dies too! As always you share your creations with us on our Facebook page, in our Flickr group or by tagging us with the hashtag #SunnyStudioStamps on instagram.
I hope the rest of your weekend is happy! :)
Friday, February 19, 2016
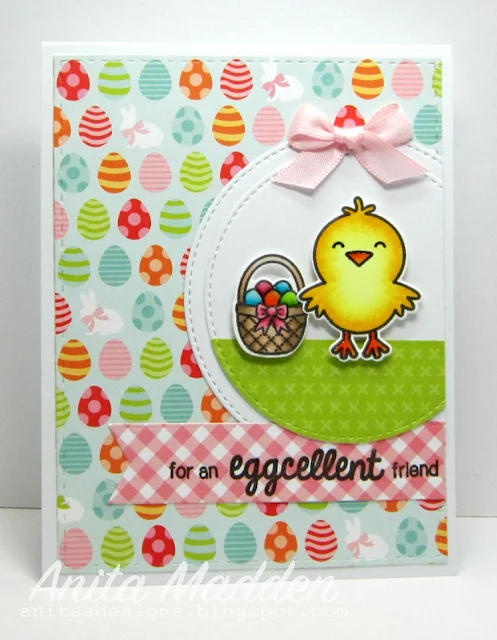
Guest Designer Spotlight: A Good Egg Easter Cards by Anita Madden
I'm so excited to welcome Anita Madden as a special guest to the blog today! Her darling cards caught my eye over at Instagram and I was delighted when she agreed to create some cards to share with us today! Take it away Anita...
Hello everyone! I’m so excited to be guest designing for Sunny Studio Stamps today. I used the A Good Egg stamp set and the coordinating dies to make the cards I’m sharing today.
I colored everything with copics and cut out all the images with the coordinating dies. I used some white acrylic paint to add polka dots to some of the eggs and I added Glossy Accents to the chick’s beak and feet. I cut my papers with stitched rectangle dies and stamped the sentiment on a flag banner. I added a few enamel dots to finish off my card.
I cut the cardstock panel with a stitched rectangle die and using the masking technique, I stamped the chick and some eggs. I masked the images and sponged on some blue and green inks. I colored the chick and eggs with copics and used Glossy Accents on the chick’s beak and feet. I adhered fun foam behind the cardstock panel and then adhered it to the card base. Again, I added some enamel dots to the card.
I colored the images with copics and cut them out using the dies. I added Glossy Accents to the chick’s beak and feet, and also to the eggs in the basket. I cut the egg designer paper with a stitched rectangle die and cut two circles with a stitched circle die. I also cut a piece of green dp with the stitched circle die for the “grass”. I stamped the sentiment on a flag baner and added a small bow.
I used a stitched rectangle die to cut a piece of watercolor paper and then applied water and distress inks to create the watercolored background. I colored the images with Copics and used the dies to cut them out. I added Glossy Accents to the chick’s beak and feet, and also to the paint in the can. I added some sequins for a little bit of sparkle.
Didn't Anita do a fabulous job?! I'm in love with every single adorable card! I hope you will stop by her blog and leave her some love! :)
Thursday, February 18, 2016
A Good Egg Happy Easter Card with Elise
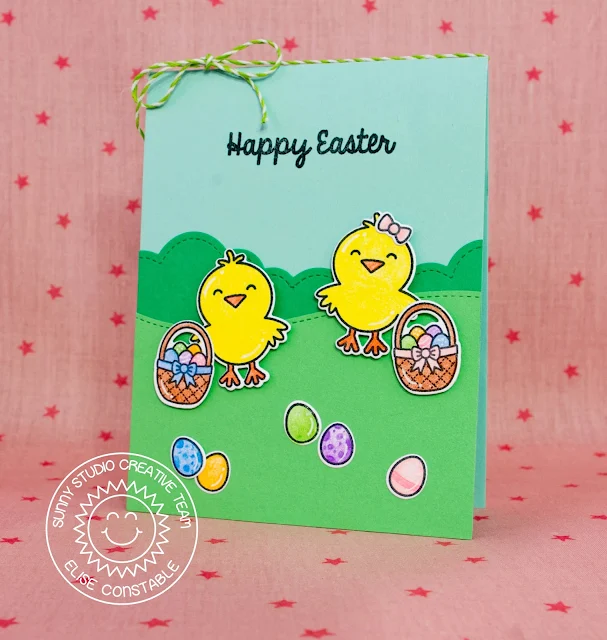
Hello everyone! It's Elise here to share an Easter card with you that features the "A Good Egg" stamp set and die!
I added some extra details to the chicks, Easter basket, and eggs with my white gel pen. That is such a fun and easy way to add some extra detail without much work! I also thought that the girl chick needed a pink bow for her hair! :)
Thanks for stopping by and stop by again tomorrow for some more inspiration! :)
Wednesday, February 17, 2016
You're an Eggcellent Daughter Card by Marion
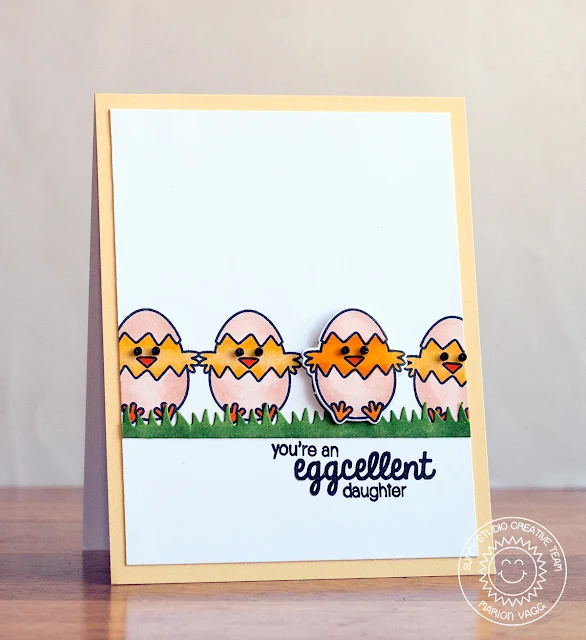
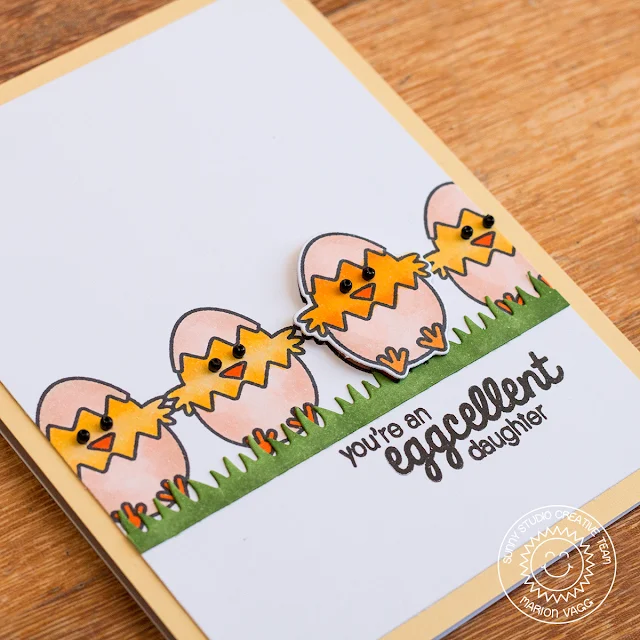
Hi there. It's Marion here with another card using the Good Egg stamp set. This set is great for Easter and has some fabulous punny sentiments in it. I've made a card for my daughter - I'll pop it in her school lunch box sometime.
Sunny Studio Products used:
Thanks for stopping by,
Marion
In order to line up my chicks in a row, a lightly drew a pencil line as a guide. Once stamped, I coloured them with Copic Markers. I decided to use the coordinating dies and stamp and die cut an additional chick to pop up for some foam tape.
I also die cut some grass from the Sunny Sentiments die set and coloured it with Copic markers. The eyes are little black seed beads that I adhered with Glossy Accents.
Sunny Studio Products used:
Thanks for stopping by,
Marion
Tuesday, February 16, 2016
You're An Eggcellent Friend Easter Chick Card with Heidi
Hello there! It's Heidi here today with a bright and cheerful card using the "A Good Egg" stamp set and coordinating dies.
To create my card I first watercolored rainbow stripes onto some white cardstock using a wide paintbrush. I then die-cut the panel using a stitched rectangular die from my stash.
To create my scene I colored six of the eggs, the paint bucket and little chick with my Copic Markers to match the watercolors. I added a strip of black cardstock to help ground my scene and make the images pop.
I hope I've inspired you to take a closer look at this adorable set! Make sure to stop back by for more inspiration this week using the Sunny Sentiments stamp set.
Monday, February 15, 2016
A Good Egg Baby Chick Easter Card with Melissa
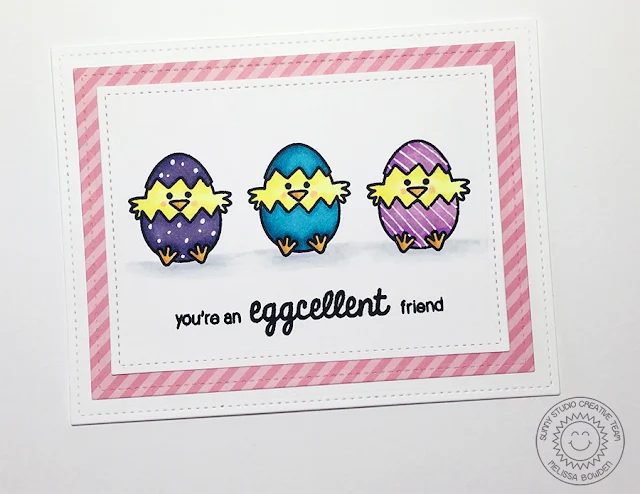
Hello everyone! Melissa here. :) I am sharing a card with you today using the super cute stamp set A Good Egg, this set is perfect for Easter but also works well for plenty of other occasions. It is just too cute! I created a super simple card...
To make the card I stamped this cute sentiment on the bottom of a rectangle die-cut panel. I then stamped three of the little chicks hatching in a row and colored them with Copic markers. I added little dots with a gel pen to the one on the right and added some stripes to the one on the left. To finish the card off I added a little shadow underneath the chicks and mounted them onto a card base with some patterned paper.
I hope you enjoyed the card for today! Thanks for stopping by! :)
Saturday, February 13, 2016
My "Live Inspired" Podcast Interview with Tracie Claiborne.
I hope you all are having a wonderful holiday weekend! I just wanted to pop in and share that my "Live Inspired" interview with Tracie Claiborne is now live at her blog. I share a bit more about how I went about starting this company and a little bit about my design process.
I hope you will stop by for a listen. Tracie is such a sweetheart and she has so many inspiring guests each week. I've become an avid listener--It's so fun to listen while I work or craft.
This week she's also offering a special discount code for her readers to our store, as well as a special giveaway (listen to the podcast for details).
Before I leave I want to apologize for the echo for my portion of the conversation. I'm embarrassed to admit I had to huddle under my desk with a microphone because the cord wouldn't reach up to my desk top & I realize now that wasn't such a smart idea. So sorry... ;)
Friday, February 12, 2016
May Your Day Be Filled With Sunshine Card by Francine + A Sale
Hi everyone, Francine here!
Today, I’m
featuring the newest Sunny Sentiments stamp set and here is my card:
I went for a
clean and simple design! The font is so BEAUTIFUL, that it doesn’t need more!!!
So I focused on that. To make the sentiment pop, I decided to create a sunny
background with Distress inks. I first sponged my panel with Squeezed Lemonade.
I then made a self-made mask with triangles that I sponged with Wild Honey and
Mustard Seed. I removed the mask and I sponged the whole background with
Mustard Seed again. I kept the top of the card lighter.
Next, I stamped
the “May your day be filled with” text with black ink to the background. I then
embossed the “Sunshine” with white embossing powder on black cardstock and
fussy cut it. I adhered it below the stamped sentiment with foam pads. To
finish off my card, I die cut a cloudy border from white cardstock that I also
fixed with foam pads for more dimension and I added 3 golden sequins.
Check out the Sunny Sentiments stamp set! There are many other stamps in it, which makes this set super
versatile!
I hope you like
what you’ve seen! Thanks for joining me today and happy crafting!
Francine
P.S. In case you haven't heard there's a 20% sale going on over at the online store today through Monday 2/15/16 using the code "SunnyValentine". :)
Thursday, February 11, 2016
Sunny Sentiments Hello Sunshine Card with Elise
Hello! It's Elise to share a sunshiny card that features Sunny Studio Stamp's "Sunny Sentiments" stamp and die! I wanted to create a card that was sunny and bright, so here is what I created:
This card also features the Sunshine word die, which goes perfectly with this stamp set! I stamped the clouds onto some blue card stock, and stamped the sun onto some yellow patterned paper, then die cut them with the coordinating dies. I attached the sun and clouds with different amounts of foam tape to get a bunch of dimension. The sentiment is cut from blue glitter paper to add some sparkle!
This card also features the Sunshine word die, which goes perfectly with this stamp set! I stamped the clouds onto some blue card stock, and stamped the sun onto some yellow patterned paper, then die cut them with the coordinating dies. I attached the sun and clouds with different amounts of foam tape to get a bunch of dimension. The sentiment is cut from blue glitter paper to add some sparkle!
I finished the card by adding a few hearts die cut from pink patterned paper with the Stitched Heart die and hearts from the Rain or Shine dies.
Thanks for stopping by and I hope that you like this card! Stop by again tomorrow for some more inspiration! :)
Wednesday, February 10, 2016
Sunny Sentiments You are My Sunshine card by Marion
Hello. It's Marion here with another bright and sunshine-y card using the Sunny Sentiments stamp set. I also used the Sunny Sentiments dies that coordinate with the stamp set.
My card was very much inspired by this recent Cas(E) this Sketch! #157.
Using a sunshine mask, I inked up the rays with Mustard Seed and Spiced Marmalade Distress Ink. I then stamped and die cut the sun and the clouds and coloured them with Copic markers. The sun has a nice thick layer of clear Wink of Stella glitter brush pen for lots of subtle sparkle. I adhered a yellow piece of card stock to the bottom of the card before stamping the sentiments.
Sunny Studio products used:
Thanks for visiting today. I hope the sun is shining bright where you are today,
Marion
Tuesday, February 9, 2016
Sunny Sentiments Encouragement CAS Card with Heidi
Hello everybody! Heidi here! This week we are introducing the "Sunny Sentiments" stamp set so I created this encouragement card, using a very clean and simple approach. I also use the "Sunshine word" die. I hope you'll enjoy today's card.
For this card, I masked a portion of the front panel, then I placed a sun rays stencil and inked the stencil using distress inks. I picked this fabulous encouragement sentiment from the "Sunny Sentiments" stamp set and stamped on the center of the stenciled portion of the card. I cut the "Sunshine word" die using yellow and black card stock and placed them on an offset to create the illusion of a drop shadow on the word die. I adhered the die-cut panel to the card and lastly I added some sequins as a finishing touch.
CAS (Clean and Simple) cards are one of my favorite cards, and with the adorable "Sunny Sentiments" stamp set you can create CAS cards or combine it with other sets to create happy and lovely cards. Visit the Sunny Studio Stamps shop to purchase the products feature on this post.
I hope you enjoy this card. Thanks so much for stopping by. Have a lovely day!
Monday, February 8, 2016
Sunny Sentiments You Are My Sunshine Card with Melissa
Hello everyone, Melissa here! Today I have a card to share using Sunny Sentiments! I paired it with the Backyard Bugs stamp set to create a
cute mini scene.
To create this card I first die cut a small square out of white paper. I stamped all the images where I wanted them, masking off the lady bugs and flower to add the grass. After they were all stamped I colored the whole scene with Copic markers. I adhered the scene to a piece of white paper with a patterned paper border and added the sentiment from Sunny Sentiments.
That completes the card! I hope you enjoyed it. Thanks for stopping by!
Subscribe to:
Comments (Atom)


